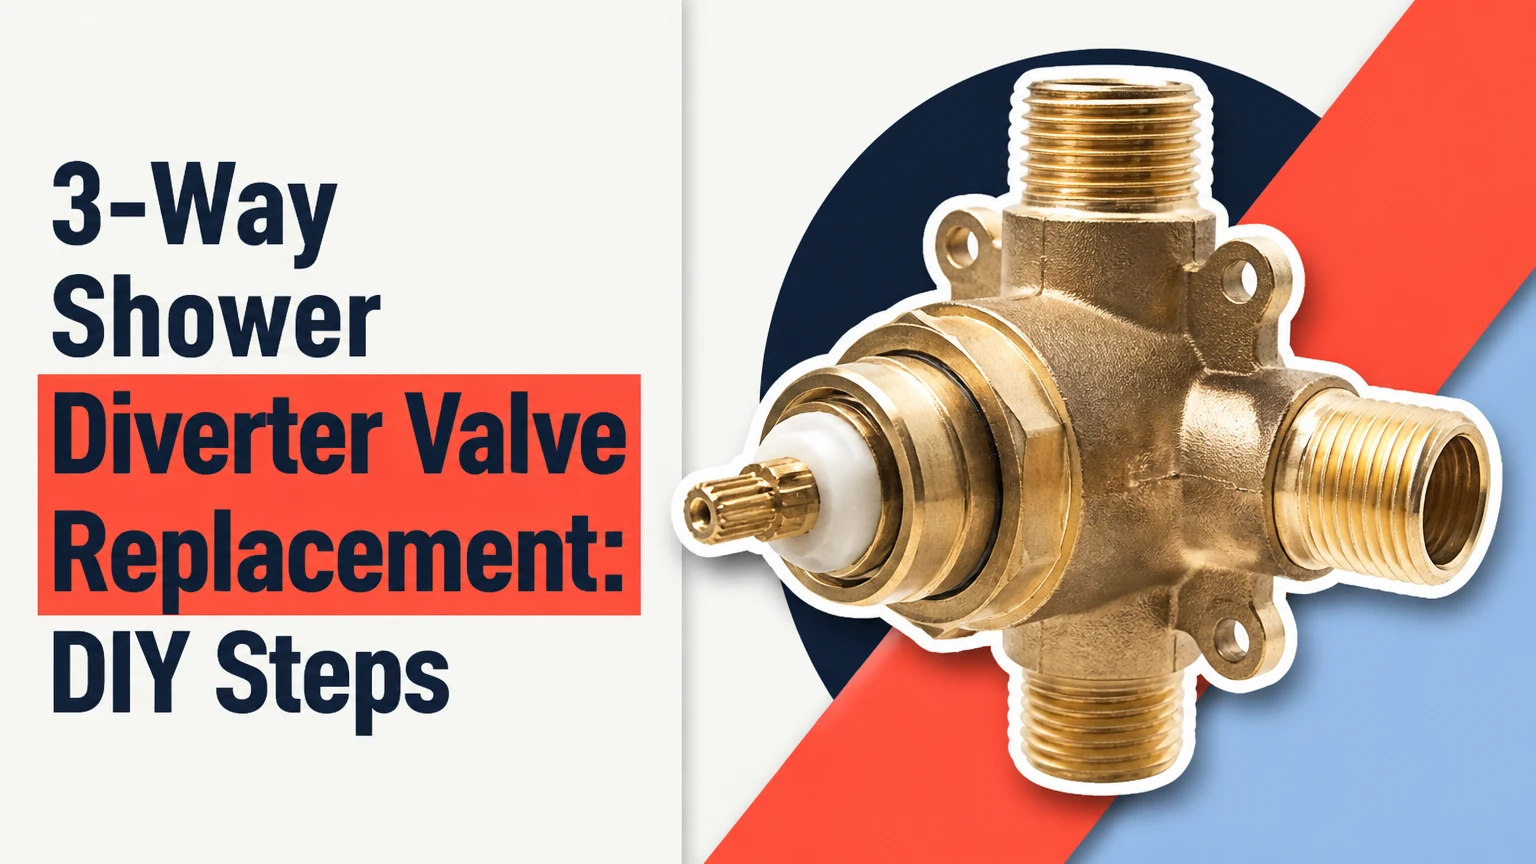
A 3-way shower diverter valve replacement redirects water between three shower outlets, such as a fixed head, handheld wand, and tub spout. External diverters often take 30-90 minutes to replace, while an in-wall cartridge or valve body can take 3-6 hours. The valve type, cartridge match, and access behind the wall determine success.
Key Facts
A three-way transfer valve usually routes already-mixed water; the pressure-balancing or thermostatic valve commonly controls temperature.
A tub-spout or shower-arm diverter can often be replaced without opening the wall.
An in-wall cartridge must match the valve manufacturer, series, orientation, and retaining method.
PTFE tape belongs on compatible tapered pipe threads, not on O-rings, compression fittings, or cartridge seals.
Typical U.S. replacement costs range from $20-$60 for an external diverter component to $200-$600 in plumbing labor for an accessible in-wall valve.
A three-way valve cannot deliver three full-flow outlets if the supply, cartridge, or pressure is inadequate.
What Is a Three-Way Shower Diverter?
A three-way shower diverter is a valve that directs water from one inlet to three selectable outlets. Common outlet combinations include an overhead showerhead, handheld shower, tub spout, body sprays, or a rain head. A rotating ceramic cartridge, spool, or plug opens one outlet and closes the others, although some models allow two outlets to operate together.
The term “three-way” describes the water paths, not necessarily three handles or three independent temperature controls. In many shower systems, hot and cold water first pass through a mixing valve. The mixed water then enters a separate transfer valve, which determines where that water exits.
That distinction matters during replacement. Replacing a transfer cartridge will not correct a temperature problem caused by a failed pressure-balancing cartridge, thermostatic cartridge, crossed supply lines, or inadequate hot-water delivery.
How Does a Three-Way Diverter Work?
A three-way diverter works by changing the position of an internal sealing element. In position one, the element opens the fixed shower outlet; in position two, it opens the handheld outlet; and in position three, it opens the tub or third outlet. Shared-function models use port geometry that leaves two outlets open simultaneously.
A diverter does not create water pressure. The available flow depends on supply pressure, pipe size, cartridge restrictions, showerhead flow limiters, and the number of outlets operating. The U.S. Environmental Protection Agency’s WaterSense specification limits standard showerheads to 2.0 gallons per minute, while some older or non-WaterSense fixtures use higher rates.
Which Replacement Type Fits the Installation?
The correct replacement depends on where the diverter is installed and whether the failed component is external, a cartridge, or the entire valve body. A shower-arm diverter is the simplest retrofit, a tub-spout diverter is often the least expensive repair, and an in-wall transfer valve provides the cleanest multi-outlet installation.
| Diverter type | Typical connection | Replacement access | Typical part cost | Best application |
|---|---|---|---|---|
| Shower-arm diverter | 1/2-inch male/female threads | No wall opening | $15-$40 | Fixed head plus handheld |
| Tub-spout diverter | Slip-fit or 1/2-inch threaded spout | No wall opening | $20-$60 | Tub and shower combinations |
| In-wall cartridge | Manufacturer-specific valve body | Front trim or rear access | $35-$150 | Existing dedicated transfer valve |
| In-wall valve body | 1/2-inch or 3/4-inch ports | Wall opening required | $100-$350 | New or complete renovation |
| Thermostatic transfer system | 1/2-inch or 3/4-inch supply | Wall opening or planned access | $150-$500 | Multiple high-flow outlets |
How Do You Identify the Existing Diverter?
Identify the diverter by location, handle arrangement, outlet behavior, and markings on the trim or cartridge. A small valve above the temperature handle is usually an in-wall transfer valve. A pull knob on the tub spout is usually an integral spout diverter, while a threaded fitting on the shower arm is an external arm diverter.
Before buying a part, record the manufacturer and model number. Remove the handle or escutcheon only after shutting off the water, then photograph the cartridge orientation, retaining clip, spline pattern, and valve-body markings. Generic cartridges frequently resemble one another but differ in length, tab location, port arrangement, and stem rotation.
Before You Start
Prepare the replacement, isolation method, tools, and work area before dismantling the valve. External replacement normally requires an adjustable wrench, strap wrench, screwdriver, replacement washers, silicone grease, and a cloth; in-wall work may also require a cartridge puller, flashlight, inspection mirror, basin, and wall-repair materials.
| Preparation item | External diverter | In-wall cartridge | In-wall valve body |
|---|---|---|---|
| Typical time | 30-90 minutes | 1-3 hours | 3-6 hours |
| Skill level | Basic mechanical | Intermediate plumbing | Advanced plumbing |
| Water shutoff | Local stop or main | Main or service stops | Main supply |
| Primary tool | Adjustable wrench | Cartridge puller | Tubing cutter or press tool |
| Replacement cost | $15-$60 | $35-$150 | $100-$350 |
| Wall repair risk | None | Low to moderate | Moderate to high |
Required Safety Checks
Shut off the bathroom supply or the main water supply, then open the shower valve to release pressure. Confirm that water has stopped before removing any retaining clip, cartridge, spout, or threaded fitting. Cover the drain so small screws and clips cannot enter the trap.
If the valve has no accessible shutoff, plan for a whole-house interruption. Do not rely on a decorative handle being in the closed position. Never heat a valve body with a cartridge, plastic stop, rubber seal, or ceramic component installed.
How Do You Replace an External Diverter?
Replace an external diverter by isolating the water, removing the old fitting without twisting the concealed pipe, installing the correct washer or thread seal, and testing every outlet. The work usually takes 30-90 minutes, but a seized tub spout or corroded shower-arm connection can turn a simple replacement into a pipe-repair job.
Step 1: Shut Off Water and Confirm the Part
Close the local shutoff or main supply and open the shower valve briefly. Confirm that the replacement has the same connection style, outlet direction, thread size, and operating function as the original.
You will know the preparation is correct when the old fitting can be loosened without pressurized water escaping. A common mistake is buying a two-outlet splitter for a three-outlet transfer application.
Step 2: Remove the Existing Fitting
Use a strap wrench on a finished tub spout or shower-arm fitting. Place a cloth between the tool and finish, and turn counterclockwise when facing the fitting. For a slip-fit tub spout, loosen the underside set screw and pull the spout straight away from the wall.
Do not apply force to the exposed shower arm if the arm disappears into a finished wall. The concealed elbow can rotate or detach, causing a leak inside the wall. Stop when the arm begins turning in the wall rather than the diverter loosening.
Step 3: Prepare the Connection
Clean old tape, scale, and debris from male pipe threads. Apply two to four clockwise wraps of PTFE tape when the fitting uses compatible tapered male threads, followed by a small amount of approved pipe sealant only if the manufacturer permits it.
Do not tape straight garden-hose-style threads, compression connections, slip-fit spouts, or O-ring joints. Those connections seal with a washer, gasket, or O-ring. Excess tape can enter the valve and obstruct the diverter cartridge.
Step 4: Install the New Diverter
Thread the diverter by hand for several turns, then tighten it with a wrench while protecting the finish. For a slip-fit tub spout, push the spout fully onto the pipe and tighten the set screw against the correct surface.
The fitting should point downward or forward without forcing the concealed pipe. Over-tightening can split a brass adapter, damage a plastic female thread, or distort a rubber washer.
Step 5: Test All Positions
Restore water slowly and inspect the connection with a dry tissue. Operate each selector position for at least 30 seconds, then check whether water exits the inactive outlets.
The repair succeeded when each selected outlet receives water without a continuous stream from another outlet and no tissue becomes damp. Minor drips from a tub spout during shower operation can indicate a worn tub-spout diverter or incorrect spout installation, not necessarily a failed in-wall valve.
How Do You Replace an In-Wall Diverter Cartridge?
Replace an in-wall diverter cartridge by shutting off water, removing the trim, documenting cartridge orientation, extracting the retaining hardware and old cartridge, cleaning the valve body, and installing the exact compatible replacement. Cartridge replacement avoids wall demolition when the brass valve body remains sound and the manufacturer still supports the cartridge.
Step 1: Remove the Handle and Escutcheon
Remove the index cap or set screw, then take off the handle and any temperature limit stop or decorative sleeve. Remove escutcheon screws or carefully unthread the plate according to the manufacturer’s instructions.
Protect finished tile with masking tape and keep screws in a labeled container. Do not pry against the tile edge with a metal screwdriver because chipped tile and cracked grout can allow water behind the wall.
Step 2: Shut Off and Inspect the Valve
Close the integral service stops if the valve has them; otherwise shut off the bathroom or main supply. Open the valve briefly to drain residual pressure, then inspect the cartridge retaining nut, horseshoe clip, screws, or threaded bonnet.
Photograph the stem position and cartridge tabs before removal. Many transfer cartridges install in only one orientation, and reversing the cartridge can swap outlets or create an apparently defective valve.
Step 3: Remove the Retainer and Cartridge
Remove the clip or bonnet with the correct screwdriver or wrench. Pull the cartridge straight outward using pliers only when the stem is designed for that load; use a manufacturer-approved cartridge puller for seized units.
Mineral scale can lock a cartridge into the brass housing. Rocking the cartridge gently may release it, but twisting aggressively can damage the valve body or break the stem, leaving the cartridge harder to extract.
Step 4: Clean and Inspect the Valve Body
Remove loose debris with a lint-free cloth and inspect the bore, port edges, seats, and retaining-groove surfaces. A small nylon brush is safer than a steel wire brush inside a precision cartridge housing.
The valve body is reusable when the bore is smooth, the ports are not eroded, and the retainer engages fully. Replace or professionally repair the valve body when it is cracked, badly pitted, cross-threaded, or incompatible with available cartridges.
Step 5: Lubricate and Install the Cartridge
Apply a thin film of silicone-based plumber’s grease to new O-rings. Align the cartridge tabs, ports, and stem orientation with the valve-body marks, then push it fully into place without hammering.
Do not use petroleum jelly, construction silicone, RTV sealant, or pipe dope on cartridge seals. Those products can swell elastomers, obstruct movement, or prevent the cartridge from seating correctly.
Step 6: Reinstall the Retainer
Install the retaining clip, nut, or bonnet exactly as removed. A clip that is only partly engaged can allow the cartridge to move under pressure, causing leaks, difficult operation, or water from multiple outlets.
The retainer is secure when it sits completely in its groove and the cartridge cannot move outward by hand. Do not substitute a generic clip or force a mismatched bonnet onto the valve.
Step 7: Pressure-Test Before Closing the Wall
Restore water slowly while the trim remains removed. Check the cartridge perimeter, stops, ports, and valve-body connections for at least five minutes, then operate every diverter position.
An inspection mirror and dry tissue reveal slow leaks better than visual inspection alone. Never close an access opening, reinstall tile, or caulk the escutcheon until the valve has passed this test.
Step 8: Reinstall Trim and Seal Selectively
Reinstall the sleeve, escutcheon, handle, limit stop, and index cap. Apply a narrow bead of bathroom-grade silicone around the top and sides of the escutcheon when required, leaving the bottom edge open so incidental water can escape.
The manufacturer’s trim instructions control the sealing method. Completely sealing every edge can trap water behind the plate and conceal a future leak.
Can the Cartridge Be Replaced Separately?
A diverter cartridge can be replaced separately when the valve body is intact and the replacement cartridge matches the original manufacturer and series. Replacing only the cartridge is not appropriate when the valve body is cracked, corroded, badly scored, obsolete, or connected to a different trim platform.
| Symptom | Likely component | First action | Replacement scope |
|---|---|---|---|
| One outlet will not open | Diverter cartridge or debris | Remove trim and inspect | Cartridge cleaning or replacement |
| Water crosses outlets | Worn seals or wrong orientation | Check cartridge and ports | Cartridge replacement |
| Leak around stem | Cartridge O-ring or bonnet seal | Inspect retainer and seals | Seal or cartridge |
| Leak from valve body | Cracked or corroded body | Pressure-test exposed body | Valve-body replacement |
| Handle binds after cartridge change | Scale or misalignment | Remove and inspect tabs | Reinstall or replace cartridge |
| Temperature is incorrect | Mixing valve cartridge | Test temperature valve | Separate mixing-valve repair |
A replacement trim kit is not automatically a replacement valve. Trim controls appearance and the handle interface, while the concealed valve body determines cartridge compatibility, port arrangement, and connection method.
What Are the Flow and Pressure Limits?
Three-way shower performance depends more on pressure, cartridge capacity, and simultaneous flow than on the label “three-way.” A typical residential system operates best around 45-60 PSI, while approximately 20 PSI may be the lower practical threshold for many fixtures; local plumbing codes and manufacturer ratings remain controlling.
A 3/4-inch supply can carry more volume than a 1/2-inch line, but changing the visible diverter will not enlarge a concealed 1/2-inch pipe. A restrictive cartridge, clogged screen, flow limiter, partially closed stop, or undersized branch can still reduce output.
Shared-function valves deserve special attention. Running a rain head rated at 2.0 gallons per minute and a handheld rated at 2.0 gallons per minute can demand about 4.0 gallons per minute before pipe losses. A pressure-balancing valve may maintain safety while still delivering weak spray.
Can One Three-Way Valve Run Two Outlets?
A three-way valve can run two outlets simultaneously only when the cartridge and valve body are designed for a shared position. A selector that provides three exclusive positions cannot be made into a reliable dual-outlet valve by leaving the handle between detents.
Shared operation may reduce spray strength because the available flow divides between outlets. Verify the valve’s flow chart, inlet capacity, and manufacturer-approved outlet combination before adding body sprays or a rain head.
What Does Replacement Usually Cost?
Typical U.S. replacement costs range from $15-$60 for an external diverter, $35-$150 for an in-wall cartridge, and $200-$600 in plumbing labor for an accessible in-wall repair. A complete valve-body replacement can exceed $800 after wall opening, soldering or press connections, trim, waterproofing, tile, and finish restoration.
| Job scope | Parts range | Labor range | Typical elapsed time |
|---|---|---|---|
| Shower-arm diverter | $15-$40 | $0-$150 | 30-45 minutes |
| Tub-spout diverter | $20-$60 | $0-$200 | 30-90 minutes |
| In-wall cartridge | $35-$150 | $150-$400 | 1-3 hours |
| In-wall valve body | $100-$350 | $300-$600 | 3-6 hours |
| Valve body plus tile repair | $150-$500 | $500-$1,200+ | 1-2 workdays |
These are typical planning ranges, not published price guarantees. Access behind the shower, regional labor rates, seized fittings, replacement trim, and tile availability create the largest differences.
When Should You Clean, Repair, or Replace?
Clean a diverter cartridge when debris or scale causes stiffness and the seals remain flexible, but replace the cartridge when outlets cross-flow, seals flatten, or the stem and ceramic surfaces are damaged. Replace the whole valve body when the concealed housing itself cannot reliably retain or seal the new cartridge.
| Condition | Cleaning | Cartridge replacement | Valve-body replacement |
|---|---|---|---|
| Light mineral residue | Appropriate | Optional | Not indicated |
| Flattened O-rings | Ineffective | Appropriate | Not indicated |
| Cracked ceramic element | Ineffective | Appropriate | Not indicated |
| Pitted cartridge bore | Ineffective | May fail | Appropriate |
| Cracked brass body | Unsafe | Ineffective | Required |
| Obsolete cartridge | Temporary only | Not possible | Required or retrofit |
Soaking a removable cartridge in white vinegar for 30 minutes may loosen mineral deposits, but the method is not universal. Some manufacturers prohibit chemical soaking, and vinegar cannot restore worn ceramic discs, hardened seals, or damaged port surfaces.
Common Mistakes and How to Fix Them
Using the Wrong Cartridge
A cartridge that fits the opening can still have the wrong port layout or rotation. Compare the old and new parts side by side, including length, tabs, stem, seals, and outlet positions, before applying grease.
Applying PTFE Tape Everywhere
PTFE tape seals suitable tapered threads; it does not seal O-rings or stop a leak caused by a missing washer. Remove excess tape from the first thread so loose material cannot enter the diverter.
Heating a Loaded Valve Body
Soldering near an installed ceramic cartridge can destroy seals and warp plastic components. Remove heat-sensitive parts, use heat protection, or use approved press or push-fit methods where permitted by local code and the manufacturer.
Over-Tightening Brass Connections
Tighten threaded fittings firmly, not continuously. A cracked female adapter behind tile can require wall access, drying, and finish repair that costs far more than the original diverter.
Sealing the Escutcheon Completely
A fully caulked plate can hide a slow leak and trap water. Follow the trim instructions and generally leave the lower edge open unless the manufacturer specifies another arrangement.
Treating Water Hammer With a New Diverter
Water hammer may result from high pressure, loose pipe supports, a fast-closing solenoid elsewhere, or trapped air after service. Check pressure and accessible pipe supports before installing an arrestor; an arrestor will not repair a loose concealed elbow.
Which Option Should You Choose?
Choose a shower-arm diverter for a no-wall-access upgrade, a tub-spout diverter for an existing tub-shower assembly, and an in-wall cartridge for a dedicated transfer valve whose body remains serviceable. Choose a complete in-wall valve only when the existing body is damaged, unsupported, or unsuitable for the required outlet configuration.
- Budget DIY owner: Use a shower-arm diverter, typically $15-$40, when a fixed head and handheld are the only required outlets.
- Tub-shower repair: Replace the tub spout or its integral diverter when the pipe and spout connection are sound.
- Bathroom renovator: Install a dedicated in-wall transfer valve while the wall is open, and add rear access where practical.
- High-flow system owner: Select a thermostatic and shared-function system only after calculating simultaneous gallons per minute.
- Rental or low-access property: Prefer externally serviceable components because future cartridge or fitting work avoids tile removal.
An in-wall valve is not automatically better. It is a poor choice for a quick retrofit when opening the wall would damage waterproofing or when the supply cannot support the intended outlets.
Frequently Asked Questions
Can I Replace a Diverter Without Removing the Tile?
Yes, external diverters and many in-wall cartridges can be replaced without removing tile. A cartridge is accessed through the handle and escutcheon opening, while a complete valve body requires access from the shower wall, an adjacent room, or a planned access panel.
Why Does Water Still Come From the Tub Spout?
Water from the tub spout during shower operation can result from a worn spout diverter, a failed transfer cartridge, incorrect cartridge orientation, or a valve designed for shared flow. Test each outlet independently before ordering parts, because replacing an in-wall cartridge will not repair a separate tub-spout mechanism.
Can PEX or CPVC Connect to a Three-Way Valve?
PEX and CPVC can connect to an approved valve body through manufacturer-compatible adapters, but the concealed valve must be supported and installed according to local code. Do not assume every valve accepts every pipe material, and do not use heat near plastic components that the manufacturer has not rated for soldering.
How Do I Find the Cartridge Manufacturer?
Look for a logo or model number on the trim, handle, valve cover, installation paperwork, or exposed cartridge. Take clear photographs of the stem and port end to a plumbing supplier, but confirm dimensions and orientation against the manufacturer’s parts diagram before purchase.
Is a Three-Way Diverter the Same as a Mixing Valve?
No. A mixing valve combines hot and cold water and often provides pressure balancing or thermostatic temperature control. A three-way diverter or transfer valve generally routes that mixed water among outlets, although combination products can place both functions in one assembly.
Should I Hire a Plumber for an In-Wall Replacement?
Hire a plumber when the valve body must be cut out, the supply cannot be isolated, the wall is waterproofed, the pipe connection is corroded, or the replacement requires soldering or code-sensitive work. DIY cartridge replacement is more reasonable when the model is identified and the valve has integral stops.
The Bottom Line
A successful 3 way shower diverter valve replacement begins with identifying the installation type, not ordering the first visually similar part. Replace an external diverter when the fitting or spout has failed, replace an in-wall cartridge when the valve body is sound, and replace the complete valve only when the concealed housing or outlet design requires it. Test pressure, orientation, every outlet, and every connection before closing the wall.