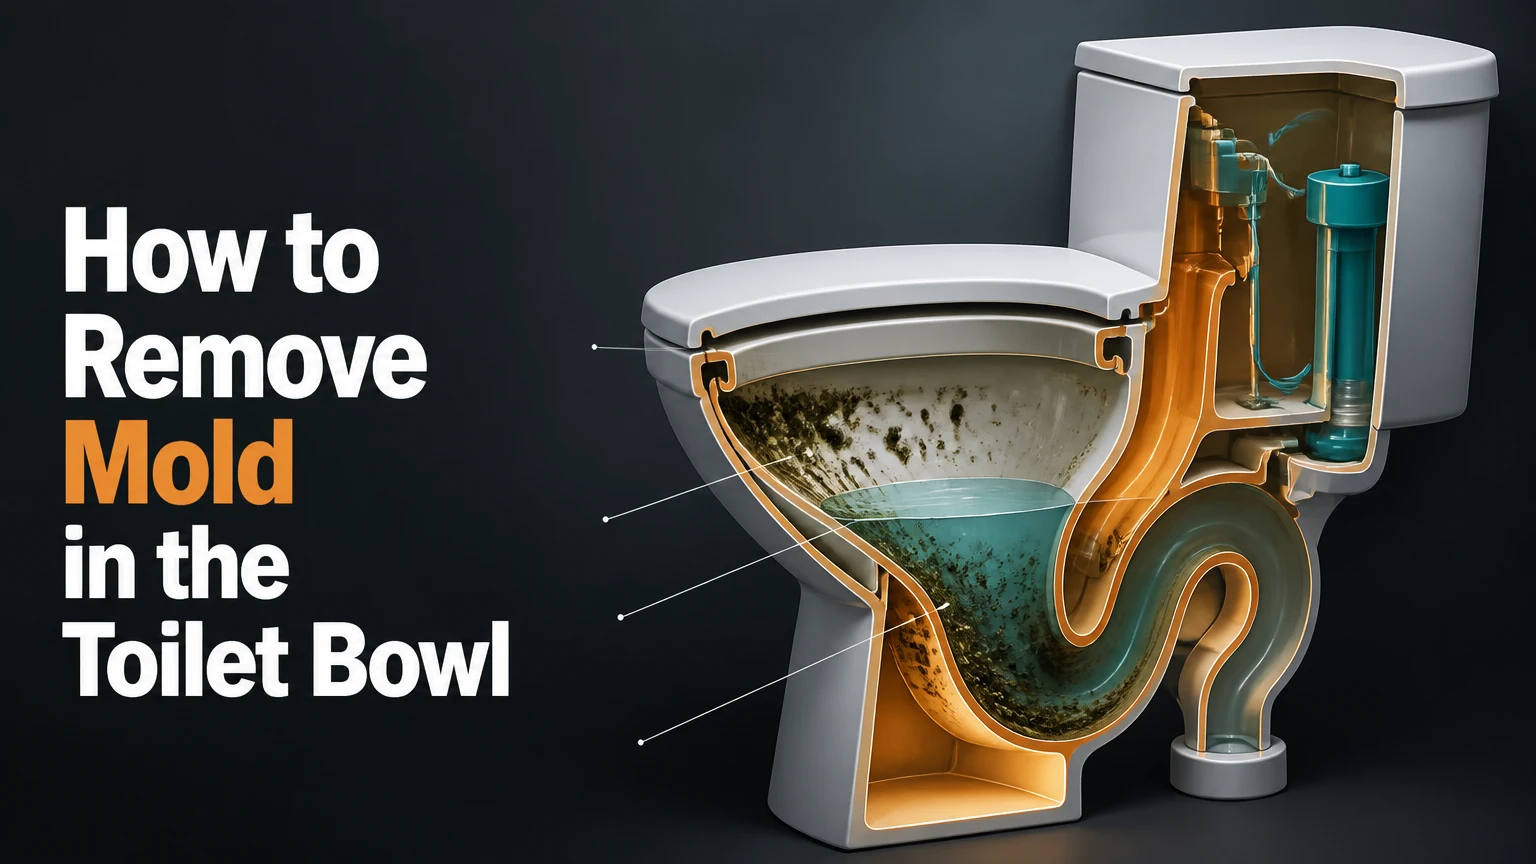
Mold in the toilet bowl is a persistent fungal organism that thrives in dark, wet, and stagnant environments. Airborne spores enter the bathroom and latch onto porous porcelain, multiplying rapidly when fed by organic waste and mineral deposits. Complete eradication requires targeted chemical agents, specific contact times, and long-term moisture control to prevent recurrence.
Key Facts / At a Glance:
- Spores colonize stagnant bathroom water within 24 to 48 hours.
- DIY removal costs range from $5 to $15 using common household acids or bases.
- Professional remediation costs $150 to $300 if fungal networks penetrate the subfloor.
- Effective eradication requires 45 to 90 minutes of total processing and dwell time.
- Preventative deep cleaning must occur every 7 to 14 days to disrupt the spore life cycle.
Before You Start Your Removal Process
Successful eradication requires preparation and the correct tools. Rushing the process or using the wrong equipment guarantees the fungus will return.
- Outcome: Complete destruction of fungal roots and spores.
- Total Time: 45 to 90 minutes (includes 30-60 minutes of passive dwell time).
- Difficulty: Beginner to Intermediate.
- Crucial Success Factor: Allowing the chemical agent enough dwell time to penetrate the porcelain micro-pores before scrubbing.
- Required Materials:
- 1 pair of thick rubber gloves
- 1 N95 respirator mask
- 1 pair of safety goggles
- 1 stiff nylon toilet brush (never use metal)
- 1 old toothbrush for the rim jets
- 1 chemical cleaning agent (vinegar, bleach, or commercial fungicide)
- 1 bucket or plunger
What Are the Main Types of Bathroom Fungi?
Understanding the specific organism in your plumbing determines the urgency and the required chemical strength. Not all bathroom growths are technically fungi, and treating them incorrectly wastes time and money.
| Common Name | Scientific Classification | Visual Appearance | Primary Diet | Health Impact |
| Black Mold | Stachybotrys chartarum | Slimy, dark green or black patches | Cellulose, dust, skin cells | High: Releases toxic mycotoxins |
| Pink Mold | Serratia marcescens | Pink or reddish slimy rings | Soap scum, shampoo, fatty residues | Moderate: Opportunistic bacterial infections |
| Green Mold | Aspergillus species | Fuzzy, olive-green texture | Sugars, organic bathroom waste | High: Triggers asthma and respiratory allergies |
| Brown Mold | Cladosporium species | Brownish, bumpy spotting | Dust particles, high humidity | Moderate: Mild allergic reactions |
Black mold requires immediate action. The Centers for Disease Control and Prevention (2022) notes that Stachybotrys chartarum produces mycotoxins that trigger severe respiratory irritation in humans. Pink mold is actually an airborne bacteria rather than a fungus, meaning it responds better to chlorine-based sanitizers than to traditional acidic fungicides. Green mold spreads the fastest through the air, requiring complete ventilation during the removal process.
Which Cleaning Agent Should You Choose?
Selecting the right chemical depends entirely on your plumbing infrastructure, your health sensitivities, and the severity of the infestation. You must choose one primary agent to avoid dangerous chemical reactions.
| Agent Type | Active Compound | pH Level | Minimum Dwell Time | Septic System Compatibility |
| White Vinegar | Acetic Acid (5%) | 2.5 | 60 minutes | Highly Safe |
| Household Bleach | Sodium Hypochlorite | 11.0 to 13.0 | 30 minutes | Unsafe (Kills beneficial bacteria) |
| Baking Soda Paste | Sodium Bicarbonate | 9.0 | 45 minutes | Highly Safe |
| Tea Tree Oil | Terpinen-4-ol | 5.0 to 6.0 | 60 minutes | Safe (Use sparingly) |
White vinegar is the superior choice for most households. Laboratory studies on household cleaners (2020) demonstrate that 5 percent white vinegar kills approximately 82 percent of known mold species. The acetic acid penetrates porous surfaces to destroy the mycelium root system.
Bleach offers instant cosmetic results by whitening the porcelain, but it presents honest limitations for long-term fungal control. Bleach has a high surface tension that prevents it from soaking into microscopic scratches in the toilet bowl. It bleaches the melanin out of the surface mold, making it invisible, but often leaves the root system entirely intact. The fungus will frequently regrow within a week. Furthermore, frequent bleach use degrades the rubber flapper valve inside the toilet tank.
Step 1: Prepare the Environment and Apply Safety Gear
Isolating the bathroom prevents airborne spores from contaminating the rest of your house. Close the bathroom door and open all available windows to create an exit path for the air. Turn on the bathroom exhaust fan immediately. According to typical plumbing practitioner guidelines, bathroom exhaust fans should move at least 1 cubic foot per minute (CFM) of air for every square foot of floor space.
Put on your safety goggles, thick rubber gloves, and an N95 mask. Inhaling dry, scrubbed spores triggers immediate respiratory distress. The N95 mask filters out the microscopic particulate matter released when you break the fungal colonies apart.
You will know this step is complete when the bathroom has active airflow venting outside the house.
Common Mistake: Relying on a standard cloth mask instead of an N95 respirator. Cloth masks cannot stop microscopic fungal spores from entering your lungs.
Step 2: Drain the Tank and Expose the Porcelain
Chemical cleaners cannot work if they are diluted by a gallon of standing water. You must expose the bare porcelain to apply the cleaner at full strength. Locate the water shut-off valve behind the toilet near the floor. Turn the oval handle clockwise until it stops completely to shut off the water supply.
Remove the heavy lid from the toilet tank and set it carefully on a towel. Press and hold the flush lever down until the tank drains entirely. Moving to the bowl, use your plunger to force the remaining standing water down the trapway. Push the plunger forcefully 10 to 15 times until the bowl is nearly empty.
You will know this step is complete when the water level sits below the visible fungal stains.
Common Mistake: Skipping the plunging process. Pouring cleaner directly into a full bowl dilutes the active compound below the threshold necessary to kill the spores.
Step 3: Apply Your Chemical Eradicator
Total saturation of the affected area is mandatory. If you selected white vinegar, pour the liquid directly into a clean spray bottle. Spray the solution generously across the entire interior surface of the bowl. Pay special attention to the underside of the rim.
The rim contains small holes called siphon jets that allow water to enter the bowl during a flush. Spores thrive inside these dark, wet cavities. Spray the eradicator directly upward into these holes. Next, move to the open tank. Spray the interior walls of the tank, avoiding direct, heavy application on the rubber flapper valve if you are using bleach.
You will know this step is complete when every inch of the bowl and tank interior is visibly wet with the cleaner.
Common Mistake: Only spraying the visible stains. Microscopic spores cover the entire porcelain surface long before they multiply enough to become visible to the human eye.
Step 4: Allow Adequate Dwell Time
Fungal roots embed themselves deeply into microscopic scratches and mineral deposits on the porcelain. The chemical agent requires passive time to break down these cellular walls. Close the toilet lid to trap the chemical fumes inside the bowl.
Leave the room and allow the solution to sit undisturbed for 30 to 60 minutes. If you are using a baking soda paste for severe stains, let it sit for a full 60 minutes. The chemical reaction occurring during this dwell time does the actual work of killing the organism. Scrubbing too early merely smears living spores around the bowl.
You will know this step is complete when the required time has elapsed and the toughest stains look visibly softer or lighter.
Common Mistake: Impatience. Rushing to scrub after five minutes guarantees the root system survives to reproduce.
Step 5: Scrub the Hidden Crevices
Physical agitation removes the dead biological material and prevents future spores from feeding on the debris. Open the lid and use your stiff nylon toilet brush to scrub the main bowl aggressively. Work in circular motions from the top rim down toward the drain hole.
Switch to the old toothbrush to scrub the siphon jets under the rim. A master plumbing practitioner rule of thumb dictates that ignoring the rim jets during a deep clean guarantees a fungal recurrence within two weeks. Scrub upward into each individual hole to clear out trapped biological matter. Inside the tank, use a sponge to wipe down the ceramic walls carefully, taking care not to bump the delicate fill valve or float arm.
You will know this step is complete when the porcelain feels smooth to the touch and no discoloration remains.
Common Mistake: Using a metal wire brush for stubborn stains. Metal scrapers scratch the porcelain glaze, creating permanent microscopic grooves that serve as perfect breeding grounds for future fungi.
Step 6: Neutralize the Reservoir
The toilet tank acts as a distribution center for the entire fixture. If spores survive in the tank, they will drop down into the clean bowl with every subsequent flush. To neutralize the reservoir completely, pour two cups of undiluted white vinegar directly into the bottom of the empty tank.
Do not mix this vinegar with bleach if you used bleach in the previous steps. Allow this neutralizing pool to sit in the bottom of the tank for 15 minutes. This ensures the water that enters the bowl during the next step carries a slightly acidic, mold-inhibiting charge.
You will know this step is complete when the tank interior smells distinctly of the neutralizing agent.
Common Mistake: Mixing chemical families. Mixing bleach with ammonia or acidic cleaners like vinegar creates deadly chloramine or chlorine gas. Always stick to one chemical family per cleaning session.
Step 7: Flush and Restore the Water Supply
Return to the shut-off valve behind the toilet. Turn the handle counter-clockwise to restore the water pressure. Watch the tank fill to ensure the fill valve shuts off correctly at the designated water line.
Once the tank is full, flush the toilet three consecutive times. This vigorous flushing rinses the dead spores, the chemical residue, and the scrubbed debris down the sewer line. Rinse your nylon brush in the clean toilet water during the final flush, then spray the brush with a disinfectant before storing it.
You will know this step is complete when the bowl holds clean, clear water and the chemical odor begins to dissipate.
Common Mistake: Storing a wet toilet brush in a dark cabinet immediately after use. This simply breeds new spores on the brush itself. Let the brush drip-dry completely before storage.
What Are the Most Common Eradication Mistakes?
Even with the right chemicals, procedural errors will allow the fungus to survive. Addressing these failure modes saves significant time and frustration.
First, failing to treat hard water scaling creates an invisible shield for spores. Fungi bond with calcium carbonate deposits left by hard water. If stains refuse to scrub away, you are likely scrubbing mineral scale, not just fungi. Treat the bowl with a dedicated citric acid descaler first to dissolve the minerals, which will expose the hidden spores to your chosen fungicide.
Second, treating only the bowl is the most frequent cause of rapid recurrence. Spores require moisture, and the tank holds gallons of stagnant water permanently. If you ignore the tank, you are only treating the symptom while ignoring the source.
Finally, improper ventilation during the cleaning process spreads the problem. Scrubbing dry mold releases thousands of microscopic spores into the air. If the exhaust fan is off, these spores settle on your bathroom towels, sink drains, and shower grout, creating entirely new colonies across the room.
How Do You Troubleshoot Persistent Spores?
When fungal growth returns repeatedly despite thorough cleaning, the plumbing ecosystem itself is failing. You must alter the environment to stop the life cycle.
If the mold returns within three days, inspect the rubber flapper inside the tank. Deteriorating rubber provides a perfect organic food source for aggressive bacteria and fungi. Run your gloved finger across the flapper. If black residue rubs off easily, the rubber is decaying. Replace the flapper valve immediately to remove the food source.
If a recurring pink or black ring appears exactly at the water line in a guest bathroom, stagnation is the culprit. Water that sits undisturbed loses its residual municipal chlorine over a few days. Flush your guest bathrooms and basement toilets at least two times a week to introduce fresh, oxygenated, chlorinated water into the bowl, which stops stagnant water buildup.
If the growth is localized entirely around the rim, your siphon jets are clogged. Use a small mirror to look up under the rim. If the jets are black, mineral deposits have trapped organic waste inside them. Pour hot white vinegar down the overflow tube inside the tank. This routes the hot acid directly through the rim jets, dissolving the blockages from the inside out.
How Can You Prevent Mold in the Toilet Bowl?
Prevention requires altering the environmental variables that allow spores to thrive. Controlling the relative humidity and the water chemistry prevents the initial colonization. The Environmental Protection Agency (2023) states that indoor humidity must be kept below 60 percent to inhibit fungal growth.
| User Profile | Recommended Prevention Method | Application Frequency | Estimated Annual Cost |
| Busy Homeowners | Install a bleach-free automatic tank drop-in cleaner | Every 60 days | $15 to $25 |
| Eco-Conscious Users | 1 cup baking soda and 2 cups vinegar fizzing treatment | Weekly | $20 to $30 |
| Renters Moving In | Initial shock treatment with 1 cup liquid bleach | Once upon move-in | $5 |
| Septic System Owners | Hydrogen peroxide (3%) maintenance sprays | Bi-weekly | $10 to $15 |
Run your bathroom exhaust fan on a timer. The fan should run during every shower and continue running for exactly 20 minutes after the water shuts off. This extracts the steam before it can condense on the porcelain toilet tank. Sweating toilet tanks create exterior moisture that drips down to the base, inviting fungal growth on the floor.
Keep the toilet lid closed before flushing. Flushing an open toilet creates a microscopic aerosol plume that launches organic waste particles up to six feet into the air. These particles land on the porcelain and provide a constant food source for ambient spores. Closing the lid contains the plume and starves the organisms.
Frequently Asked Questions
Is toilet mold dangerous to my health?
Yes, specific strains pose significant risks. Stachybotrys chartarum releases mycotoxins that cause chronic coughing, eye irritation, and fatigue. Even benign strains can trigger severe asthma attacks in vulnerable individuals when allowed to multiply in a confined bathroom space.
Can a septic system handle bleach treatments?
No, you should avoid using liquid bleach if you rely on a residential septic system. Sodium hypochlorite indiscriminately kills the beneficial bacteria inside the septic tank that break down solid human waste. Use white vinegar or hydrogen peroxide instead to maintain septic health.
Why does the guest bathroom get worse than the primary bathroom?
Guest bathrooms suffer from chronic water stagnation. Municipal tap water contains trace amounts of chlorine that inhibit organic growth. When a toilet sits unflushed for weeks, the chlorine evaporates, leaving a stagnant pool of untreated water that serves as an ideal breeding ground for ambient spores.
Does a pumice stone work for removing dark rings?
A wet pumice stone effectively grinds away hard water mineral rings that harbor fungal spores. However, you must keep the stone and the porcelain completely soaked during the process. Using a dry pumice stone will permanently scratch the ceramic glaze, creating new crevices for future growth.
Can I mix baking soda and vinegar together in the bowl?
Mixing baking soda (a base) and vinegar (an acid) creates an immediate fizzing reaction that physically lifts dirt, but it ultimately neutralizes the fungicidal properties of both ingredients. The resulting liquid is essentially salt water. For chemical eradication, apply them separately with a rinse in between.