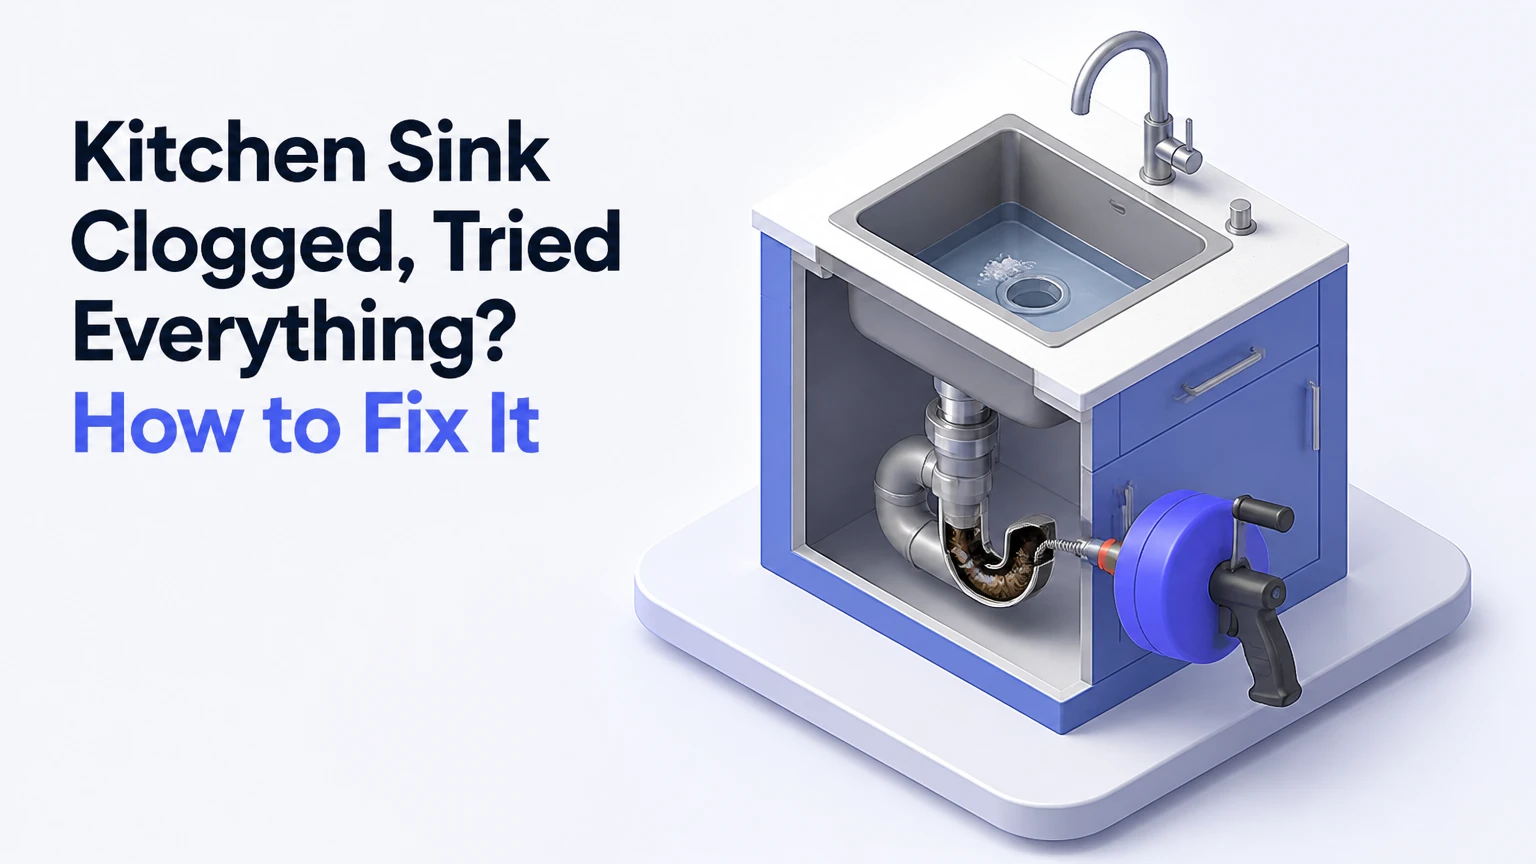
When your kitchen sink is clogged and you have tried everything, stop repeating liquid remedies and locate the physical obstruction. Remove standing water, verify that the garbage disposal is clear, plunge with every connected opening sealed, clean the P-trap, then feed a drain auger directly into the wall pipe.
Key Facts: At a Glance
- A completely blocked kitchen sink usually requires mechanical removal, not another homemade drain mixture.
- A double-basin sink cannot be plunged effectively unless the second drain is sealed.
- A clean P-trap with continued backup usually places the blockage inside the branch drain behind the wall.
- A 15-25-foot hand auger reaches many kitchen branch-line clogs, but it cannot correct a collapsed or badly offset pipe.
- Manual disassembly is unsafe when caustic drain cleaner remains in the sink or trap.
- Backups in several fixtures indicate a larger drainage problem, not an isolated kitchen sink clog.
Before You Start
A severe kitchen sink blockage usually takes 30-90 minutes to diagnose and clear with basic tools. Difficulty is moderate because the work involves dirty water, removable drain fittings, and controlled use of a flexible auger.
| Requirement | Typical specification | Why it matters |
| Working time | 30-90 minutes | Deep grease restrictions may require several auger passes |
| DIY cost | $10-$60 | Covers gloves, a sink plunger, bucket, and manual auger |
| Auger reach | 15-25 feet | Short plastic drain tools rarely reach wall-line clogs |
| Auger cable | About 1/4 inch | Flexible enough for common residential sink lines |
| Bucket capacity | 3-5 gallons | A trap and backed-up pipe may release substantial water |
| Protective equipment | Gloves and eye protection | Standing drain water may contain debris or chemical residue |
| Difficulty | Moderate | Requires pipe removal and leak-free reassembly |
Collect a bucket, old towels, rubber or chemical-resistant gloves, eye protection, a flat-bottom sink plunger, adjustable pliers, a flashlight, a drain brush, and a manual drum auger. Use plastic tongs for visible disposal debris.
Do not begin by removing the P-trap when anyone has recently poured chemical drain opener into the sink. Lowe’s specifically warns against plunging, inserting tools, or removing the trap after chemical cleaner use because hazardous liquid can remain in the standing water.
Household cleaners may contain corrosive or toxic ingredients that require careful handling and disposal, according to the U.S. Environmental Protection Agency. If you cannot confirm what entered the drain, treat the water as contaminated and tell the plumber exactly which products were used.
Where Is the Kitchen Sink Clog Located?
The pattern of the backup identifies the likely blockage location. A single basin that drains through the other basin points toward the shared trap or outlet, while several fixtures backing up together suggests a larger branch or main-drain obstruction.
| Symptom | Most likely location | Best next action |
| One basin blocked, second basin normal | Strainer, tailpiece, or disposal inlet | Inspect the affected side |
| Both basins fill together | Shared trap or wall branch | Seal one side, plunge, then clean trap |
| Disposal hums but does not spin | Jammed disposal mechanism | Disconnect power and free the jam |
| Disposal spins but water remains | Disposal outlet, trap, or branch line | Inspect the discharge pipe and trap |
| P-trap is empty and clean | Pipe behind the wall | Auger through the trap arm opening |
| Water backs into dishwasher | Shared sink-disposal connection | Stop dishwasher and clear sink drain |
| Sink gurgles after draining | Partial restriction or venting issue | Clean branch line and monitor |
| Shower, tub, or floor drain also backs up | Larger branch or main sewer | Stop water use and call a plumber |
A P-trap is the curved pipe beneath the sink that retains a small water seal. Its bend also catches dense food particles, grease deposits, utensils, labels, and other objects before they travel deeper into the drainage system.
A kitchen clog may also sit beyond the trap. Grease can coat the wall pipe gradually, reducing its usable diameter until one final food load closes the remaining channel.
Why Did the Usual Remedies Fail?
Hot water, baking soda, vinegar, salt, and dish detergent may improve a lightly restricted drain, but they cannot reliably retrieve a solid object or cut through a dense plug several feet inside the pipe. Once water no longer passes at all, mechanical pressure or extraction becomes the practical next step.
| Method | Useful for | Poor choice for | Typical time |
| Hot tap water and detergent | Fresh, soft grease residue | Solid objects or total blockage | 10-15 minutes |
| Baking soda and vinegar | Odor and minor soft residue | Dense grease, utensils, packed food | 30-60 minutes |
| Sink plunger | Soft obstruction near trap | Long hardened restriction | 5-10 minutes |
| P-trap removal | Objects or buildup in trap | Clog several feet inside wall | 20-40 minutes |
| Manual drain auger | Branch-line food and grease clogs | Collapsed or separated pipe | 30-60 minutes |
| Powered cable machine | Longer or tougher restrictions | Fragile pipe or inexperienced use | 30-90 minutes |
| Hydro-jetting | Heavy wall-to-wall grease buildup | Structurally damaged pipe without inspection | 1-3 hours |
Baking soda and vinegar create visible gas bubbles, but visible fizz is not proof that a blocked pipe has been opened. The mixture is most appropriate for light residue, not a kitchen sink that remains full after repeated attempts.
Boiling water also has limits. Very hot water may soften grease temporarily and carry it farther into the pipe, where it can cool and solidify again. Use hot tap water for flushing unless the pipe manufacturer and plumbing condition clearly permit higher temperatures.
Step 1: Remove the Standing Water
Scoop most standing water into a separate container before opening any pipe. Leave only enough water to cover the plunger cup during the plunging step.
Use a small container, wet-dry vacuum, or absorbent sponge. Do not send the removed water through another nearby fixture because a shared branch-line clog may cause it to return through the kitchen sink.
You will know this step is complete when: the basin contains no more than 1-2 inches of water and you can see the drain opening clearly.
Common mistake: Leaving a full basin above the trap. Removing a slip nut under that pressure can release the entire basin contents into the cabinet.
Step 2: Check the Garbage Disposal Safely
A garbage disposal must be electrically isolated before inspection. Switch it off, unplug it under the sink when possible, and confirm that the wall switch cannot start it.
Shine a flashlight into the chamber. Remove visible objects with tongs or pliers, never with your fingers. If the motor hums but the grinding plate does not turn, use the manufacturer’s bottom wrench socket or approved unjamming method.
Press the reset button only after the obstruction is removed and the unit has cooled. Run cold water during the brief function test.
A disposal that spins normally while both basins remain full is usually not the primary problem. The obstruction is more likely inside the disposal discharge elbow, shared P-trap, or branch pipe.
You will know it worked when: the grinding plate rotates freely and water exits the disposal rather than rising in the adjacent basin.
Common mistake: Repeatedly energizing a jammed motor. This can trip the internal overload and may damage the unit without clearing the drain.
Step 3: Plunge the Sink With Every Opening Sealed
A sink plunger works only when pressure cannot escape through another drain or connected opening. Use a flat-bottom cup plunger, which is designed to seal against flat sink surfaces. Lowe’s distinguishes this tool from a flanged toilet plunger and recommends the sink-style cup for sinks, tubs, and showers.
For a double sink, seal the second drain tightly with a wet cloth or stopper. If the sink connects to a dishwasher through a disposal or tailpiece, clamp or firmly pinch the flexible drain hose only when doing so will not damage it.
Add enough water to submerge the plunger rim. Center the cup over the drain, press down slowly to expel trapped air, then use 15-20 forceful strokes while maintaining the seal. Finish with a sharp upward pull.
Repeat two or three cycles. Watch the second basin and under-sink fittings for movement or leakage.
You will know it worked when: the water level falls rapidly and a one-gallon test pour drains without returning.
Common mistake: Plunging an unsealed double sink. The pressure simply pushes air and water into the other basin instead of acting on the clog.
Step 4: Inspect the Drain Connections
Inspect the visible tailpiece, disposal elbow, dishwasher connection, and horizontal pipe before removing the entire trap. These short sections commonly collect fibrous food, coffee grounds, grease, and broken object fragments.
Place the bucket below the fittings. Loosen one connection at a time and support the pipe so its weight does not twist the sink strainer or disposal outlet.
A blockage inside the disposal discharge elbow can imitate a deeper drain clog. Clean the elbow with a flexible brush, rinse it into the bucket, and inspect its rubber gasket before reassembly.
You will know it worked when: each short section is visibly open from end to end.
Common mistake: Assuming the clog must be inside the P-trap. The small outlet elbow attached to a disposal may be packed even when the trap itself is clear.
Step 5: Remove and Clean the P-Trap
Place a bucket directly beneath the U-shaped P-trap and loosen both slip nuts. Plastic nuts often loosen by hand, while older metal fittings may require adjustable or tongue-and-groove pliers.
Lower the trap slowly and empty it into the bucket. Push a bottle brush through the bend, remove solid debris, and wash the trap in a separate utility area rather than another potentially connected sink.
Inspect every slip-joint washer. A beveled washer normally installs with the narrow edge facing the mating pipe or fitting, but confirm the orientation of the existing assembly before removing it.
Some P-traps include a clean-out plug that provides access without removing the entire bend. Lowe’s notes that this opening may allow a small drain tool to enter the trap directly.
Before reinstalling the trap, look into the wall-facing trap arm. Standing water at the wall opening strongly suggests that the blockage is farther inside the branch drain.
You will know it worked when: the trap is completely clear and water can pass through it without pooling.
Common mistake: Overtightening plastic slip nuts. Tighten by hand first, test the joint, then add only enough tool pressure to stop a minor seep.
Step 6: Snake the Drain Through the Wall Pipe
Remove the P-trap and insert a 1/4-inch manual drain auger directly into the wall pipe. Bypassing the trap gives the cable a straighter path and avoids wasting cable length inside removable plumbing.
Home Depot recommends feeding the auger until resistance is felt, locking a workable cable length, and rotating the crank so the tip bores into or engages the clog.
Advance the cable in short sections. Rotate clockwise while applying steady forward pressure. When resistance appears, stop pushing hard and determine whether the cable is meeting a fitting or an obstruction.
A pipe bend often feels smooth and fixed. Pull the cable back 1-2 inches, keep it rotating, and advance gently. A soft or springy resistance that changes position is more consistent with packed debris.
Feed 10-15 feet first. If the cable continues freely without opening the drain, extend toward 20-25 feet. Retrieve the cable slowly while continuing to rotate, and wipe it as it exits.
Run the cable through a second time when the first pass retrieves grease or food. Opening one narrow hole can restore temporary flow while leaving most of the deposit attached to the pipe wall.
Home Depot also advises placing the cable directly into the wall drain after P-trap removal when that access is available.
You will know it worked when: the cable advances beyond the previous resistance and no standing water remains inside the wall opening.
Common mistake: Forcing the cable with a drill or excessive hand pressure. Old galvanized steel, corroded metal, and thin damaged plastic may not tolerate aggressive augering.
Step 7: Reassemble and Test the Drain
Clean the slip-joint surfaces, reinstall the washers in their original direction, and align the P-trap without pulling the pipes sideways. Misalignment creates leaks even when the nuts feel tight.
Hand-tighten all slip nuts. Add a small amount of tool pressure only if necessary.
Test the drain gradually:
- Pour one quart of water.
- Inspect every joint with a dry paper towel.
- Pour one gallon of water.
- Fill the basin halfway and release it.
- Run the faucet for two minutes.
- Check the cabinet again after ten minutes.
The sink should empty without rising in the other basin, gurgling persistently, or leaking at the trap joints. Home Depot recommends rechecking the drain after securing the P-trap and confirms that standing water should drain quickly once the obstruction is cleared.
You will know it worked when: a half-full sink drains rapidly and every slip joint remains dry.
Common mistake: Filling the entire basin during the first test. A loose washer can release several gallons before you can stop the flow.
Common Mistakes and How to Fix Them
| Mistake | What happens | Recovery |
| Mixing several drain chemicals | Heat, fumes, or corrosive liquid may remain | Stop work, ventilate, avoid contact, call a plumber |
| Plunging after chemical cleaner | Contaminated water can splash upward | Do not plunge or dismantle the trap |
| Leaving the second basin open | Pressure escapes through the shared drain | Seal the second opening completely |
| Snaking through the assembled trap | Cable binds in the U-bend | Remove the trap and enter through the wall pipe |
| Forcing the cable past hard resistance | Cable may kink or damage weak pipe | Retract, rotate gently, or stop |
| Reinstalling washers backward | Trap leaks despite tight nuts | Restore correct washer orientation |
| Overtightening plastic fittings | Threads or fittings crack | Replace damaged parts and hand-tighten |
| Running the disposal in backed-up water | Debris may splash or motor may overload | Isolate power and clear the drain first |
The most dangerous error is combining chemical treatment with immediate mechanical work. Caustic drain cleaners may remain trapped in the basin, P-trap, and auger debris after an unsuccessful application.
The EPA identifies certain household cleaners as potentially corrosive or toxic. Lowe’s gives an equally direct instruction: do not use a plunger, insert tools, or remove the trap after chemical cleaner use.
What If the Snake Will Not Pass?
A drain snake that stops at the same distance every time may be hitting a sharp fitting, heavy obstruction, damaged pipe, or improperly configured connection. Do not assume that every hard stop is grease.
Measure the exposed cable when resistance begins. A stop within the first 1-3 feet often corresponds to a nearby fitting or compact blockage. A stop much farther away may occur where the kitchen branch joins a larger line.
Pull back slightly, rotate the drum, and advance with controlled pressure. Change the cable’s starting orientation at the wall opening. Never hammer or sharply thrust the cable.
Stop when the cable repeatedly kinks, returns polished or damaged, or cannot rotate. A powered machine can injure the operator or damage the pipe when the cable binds.
What If the Sink Clogs Again After One Day?
A rapidly recurring clog usually means the first attempt opened a narrow passage without removing the surrounding buildup. Water can temporarily flow through that channel until grease and food close it again.
Run the auger through several controlled passes and retrieve debris each time. If recurring clogs continue, a plumber may recommend a larger cable, camera inspection, or professional cleaning method based on the pipe material and condition.
Hydro-jetting can remove broad grease deposits from pipe walls, but it is not appropriate for every line. Weak, separated, or heavily corroded pipes should be inspected before high-pressure cleaning.
Recurring blockage at the same location may also indicate poor slope, a damaged fitting, root intrusion farther downstream, or a structural defect. An auger cannot repair those conditions.
How Much Does It Cost to Clear a Kitchen Sink?
DIY clearing typically costs $10-$60 when you already own basic hand tools. Professional service commonly costs more because pricing may include travel, machine setup, cable cleaning, inspection, after-hours response, or pipe repair.
| Service or tool | Typical cost | Typical use |
| Flat sink plunger | $5-$15 | Trap-area soft blockage |
| Small drain brush | $5-$12 | Tailpiece and removable fittings |
| 15-25-foot manual auger | $20-$60 | Kitchen branch-line clogs |
| Wet-dry vacuum rental | $20-$40 | Standing-water extraction |
| Basic plumber drain clearing | $150-$350 | Accessible branch-line clog |
| Camera inspection | $200-$500 | Recurring or unexplained blockage |
| Hydro-jetting | $300-$800+ | Heavy grease or sludge buildup |
| Pipe repair | Varies widely | Broken, offset, corroded, or collapsed line |
These are typical planning ranges, not fixed quotations. Location, access, pipe length, after-hours timing, and the need to remove cabinetry or repair damaged plumbing can change the final cost substantially.
When Should You Stop and Call a Plumber?
Call a licensed plumber when several fixtures back up, sewage appears, chemicals remain in the drain, the pipe leaks inside the wall, or a 20-25-foot cable does not restore flow. These signs exceed a routine removable-trap clog.
Stop DIY work under any of these conditions:
- Water rises in a shower, bathtub, floor drain, or toilet.
- The kitchen clog returns repeatedly after thorough augering.
- The wall pipe is corroded, loose, cracked, or visibly offset.
- Chemical drain opener remains in standing water.
- The auger cable binds and cannot rotate or retract.
- The sink cabinet contains significant water damage or mold.
- The clog began after construction, remodeling, or a dropped object.
- Wastewater smells strongly of sewage rather than ordinary kitchen residue.
Water from a drain backup may contain sewage or unknown chemicals and can create a health hazard. Utah State University Extension specifically warns that drain-backup water can be contaminated.
Alternate Kitchen Sink Setups
Double-Basin Sink
Seal the basin opposite the plunger. If the clog lies after the two drains join, an open second basin releases nearly all plunging pressure.
When one basin fills as the other drains, inspect the shared tee, trap, and trap arm. The blockage is usually downstream from the point where both sides connect.
Sink With a Garbage Disposal
Disconnect power first. Inspect the grinding chamber, discharge elbow, and rubber outlet gasket before assuming that the wall drain is blocked.
A rotating disposal does not prove its outlet is open. Food can pass through the grinding chamber and lodge immediately inside the discharge elbow.
Sink Without a Garbage Disposal
Remove the strainer basket and inspect the straight tailpiece. Long utensils, produce labels, fibrous vegetables, and compacted food may lodge before the P-trap.
A simple non-disposal setup often provides easier access because fewer elbows and appliance connections sit between the basin and trap.
How Can You Prevent Another Severe Clog?
Preventing kitchen clogs requires controlling grease and solids before they enter the drain. A strainer catches particles, but it does not prevent liquid grease from coating the branch line.
Scrape plates into the trash. Collect cooking oil and meat fat in a container rather than pouring them into the sink. Wipe greasy pans with a paper towel before washing.
Avoid sending coffee grounds, rice, pasta, flour, eggshells, fibrous peels, and large food loads through a disposal. These materials may swell, form paste, wrap around components, or combine with grease farther down the pipe.
After ordinary dishwashing, run enough water to carry suspended residue through the trap and branch line. Do not rely on a brief trickle.
A monthly visual inspection under the sink can catch slow trap leaks, loose fittings, and early cabinet damage before a complete failure occurs.
Frequently Asked Questions
Can I use boiling water in a clogged kitchen sink?
Use caution. Hot tap water may help move fresh grease, but boiling water can soften some plastic components, stress questionable joints, or push grease deeper before it cools again. A completely blocked sink is better handled by removing standing water and using mechanical clearing methods.
Why does the other sink fill when I use the disposal?
Both basins normally join a shared drain path. When the pipe downstream is blocked, the disposal pushes water and ground debris toward the path of least resistance, which may be the adjacent basin instead of the wall drain.
Can baking soda and vinegar clear a total blockage?
Baking soda and vinegar are unlikely to clear a complete blockage caused by packed food, hardened grease, or a solid object. Their reaction may loosen light residue, but it does not provide the reach, cutting action, or extraction force of a plunger, trap cleaning, or auger.
How far should I snake a kitchen sink drain?
Start with 10-15 feet and extend toward 20-25 feet when necessary. Stop earlier if the cable repeatedly binds, kinks, cannot rotate, or meets a hard obstruction that does not change after gentle repositioning.
Why is my P-trap empty but the sink still clogged?
A clear P-trap places the restriction farther downstream, usually inside the trap arm or branch drain behind the wall. Feed a suitable hand auger directly into the wall opening after removing the trap.
Can a clogged kitchen sink indicate a main sewer problem?
Yes, but an isolated kitchen backup usually involves the kitchen branch. A main or larger branch problem becomes more likely when toilets, showers, tubs, floor drains, or other sinks also drain slowly or back up.
The Bottom Line
When your kitchen sink is clogged and you have tried everything, stop adding liquids and escalate in a controlled order: remove standing water, isolate the disposal, seal connected openings, plunge correctly, clean the P-trap, and snake the wall drain.
Successful repair depends more on locating the obstruction than applying greater force. Stop when chemicals, multiple-fixture backups, damaged pipes, sewage, or immovable cable resistance make continued DIY work unsafe.