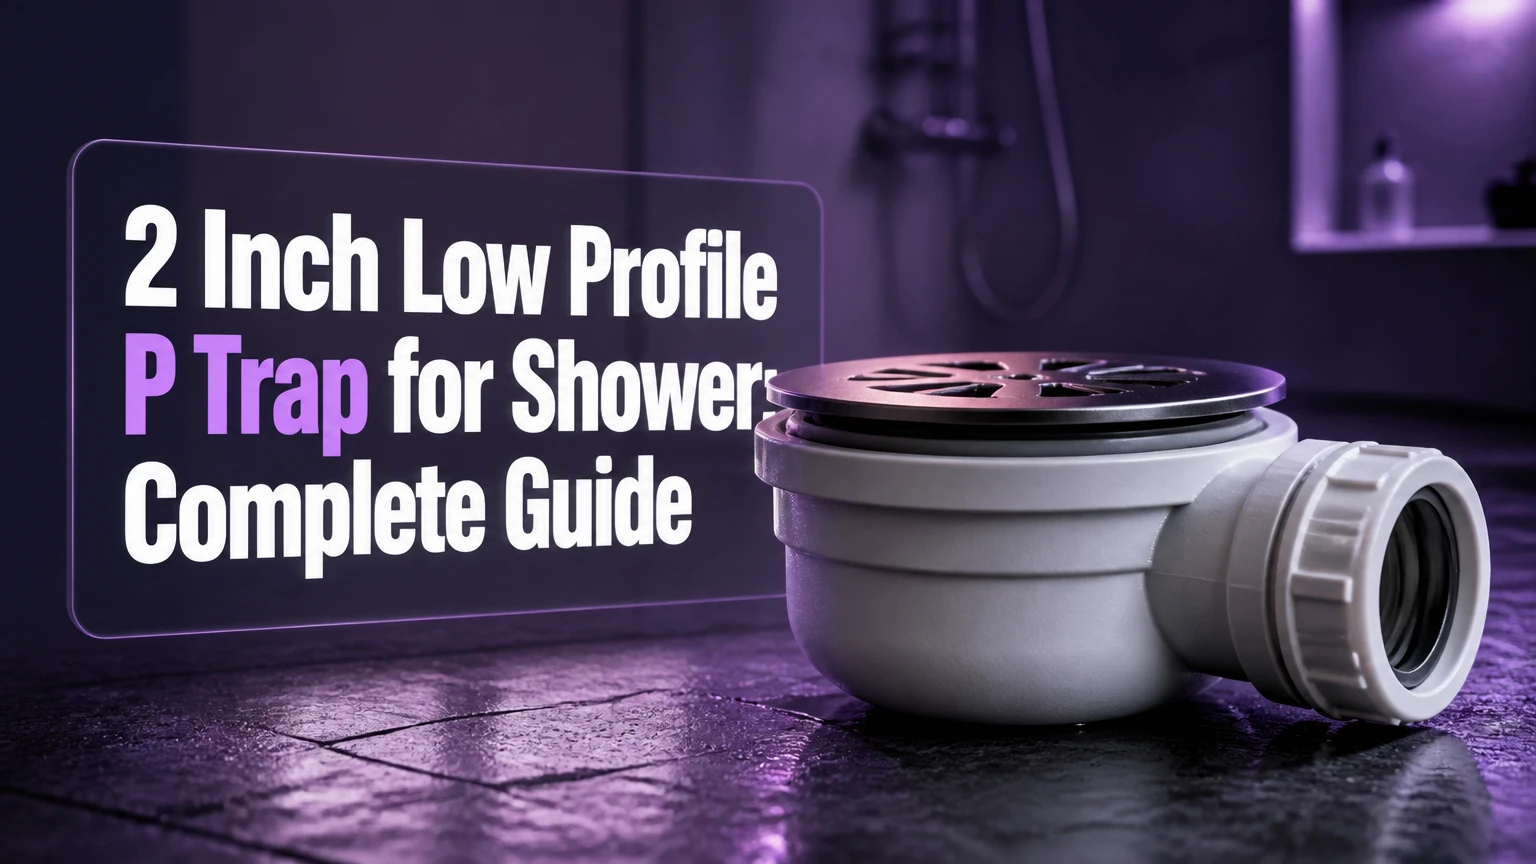
A 2 inch low profile P trap for shower installations is a compact drainage fitting used when a standard trap will not fit beneath a shallow shower floor. The correct product must still provide an approved trap seal, connect to the required drain size, maintain proper slope and venting, and remain accessible enough to install and service without weakening the floor structure.
Key Facts at a Glance
- A low-profile shower trap saves vertical space, but it does not eliminate trap-seal, venting, drainage-slope, or approval requirements.
- The 2024 International Plumbing Code requires a liquid trap seal between 2 and 4 inches for conventional fixture traps.
- Under the 2024 IPC, a shower flowing at 5.7 gallons per minute or less may use a 1 1/2-inch minimum trap, while flows above 5.7 and up to 12.3 gpm require a 2-inch minimum trap.
- Two-inch and smaller horizontal drainage piping generally requires a minimum slope of 1/4 inch per foot under the IPC.
- A one-way membrane drain seal may control odors, but it should not be assumed to replace the code-required P-trap.
- The best solution is usually the shallowest listed assembly that preserves structural framing, drainage fall, vent placement, and maintenance access.
What Is a Low-Profile Shower P-Trap?
A low-profile shower P-trap is a compact trap assembly that retains enough liquid to block sewer gas while occupying less space beneath the shower than a conventional DWV P-trap. Manufacturers reduce the profile through tighter geometry, a side outlet, an integrated drain-and-trap arrangement, or a specially designed shallow body.
The term is used loosely in product listings. It may describe any of the following:
- A compact solvent-weld PVC or ABS P-trap.
- A shower drain with a horizontally offset outlet.
- A proprietary shallow water-seal trap.
- A European-style removable shower waste.
- A one-way membrane drain insert.
- A flexible fitting marketed as a flat trap.
These products are not interchangeable. A compact water-seal trap remains a true fixture trap. A side-outlet drain may still require a separate trap downstream. A membrane insert generally supplements odor protection unless the complete assembly is specifically listed and accepted as the fixture trap by the local authority having jurisdiction.
How Does a Low-Profile Trap Work?
A conventional low-profile P-trap works by retaining water between its dip and crown weir. The retained water creates a physical barrier between the bathroom and the sanitary drainage system, while the outlet allows new wastewater to displace the existing water during each shower.
The important measurement is the trap seal depth, not simply the trap’s external height. The IPC requires a liquid seal of at least 2 inches and no more than 4 inches for a conventional fixture trap. IAPMO describes the seal as the vertical depth between the crown weir and the top of the trap dip, and identifies 2-4 inches as the range used to balance gas protection with self-scouring performance.
That requirement limits how flat a traditional trap can become. A manufacturer can widen the body or reconfigure the outlet, but a code-compliant water-seal trap cannot simply be flattened until almost no water remains.
What About a Mechanical Membrane Seal?
A mechanical membrane seal opens under flowing water and closes after the discharge stops. Oatey, for example, sells a 2-inch one-way drain seal designed to block odors, gases, and pests in shower or general-purpose drains. The manufacturer presents it as a tool-free drain insert, particularly useful where a conventional P-trap may dry out.
That does not automatically make the insert a substitute for a P-trap. The IPC has historically prohibited traps that depend on moving parts to maintain their seal, while requiring approved liquid-seal traps unless a specific listed alternative is accepted.
Use a membrane product as the sole trap only when all three conditions are met:
- The complete assembly is listed for that use.
- The manufacturer’s instructions permit it as the fixture trap.
- The local plumbing official accepts the installation.
How Much Vertical Space Does a Low-Profile Trap Need?
Most installations require more space than the trap body’s advertised height. The total depth includes the shower drain body, connecting tailpiece, trap, pipe slope, subfloor thickness, waterproofing system, and enough working clearance to assemble the joints.
| Component or measurement | Typical planning range | Why it matters |
|---|---|---|
| Compact 2-inch DWV trap body | About 5-7 inches | Conventional water-seal geometry consumes the most depth |
| Proprietary shallow water-seal waste | About 3-5 inches | Product-specific, often integrated with the drain |
| Membrane-style drain body | About 2-3 inches | May not replace the required fixture trap |
| Required water seal | 2-4 inches | Code measurement inside a conventional trap |
| Two-inch pipe fall over 4 feet | 1 inch | Adds depth between trap and downstream connection |
| Typical subfloor | 3/4 inch | Reduces the cavity available below the shower |
| Shower base and drain body | About 1-4 inches | Varies substantially by receptor design |
These are planning ranges, not universal product dimensions. Always use the manufacturer’s dimensional drawing for the exact trap, drain, shower pan, and connector combination.
Nominal Pipe Size Is Not Exact Inside Diameter
A fitting labeled “2 inch” is made for nominal 2-inch piping. The description does not mean every pipe has an internal diameter of exactly 2.000 inches.
PVC Schedule 40, cellular-core DWV, ABS, cast iron, and tubular fittings use different wall structures and connection standards. Match the trap to the pipe material, nominal size, joint type, and applicable DWV standard rather than measuring only the open bore.
Which Type of Low-Profile Trap Should You Choose?
The best option depends on available depth, inspection requirements, access, pipe material, and whether the shower drain can be relocated.
| Trap or drain arrangement | Approximate profile | Connection | Best application | Main limitation |
|---|---|---|---|---|
| Standard 2-inch PVC P-trap | 6-8 inches total planning depth | Solvent weld | New construction with open framing | Often too deep for shallow assemblies |
| Compact DWV P-trap | 5-7 inches | Solvent weld | Remodel with moderate clearance | Limited savings |
| Integrated shallow water-seal waste | 3-5 inches | Proprietary gasket or weld | Low-entry shower systems | Approval and replacement parts vary |
| Side-outlet shower drain | 3-5 inches at drain | Horizontal outlet | Joist conflicts near drain center | May still need a downstream trap |
| Membrane drain seal | 2-3 inches at drain | Push-fit or proprietary | Supplemental odor control | Not automatically a P-trap substitute |
| Raised shower platform plus standard trap | Added 2-6 inches above floor | Conventional DWV | Remodel where framing cannot change | Raises entry height |
| Relocated drain plus standard trap | Depends on route | Conventional DWV | Major renovation | More demolition and piping work |
Best Overall for Permitted Residential Work
A listed compact PVC or ABS water-seal trap is usually the safest choice for permitted residential work. It uses familiar DWV materials, provides a visible liquid seal, and can be inspected using ordinary code criteria.
The drawback is modest space savings. A conventional 2-inch trap cannot become ultra-flat while retaining the required seal and usable flow path.
Best for an Extremely Shallow Shower Base
A proprietary shower drain with an integrated shallow trap can solve installations where only 3-5 inches are available. Choose a system with a published dimensional drawing, flow rating, cleaning procedure, listing information, and replaceable internal components.
The honest limitation is compatibility. A proprietary drain may fit only a particular shower tray, waterproofing flange, grate, gasket, or outlet orientation.
Best When Framing Must Remain Untouched
A raised shower platform is often more reliable than cutting a structural member to force in a trap. Adding 2-4 inches above the existing floor may create enough depth for a standard assembly while preserving joist strength and familiar plumbing components.
This solution is less suitable where a curbless entrance, accessibility requirement, or low ceiling makes additional elevation unacceptable.
Does a Shower Always Require a 2-Inch P-Trap?
No. The applicable code, adopted edition, local amendments, fixture outlet, and total shower flow determine the minimum trap size.
Under the 2024 IPC, a shower with a total flow of 5.7 gpm or less has a 1 1/2-inch minimum trap size. A total flow above 5.7 gpm and up to 12.3 gpm requires a 2-inch minimum trap. Higher-flow multi-head systems require still larger traps.
| Total shower flow under 2024 IPC | Drainage fixture units | Minimum trap size |
|---|---|---|
| 5.7 gpm or less | 2 DFU | 1 1/2 inches |
| More than 5.7 to 12.3 gpm | 3 DFU | 2 inches |
| More than 12.3 to 25.8 gpm | 5 DFU | 3 inches |
| More than 25.8 to 55.6 gpm | 6 DFU | 4 inches |
A local jurisdiction may use the Uniform Plumbing Code, an older IPC edition, a state code, or amendments that impose different requirements. A 2-inch shower drain remains common because it provides capacity for multiple outlets, reduces restriction from hair accumulation, and aligns with many shower drain bodies.
What Code Requirements Affect a Low-Profile Trap?
A low-profile assembly must satisfy the same functional requirements as a standard installation unless an approved alternative design applies.
Trap Seal
A conventional fixture trap must retain a 2-4-inch liquid seal under the IPC. A trap with less than a 2-inch seal should not be treated as code compliant merely because a seller calls it a P-trap.
Drainage Slope
The 2024 IPC requires horizontal drainage piping 2 1/2 inches or smaller to slope at least 1/4 inch per foot. This equals approximately a 2 percent fall.
A shallow trap can fit under the shower yet still fail as a system when there is no remaining depth for the outlet pipe to fall toward the branch drain.
Vent Distance
Under the IPC table, a 2-inch trap arm installed at 1/4 inch per foot may extend up to 8 feet from the trap to its vent connection.
Do not apply that number universally. Other codes calculate trap-arm length differently, and local amendments can shorten or otherwise modify the allowed distance.
Trap-to-Fixture Relationship
Avoid installing two traps in series. A shower drain with an integral trap connected to another P-trap can create an air-locked section, slow drainage, and difficult maintenance.
Also avoid turning a P-trap into an S-trap through an unvented vertical drop after the outlet. The trap arm must retain the geometry and venting required by the adopted code.
Product Approval
Verify the listing and installation instructions for any unconventional assembly. The local inspector may ask for:
- Manufacturer and model number.
- Applicable ASME, ASTM, CSA, or IAPMO listing.
- Trap-seal specification.
- Flow capacity.
- Cleaning access.
- Pipe and joint compatibility.
- Written approval for alternative materials or methods.
Can You Fit a Trap Inside 2×6 or 2×8 Joists?
Sometimes, but the nominal joist name does not equal the available cavity. A 2×6 is approximately 5 1/2 inches deep, while a 2×8 is approximately 7 1/4 inches deep before accounting for subfloor, ceiling material, pipe slope, fasteners, blocking, and required structural clearances.
The drain location may be more important than the trap profile. A trap positioned between joists can use the cavity depth. A drain centered over a joist creates a structural conflict that no compact fitting can solve safely.
Do not notch or drill joists based on plumbing convenience alone. Engineered I-joists, floor trusses, sawn lumber, and engineered lumber each have different permitted hole zones. Obtain the joist manufacturer’s guidance or a structural design before altering framing.
Practitioner rule: Move the drain a few inches when possible before redesigning the entire floor around an ultra-shallow trap.
How Do You Install a Low-Profile Shower P-Trap?
Installation normally takes one to three hours when the framing is open and the branch drain is nearby. Restricted access, drain relocation, structural work, or ceiling repair can turn it into a full-day project.
Before You Start
| Item | Typical requirement |
|---|---|
| Difficulty | Intermediate to advanced |
| Direct-access installation time | 1-3 hours |
| Typical trap and fittings | $20-$120 |
| Professional plumbing labor | Commonly $200-$600 |
| Tools | Tape, level, saw, deburring tool, marker, inspection mirror |
| PVC materials | Correct primer and solvent cement |
| ABS materials | Approved ABS cement |
| Testing | Water test before closing floor or ceiling |
Step 1: Confirm the Adopted Code
Identify the plumbing code and local amendments before buying the trap. Confirm minimum trap size, acceptable trap type, venting method, listing requirements, and whether the work requires a permit.
You will know this step is complete when the planned assembly can be described by product model, pipe size, seal type, vent method, and approval basis.
Step 2: Measure the Entire Drainage Envelope
Measure from the shower drain outlet to the lowest obstruction, not merely from the subfloor to the ceiling below. Include the drain body, connector, trap, pipe fall, joist position, and working room needed to make the joint.
A common mistake is buying a 3-inch-high drain while ignoring the additional depth required by its outlet elbow and separate P-trap.
Step 3: Dry-Fit the Shower and Drain
Set the shower base or template in its final position. Mark the drain center, joists, blocking, branch drain, and vent route.
Dry-fit the full assembly without cement. The trap outlet should align with the downstream pipe without forcing either fitting sideways.
Step 4: Cut and Deburr the DWV Pipe
Make square cuts with a suitable saw or pipe cutter. Remove burrs from the inside and outside edges so hair and debris do not collect on rough plastic.
Do not shorten a proprietary trap beyond the manufacturer’s permitted cut lines.
Step 5: Assemble the Trap at the Correct Angle
For solvent-weld PVC, use the primer and cement specified for the pipe and fitting. Fully insert each pipe into the socket and orient the trap before the joint sets.
Follow the cement manufacturer’s cure schedule. Cure time varies with pipe diameter, temperature, humidity, interference fit, and test pressure, so “always wait 24 hours” is not a universal installation rule.
Step 6: Maintain the Required Fall
Set the trap arm and horizontal drain to the required slope. Under the IPC, 2-inch and smaller piping generally needs 1/4 inch of fall per foot.
Check the pipe itself rather than the bottom of an irregular fitting. The system should fall continuously without a belly that retains sludge.
Step 7: Test Before Closing the Floor
Secure the shower drain according to its gasket, clamping, adhesive, or waterproofing instructions. Run several gallons of water through the drain and inspect every joint.
Test again after the shower base is loaded. A fitting that remains dry while unloaded can leak after the receptor, subfloor, or piping shifts slightly under weight.
How Much Does the Installation Cost?
A straightforward trap replacement may cost less than $300, while a shallow-floor conversion involving structural or finish work can exceed $1,500. The trap itself is often one of the least expensive parts.
| Cost component | Typical range | Main cost driver |
|---|---|---|
| Standard or compact plastic trap | $15-$50 | Material and brand |
| Proprietary shallow trap or drain | $50-$200 | Listing, grate, waterproofing system |
| Extra DWV fittings and pipe | $20-$100 | Route length and material |
| Plumber labor with open access | $200-$600 | Local rates and complexity |
| Ceiling opening and repair | $250-$1,000 | Finish type and access |
| Drain relocation | $400-$1,500+ | Demolition and branch routing |
| Structural framing correction | $500-$2,500+ | Engineer and carpenter involvement |
| Raised shower platform | $300-$1,500+ | Framing, waterproofing, tile |
These are typical planning figures, not fixed quotations. Permit fees, regional labor rates, high-rise access, fire-rated assemblies, and custom waterproofing can materially increase the final cost.
Common Mistakes and How to Fix Them
| Problem | Likely cause | Corrective action |
|---|---|---|
| Shower drains slowly from first use | Flat pipe, backfall, double trap, undersized outlet | Verify slope and trace the complete drainage path |
| Sewer odor appears | Dry seal, siphoning, failed gasket, missing trap | Refill and test seal, inspect venting and joints |
| Trap fits but outlet will not connect | Pipe fall or joist was omitted from measurements | Re-route branch, relocate drain, or raise shower |
| Recurring hair blockage | Tight waterways or inaccessible proprietary insert | Install removable strainer and maintain from above |
| Ceiling joint leaks | Forced alignment or poorly assembled gasket | Rebuild joint without side load |
| Inspector rejects membrane device | Product is not accepted as sole fixture trap | Install approved water-seal trap or obtain approval |
| Gurgling follows shower use | Vent restriction or excessive trap-arm fall | Correct venting and trap-arm geometry |
| Trap freezes in exposed space | Unconditioned or exterior cavity | Relocate or protect piping under approved design |
Practitioner rule: Never select a trap based only on its advertised height. Select the complete drain-to-branch assembly.
Maintenance and Cleaning
Low-profile traps can collect hair and soap residue faster when their internal passages are tighter than those of a conventional sweeping trap. A removable grate, hair strainer, or top-access cleaning cup materially improves serviceability.
Use these maintenance practices:
- Remove visible hair from the grate weekly in high-use showers.
- Clean a removable trap cup or insert according to the manufacturer’s instructions.
- Flush with hot tap water after mechanical cleaning.
- Use a small approved hand snake when the trap geometry allows it.
- Avoid forcing a large auger through a proprietary membrane or thin internal component.
- Avoid mixing chemical drain cleaners with other products.
A trap hidden above a finished ceiling should have durable joints and a clear maintenance route from the shower side whenever possible.
Alternatives When No Low-Profile Trap Fits
A different construction strategy is often safer than installing an unapproved flat fitting.
Relocate the Shower Drain
Moving the drain between joists may create enough depth for a standard trap. This often produces the most conventional and serviceable result.
Raise the Shower Base
A platform can recover several inches of vertical space without cutting structural framing. The design must still preserve safe entry, waterproofing, and any accessibility requirements.
Lower the Ceiling Below
A small soffit may provide trap clearance in a basement, utility room, or secondary space. Confirm fire separation, headroom, and finish requirements before using this approach.
Choose a Different Shower Receptor
Some shower bases place the drain outlet higher or nearer an edge, allowing the trap to sit between joists. Product selection at the design stage can avoid expensive framing changes later.
Redesign the Branch Drain
A plumber may connect to a lower branch, alter the vent route, or use a permitted alternative venting method. This requires system-level planning rather than simply substituting one fitting.
How to Choose the Right 2 Inch Low Profile P Trap
Choose the trap only after answering these questions:
- What is the exact finished vertical space?
- Where are the joists and structural restrictions?
- Does the shower drain contain an integral trap?
- What is the total showerhead and body-spray flow?
- Which plumbing code and edition apply?
- Is the product approved as a trap or only as a drain seal?
- Can the trap arm maintain continuous slope?
- Where will the vent connect?
- Can the assembly be cleaned from above?
- Will every concealed joint remain accessible for testing before closure?
For most permitted homes, prioritize a listed water-seal trap and conventional DWV joints. Use an ultra-shallow proprietary assembly only when its documentation, flow rating, maintenance method, and local approval are clear.
Limitations of Low-Profile Shower Traps
A low-profile trap cannot correct every shallow-floor problem. It cannot create drainage fall where the downstream pipe is too high, legalize damaged joists, replace required venting, compensate for an undersized branch drain, or guarantee access after a tiled shower is completed.
The smallest product may also be the hardest to clean. Saving one inch during construction can produce years of maintenance difficulty if the internal seal, cup, or membrane cannot be reached without removing the shower base or opening the ceiling.
Frequently Asked Questions
Can a shower P-trap be installed sideways?
A P-trap must be installed in the orientation approved by its manufacturer so the internal water level forms the intended seal. Rotating a conventional trap onto its side changes the relationship between the dip and weir, reduces or destroys the seal, and can create leakage or drainage problems.
Does the P-trap need to sit directly under the shower drain?
The trap does not always need to be perfectly centered beneath the drain, but it must connect through an approved fixture drain arrangement. Offsetting the trap may help avoid a joist, provided the pipe, fittings, trap-arm slope, venting, and developed length comply with the applicable code.
Can I use a flexible flat trap under a shower?
Do not use a flexible flat trap unless it is specifically listed and locally approved for permanent concealed shower drainage. Corrugated or flexible waterways can retain hair, deform, loosen, and complicate cleaning. Standard rigid DWV fittings or a listed proprietary shower-waste system are generally more dependable.
Will a one-way drain seal stop shower odors?
A one-way drain seal can reduce odors caused by an evaporated trap seal, and manufacturers offer 2-inch products for shower drains. It will not repair a leaking pipe, missing vent, failed toilet seal, cracked trap, or open sewer connection. Confirm whether the device supplements or legally replaces the fixture trap.
How far can a 2-inch shower trap be from the vent?
The IPC permits up to 8 feet between a 2-inch trap and its vent when the fixture drain slopes 1/4 inch per foot. That figure applies to the IPC table and may differ under the UPC, older code editions, or local amendments, so verify the adopted rule before rough-in.
Is a 2-inch trap better than a 1 1/2-inch trap?
A 2-inch trap provides a larger waterway and may better accommodate multi-head showers and normal hair accumulation, but larger is not automatically better in every system. The trap must match the fixture outlet, design flow, branch capacity, venting, and adopted code. The 2024 IPC permits 1 1/2 inches for showers flowing 5.7 gpm or less.
Conclusion
A 2 inch low profile P trap for shower construction is appropriate when limited floor depth prevents a standard trap from fitting, but the product must be evaluated as part of the entire drainage system. Confirm the trap seal, flow-based pipe size, total assembly depth, 1/4-inch-per-foot drainage fall, vent location, structural clearances, product listing, and cleaning access before purchasing or cutting the floor.