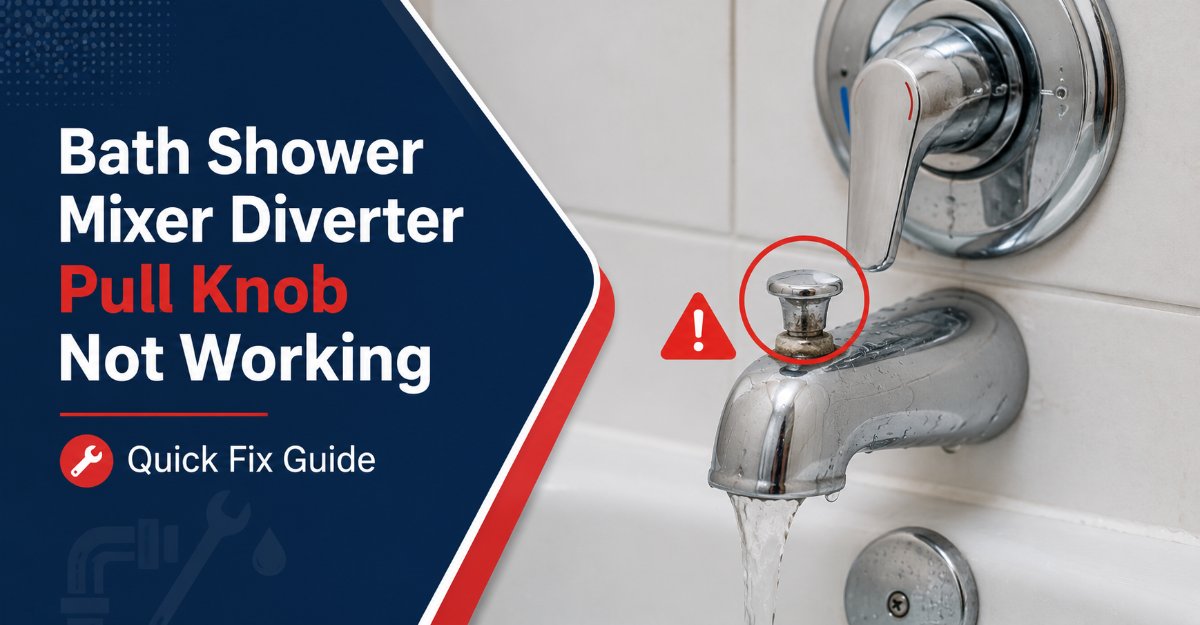
A bath shower mixer diverter pull knob that is not working usually has limescale, a worn seal, a bent rod, or a broken internal gate. Clean the accessible mechanism first, then test whether the knob stays raised and sends water to the shower. Replace the diverter spout when its internal bore or gate is damaged.
Key facts
A pull-up bath diverter redirects water from the bath spout to the shower riser.
A knob that drops immediately usually has scale, a damaged seal, a broken spring, or insufficient flow through the spout.
Water from both outlets usually indicates a worn diverter seal or cracked internal housing.
Slip-on spouts normally use a concealed underside set-screw; threaded spouts screw onto a wall nipple.
Typical DIY cleaning takes 15-30 minutes, while spout replacement takes 20-60 minutes.
Shut off the water before removing a spout if the fitting can expose an open pipe or if the isolation valves are uncertain.
What Does a Bath Shower Mixer Diverter Do?
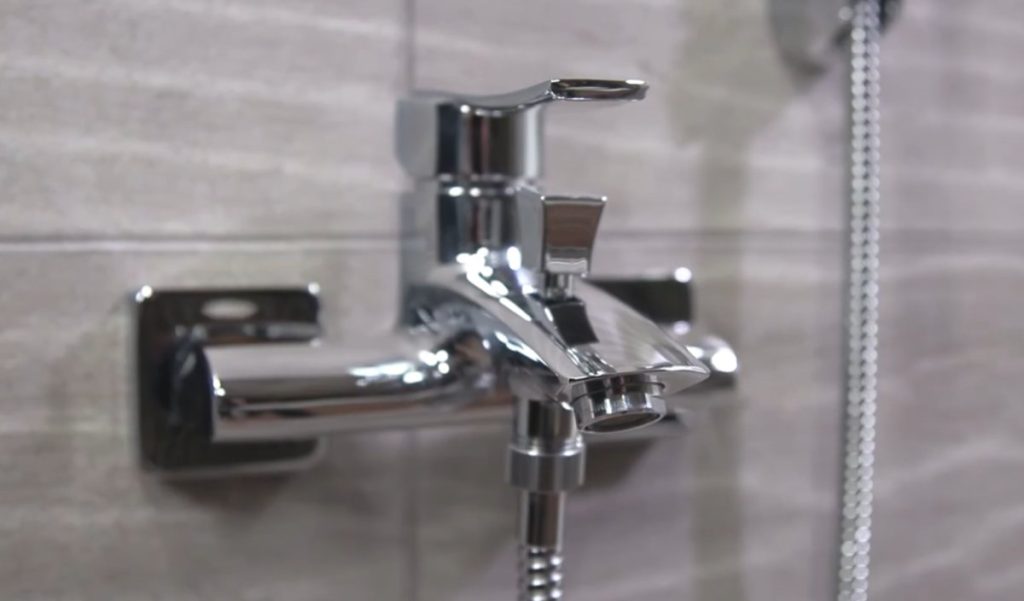
A bath shower mixer diverter is the switching valve that directs mixed hot and cold water either through the bathtub outlet or up to the showerhead. In a pull-knob design, the control sits on the spout and lifts a rod, plunger, washer, or gate inside the outlet.
This diverter is different from a concealed shower diverter mounted behind the wall. A spout diverter is usually accessible from the bathroom, while a concealed diverter cartridge may require trim removal and model-specific replacement parts.
The normal position lets water leave through the bath spout. Pulling the knob raises the internal gate and restricts the spout passage, so water enters the shower riser. Turning the mixer off removes flow pressure, and many designs allow the gate to fall back into the bath position.
A pull knob is therefore a mechanical component, not a pressure-balancing control. The knob does not create more water pressure. It only changes the outlet path.
How Does the Pull Knob Work?
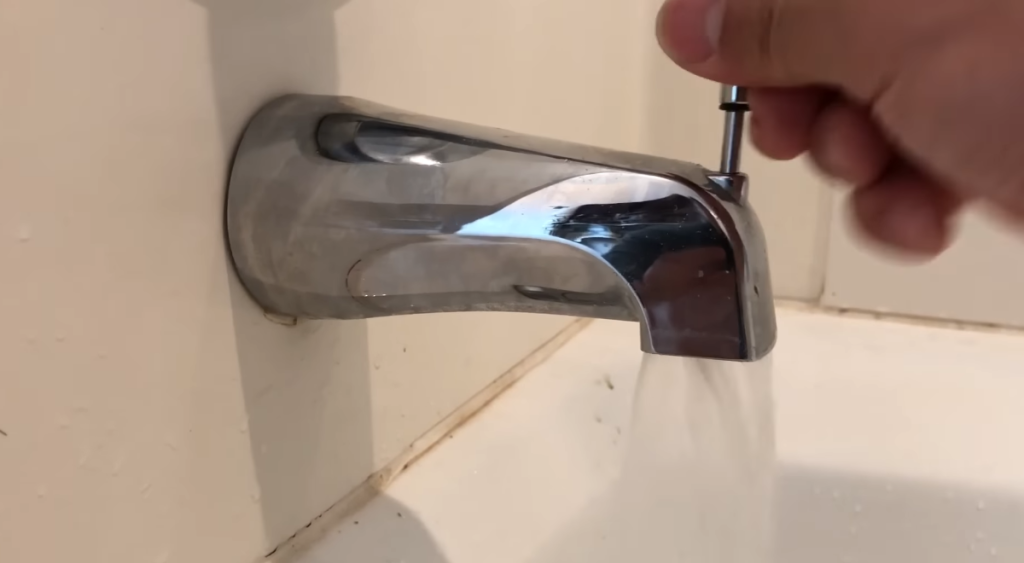
A pull-up bath diverter uses a vertical rod connected to a sealing element inside the spout. When the knob is raised, the sealing element closes or narrows the bath outlet, allowing water pressure to drive flow toward the shower pipe.
The exact mechanism varies by manufacturer. Some spouts use a rubber-faced plunger, some use a plastic gate, and others use a spring-assisted cartridge. Gravity may return the gate, but the return action can also depend on a spring, water movement, or the shape of the seal.
The operating sequence is:
- Bath position: The gate rests low, leaving the spout outlet open.
- Pull position: The knob lifts the rod and raises the gate.
- Sealing position: The washer or gate contacts an internal seat.
- Shower flow: Water is restricted at the spout and travels into the riser.
- Reset: Flow stops, and the rod returns to the bath position.
A blocked showerhead can confuse diagnosis. If the shower outlet has heavy mineral deposits, water may not move freely after the diverter is pulled, even when the diverter itself works.
Why Is the Bath Shower Mixer Diverter Pull Knob Not Working?
The most common causes are mineral deposits, a hardened rubber washer, a distorted rod, a broken spring, or a damaged spout body. The visible knob can remain intact while the internal gate no longer seals, moves freely, or returns correctly.
Hard-water deposits build around the rod and gate. Calcium carbonate scale increases friction, narrows the passage, and can prevent the seal from contacting its seat. Rubber washers also lose flexibility over time, especially after years of exposure to hot water and cleaning chemicals.
Use the symptom rather than the age of the fitting to choose the first test.
| Symptom | Most likely cause | First diagnostic action | Typical remedy |
|---|---|---|---|
| Knob will not lift | Scale, seized rod, bent stem | Turn water off and test gentle movement | Clean or replace spout |
| Knob rises but drops immediately | Worn seal, broken spring, poor flow | Run water and observe return speed | Replace seal, spring, or assembly |
| Water comes from both outlets | Failed gate seal, cracked housing | Inspect split flow at low and high flow | Replace mechanism or spout |
| Shower has weak flow only | Blocked showerhead, riser, or mixer | Remove and inspect showerhead screen | Clean head or diagnose supply |
| Knob spins without resistance | Broken rod connection or retaining screw | Inspect knob and stem fastening | Replace knob or diverter kit |
| Water leaks around knob | Worn stem O-ring or cracked top seal | Dry area and run mixer briefly | Replace seal or spout |
A low-flow mixer can also make a sound diverter appear faulty because insufficient flow may not overcome the shower riser’s resistance. Test the diverter with the showerhead temporarily removed only if the fitting can be safely accessed and the water cannot spray into the wall.
How Can You Diagnose the Fault Before Removing Parts?
A five-minute observation test can usually separate a blocked shower outlet from a failed diverter. Run the mixer at a moderate flow, pull the knob once, and record whether the knob stays up, whether the bath outlet stops, and whether the shower riser receives water.
Test the knob movement
Move the knob without forcing it. Smooth travel with a firm return suggests the rod is intact. Grinding, stiffness, or a short jerking movement points to scale or a bent internal part.
Do not use pliers on a chrome knob. Plier marks can damage the finish and may twist the rod inside the spout.
Test the flow paths
With the knob raised, a small dribble from the bath spout can be normal on some designs. A strong stream from both outlets is not normal and indicates that the internal gate is failing to seal.
If the bath stream stops but the shower remains weak, inspect the showerhead, hose, riser, and mixer inlet filters before replacing the diverter.
Check the pipe and spout for movement
A spout that rotates on the wall can loosen its connection or stress the pipe nipple. Movement at the spout base, water staining behind the escutcheon, or dampness at the wall joint warrants caution because the leak may be concealed.
How Do You Clean a Stuck Diverter Safely?
Clean exposed scale with warm water and a small amount of white vinegar for 15-30 minutes, then rinse thoroughly. Do not immerse an entire plated spout in acid for hours because vinegar can dull some finishes and damage nearby grout, sealants, or natural stone.
Use this no-disassembly method:
- Turn the mixer off and dry the spout.
- Apply a cloth soaked in a 1:1 mixture of warm water and white vinegar around the rod and knob base.
- Leave the cloth in place for 15-30 minutes.
- Brush loosened deposits with a soft nylon toothbrush.
- Rinse with clean water and operate the knob several times.
- Run water for 30 seconds to flush loosened particles.
A plastic bag filled with solution can work on an inexpensive chrome spout, but the method is not universally safe. Avoid vinegar on marble, limestone, unsealed stone, some brushed finishes, and manufacturer finishes that prohibit acidic cleaners. A manufacturer-approved limescale product is safer when the finish is unknown.
The practical limit is simple: cleaning can free a movable gate, but it cannot restore a split washer, missing spring, cracked housing, or deeply pitted bore.
Can You Replace the Internal Diverter Mechanism?
You can replace an internal diverter mechanism only when the manufacturer supplies a matching repair kit and the spout allows access. Many older bath spouts have no serviceable internal cartridge, so replacing the complete spout is more reliable than forcing an incompatible washer into it.
Before ordering parts, identify:
- Manufacturer name and model number
- Spout length from wall to outlet
- Pull-knob shape and rod diameter
- Slip-on or threaded connection
- Set-screw location and size
- Pipe material and external diameter
- Replacement kit part number
Some pull knobs have a decorative cap and retaining screw. Others are permanently attached to a rod, and the internal gate is removed through the spout opening or by replacing the entire outlet. The procedure in one brand’s manual must not be assumed for another brand.
For a serviceable design, remove the cap with a protected plastic tool, remove the retaining screw, and extract the rod only as the manufacturer specifies. Keep the small washer, spring, and retaining components in order. A missing spring or reversed seal can produce the same dual-flow symptom as the original fault.
Stop the internal repair if the rod is corroded, the bore is rough, or the gate seat is pitted. A new seal cannot seal reliably against a damaged seat.
Should You Repair the Mechanism or Replace the Spout?
Replacing the complete diverter spout is usually the better choice when the fitting is old, heavily scaled, or missing a readily available repair kit. Internal repair costs less in parts, but the complete spout provides a new gate, seat, rod, and housing in one installation.
| Option | Typical parts cost | DIY time | Best condition | Main risk |
|---|---|---|---|---|
| Clean existing mechanism | $3-$10 or £3-£8 | 15-30 minutes | Light surface scale | Finish damage from acid |
| Replace washer or spring | $5-$20 or £5-£16 | 30-60 minutes | Matching kit available | Wrong seal or lost parts |
| Replace standard spout | $20-$60 or £16-£50 | 20-45 minutes | Worn or pitted spout | Wrong connection type |
| Plumber replacement | $150-$300 typical US range | 1-2 hours appointment | Corroded or concealed pipe | Higher total cost |
The stated prices are typical consumer and service ranges, not universal quotes. Local labor, brand, finish, access, and regional currency can change the total substantially.
Repair the mechanism when the spout is a premium finish, the replacement cartridge is documented, and the internal housing is clean. Replace the spout when a standard compatible unit costs less than the repair kit plus diagnostic time.
Which Type of Diverter Spout Do You Have?
A slip-on spout slides over a smooth copper or brass pipe and usually locks with a hex set-screw underneath. A threaded spout rotates onto a male threaded nipple, with threads either at the rear or inside the front of the outlet.
| Spout type | Visible identification | Common connection | Removal method | Seal requirement |
|---|---|---|---|---|
| Slip-on | Underside hex screw | Smooth 1/2-inch copper pipe | Loosen set-screw, slide off | O-ring or compression fit |
| Rear-threaded | No underside screw, rear collar | 1/2-inch male nipple | Turn counterclockwise | PTFE tape or approved seal |
| Front-threaded | Threads inside outlet nose | Adapter or nipple at front | Remove front adapter | Manufacturer-specific seal |
| Integral mixer spout | Part of tap body | Proprietary mixer body | Replace tap assembly | New cartridge or body seals |
Do not twist a slip-on spout as if it were threaded. Twisting can rotate the copper pipe inside the wall and loosen an inaccessible connection.
Do not apply PTFE tape to a slip-on pipe. Tape belongs on compatible tapered or parallel threaded joints where the manufacturer specifies it, not under a set-screw sleeve or on an O-ring sealing surface.
How Do You Replace the Complete Diverter Spout?
A complete spout replacement normally takes 20-45 minutes when the connection is accessible and undamaged. The factor that most determines success is identifying the connection type before applying force.
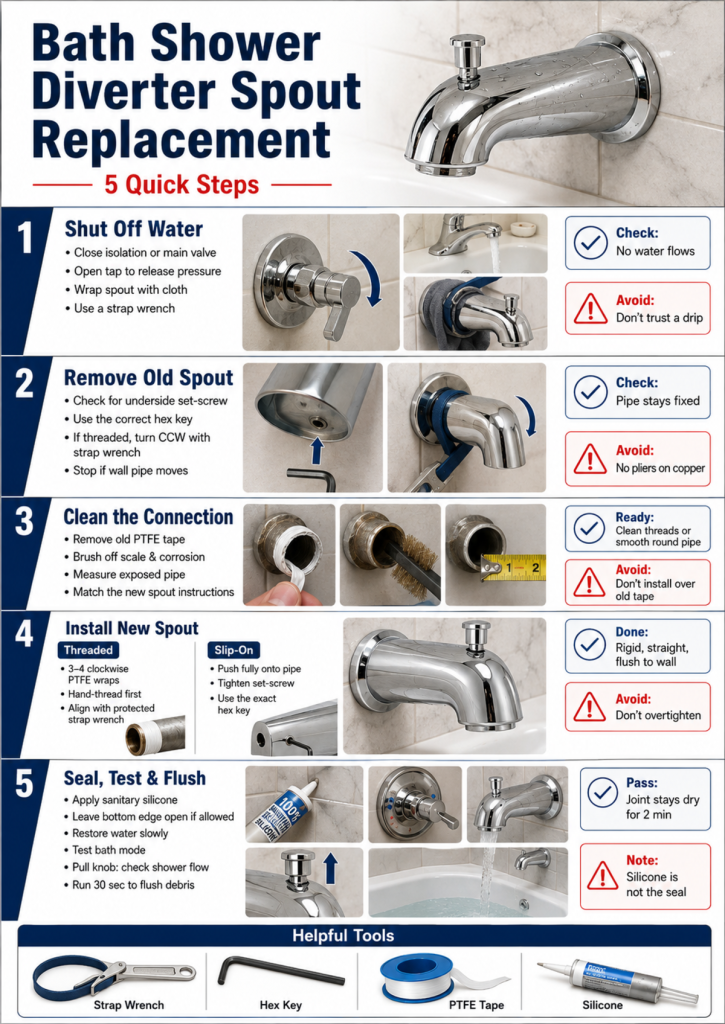
Before you start
| Requirement | Typical specification |
|---|---|
| Time | 20-45 minutes |
| Difficulty | Basic to intermediate DIY |
| Tools | 4 mm or 5 mm hex key, adjustable wrench, strap wrench |
| Materials | Replacement spout, cloth, brush, PTFE tape if threaded |
| Sealant | Bathroom-grade sanitary silicone, 1 small tube |
| Safety | Water isolation method confirmed before removal |
Step 1: Isolate the water and protect the finish
Close the bath mixer isolation valves if present. Otherwise shut off the local supply or the property’s main stop valve, then open the tap briefly to release pressure.
Cover the spout with a thick cloth before using a strap wrench. A strap wrench distributes force without cutting through chrome plating.
You will know this step worked when no water emerges from the spout after the mixer is opened briefly. The common mistake is relying on a dripping tap as proof that the supply is isolated.
Step 2: Remove the old spout
Look underneath the base for a set-screw. Insert the correct hex key fully, loosen the screw counterclockwise, and slide the spout straight outward.
If there is no set-screw, the spout may be threaded. Turn it counterclockwise with a strap wrench, using controlled force. Stop if the wall pipe moves, the escutcheon shifts, or the connection begins to flex inside the wall.
The removal is successful when the pipe nipple or smooth stub remains fixed. Do not grip a thin copper pipe with bare pliers because crushing the pipe can prevent the new spout from sealing.
Step 3: Inspect and clean the pipe connection
Remove old PTFE tape, corrosion, and mineral deposits with a nylon brush. Measure the exposed pipe and compare it with the replacement spout’s installation instructions.
A threaded nipple that is too short may not engage enough threads. A nipple that is too long may prevent the spout from seating against the wall or may obstruct the diverter gate.
You will know the connection is ready when the threads are visible and undamaged, or when the smooth pipe is clean and round. The common mistake is installing over old tape, which can cause false tightness and leaks.
Step 4: Install the replacement spout
For a threaded connection, wrap approximately 3-4 clockwise turns of PTFE tape onto the male threads, starting one thread back from the end. Thread the spout by hand first, then tighten it with a protected strap wrench until aligned.
For a slip-on connection, push the spout fully onto the pipe and tighten the underside set-screw with the specified hex key. Do not substitute a near-size key because it can round the screw.
The fitting is correctly installed when the spout is rigid, aligned, and flush with the wall seal. The common mistake is overtightening a threaded spout, which can crack a casting or damage pipework behind the wall.
Step 5: Seal, test, and flush
Apply a narrow bead of bathroom-grade sanitary silicone around the rear joint where the spout meets the wall, leaving the lower edge open if the manufacturer’s instructions permit drainage. Do not use silicone as a substitute for a correct threaded or O-ring seal.
Restore water slowly and inspect the connection with the diverter in bath mode. Pull the knob and check shower flow, then turn the mixer off and confirm that the knob returns.
The test passes when the joint remains dry after two minutes of flow and water exits the intended outlet. Run the new spout for 30 seconds before using the shower to flush installation debris.
What If Water Still Comes From Both Outlets?
Water from both the bath spout and showerhead after cleaning usually means the diverter gate is not sealing, rather than a problem with the showerhead. A cracked housing, worn washer, incorrect replacement seal, or damaged seat can all create dual flow.
Use the following recovery sequence:
- Confirm the new or cleaned knob moves through its full travel.
- Check that the rod is connected to the gate.
- Remove and clean the showerhead screen separately.
- Verify that the replacement seal matches the original diameter and orientation.
- Replace the complete spout if the internal seat is rough or pitted.
- Call a plumber if water appears behind the wall or around the pipe entry.
A minor trickle may be normal on some bath-shower mixers because their diverter does not create a perfect shutoff. A forceful stream from both outlets is a failed seal.
What If the Knob Drops Immediately?
A knob that drops as soon as water flows usually has a worn retaining mechanism, scale around the stem, a damaged spring, or a gate that cannot seal against pressure. Low water flow can contribute, but simply increasing supply pressure is not a dependable repair.
Test the bath spout with the showerhead removed. If the knob stays raised with unrestricted flow but falls when the showerhead is fitted, clean the showerhead and check the hose for kinks. If the knob falls in both tests, the internal diverter needs cleaning, a repair kit, or replacement.
Practitioner rule: do not glue the knob in the raised position. That can leave the shower riser pressurized and may conceal a leak at a weak wall connection.
What If the Shower Has Low Pressure After Repair?
Low shower pressure after a diverter repair can come from a blocked showerhead, flow restrictor, kinked hose, partially closed isolation valve, clogged mixer inlet filter, or low household supply. The diverter is only responsible if bath flow is normal and the restriction changes when the diverter moves.
| Test | Result | Likely fault | Correct action |
|---|---|---|---|
| Bath flow test | Strong bath flow | Shower-side restriction | Clean head or hose |
| Showerhead removed | Strong hose flow | Blocked showerhead | Descale or replace head |
| Both outlets weak | Weak supply or mixer | Supply-side fault | Check valves and filters |
| Knob drops with head fitted | Flow resistance | Weak seal or low flow | Repair diverter and clean head |
| Flow varies with other taps | Supply pressure issue | Shared plumbing demand | Check household supply |
Do not drill out a flow restrictor before checking local plumbing rules and the shower manufacturer’s instructions. Removing it can increase water use and may damage a thermostatic mixer’s intended operation.
Common Mistakes That Turn a Small Repair Into a Leak
- Forcing a seized knob: Excessive force can bend the rod or crack the spout. Use local descaling first, then replace the unit if movement remains restricted.
- Assuming every spout is threaded: A slip-on spout can damage the pipe when twisted. Check for the underside set-screw.
- Using too much PTFE tape: Thick tape can prevent full thread engagement and make the spout sit crooked. Use the manufacturer’s specified amount.
- Caulking every edge completely: A sealed lower edge can trap water behind the wall plate. Follow the spout instructions and preserve drainage where required.
- Replacing only a washer in a pitted housing: A new washer cannot seal against a rough or cracked seat. Replace the complete spout.
- Ignoring movement behind the wall: A moving nipple or pipe may indicate an unsecured fitting. Stop before the connection breaks inside the wall.
When Should You Call a Plumber?
Call a plumber when the pipe moves inside the wall, the threaded nipple is corroded, the isolation valve does not close, or water leaks behind the finished wall. Professional help is also appropriate when the diverter is part of a concealed mixer valve rather than a removable spout.
Old galvanized steel and iron pipework deserves particular caution. Corrosion can make a threaded connection seize, and applying enough torque to remove it may damage a hidden fitting or require wall access.
Renters should photograph the symptom and notify the landlord before removing the spout. A tenant-caused leak can create responsibility for wall, tile, or flooring damage even when the original diverter failure was ordinary wear.
Frequently Asked Questions
Can I use WD-40 on a bath diverter knob?
Do not spray WD-40 into a bath diverter or onto a water-contact seal unless the manufacturer specifically approves it. Petroleum-based products can affect rubber components and contaminate the water path. Use clean water, a soft brush, and a compatible limescale product instead.
How do I know whether the showerhead or diverter is blocked?
Remove the showerhead and run water through the hose or riser briefly into the bath. Strong flow with the head removed indicates a blocked showerhead or restrictor. Weak flow in both configurations points toward the mixer, isolation valve, supply pipe, or diverter.
Can I replace a bath diverter spout without turning off the water?
Only if the spout can be removed without opening the water passage, which is not guaranteed. The safe method is to isolate the supply and release pressure first. A slip-on spout may expose an open pipe when removed, so do not rely on the mixer’s closed position.
Why does my new diverter spout still leak at the wall?
A wall-joint leak usually comes from the wrong connection, damaged threads, insufficient O-ring contact, incorrect pipe length, or a poor seal. Silicone cannot correct a mismatched fitting. Remove the spout, inspect the joint, and follow the replacement manufacturer’s sealing method.
Is a pull-up diverter better than a twist diverter?
Neither design is universally better. Pull-up diverters are simple and easy to operate, while twist or cartridge diverters can provide more controlled switching on some mixer systems. Reliability depends more on seal quality, water conditions, replacement-part availability, and access than on the handle style.
How long should a bath diverter spout last?
A reasonable service expectation is approximately 5-15 years, but water hardness, cleaning chemicals, usage, finish quality, and pipe corrosion change the result. A spout that still has a smooth body and available parts may justify repair; a pitted or obsolete unit is usually better replaced.
The Bottom Line
When a bath shower mixer diverter pull knob is not working, first observe whether it is stuck, drops, or allows water through both outlets. Clean light scale carefully, rule out a blocked showerhead, and identify the spout connection before removing anything. Repair a documented mechanism when the housing is sound; replace the complete spout when the seal, seat, rod, or internal body is damaged.