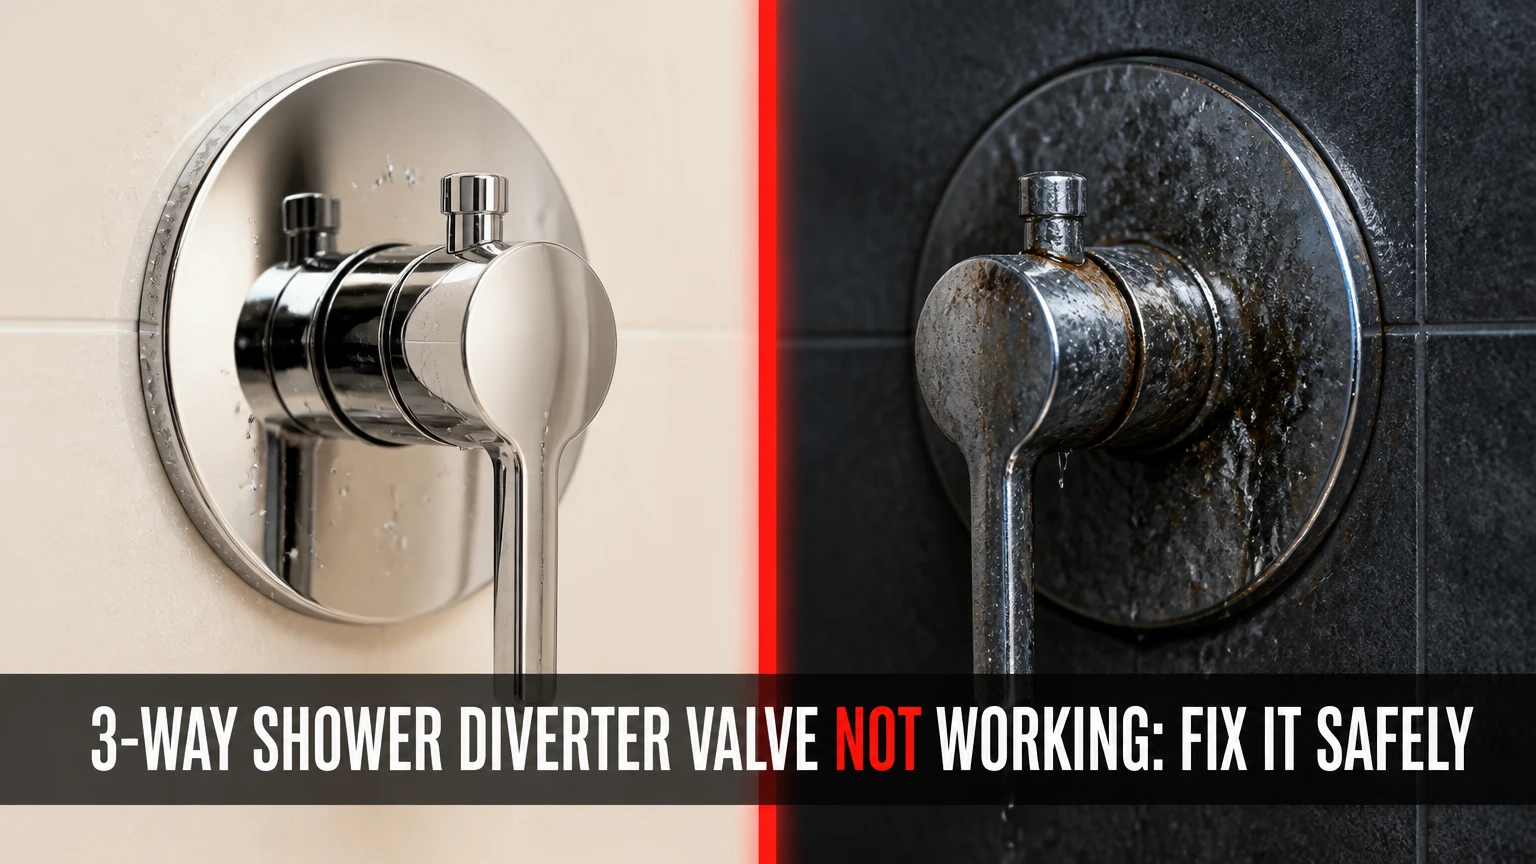
A 3-way shower diverter valve that is not working usually has a scaled cartridge, damaged seal, blocked port, stripped handle, or incorrect internal alignment. First identify whether the control is a tub-spout diverter, an in-wall selector, or a three-outlet rotary valve, because each uses different parts and repair methods.
Key Facts at a Glance
A tub-spout pull pin normally controls two outlets, not three: the tub spout and shower riser.
Water dripping briefly from a tub spout after diversion can be residual water, not valve failure.
Continuous tub-spout flow while showering usually indicates worn seals, a damaged cartridge, or a blocked valve port.
Diverter cartridges are brand- and model-specific; appearance alone does not prove compatibility.
Typical DIY repair time is 1-2 hours, while a professional service visit commonly takes 45-90 minutes.
A diverter does not create water pressure. A clogged showerhead, shutoff, mixing valve, or supply pipe can cause the same symptom.
Why Is My 3-Way Shower Diverter Valve Not Working?
A shower diverter fails when its internal seal no longer closes the unused outlet, its moving mechanism cannot reach the selected port, or debris restricts the passage. The fastest diagnosis is to observe where water goes, test whether the handle moves normally, and determine whether the fault affects one outlet or every outlet.
A terminology correction matters. Many bathroom fixtures marketed as “three-way” have three selectable destinations, but a standard tub-spout pull pin is a two-way diverter. A true three-way in-wall valve may route water to an overhead shower, handheld shower, and body spray, while some models permit only one outlet at a time and others permit two outlets together.
Do not replace a cartridge until you know which arrangement you have. A replacement for a Delta three-setting diverter, for example, may not fit a Moen transfer valve even when both controls look similar.
What Does Each Symptom Mean?
The symptom usually identifies the failed component, but a short isolation test prevents an unnecessary cartridge replacement. Compare the water path, handle behavior, and flow rate against the table before removing trim.
| Symptom | Most likely cause | First test | Typical repair |
|---|---|---|---|
| Tub spout runs continuously during shower use | Worn diverter seal or cartridge | Compare flow after 30 seconds | Replace spout or cartridge |
| Showerhead has weak flow only | Clogged showerhead or riser | Remove and test showerhead briefly | Clean screen or showerhead |
| All outlets have weak flow | Blocked cartridge, stop, or supply | Test every outlet separately | Flush valve or inspect supply |
| Handle is stuck | Mineral scale or seized cartridge | Stop if force exceeds hand pressure | Descale trim or replace cartridge |
| Handle turns but flow does not change | Broken stem, adapter, or cartridge | Remove handle and inspect stem | Replace adapter or cartridge |
| Water comes from two selected outlets | Normal design or failed seal | Check manufacturer’s outlet logic | Replace cartridge if unintended |
| No water after repair | Closed service stop or blocked cartridge | Check stops and orientation | Open stops or reinstall cartridge |
Normal Residual Water Versus a Fault
A small amount of water draining from a tub spout for several seconds after switching to the shower is normal. The shower riser and showerhead retain water, and that water can return through the open spout path after the diverter moves.
Continuous flow is different. If the tub spout produces a steady stream throughout a shower, especially one strong enough to fill the tub, the diverter is bypassing water. A practical field threshold is this: a few seconds of tapering drainage is usually residual water, while flow that remains steady beyond 30-60 seconds warrants inspection.
Which Type of Diverter Do You Have?
The control location determines the repair path. A tub-spout diverter is usually replaced from the bathroom side, while an in-wall cartridge requires exact model identification and may expose a valve-body problem that trim removal cannot solve.
| Diverter type | Visual location | Outlet arrangement | Normal repair access |
|---|---|---|---|
| Tub-spout pull pin | Top of tub spout | Tub spout and showerhead | Unscrew or slide off spout |
| Tub-spout twist gate | Front or side of spout | Tub spout and showerhead | Remove complete spout |
| In-wall stem diverter | Separate wall handle | Two or three ports | Escutcheon opening |
| Rotary transfer valve | Dial near mixing control | Two or three selectable outlets | Trim and cartridge opening |
| Push-button selector | Wall plate or valve trim | Two or three outlets | Button, trim, or cartridge opening |
Tub-Spout Diverters
A pull-pin spout is not the same component as a three-outlet transfer valve. Its gate blocks the spout opening and pushes water into the shower riser, so a leaking spout often needs a complete spout replacement rather than an in-wall cartridge.
Identify the connection before buying a replacement. A threaded spout screws onto a male pipe nipple, while a slip-on spout slides over copper pipe and locks with a set screw. Forcing the wrong style can damage the pipe inside the wall.
In-Wall and Rotary Diverters
An in-wall diverter uses a stem, spool, ceramic disc, or cartridge to align the inlet with selected outlet ports. The trim handle may have two, three, or more detents, and the valve body may permit sequential selection, independent selection, or simultaneous flow.
The trim brand does not always identify the rough-in valve. Record the manufacturer, model number, handle position, number of settings, cartridge length, and valve-body markings before ordering parts.
How Do You Diagnose the Fault Before Disassembly?
Diagnosis takes about 10 minutes and requires no cartridge removal. Run the water at a moderate temperature, select each outlet separately, and record whether the failure follows the outlet, the handle position, or the entire valve.
- Select the showerhead and watch the tub spout for 60 seconds.
- Select the handheld or body sprays and compare flow.
- Turn the diverter slowly through every detent without forcing it.
- Remove the showerhead and briefly test flow into a bucket.
- Check whether the handle feels loose, gritty, unusually tight, or disconnected.
- Look for water escaping around the handle or escutcheon.
- Stop testing if water enters the wall or the handle requires a wrench.
A showerhead that flows strongly with its spray face removed is obstructed at the head, not necessarily at the diverter. If every outlet remains weak with outlet fittings removed, inspect the cartridge, service stops, pressure-balancing valve, and supply restrictions.
Can Cleaning Fix a Stuck Cartridge?
Cleaning can restore movement when mineral scale coats an accessible stem or trim component, but vinegar is not a universal cure for a damaged cartridge. Rubber seals, plated finishes, lubricants, and ceramic assemblies can react poorly to prolonged soaking, so follow the manufacturer’s service instructions before immersing any part.
Step 1: Isolate the Water Supply
Close the shower’s integral service stops if the valve has them. Otherwise close the home’s main shutoff, open the shower control, and confirm that flow has stopped before removing the retaining nut.
Place a towel over the drain and protect the finish with a cloth. A dropped retaining clip can disappear into the drain, and a wrench against exposed chrome can leave permanent marks.
Step 2: Clean Only Accessible Scale
Remove the handle and visible trim. Use a nylon brush, a plastic pick, and a cloth dampened with diluted white vinegar on removable metal parts. Do not use a screwdriver to scrape the valve bore, and do not use muriatic acid or abrasive powder.
If the cartridge is removed, inspect the manufacturer’s instructions. Some brass stems can tolerate brief descaling, but a sealed ceramic or composite cartridge is usually more reliably replaced than soaked.
Step 3: Inspect the Seals
Look for flattened O-rings, torn rubber, missing springs, scratched sealing faces, and mineral deposits around the ports. A cracked seal requires replacement, even if the handle becomes easier to turn after cleaning.
Use silicone plumbing grease approved for potable-water plumbing. Petroleum jelly, motor oil, and general-purpose penetrating oils can damage elastomers or contaminate the water path.
How Do You Replace a Diverter Cartridge?
Replacing a matching cartridge requires shutting off water, removing the trim, preserving the original orientation, cleaning the bore, and testing before final reassembly. The task typically takes 60-120 minutes when the correct part and accessible service stops are available.
Before You Start
| Requirement | Typical specification |
|---|---|
| Time | 1-2 hours |
| Difficulty | Moderate, 3 out of 5 |
| Replacement part | Exact OEM or verified compatible cartridge |
| Tools | Phillips screwdriver, Allen keys, adjustable wrench |
| Extraction | Cartridge puller for seized cartridges |
| Lubricant | 1 small packet of silicone plumbing grease |
| Cleaning supplies | Nylon brush, cloth, plastic pick |
| Water isolation | Two integral stops or one main shutoff |
Step 1: Identify and Photograph the Valve
Record the brand, trim model, cartridge markings, number of outlets, and handle positions. Photograph the assembled trim and the old cartridge before removal.
Do not rely on color, handle shape, or a retailer’s phrase such as “universal three-way.” Cartridge dimensions, retaining methods, indexing tabs, and port geometry must match.
You will know this step worked when: the replacement part listing identifies the same rough-in valve or cartridge number.
Common mistake: ordering a mixing-valve cartridge for a transfer valve. The two components regulate different functions.
Step 2: Shut Off and Drain the Valve
Close local stops or the main supply. Open the shower control and diverter briefly to release trapped pressure, then close both controls.
You will know this step worked when: no water flows after the handle is opened and the valve no longer feels pressurized.
Common mistake: assuming the bathroom stop controls the shower. Many homes have no local shower isolation valves.
Step 3: Remove the Handle and Escutcheon
Remove the index cap if present, loosen the handle screw, and pull the handle straight from the stem. Remove the escutcheon screws or retaining sleeve without prying against finished tile.
Keep screws and clips in a labeled container. Some trim kits use different screw lengths that can damage the valve or fail to hold the plate securely.
You will know this step worked when: the retaining clip or cartridge nut is fully visible.
Common mistake: twisting a seized handle aggressively. Apply penetrating treatment only to external metal hardware, not inside the waterway, and use a handle puller when necessary.
Step 4: Remove and Replace the Cartridge
Remove the retaining clip or nut according to the valve design. Pull the cartridge straight out with an approved puller; rocking it sharply can score the brass valve bore or break the cartridge inside the wall.
Compare the old and new parts before installation. Transfer only manufacturer-approved clips or adapters, lubricate the new O-rings with silicone grease, and align tabs, arrows, and ports exactly as specified.
You will know this step worked when: the cartridge seats fully and the retaining hardware installs without force.
Common mistake: reversing the cartridge. A reversed cartridge can produce no flow, incorrect outlet selection, or hot and cold behavior that appears to be a separate mixing-valve failure.
Step 5: Flush and Test the Valve
Before reinstalling the trim, open the water supply slowly. Cycle the diverter through every position and inspect the cartridge area, retaining nut, handle stem, and wall opening for leaks.
If the manufacturer permits it, flush the valve briefly with the outlet fittings removed. Reinstall the escutcheon only after confirming stable flow and correct outlet selection.
You will know this step worked when: the selected outlet flows, unused outlets remain closed, and no water appears around the trim after five minutes.
Common mistake: testing with the showerhead installed. A clogged screen can hide a successful valve repair.
What If the Tub Spout Diverter Is the Problem?
Replace a faulty tub-spout diverter when the pull pin remains loose, the gate no longer seals, or water continues flowing strongly from the spout during shower use. A tub-spout replacement is usually simpler and less expensive than opening an in-wall valve.
| Spout connection | Identification clue | Removal method | Typical replacement cost |
|---|---|---|---|
| Slip-on with set screw | Small screw underneath | Loosen Allen screw and slide off | $20-$60 |
| Threaded 1/2-inch | Spout rotates from nipple | Unscrew with strap wrench | $25-$75 |
| Threaded 3/4-inch | Larger connection on older systems | Verify thread size first | $35-$100 |
| Integrated specialty spout | Brand-specific fitting | Follow OEM instructions | $60-$180 |
Clean the pipe nipple, apply thread sealant only where permitted, and keep the new spout square to the wall. Do not use a pipe wrench directly on a polished spout because the jaws can crush or scratch the finish.
A replacement spout does not fix a separate in-wall transfer valve. If the tub spout works correctly but the handheld and overhead outlets do not switch, diagnose the wall-mounted diverter instead.
When Is the Valve Body the Real Problem?
The valve body is the likely fault when a new cartridge still leaks, the bore is deeply scored, the retaining threads are stripped, or the outlet port is damaged. Cartridge replacement cannot restore a sealing surface that has been physically cut or distorted.
Wall access may be required for a complete rough-in replacement. Some installations provide an access panel behind the shower; others require removing tile or opening the opposite wall, so inspect the rear side before committing to demolition.
A professional should handle soldering, press fittings, inaccessible shutoffs, active wall leaks, and any repair near electrical wiring. Water escaping into the wall can damage framing and insulation long before staining appears on the finished surface.
Should You Repair or Replace the Diverter?
Repair the existing diverter when the valve body is sound, the cartridge is available, and the failure is limited to scale, seals, or a removable spout. Replace the complete valve only when the body, ports, threads, or model availability make a cartridge repair unreliable.
| Repair choice | Parts cost, typical | Labor time, typical | Best application |
|---|---|---|---|
| Clean accessible trim | $5-$15 | 20-45 minutes | Light external scale |
| Replace tub spout | $20-$100 | 30-60 minutes | Pull-pin or twist-gate failure |
| Replace cartridge | $30-$120 | 60-120 minutes | In-wall seal or switching fault |
| Replace rotary diverter | $80-$250 | 1-3 hours | Failed modern selector |
| Replace rough-in valve | $150-$500+ | 4-10 hours | Damaged or obsolete valve body |
Typical professional labor ranges from $150-$350 for an accessible cartridge or spout repair. A concealed valve-body replacement can exceed $800 after wall repair, tile replacement, soldering, or finish restoration. Local rates, access, brand, and emergency scheduling change these figures substantially.
Expert Rule: Do Not Upgrade Blindly
A ceramic rotary diverter is not automatically better for hard water. Ceramic discs resist some wear, but grit, scale, and improper alignment can still damage them; a replaceable cartridge from a well-supported brand may be a better long-term choice than an obscure “universal” selector.
Expert Rule: Flow Loss Is Often Misdiagnosed
A diverter routes water but does not increase the supply available to the shower. If pressure drops only when multiple outlets run, the restriction may be the home’s pipe size, pressure-balancing valve, flow limiter, or water heater capacity rather than the selector.
Expert Rule: Handle Resistance Is a Stop Signal
A diverter handle should move through its intended positions with controlled hand pressure. Using pliers on the handle can snap the stem, rotate an internal cartridge out of alignment, and turn a $60 cartridge repair into a concealed valve-body repair.
What Common Mistakes Cause Repeat Failure?
Most repeat failures follow incorrect identification, excessive force, poor flushing, or installation without a leak test. Correcting the procedure is often more effective than buying a more expensive replacement part.
- Replacing the wrong component: Confirm whether the fault is at the spout, transfer valve, mixing valve, showerhead, or supply stop.
- Using petroleum lubricant: Use silicone plumbing grease on compatible O-rings; avoid Vaseline, motor oil, and general-purpose oils.
- Skipping orientation marks: Photograph the original position and match tabs, arrows, and port labels.
- Forcing a cartridge: Use the correct puller instead of levering against tile, copper, or the valve bore.
- Over-tightening the retaining nut: Tighten according to the manufacturer’s instructions; excessive force can distort seals.
- Failing to flush debris: Remove loose scale and flush the valve before installing delicate ceramic components.
- Reinstalling trim before testing: Test for five minutes with the wall opening visible.
- Ignoring hidden water: Stop immediately if water appears behind the escutcheon or inside the wall.
What If the Handle Spins, Leaks, or Makes Noise?
A freely spinning handle usually indicates a stripped handle adapter, broken stem, or disconnected cartridge interface rather than a blocked outlet. Remove the handle and inspect the screw, splines, adapter, and stem before ordering a cartridge.
A diverter that drips from the handle area may have a failed stem seal or O-ring. Water from the spout or showerhead points instead to internal bypass, while water at the escutcheon can indicate a cartridge seal, loose retaining hardware, or a leak in the valve body.
Whistling or squealing often comes from a partially closed stop, restricted screen, damaged seal, or high-velocity passage. Test with the showerhead removed and check service stops first; replacing a quiet cartridge will not fix a closed supply stop.
How Do You Verify the Repair?
Verify the repair by testing every outlet separately, checking the unused outlets for bypass, and inspecting the wall opening under pressure. A successful repair changes the water path correctly, stops continuous leakage, and leaves the handle aligned with its markings.
Use this sequence:
- Open the main or local water supply slowly.
- Check the retaining nut and cartridge area for 60 seconds.
- Select outlet one and measure flow visually.
- Select outlet two and repeat.
- Select outlet three if the valve has a third destination.
- Run two outlets together only if the valve is designed for simultaneous operation.
- Turn the water off and confirm that flow stops rather than continuing as a steady stream.
- Reinstall trim after the five-minute leak check.
If flow is absent after replacement, shut off water and check cartridge orientation, service-stop position, debris at the inlet, retaining-clip seating, and whether the cartridge is fully inserted. Do not repeatedly cycle a wrongly installed cartridge under pressure.
When Should You Call a Plumber?
Call a plumber when the shutoff cannot stop the water, the cartridge breaks inside the wall, the valve body leaks, wall access is required, or the repair involves soldering or press connections. Professional help is also appropriate when the shower controls share a complicated thermostatic system or multiple outlets lose flow simultaneously.
A licensed plumber can identify an obsolete valve, source compatible parts, pressure-test the installation, and repair concealed pipework. Photograph the trim, cartridge, valve markings, and wall access before the appointment to reduce diagnostic time.
FAQ
Is a three-way diverter the same as a shower mixing valve?
No. A mixing valve controls water temperature and often pressure balance, while a diverter routes already mixed water to selected outlets. A bathroom can have one combined trim assembly containing both functions, but the internal cartridges remain different and are not interchangeable.
Can a diverter valve cause low water pressure?
A blocked or partly closed diverter can reduce flow through one outlet, but the diverter does not create household pressure. Test the showerhead, service stops, mixing valve, inlet screens, and supply pipe before blaming the selector, especially when every outlet has weak flow.
How do I find the correct replacement cartridge?
Use the valve manufacturer, rough-in model, cartridge number, stem length, retaining method, port arrangement, and orientation marks. Remove the old cartridge only after water isolation, then compare both parts physically. Retailer descriptions such as “fits most three-way valves” are insufficient evidence of compatibility.
Why does water still drip after I turn the shower off?
A brief drip can come from water retained in the showerhead, riser, or tub spout. A steady stream lasting several minutes indicates a shutoff or mixing-valve problem, not necessarily the diverter. Test the fixture after the retained water has drained before disassembling the selector.
Can hard water permanently damage a shower diverter?
Hard-water scale can restrict movement, damage O-rings, clog ports, and pit sealing surfaces over time. Regularly clean removable screens, avoid forcing a scaled handle, and use the manufacturer’s approved maintenance method. A water softener can reduce scale formation but cannot repair an already scored valve bore.
The Bottom Line
A 3-way shower diverter valve not working requires diagnosis before replacement. Confirm the valve type, distinguish residual tub-spout drainage from continuous bypass, test every outlet, and install only a cartridge that matches the rough-in body. Clean accessible scale cautiously, replace worn seals or cartridges, and call a plumber for concealed leaks, damaged valve bodies, or unsafe water isolation.