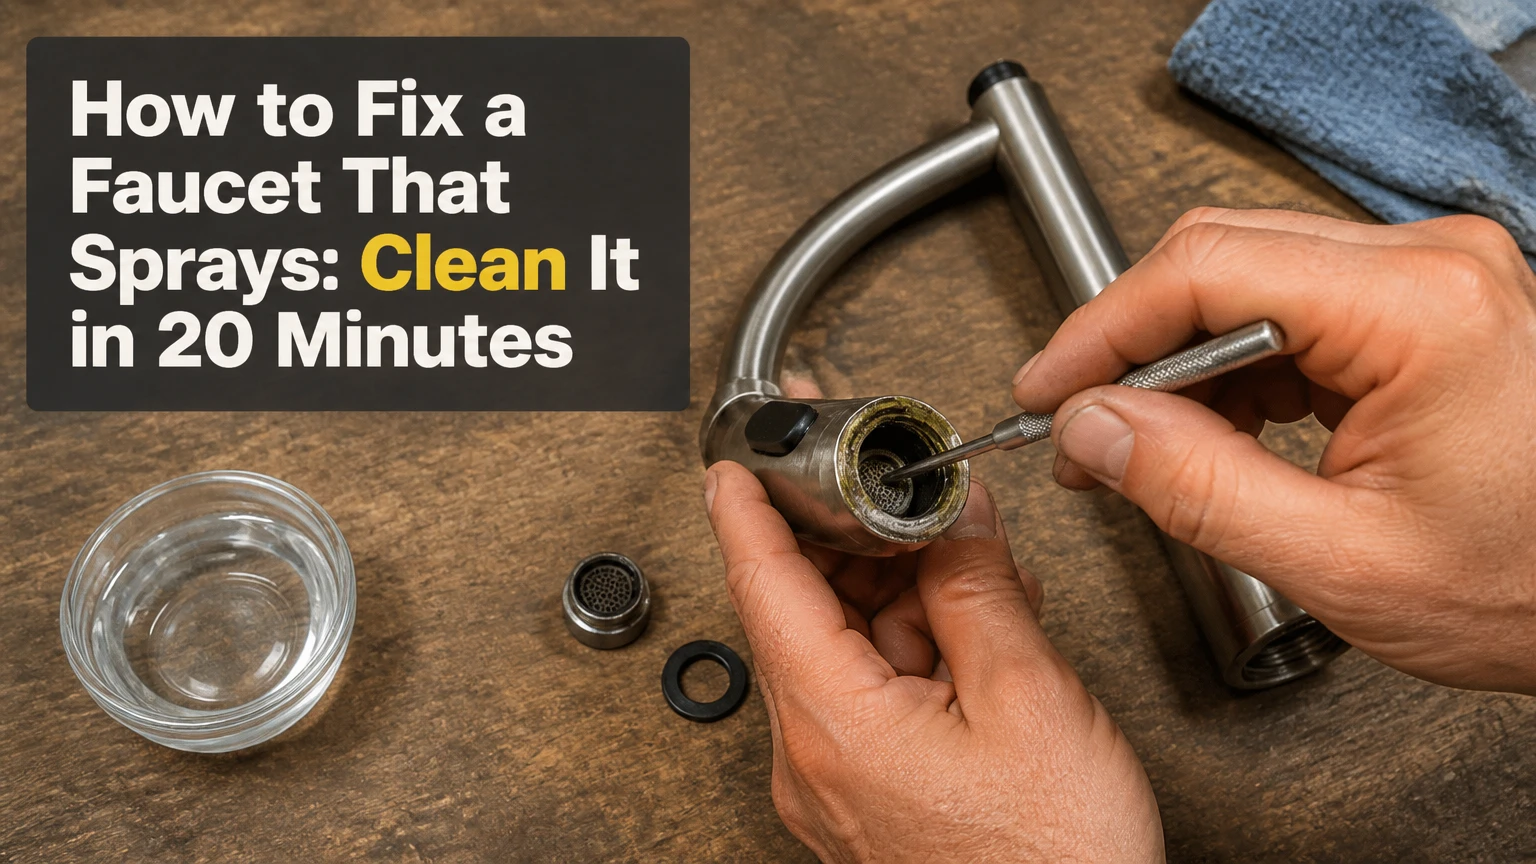
To fix a faucet that sprays, remove and clean the faucet aerator, flush the open spout, and reinstall the screen with its rubber washer in the original order. Most repairs take 10-30 minutes and cost $0-$10. If water still sprays with the aerator removed, the faucet body, diverter, or cartridge needs further diagnosis.
Key Facts
A clogged, scaled, or damaged aerator causes most uneven faucet streams.
White vinegar dissolves mineral deposits, but a replacement aerator is faster when the screen is cracked or deformed.
Close the drain before removing the aerator because screens, flow restrictors, and washers are easy to lose.
A faucet that sprays with the aerator removed has a problem upstream of the aerator.
Hand-tightening usually seals an aerator; excessive plier force can crush the housing or damage the finish.
Typical DIY repair cost is $0 for cleaning or $2-$10 for a standard replacement aerator.
Why Is the Faucet Spraying?
A faucet sprays when water exits through an obstructed, damaged, or incorrectly assembled aerator instead of forming one cohesive stream. Mineral scale and sediment block the aerator’s small outlets, while a torn screen, missing washer, or reversed insert can divert water sideways.
The aerator sits at the end of most bathroom and kitchen faucet spouts. Its screen divides the flow into small streams and mixes air with water, reducing splash while preserving a usable sensation of pressure. The result is not perfectly laminar flow in every household faucet, but it is controlled and symmetrical.
Common causes differ by symptom. Sideways jets usually indicate blocked screen openings or a cracked insert. A spray combined with low flow often indicates heavy scale. Water leaking around the aerator threads points to a washer problem rather than a screen problem.
A sudden spray after plumbing work deserves a different suspicion. Shutoff-valve replacement, water-heater service, or a building water interruption can release rust and pipe sediment that reaches one faucet first.
How Do You Diagnose the Spray Before Removing Parts?
Run the faucet for five seconds and observe whether the spray comes from the aerator face, the threaded joint, the spout seam, or a separate pull-out head. The spray location identifies which component to inspect first.
Use this quick test before gathering tools:
- Remove detachable faucet accessories, such as a hose nozzle or spray head.
- Check whether the metal or plastic aerator is visibly recessed.
- Look for white, green, or reddish deposits around the outlet.
- Cover the drain and remove the aerator.
- Briefly run cold water with the aerator off.
If the open spout produces a smooth stream, the aerator is the fault. If the open spout still produces a broken spray, stop cleaning the aerator and inspect the faucet’s internal cartridge, diverter, or spout passage.
| Observed symptom | Most likely cause | First action | Typical repair |
|---|---|---|---|
| Jets shoot sideways | Blocked or cracked aerator screen | Remove aerator | Clean or replace, $0-$10 |
| Water leaks around threads | Missing or flattened washer | Inspect washer | Replace washer, $1-$3 |
| Weak flow plus spray | Scale or sediment restriction | Flush open spout | Descale or replace aerator |
| Spray remains with aerator removed | Cartridge, diverter, or spout fault | Stop aerator work | Model-specific repair |
| Spray head pulses | Clogged pull-down screen or diverter | Remove spray head | Clean screen or diverter |
| Problem began after shutoff work | Loose pipe sediment | Flush cold line | Clean aerator and supply path |
What Tools and Parts Do You Need?
A faucet aerator repair requires a towel, a small container, an old toothbrush, and adjustable pliers only when hand removal fails. Add white vinegar, a toothpick, and the correct replacement washer or aerator if mineral deposits or damaged components are present.
Before you start
| Item | Typical requirement | Purpose |
|---|---|---|
| Repair time | 10-30 minutes | Cleaning or standard replacement |
| Difficulty | Basic DIY | No supply-line disconnection required |
| White vinegar | 120-250 milliliters | 30-60 minute mineral soak |
| Old toothbrush | 1 | Brush screen and housing |
| Soft cloth | 1-2 | Protect chrome, brass, or black finish |
| Small bowl | 1 | Hold parts during cleaning |
| Toothpick | 1 | Lift debris without enlarging holes |
| Replacement aerator | $2-$10 | Use when screen is damaged or heavily scaled |
| Cache key | 1 matching key | Remove recessed aerators |
Do not use a knife to pry out a screen. A sharp tool can enlarge outlet holes, deform a flow regulator, and permanently change the faucet’s flow pattern.
Which Aerator Type Does Your Faucet Have?
The correct aerator type depends on where the threads are located and whether the component is visible from outside the spout. Standard male, female, dual-thread, and hidden cache aerators require different identification and removal methods.
| Aerator type | How to identify it | Removal method | Replacement consideration |
|---|---|---|---|
| Male-threaded | Threads are on outside housing | Turn housing counterclockwise | Match outside diameter and thread pitch |
| Female-threaded | Threads are inside housing | Grip outer rim and turn counterclockwise | Match faucet spout’s male thread |
| Dual-thread | Internal and external threads | Hand-remove outer housing | Common universal replacement style |
| Hidden cache | Recessed inside spout | Insert matching cache key | Key shape and size must match |
| Spray-head screen | Screen sits inside detachable head | Unscrew head or retaining ring | Model-specific screen may be needed |
| Neoperl-style insert | Small insert inside a threaded shell | Remove shell, then lift insert | Match insert size and flow rating |
A hidden aerator often looks like an empty circular opening because its housing is recessed into the spout. Do not force a flat screwdriver into the opening. The key can be identified by comparing the internal teeth with a manufacturer’s parts diagram or by using a universal cache-key set.
Take a photograph of the disassembled parts before cleaning. Faucet aerators can contain a washer, perforated screen, plastic mixer, flow restrictor, and retaining shell, and several pieces can look interchangeable when they are not.
How to Fix a Faucet That Sprays Step by Step
Cleaning the aerator is the best first repair because it is inexpensive, reversible, and isolates the most common failure point. The procedure has six steps and normally takes 10-30 minutes, with success determined by whether the open spout runs smoothly before reinstallation.
Step 1: Close the drain and protect the finish
Close the sink stopper and place a towel over the basin. Put a second folded cloth around the aerator if pliers are necessary.
The closed drain prevents a small rubber washer or screen from entering the trap. The cloth prevents channel-lock jaws from scratching polished chrome, brushed nickel, stainless steel, or matte-black coating.
Success checkpoint: The drain is closed, the parts can be placed in a bowl, and the wrench will contact cloth rather than finished metal.
Common mistake: Starting with pliers on the bare housing. Try hand removal first.
Step 2: Remove the aerator counterclockwise
Grip the visible aerator and turn it counterclockwise when facing the outlet. If it is recessed, insert the matching cache key and turn counterclockwise with gentle, even pressure.
For a stuck external aerator, wrap the housing in a soft cloth and use adjustable pliers with light pressure. Apply a small increase in force rather than a sudden twist. If the housing begins to deform, stop and replace it or use a penetrating approach approved for the faucet finish.
Success checkpoint: The aerator separates from the spout without bent threads or crushed housing.
Common mistake: Turning clockwise because the faucet is viewed from below. The removal direction is counterclockwise from the water-outlet side.
Step 3: Record the component order
Place every part in the bowl in the order removed. Photograph the arrangement and note the direction of the screen, mixer, flow restrictor, and rubber washer.
A typical assembly includes the outer housing, rubber gasket, plastic mixing insert, metal or plastic screen, and retaining ring. Designs vary, so the photograph is more reliable than assuming every aerator follows the same stack.
Success checkpoint: You can identify the sealing washer and the face that points toward the sink.
Common mistake: Throwing all pieces into vinegar immediately. Disassembly order becomes difficult to reconstruct after soaking.
Step 4: Remove debris and soak the parts
Lift loose sediment with a toothpick, then soak removable components in warm white vinegar for 30-60 minutes. Scrub the screen and housing with an old toothbrush, and rinse every part under running water.
Vinegar dissolves calcium carbonate scale, but it does not repair a torn mesh or restore a distorted plastic insert. Avoid prolonged acid exposure on delicate decorative finishes, rubber parts, or manufacturer components that specifically prohibit vinegar; when uncertain, soak only the removable screen and housing.
Success checkpoint: Screen holes are open, the parts have no loose grit, and the rubber washer remains flexible rather than brittle.
Common mistake: Pushing a needle through every hole. Enlarged holes can produce a permanently uneven stream.
Step 5: Flush the open faucet spout
With the aerator removed, turn on the cold faucet for 5-10 seconds, then shut it off. Place a hand or bowl beneath the outlet to catch sediment and avoid splashing.
Flushing clears loose particles trapped just inside the spout. Use cold water first because it avoids drawing hot-water-tank sediment through the faucet, and do not leave the line running unattended.
Success checkpoint: The open spout produces a continuous stream without side jets or visible grit.
Common mistake: Skipping the flush after a water shutoff or plumbing repair. Sediment can immediately reclog a clean aerator.
Step 6: Reassemble and hand-tighten
Reinstall the parts in their original order, seat the rubber washer flat, and screw the aerator onto the spout by hand. Tighten only until the connection is snug, then run the faucet and inspect the joint.
A washer seals the threads; thread tape is generally unnecessary on a faucet aerator because the gasket, not the threads, creates the seal. If water leaks around the joint, shut off the faucet, reseat or replace the washer, and try again.
Success checkpoint: The stream is centered, the spray face remains dry around its perimeter, and the faucet has no thread leak.
Common mistake: Using pliers for final tightening. If tools are needed, use only a slight additional turn through a protective cloth.
Should You Clean or Replace the Aerator?
Clean an aerator when the screen is intact and deposits are light; replace it when the screen is cracked, the insert is distorted, or vinegar fails to restore a centered stream. Replacement costs little more than a cleaning kit and eliminates severe internal scale immediately.
| Repair option | Typical cost | Time | Best condition | Main limitation |
|---|---|---|---|---|
| Vinegar cleaning | $0-$2 | 30-60 minutes | Light or moderate scale | Does not repair cracks |
| Washer replacement | $1-$3 | 5-10 minutes | Thread leakage | Does not fix blocked screen |
| Standard aerator replacement | $2-$10 | 5-15 minutes | Damaged or heavily scaled unit | Requires correct size |
| Silicone-face aerator | $5-$15 | 10-20 minutes | Hard-water household | Higher initial price |
| Manufacturer aerator | $10-$30 | 10-30 minutes | Specialty or branded faucet | May require model lookup |
| Plumber service | $45-$150 typical | 30-90 minutes | Internal fault or access issue | Labor exceeds part cost |
A low-flow replacement is not automatically the best replacement. The U.S. Environmental Protection Agency WaterSense program identifies bathroom faucet aerators and faucets at a maximum flow rate of 1.5 gallons per minute, while kitchen fixtures may use different rates; choose the rating intended for the faucet rather than selecting the lowest number available.
What Size Replacement Aerator Do You Need?
A replacement aerator must match the faucet’s thread style, diameter, thread pitch, and flow rate. The most reliable method is to take the old aerator to a plumbing-supply store or identify the faucet model before ordering, because visually similar parts are not universally compatible.
Measure the old housing across its widest threaded section, not the screen opening. A coin can provide a rough size comparison, but calipers or a manufacturer parts diagram are more dependable. Common standard sizes include regular and junior aerator formats, but naming conventions vary between manufacturers and regions.
Check four specifications:
- External or internal thread location
- Housing diameter and thread pitch
- Flow rating, such as 1.0, 1.5, or 2.2 gallons per minute
- Swivel, laminar, spray, or standard stream design
Do not use plumber’s tape to compensate for the wrong thread. Tape cannot correct mismatched diameter or pitch and may prevent the washer from seating correctly.
Why Does the Faucet Still Spray After Cleaning?
A faucet that still sprays after aerator cleaning usually has a damaged aerator, debris deeper in the spout, or an internal cartridge or diverter fault. The decisive test is to run water with the aerator removed: a smooth open-spout stream points back to the aerator, while continued spray points upstream.
The spray remains with the aerator removed
Inspect the end of the spout for a damaged passage, lodged sediment, or a removable internal insert. On single-handle faucets, a worn cartridge can disturb the mixed-water path, although cartridges more commonly cause poor temperature control, dripping, or low flow than a spray at the spout.
A pull-down kitchen faucet may have a diverter valve that switches water between the main spout and hand sprayer. A partially stuck diverter can produce pulsing or cross-flow even when the outlet screen is clean.
Water leaks after reassembly
Remove the aerator and inspect the washer for flattening, cuts, stiffness, or incorrect placement. Replace the washer if it no longer compresses evenly, then reinstall the aerator without thread tape unless the faucet manufacturer specifies another sealing method.
Flow is low and spray is intermittent
Sediment may be lodged in the supply-line screen, shutoff valve, cartridge inlet, or pull-down hose. Test another faucet on the same supply; if several fixtures have low flow, the fault is not limited to one aerator.
How Do You Fix a Pull-Down or Pull-Out Faucet That Sprays?
Remove the pull-down spray head, clean its inlet screen and rubber seals, and test the hose connection separately. A pull-down faucet can spray because of a clogged head, a stuck diverter, a kinked hose, or a damaged O-ring rather than a conventional spout aerator.
Turn off the faucet and unscrew the spray head from the hose. Keep the hose from retracting into the spout, then rinse the head and soak only compatible removable parts. Check the hose for kinks beneath the sink and confirm that the counterweight moves freely.
If the main spout runs normally with the spray head removed, replace or clean the head. If water exits incorrectly from both outlets, inspect the diverter according to the faucet manufacturer’s service instructions.
What Are the Most Common Repair Mistakes?
Most failed aerator repairs result from incorrect orientation, excessive force, or a missed upstream sediment problem. Recovery is usually straightforward if the housing and faucet threads remain undamaged.
| Mistake | Result | Recovery |
|---|---|---|
| Overtightening with pliers | Crushed housing or scratched finish | Replace housing and hand-tighten |
| Losing the rubber washer | Leak around threaded joint | Install a matching gasket |
| Reversing the screen or insert | Low flow or worse spray | Reassemble from photograph |
| Using a needle aggressively | Enlarged screen holes | Replace the aerator |
| Applying thread tape automatically | Washer cannot seat correctly | Remove tape and inspect gasket |
| Leaving sediment in the spout | Clean aerator reclogs quickly | Flush open spout for 5-10 seconds |
| Buying the lowest-flow model | Insufficient kitchen flow | Match the original flow rating |
| Forcing a cache key | Damaged internal teeth | Obtain the correct key or service tool |
A counterintuitive rule matters here: a tighter aerator connection does not create a better seal. The washer provides the seal, so additional torque after contact increases damage without improving water control.
When Should You Call a Plumber?
Call a plumber when the faucet sprays with the aerator removed, the faucet body leaks, the cartridge cannot be removed safely, or the repair requires disconnecting corroded supply lines. Professional help is also sensible when the faucet is under warranty or the replacement part is model-specific.
Stop DIY work immediately if water continues flowing after the handle is closed, a shutoff valve will not close, or a supply connection begins leaking. Place a container under the connection and close the home’s main shutoff if necessary.
A plumber’s typical simple-service price is approximately $45-$150, but local labor rates, access, emergency timing, and branded parts can raise the total. A cartridge replacement may cost more than an aerator repair because it requires handle removal, retaining hardware, and sometimes specialized extraction tools.
How Can You Prevent Future Faucet Spray?
Rinse aerators every 6-12 months and inspect them sooner in hard-water homes. A silicone spray-face aerator allows surface deposits to be rubbed away, while a sediment-control strategy reduces particles reaching the screen.
Use these maintenance practices:
- Clean the aerator after building plumbing work or a water-main interruption.
- Do not use abrasive pads on chrome, brushed nickel, or matte finishes.
- Replace brittle washers before they begin leaking.
- Keep the faucet outlet free of caulk, grout, and cleaning residue.
- Match replacement flow rate to the original fixture purpose.
- Clean pull-down spray-head screens separately from the main faucet body.
- Consider a point-of-use filter if sediment repeatedly returns.
Vinegar is useful for calcium scale, but it is not a complete hard-water solution. It cannot remove every type of corrosion, prevent new deposits, or repair a deteriorated screen.
How Much Time and Money Should You Expect?
A basic faucet-spray repair typically takes 10-30 minutes and costs $0-$10 when cleaning or replacing a standard aerator. Hidden aerators, seized parts, branded cartridges, and corroded plumbing increase both time and expense.
| Scenario | Typical time | DIY material cost | Likely result |
|---|---|---|---|
| Light screen debris | 10-15 minutes | $0-$2 | Cleaning restores stream |
| Moderate calcium scale | 40-75 minutes | $0-$5 | Soak and brushing required |
| Cracked standard aerator | 5-15 minutes | $2-$10 | Immediate replacement |
| Hidden cache aerator | 15-30 minutes | $5-$20 | Key and matching insert needed |
| Pull-down spray-head blockage | 15-30 minutes | $0-$20 | Head cleaning or replacement |
| Cartridge or diverter fault | 45-120 minutes | $20-$100+ | Model-specific repair |
| Plumber diagnosis | 30-90 minutes | $45-$150 typical | Professional isolation and repair |
The lowest-cost path is cleaning, but replacement is often the better value when a screen has visible damage or severe scale. An aerator commonly lasts about 1-3 years in mineral-heavy water, although usage, water chemistry, and filter performance change that interval.
Frequently Asked Questions
Can I use lemon juice instead of white vinegar?
Yes, lemon juice can loosen some calcium deposits, but white vinegar is usually cheaper and easier to use in a small soak. Rinse the aerator thoroughly after either treatment, and avoid acidic cleaners on finishes or parts whose manufacturer instructions prohibit them.
Why does only one faucet spray?
One faucet usually sprays because its aerator or local supply path has collected more sediment than other fixtures. The outlet may also be older, more frequently used, or located downstream from plumbing work. Compare the affected faucet with another fixture before investigating the entire household water system.
Is a faucet aerator supposed to spray slightly?
A properly functioning aerator produces a centered, consistent stream or an intentionally patterned flow. Minor droplets can occur at very low flow, but sideways jets, pulsing, and water escaping around the rim indicate blockage, damage, or incorrect assembly.
Can I run the faucet without an aerator?
You can briefly run cold water without the aerator to flush sediment and diagnose the fault. Do not treat prolonged operation without the aerator as the finished repair, because the faucet may splash, use more water, and lack the intended flow control.
How do I remove an aerator that will not turn?
Protect the housing with a soft cloth and apply gentle counterclockwise pressure with adjustable pliers. If the metal deforms, stop forcing it; replace the housing or use a manufacturer-approved removal method. Hidden aerators require the correct cache key rather than conventional pliers.
Should I replace the cartridge for a spraying faucet?
Replace the cartridge only when the faucet sprays with the aerator removed or also has cartridge symptoms such as dripping, poor temperature control, or a handle that will not regulate flow. A cartridge will not fix a blocked or cracked outlet aerator.
The Bottom Line
To fix a faucet that sprays, remove the aerator, clean it in warm white vinegar for 30-60 minutes, flush the open spout for 5-10 seconds, and reinstall the washer and screen correctly. Replace the aerator when cleaning cannot restore a centered stream. If the faucet still sprays without the aerator, investigate the diverter, cartridge, spout, or supply path instead of repeating the cleaning procedure.