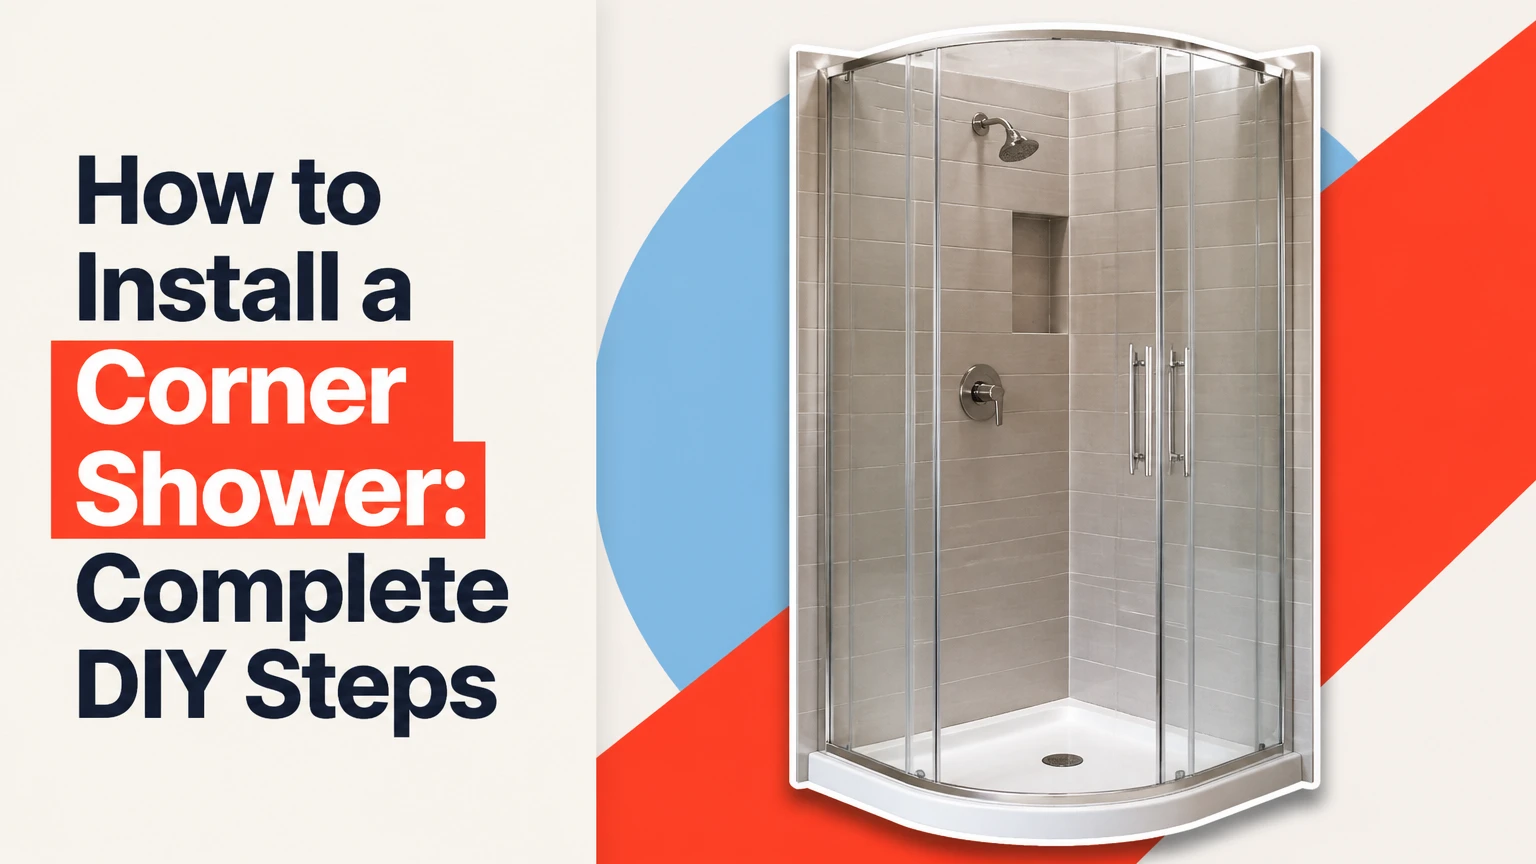
To install a corner shower, prepare the framing and plumbing, set the manufacturer-approved shower pan in a stable bed, attach waterproof wall panels, install the enclosure, and seal the specified joints. A typical prefabricated corner shower takes 12-24 labor hours, but the pan, drain, wall alignment, and waterproofing determine whether the finished shower remains leak-free.
Key Facts at a Glance
A corner shower uses two adjoining walls, but the walls must be structurally sound, square enough for the enclosure, and protected from moisture.
A residential shower drain normally uses a 2-inch drain line, while the existing trap and local plumbing code determine the required layout.
A shower pan must be level at its rim and slope toward the drain; many manufactured pans build the required slope into the product.
A 36-by-36-inch corner shower is a practical common size, but code-required clearances and door swing can make the usable space smaller.
Prefabricated acrylic or fiberglass kits generally cost less and install faster than tiled showers, which demand a complete waterproofing system.
Use only the sealant, fasteners, adhesive, and pan-bedding method specified by the shower manufacturer.
Is a Corner Shower Suitable for Your Bathroom?
A corner shower is an enclosure installed where two bathroom walls meet, usually with a separate shower pan, wall surround, valve, showerhead, and glass or framed door. The configuration saves floor area compared with a shower projecting across an entire wall, but the door and user-clearance requirements still control the actual footprint.
A corner unit works particularly well in a small bathroom, a powder-room conversion, or a tub replacement where the plumbing can remain near an existing drain. A neo-angle enclosure clips the front corner and often provides more passage space outside the shower. A curved or quadrant enclosure may reduce door-swing conflicts, although its sliding hardware has more parts to clean and adjust.
Corner showers are not automatically easier than wall-to-wall showers. The two existing walls must accept fasteners, the corner must be reasonably square, and the shower pan must align with the drain. A badly twisted floor or an offset drain can create more work than the enclosure itself.
Is the project safe for a beginner?
A competent DIYer can install a prefabricated kit when the drain location, water lines, framing, electrical layout, and waterproofing substrate are straightforward. Hire a licensed plumber for concealed pipe relocation when local law requires it, and hire a professional for gas, structural, extensive mold, or uncertain electrical work.
Do not begin by buying the glass. Choose the complete enclosure and pan first, then verify the finished dimensions, door handing, wall construction, drain position, and rough-in drawings. Shower glass and custom panels are expensive to return after installation errors.
Which Corner Shower Configuration Fits?
The best configuration depends on external clearance, door operation, available width, and cleaning preferences. A neo-angle unit suits a compact room with enough space for an outward-swinging door, while a curved sliding enclosure helps where a hinged door would hit a toilet, vanity, or bathroom door.
| Configuration | Typical footprint | Door requirement | Main advantage | Main limitation |
|---|---|---|---|---|
| Square | 32-40 in. per side | 24-30 in. swing or sliding | Straightforward wall-panel layout | Hinged door projects into room |
| Rectangular | 36 x 48 in. or larger | 24-30 in. swing or sliding | More shoulder and elbow room | Uses more floor area |
| Neo-angle | 36 x 36 in. typical | Outward-swinging or pivot door | Clips the front corner for passage space | Requires accurate five-sided layout |
| Curved or quadrant | 34-40 in. radius-based size | Curved sliding door | Avoids most external door swing | Rollers and tracks need adjustment |
Measure the clearance from the proposed door edge to the nearest toilet, vanity, wall, and bathroom entry door. A nominal 36-inch unit may need considerably more than 36 inches of clear floor space outside its threshold. Follow the door manufacturer’s required safety clearance rather than assuming a universal dimension.
Which Construction Type Should You Use?
A prefabricated acrylic or fiberglass kit is the lower-risk choice for most DIY installations because the pan and surround are factory-formed and the waterproofing details are limited. A tiled shower offers flexible dimensions and a custom appearance, but the entire floor, curb, corners, niches, seams, and penetrations need a compatible waterproofing system.
| Construction | Typical material cost | Typical installation time | Waterproofing risk | Best use |
|---|---|---|---|---|
| Acrylic kit | $400-$1,200 | 12-24 labor hours | Lower when installed correctly | Budget renovation |
| Fiberglass kit | $350-$1,100 | 12-24 labor hours | Lower, but surface can flex | Fast replacement |
| Solid-surface panels | $1,000-$3,000 | 20-35 labor hours | Moderate at seams and penetrations | Low-maintenance upgrade |
| Tiled shower | $2,000-$6,000+ materials | 40-60 labor hours | High if membrane details fail | Custom or premium bathroom |
A prefabricated surround is not waterproof merely because it is plastic. Water can enter at the drain, valve escutcheon, panel joints, fastener penetrations, door tracks, and transitions to adjacent walls. A tiled shower is not waterproof because grout is present; grout is a finish, while the membrane behind or beneath it provides the primary water protection.
What Measurements and Plumbing Does a Corner Shower Need?
A corner shower usually needs a 2-inch drain line, a correctly positioned P-trap, a level pan rim, and a water-resistant wall assembly. Typical valve placement is approximately 42-48 inches above the finished shower floor, while the showerhead is commonly 72-80 inches high, but the product instructions, user needs, and local code take priority.
The 1/4-inch-per-foot slope figure applies mainly to site-built shower floors and drainage surfaces. Many manufactured pans already contain the required slope, so do not add a second slope or alter the pan. Confirm the pan’s drain center, offset, outlet type, and required trap location before cutting the subfloor.
The often-repeated 32-by-32-inch “minimum code size” is not universal. In jurisdictions using the International Residential Code, shower compartments commonly use a 30-inch minimum dimension and 900 square inches of area, measured within the finished interior, subject to exceptions and local adoption. Local amendments can differ.
An 80-inch ceiling reference also varies by jurisdiction and measurement location. Verify the adopted plumbing and residential codes with the building department before framing. A permit and inspection may be required when supply or drain lines move, even if the enclosure is a retail kit.
Before You Start
| Item | Typical requirement | Check before purchase |
|---|---|---|
| Labor time | 12-24 hours for prefab | Add 1-3 days for repairs or curing |
| DIY difficulty | Intermediate | Plumbing and waterproofing experience helps |
| Prefab materials | $400-$1,200 | Confirm pan, surround, drain, and enclosure contents |
| Drain | 2-inch pipe, typical | Match PVC, ABS, or local system |
| Pan bedding | Manufacturer-specified mortar or support | Never substitute thinset without approval |
| Sealant | 100% silicone, if specified | Check color, cure time, and substrate compatibility |
| Tools | Level, square, drill, hole saw, tape, pry bar | Add pipe tools for plumbing alterations |
Protect the bathroom floor, shut off water, locate electrical cables and pipes, and arrange a way to remove the old fixture. Wear eye protection during demolition and use respiratory protection when cutting unknown materials or handling mold-contaminated materials.
How to Install a Corner Shower in 9 Steps
The following sequence applies to a typical direct-to-stud prefabricated shower kit. Product instructions override generic dimensions, because pan flanges, drain assemblies, wall-panel overlaps, and enclosure tracks differ between manufacturers.
Step 1: Confirm the Layout and Remove the Existing Fixture
Remove the old enclosure, trim, wallboard, pan, and damaged flooring until the framing and subfloor are visible. Photograph the plumbing before demolition, then check the corner with a long level, framing square, and straightedge.
Repair soft subflooring, mold-damaged framing, and loose studs before continuing. Measure the finished opening, not only the stud bay, and verify that the largest panel can pass through the home.
You will know it worked when: the corner is accessible, the subfloor is solid, and the planned pan fits without forcing the walls.
Common mistake: ordering a one-piece surround that cannot pass through the bathroom doorway or turn through a hallway. Use a multi-piece kit when delivery access is limited.
Step 2: Square, Plumb, and Reinforce the Framing
Straighten the corner before installing the waterproof substrate. Shim or plane studs so the walls are plumb, add blocking where the valve, showerhead drop-ear, grab bars, shelves, and enclosure tracks require solid attachment, and keep fasteners away from pipe paths.
A corner does not need mathematical perfection for every kit, but large deviations cause panel gaps and door misalignment. Use the enclosure manual to locate structural fasteners rather than relying on hollow-wall anchors for heavy glass.
You will know it worked when: a level lies flat against each wall, the corner is close to 90 degrees, and every specified attachment point has backing.
Common mistake: installing wall panels over bowed framing. The panel may hide the defect while the door reveals it.
Step 3: Build the Approved Waterproof Wall Assembly
Install the substrate required by the kit, such as approved cement backer board or a compatible foam waterproofing board. Do not install ordinary drywall in a wet shower area unless the complete manufacturer system specifically permits it.
Seal board seams, corners, fastener penetrations, and transitions using the waterproofing system’s tape, sealant, membrane, or preformed components. A plastic surround does not protect the wall behind an uncovered gap or an incorrectly cut valve opening.
You will know it worked when: the wall assembly has continuous water protection from the pan flange to the finished surround and the valve penetrations are planned.
Common mistake: placing cement board over the pan flange in a way that pushes the wall panels forward or blocks the manufacturer’s overlap. Follow the kit cross-section.
Step 4: Install or Modify the Drain and Water Supply
Position the P-trap and 2-inch drain line according to the pan drawing, with enough vertical and horizontal adjustment for the drain assembly. Dry-fit the pan over the pipe before solvent-welding concealed joints, and keep the drain line supported so it cannot move when the pan is loaded.
Secure the shower valve to blocking at the specified depth. Connect hot, cold, and riser piping according to the valve manufacturer’s markings, then cap the lines and pressure-test them before closing the wall.
You will know it worked when: the pan drain opening aligns without side pressure, the valve is at the correct finished depth, and the concealed supply connections hold pressure.
Common mistake: measuring valve height from the subfloor. Mark heights from the finished shower floor, including the pan surface.
Step 5: Set the Shower Pan in Its Support Bed
Dry-fit the shower pan, check the rim in both directions, and mark the drain and flange locations. Remove the pan, apply only the support material and thickness specified by the manufacturer, then lower the pan into place without twisting it.
Many pans use a mortar bed to eliminate flex beneath the floor. Mortar type and quantity vary, so do not assume that standard thinset, construction adhesive, plaster, or a 1-2-inch layer is suitable. Install the drain gasket and compression components in the exact order shown by the pan manual.
Fasten the flange to framing with approved corrosion-resistant screws or washers, avoiding excessive force that can crack acrylic. Keep the drain opening clean while the bedding cures.
You will know it worked when: the pan rim remains level, the floor feels solid under load, and the drain body is centered without stressing the pipe.
Common mistake: walking on an unsupported or freshly installed pan. Flex can disturb the drain seal before the support material cures.
Step 6: Cut and Attach the Wall Panels
Mark valve, diverter, showerhead, shelf, and pipe openings from measured reference points, then transfer them to the correct panel. Drill from the finished side with the appropriate hole saw, support the panel, and leave the clearance required around trim components.
Test-fit every panel before applying adhesive. Use the adhesive pattern, bead size, cure conditions, and fasteners specified for the kit; an incompatible adhesive can soften plastic or release in heat and humidity.
You will know it worked when: panels meet at their designed seams, trim covers each opening, and no adhesive contaminates the visible surface.
Common mistake: measuring from an unfinished corner rather than from a fixed panel edge. Dry-fit first because the corner may not be square.
Step 7: Assemble the Shower Enclosure
Install wall jambs, tracks, fixed glass, rollers, hinges, and the door in the sequence provided by the enclosure manufacturer. Drill only where permitted, use the supplied anchors or structural fasteners, and never modify tempered glass.
Set the door so it closes against the intended seal without rubbing the threshold. Sliding doors require parallel tracks and correctly seated rollers; pivot doors require plumb jambs and the specified swing clearance.
You will know it worked when: the door opens freely, the seals contact evenly, and the fixed panels remain stable when lightly pushed.
Common mistake: tightening every frame screw before leveling the jambs. Leave adjustment available until the glass and door are aligned.
Step 8: Seal the Correct Joints
Use the sealant specified by the kit, commonly 100% bathroom-grade silicone at wall seams, penetrations, pan transitions, and the outside perimeter of enclosure tracks. Apply a continuous bead to clean, dry surfaces and tool it before a skin forms.
Follow the enclosure manual for internal track sealing. Many framed sliding doors use weep holes that return water to the shower, so sealing the wrong track edge can trap water or send it outside the pan.
You will know it worked when: beads are continuous, fastener heads and penetrations are covered where specified, and weep openings remain unobstructed.
Common mistake: using acrylic latex caulk because it is easier to tool. Latex caulk generally has poorer long-term performance in continuously wet joints.
Step 9: Cure, Test, and Finish the Bathroom
Respect the sealant, adhesive, mortar, and grout cure times. A 24-hour period is common for some silicone products, while cool temperatures, thick beads, and low ventilation can require longer; use the product label rather than a fixed rule.
Run water into the drain, inspect the drain connection and trap below, spray each wall seam and door area, and watch the room below or adjacent access panel. Check the showerhead, valve trim, escutcheon seal, door sweep, threshold, and drain flow.
You will know it worked when: no supply or drain connection leaks, water returns through the threshold and weep system, and the floor drains without visible pooling.
Common mistake: testing only the plumbing connections. A door-track leak can remain hidden until the shower is sprayed at the same angle used during bathing.
How Much Does a Corner Shower Installation Cost?
A prefabricated corner shower commonly costs $400-$1,200 for the kit, while a custom tiled shower commonly requires $2,000-$6,000 or more in materials and custom glass. Professional labor often adds $1,000-$3,500, with permits, demolition, drain relocation, subfloor repair, and electrical work increasing the total.
| Cost component | Prefabricated kit | Custom tiled shower | Main cost variable |
|---|---|---|---|
| Pan and floor | $150-$500 | $400-$1,500 | Size, drain, and waterproofing system |
| Walls or tile | $150-$700 | $600-$2,000 | Panel material or tile grade |
| Glass enclosure | $150-$900 | $900-$3,000+ | Framing, thickness, custom dimensions |
| Plumbing changes | $200-$1,500 | $500-$2,000 | Drain and valve relocation |
| Labor | $1,000-$3,500 | $2,500-$7,000+ | Region, demolition, inspection |
| Permit and repair allowance | $100-$1,000 | $200-$2,000 | Local fees and hidden damage |
These are typical planning ranges, not a contractor quote. Get separate prices for plumbing, waterproofing, glass, demolition, and finish carpentry so a low enclosure price does not conceal a high infrastructure cost.
How Long Does Installation Take?
A straightforward prefabricated corner shower usually requires 12-24 labor hours, often spread across two or three calendar days because mortar, adhesive, and silicone need curing time. A tiled installation commonly takes 5-7 calendar days or longer, with waterproofing inspections, thinset, grout, and custom-glass measurement affecting the schedule.
Add one to three days when the subfloor is damaged, the drain must move, the walls need reframing, or an inspection is required before closing the assembly. Custom glass often cannot be permanently measured until tile and finished surfaces are complete.
What Are the Most Common Installation Failures?
Most corner-shower failures occur at transitions rather than across the broad pan or wall surface. The highest-risk locations are the drain assembly, pan-to-wall interface, valve opening, enclosure threshold, fastener penetrations, and corners where surfaces move differently.
| Failure | Likely cause | Diagnostic sign | Corrective action |
|---|---|---|---|
| Pan flexes or cracks | Missing or inadequate support | Squeak, movement, cracked seal | Remove and reset with approved bedding |
| Water leaks below drain | Misaligned gasket or loose compression nut | Moisture under pan after filling | Reassemble drain and retest |
| Door leaks at bottom | Blocked weep holes or wrong sealant location | Water accumulates in track | Clear weeps and seal exterior edge only |
| Panels separate | Uneven wall or incorrect adhesive | Open seam or visible bow | Reframe, replace adhesive, reseal |
| Slow drainage | Debris or poor trap alignment | Water remains after test | Remove strainer, inspect trap, flush line |
| Valve trim leaks | Unsealed or oversized opening | Water behind escutcheon | Replace seal, correct opening, inspect wall |
A professional rule of thumb is to diagnose the water path before adding caulk. Extra sealant can conceal a failed gasket, block a weep hole, or make future repairs harder without correcting the underlying movement.
How Do You Handle Special Bathroom Situations?
Different room conditions change the correct installation method, even when the same corner kit fits the opening. Plan the variation before demolition because the drain, framing, door, and waterproofing decisions are connected.
Replacing a Bathtub
A tub-to-shower conversion often leaves the drain in the wrong location for a corner pan. Confirm the new pan drawing before moving the trap, and inspect the subfloor for stains around the old tub waste. A corner shower may also require a new water-resistant wall height and a larger access opening for plumbing work.
Installing on a Concrete Slab
A slab may require concrete cutting to relocate the drain, followed by approved pipe bedding and patching. Test the existing drain location first, because cutting concrete for a few inches of adjustment can add labor, dust, inspection requirements, and structural risks.
Working With an Out-of-Square Corner
A small framing correction can bring a corner within the kit’s tolerance. A large deviation may require a different enclosure, a custom filler strip, a site-built wall, or a tiled solution; forcing glass panels into a bad corner creates stress and uneven seals.
Planning for Accessibility
A low-threshold or curbless corner shower needs coordinated floor slope, waterproofing, drainage, door width, and potentially grab-bar blocking. A compact 32-inch enclosure may fit the room but provide insufficient turning or transfer space for a wheelchair or walker, so consult applicable accessibility standards before purchase.
Which Setup Should You Choose?
Choose a 36-inch prefabricated kit when speed, predictable waterproofing, and controlled cost matter more than custom appearance. Choose a neo-angle kit for a tight room with an outward door path, a curved sliding unit where swing clearance is unavailable, and a tiled system only when the installer can complete and verify the full waterproofing assembly.
- Budget DIY renovation: Use an acrylic or fiberglass multi-piece kit, keep the drain near its existing position, and hire a plumber only for concealed alterations.
- Small bathroom with a nearby toilet: Select a curved sliding or neo-angle enclosure after drawing the complete door path on the floor.
- Long-term premium remodel: Use a custom pan and membrane system with tile and professionally measured glass, especially when the desired footprint is nonstandard.
- Rental or quick resale repair: Prefer a readily replaceable prefab surround with accessible plumbing and standard enclosure parts.
- Older or damaged bathroom: Budget for framing, subfloor, ventilation, and electrical corrections before selecting decorative finishes.
A corner shower is not a universal space solution. It is a poor choice when the only available corner contains major structural framing, when the door would obstruct the room, or when the finished interior cannot meet local clearance rules.
FAQ
Can I install a corner shower over existing tile?
Usually, a prefabricated kit should be installed over the substrate and framing specified by its manufacturer, not directly over unknown existing tile. Existing tile can conceal soft drywall, failed waterproofing, and uneven surfaces; remove enough material to verify the wall condition and preserve the pan flange detail.
Does a corner shower need a shower liner?
A manufactured pan normally uses its integrated waterproof body and drain assembly rather than a separate PVC liner. A site-built tiled shower needs a listed waterproofing method, such as a surface-applied membrane or properly installed liner system, and the method must match the drain, curb, corners, and wall transitions.
Should the shower door open in or out?
A hinged shower door generally opens outward, or both inward and outward where the hardware and code permit, so a person can be reached during an emergency. Verify the required clearance around toilets, vanities, walls, and the bathroom entry before selecting the handing.
Can I use construction adhesive on acrylic shower panels?
Only use an adhesive approved for the specific acrylic or fiberglass panel and substrate. Some solvent-based products can attack plastic, while an incorrect bead pattern can leave unsupported areas that flex, telegraph through the finish, or separate when humidity changes.
Why does my new shower smell musty?
A musty odor commonly indicates trapped moisture, a blocked door-track weep path, poor bathroom ventilation, a drain-trap problem, or water behind a wall transition. Dry the enclosure, inspect accessible joints and the fan, and investigate concealed moisture before covering the smell with cleaner.
How long should silicone cure before using the shower?
Use the silicone manufacturer’s stated cure time, with 24 hours common for a thin bead under favorable conditions. Thick joints, cool temperatures, high humidity, and limited airflow can extend curing, so wait longer when the bead remains soft or the label specifies a longer period.
The Bottom Line
To install a corner shower successfully, verify the finished footprint and door clearance, confirm the 2-inch drain and pan location, correct the framing, waterproof the wall assembly, support the pan exactly as specified, and test every drain, supply, seam, and enclosure track before regular use. The decisive issue is not the kit’s appearance. It is continuous water control from the showerhead to the drain and stable support beneath the pan. Planning those details first makes how to install a corner shower a manageable renovation rather than a concealed leak repair.