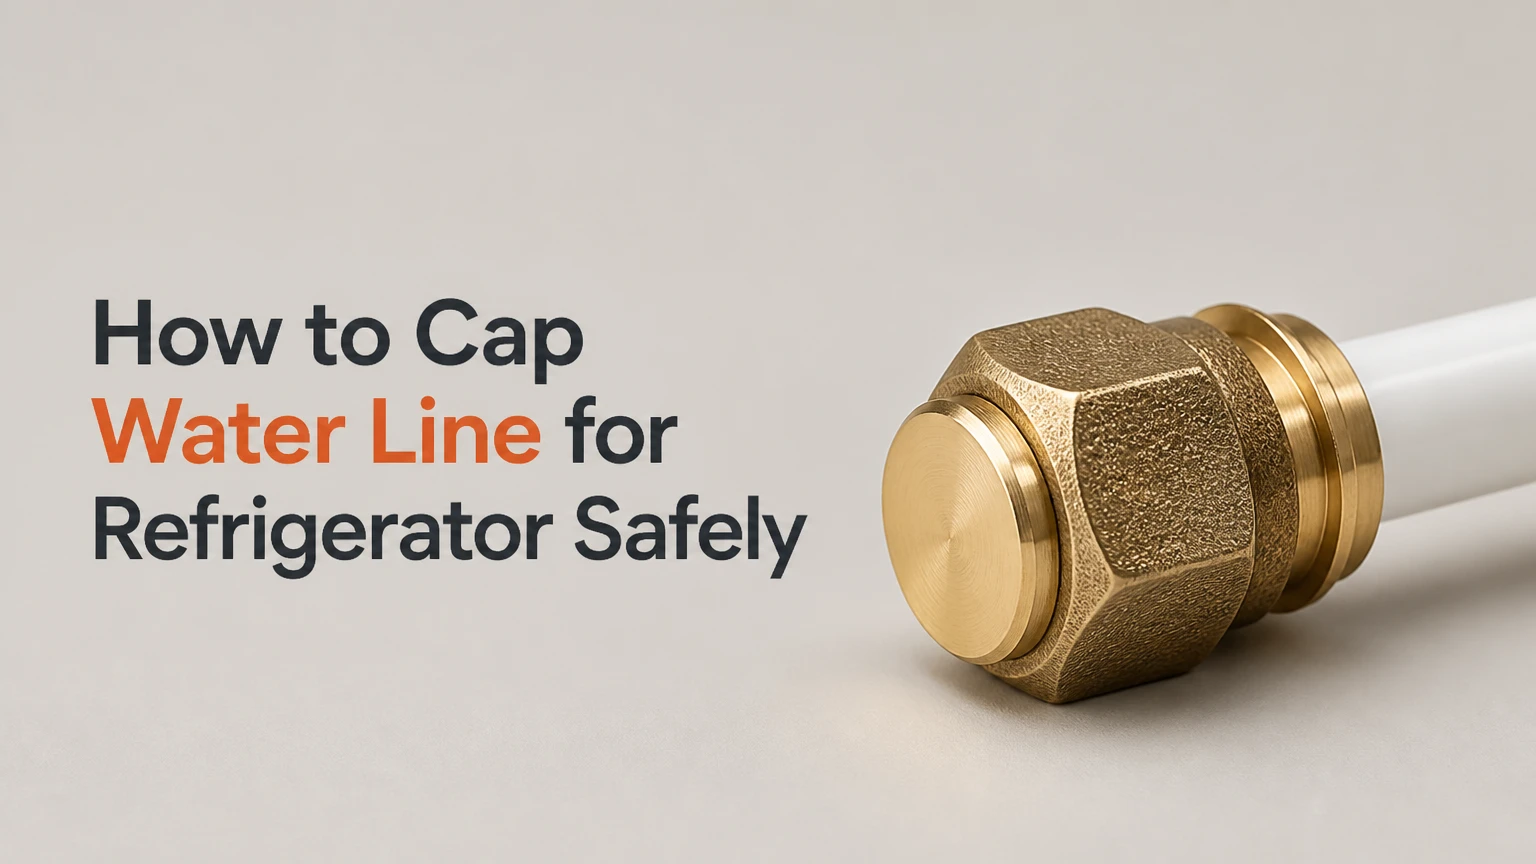
To cap a refrigerator water line, shut off the supply valve, drain and disconnect the tubing, make a square cut if needed, install a compatible 1/4-inch compression or push-to-connect cap, then restore pressure and inspect for leaks. The most important factor is matching the cap to the tube material and outside diameter.
Key Facts at a Glance
- A refrigerator supply line is commonly 1/4-inch outside-diameter copper, PEX, polyethylene, or nylon tubing, but measurement is safer than assumption.
- A shut-off valve must be closed before disconnecting the refrigerator line because household water pressure can flood a room quickly.
- Push-to-connect caps require a clean, square tube end and full insertion to the fitting’s marked depth.
- Compression caps need the correct nut and ferrule; excessive tightening can distort the ferrule and create a permanent leak path.
- A temporary cap should remain accessible, while a line abandoned inside a wall should normally be removed or terminated according to local plumbing requirements.
- Typical DIY materials cost $3-$15, and the accessible procedure takes 15-30 minutes.
What Does Capping a Refrigerator Water Line Do?
Capping a refrigerator water line seals the open end of the pipe that supplied an ice maker or dispenser. The cap prevents pressurized water from escaping after a refrigerator is removed, replaced, or converted to a model without a water connection.
A refrigerator line is usually connected to a dedicated angle-stop valve under the sink, a recessed appliance box, or a branch connection in a basement or cabinet. The refrigerator-side tube may be copper, PEX, polyethylene, nylon, or braided stainless steel. Each material needs a fitting designed for its connection method.
Capping the loose tube is different from closing the shut-off valve. A closed valve stops flow temporarily, but its downstream hose can still be disturbed, damaged, or reopened accidentally. A cap provides a second barrier at the accessible terminal end.
Water pressure is not automatically 40-80 PSI in every house. That range is a common residential design range, while actual pressure depends on the municipal supply, pressure-reducing valve, elevation, and pump settings. The International Residential Code commonly limits excessive residential pressure through pressure-regulating requirements, so local conditions should be checked rather than assumed.
Which Cap Fits the Line?
The correct cap depends on the line’s outside diameter, material, end configuration, and whether the termination must remain removable. Most refrigerator connections use a 1/4-inch outside diameter, but a 5/16-inch or 3/8-inch tube can appear in appliance installations and filter systems.
| Existing line or connection | Suitable cap | Tools normally needed | Best use |
|---|---|---|---|
| 1/4-inch copper tube | Brass compression cap | Two adjustable wrenches, tubing cutter | Low-cost accessible termination |
| 1/4-inch PEX or rigid plastic tube | Manufacturer-approved push-to-connect cap | Tubing cutter, depth gauge | Fast temporary or accessible cap |
| 1/4-inch polyethylene or nylon tube | Plastic-rated push cap or compatible compression cap | Tubing cutter, insert if specified | Flexible appliance tubing |
| Braided stainless hose with female end | Male threaded plug or valve cap with washer | Adjustable wrench | Capping the hose without cutting |
| Copper branch intended for permanent abandonment | Copper sweat cap or approved permanent fitting | Tubing cutter, torch, solder, heat protection | Accessible, code-compliant permanent work |
A compression cap is not interchangeable with a threaded pipe cap. A 1/4-inch compression connection uses tubing outside diameter and a ferrule, while pipe threads use a thread standard such as NPT. The two connection systems seal differently.
Push-to-connect or compression: which is better?
Push-to-connect caps install faster, while brass compression caps offer a simple, inexpensive mechanical seal when the installer can cut and prepare the tube accurately. Neither fitting is universally superior; the better choice depends on material compatibility, accessibility, and whether future removal matters.
| Decision factor | Push-to-connect cap | Compression cap | Practical winner |
|---|---|---|---|
| Installation time | About 2-5 minutes after cutting | About 5-10 minutes | Push-to-connect |
| Typical material cost | $5-$15 | $3-$8 | Compression |
| Required preparation | Square cut, insertion mark | Square cut, nut and ferrule | Push-to-connect |
| Future removal | Disconnect clip or tongs | Loosen nut and replace ferrule if damaged | Push-to-connect |
| Tolerance for damaged tubing | Low, because the O-ring needs a smooth surface | Low, because the ferrule needs an undamaged tube | Neither |
| Hidden-wall suitability | Depends on product and local code | Depends on product and local code | Remove line where practical |
Use a push-to-connect fitting only when its manufacturer lists the exact tubing material and size. Some fittings accept copper, PEX, and CPVC but do not accept every flexible polyethylene or nylon tube used in appliance kits.
What You Need Before Starting
Prepare the fitting, isolation method, cutting tool, and leak-check materials before disconnecting the line. A shallow container and dry paper towels matter because a line can retain water even after the refrigerator valve is closed.
| Item | Typical quantity or specification | Purpose |
|---|---|---|
| Compatible cap | 1, sized to tube outside diameter | Seals the line |
| Tubing cutter | 1, rated for 1/4-inch tubing | Makes a square cut |
| Adjustable wrench | 1-2 | Disconnects or tightens compression fittings |
| Bucket or shallow pan | 1, 1-2 quart capacity | Catches residual water |
| Clean towels | 2-4 | Protects cabinets and flooring |
| Flashlight | 1 | Inspects the valve and fitting |
| Disconnect clip or tongs | 1, for push fittings | Removes a push-to-connect cap later |
Before-start checklist
- Time: 15-30 minutes for an accessible connection.
- Difficulty: Basic DIY for a visible valve and undamaged tubing.
- Typical cost: $3-$15 for the cap and small supplies.
- Prerequisite: A working shut-off valve or access to the home’s main water shut-off.
- Do not begin: If the valve will not close, the tube is corroded, or the connection is inside a finished wall.
How to Cap a Refrigerator Water Line
The process has six stages: isolate the supply, relieve pressure, identify the connection, prepare the tube, install the cap, and test the seal. Most failures occur because the installer uses the wrong fitting or skips the square-cut and insertion-depth checks.
Step 1: Shut Off the Water Supply
Turn the refrigerator’s dedicated shut-off valve clockwise until it stops, then operate the refrigerator dispenser briefly to release downstream pressure. If the valve does not close fully, shut off the main house supply before disconnecting the line.
Common valve locations include the cabinet beneath the kitchen sink, a basement ceiling below the kitchen, and a recessed appliance outlet box behind the refrigerator. Some older installations use a saddle valve attached to a larger copper pipe. Saddle valves can corrode or fail to close, so do not rely on one that continues passing water.
Success checkpoint: The dispenser stops flowing, and no water continues entering the disconnected line.
Common mistake: Turning off the refrigerator or unplugging it without closing the plumbing valve. Electrical power does not stop water flow.
Step 2: Protect the Cabinet and Disconnect the Line
Place a pan beneath the valve or connection, then wrap the fitting with a towel. Loosen the compression nut slowly with an adjustable wrench. Hold the valve body with a second wrench when necessary so the valve does not twist inside the cabinet.
A small amount of trapped water is normal. A continuous stream indicates that the shut-off valve is not isolating the line. Stop immediately and close the main supply rather than trying to tighten or cap a wet, pressurized connection.
Success checkpoint: The tube separates with only residual water draining into the pan.
Common mistake: Bending the valve or copper stub while turning the nut. Twisting the valve can damage the supply connection behind the cabinet.
Step 3: Identify and Inspect the Tubing
Measure the tube outside diameter with a ruler or caliper and identify its material. Look for flattened sections, deep scratches, corrosion, kinks, or a previously damaged end.
| Tube appearance | Likely material | Inspection concern | Cap approach |
|---|---|---|---|
| Rigid reddish-brown metal | Copper | Green corrosion, work-hardening, burrs | Brass compression or approved push cap |
| White, red, blue, or translucent plastic | PEX, PE, or nylon | Oval shape, gouges, brittle surface | Material-rated push or compression fitting |
| Stainless braid around inner tube | Braided appliance hose | Damaged braid, missing washer | Threaded plug or replacement end cap |
| Thin soft copper coil | Appliance copper tubing | Kinks and flattened bends | Cut back to sound round tubing |
Do not assume that every translucent tube is PEX. Polyethylene and nylon tubing have different fitting approvals and may require an internal tube insert for compression connections. Follow the cap manufacturer’s compatibility chart.
Success checkpoint: The line size, material, and sound section are known before a fitting is opened.
Common mistake: Selecting a cap based on the refrigerator brand. The cap must match the plumbing connection, not the appliance name.
Step 4: Make a Square Cut and Prepare the End
Use a tubing cutter to cut copper or plastic tubing at a clean, 90-degree angle. Leave enough exposed tube to insert fully into a push fitting or to install the nut and ferrule without forcing the line into a bend.
Do not cut soft tubing with scissors or a utility knife. Those tools can flatten the end or create an angled cut, preventing an O-ring from sealing evenly. Remove external burrs from copper, but avoid scraping the sealing surface of plastic tubing.
For push-to-connect fittings, mark the manufacturer’s specified insertion depth around the tube. There is no universal 15/16-inch depth: fitting bodies differ, and a printed depth gauge or product instruction takes priority.
Success checkpoint: The cut end is round, smooth, square, and free of longitudinal scratches where the seal will contact.
Common mistake: Reusing a section that has been compressed by an old ferrule. Cut back beyond the old deformation or replace the tube section.
Step 5: Install the Compatible Cap
Install the selected cap according to its connection type. Keep the tubing straight while engaging the fitting, because side loading can prevent the seal from seating.
Push-to-connect cap
Push the cap straight onto the tube until it reaches the depth mark or the fitting’s internal stop. Pull back gently to confirm that the grip ring has engaged. Do not use thread sealant on the smooth tube portion or push-fit socket.
A push fitting seals with an internal elastomeric O-ring and grips the tube with a retaining ring. The O-ring needs a smooth circumference, while the grip ring needs full insertion. A tube that feels inserted but has not reached the specified depth can eject when pressure returns.
Compression cap
Slide the compression nut onto the tube, then install the correct ferrule in the orientation specified by the fitting. Insert the tube fully into the cap body and tighten the nut by hand before using a wrench.
Hold the cap body with one wrench and tighten the nut with another. Follow the fitting instructions rather than applying a universal torque or turn count, because ferrule design and tube material change the required tightening. Stop when the fitting seals; repeated tightening can crush the ferrule.
Threaded cap for a braided hose or valve
Match the cap to the existing male or female connection and use the supplied rubber washer when the fitting is designed to seal with a washer. Do not substitute thread tape for a missing washer on a washer-sealed hose connection.
Success checkpoint: The cap is fully seated, the tube is not bent, and no fitting body rotates at the valve.
Common mistake: Installing a brass compression ferrule on soft plastic tubing without the specified insert. The tube can collapse under the ferrule and leak.
Step 6: Restore Pressure and Test the Seal
Open the dedicated shut-off valve slowly while watching the cap. Keep a dry paper towel around the connection for at least five minutes, then inspect again after the cabinet has remained undisturbed.
A dry towel detects a small seep more reliably than visual inspection alone. Check the fitting again after several hours and the next day, especially if the line is inside a cabinet where a slow leak could damage particleboard.
Success checkpoint: The towel stays dry, the tube does not move, and the capped connection remains dry under full household pressure.
Common mistake: Testing only while the valve is barely open. A fitting must be checked at normal operating pressure, not merely during a low-flow trickle.
Temporary and Permanent Capping Options
A temporary cap should remain accessible and removable without cutting into finished surfaces. A permanent abandonment requires more planning because an unused branch can retain stagnant water and a hidden mechanical fitting can become impossible to inspect.
| Situation | Preferred approach | Accessibility requirement | Typical labor |
|---|---|---|---|
| Refrigerator removed temporarily | Push-to-connect cap on sound tubing | Keep under sink or in appliance box | 15-20 minutes |
| Renter replacing appliance | Valve-compatible cap or removable tube cap | Fully visible and reversible | 10-20 minutes |
| Cabinet renovation | Remove branch back to accessible supply point | No concealed termination preferred | 1-3 hours |
| Copper line inside open wall | Sweat cap or remove branch | Follow local code and fire protection | 1-2 hours |
| Line buried behind finished drywall | Plumber evaluates removal or rerouting | Avoid inaccessible mechanical joint | Varies by access |
The safest permanent solution is often removing the unused branch back to its source, rather than leaving a long capped tube. A short, accessible capped stub may be acceptable in some plumbing layouts, but local code and the pipe system design control the final choice.
Can a capped line stay behind drywall?
A capped refrigerator line should not be concealed behind finished drywall unless the fitting and installation method are permitted by the applicable plumbing code and manufacturer instructions. Push-to-connect and compression fittings are often best kept accessible because future inspection or replacement may be necessary.
A line that passes through a wall can also be damaged by fasteners, freeze in an exterior cavity, or remain connected to a water source for years. During renovation, remove the abandoned branch or terminate it at an accessible, approved location before closing the wall.
Common Problems and How to Fix Them
Most refrigerator-line leaks come from poor tube preparation, incorrect fitting compatibility, valve movement, or over-tightened compression connections. Shut off the water before attempting any correction.
| Symptom | Probable cause | Corrective action | Replacement trigger |
|---|---|---|---|
| Slow drip at compression nut | Ferrule misaligned or under-tightened | Depressurize, reseat, tighten slightly | Replace distorted ferrule |
| Leak at push-fit socket | Angled, scratched, or shallow tube insertion | Remove, cut back, mark depth, reinstall | Replace fitting if O-ring is damaged |
| Tube pulls out under pressure | Tube not fully inserted or wrong fitting | Shut water off immediately, reinstall correct cap | Replace tube if grip marks are deep |
| Valve rotates in cabinet | Valve body was not supported | Shut main supply and stabilize connection | Call a plumber for damaged stub |
| Water continues after valve closes | Failed shut-off or saddle valve | Close main supply before disconnection | Replace the valve |
| Plastic tube splits near cap | Brittle or unsupported tubing | Cut back to sound material and support it | Replace the line if cracking continues |
What should you do if the cap still drips?
Turn off the supply, dry the fitting, and identify whether water emerges from the tube seal, compression nut, or threaded joint. Recutting damaged tubing usually solves a push-fit leak, while a compression leak may require a new ferrule rather than more tightening.
Do not add pipe thread tape to compression threads. The compression nut threads provide mechanical force; tape cannot repair a poorly seated ferrule and may prevent the nut from tightening correctly.
What if the cap will not come off later?
Push-to-connect caps require a release collar to be depressed evenly while the tube is pulled out. Use the fitting manufacturer’s disconnect clip or tongs, and depressurize the line first.
Compression caps normally loosen with a wrench, but the ferrule may remain seized to the tube. If the ferrule has cut into copper or deformed plastic, cut off the damaged end and install a new ferrule or replace the short tube section.
Situational Recommendations
For renters
Use a removable cap at the accessible shut-off valve or on an undamaged appliance tube. Avoid cutting a landlord-installed line unless permission covers the alteration, and photograph the original connection before disassembly.
For budget-conscious DIY work
A brass compression cap is typically the least expensive option for accessible copper tubing. It is appropriate only when the tube is round, clean, and compatible with the ferrule supplied for that fitting.
For a braided stainless supply hose
Do not cut the braided hose unless the manufacturer provides a specific termination method. A matching washer-sealed plug or a cap at the shut-off valve is usually simpler and avoids exposing the inner tube.
For a refrigerator that will be reconnected
Cap the line without shortening it unnecessarily, label the shut-off valve, and protect the tube from kinks. A temporary cap is preferable to burying the line because the next refrigerator may use the same supply.
For a failed or inaccessible valve
Use the main house shut-off only if the valve is clearly identified and the water can be restored safely. A plumber should replace a seized valve, leaking saddle valve, or connection that twists inside the wall.
How Much Does Capping Cost?
DIY capping usually costs $3-$15 for a compatible cap, while professional service commonly costs $150-$300 depending on access, valve replacement, travel, and local labor rates. A permanent removal behind a wall costs more because drywall, cabinetry, or flooring may require opening and repair.
| Work type | Materials | Typical time | Typical total cost |
|---|---|---|---|
| Push-to-connect cap on accessible tube | $5-$15 | 15-20 minutes | $5-$15 DIY |
| Compression cap on copper line | $3-$8 | 20-30 minutes | $3-$8 DIY |
| Cap braided hose at valve | $2-$10 | 10-20 minutes | $2-$10 DIY |
| Replace failed shut-off valve | $10-$40 | 45-90 minutes | $150-$300 professional |
| Remove concealed branch during renovation | $20-$100 materials | 1-3 hours | About $200-$600, access dependent |
These are typical planning ranges, not fixed prices. Regional labor rates, emergency scheduling, water damage, and wall access can change the total substantially.
Expert Rules That Prevent Repeat Leaks
A closed valve is not a finished repair. A shut-off valve can leak through its stem or reopen when cabinet contents strike it. Capping the accessible line creates a more reliable terminal barrier.
The last inch of tubing matters more than the brand of cap. A premium fitting cannot seal a tube that is oval, scratched, kinked, or marked by an old ferrule. Cutting back to clean material often resolves a leak faster than tightening.
Do not hide a fitting to make the installation look finished. An accessible cap can be inspected in seconds, while a concealed leak may damage cabinets or framing before anyone notices.
A “permanent” cap is not always the best permanent solution. Removing an abandoned branch reduces the length of stagnant piping and eliminates a future failure point, but the work must preserve the integrity of the active supply line.
FAQ
Can I cap a refrigerator water line without cutting it?
Yes. If the line ends at a shut-off valve or has a suitable threaded connection, install a compatible valve cap or washer-sealed plug without cutting the tubing. This approach preserves length for a future refrigerator. A loose compression nut alone is not a cap and should not be treated as a permanent seal.
Is a 1/4-inch cap universal for refrigerator water lines?
No. Many refrigerator lines measure 1/4-inch outside diameter, but 5/16-inch and 3/8-inch lines also occur in appliance and filtration installations. Measure the tube and verify material compatibility before purchasing a cap. A 1/4-inch pipe-thread cap is also different from a 1/4-inch compression cap.
Can I use a rubber plug to seal the line?
A generic rubber plug is not a reliable pressure-rated termination for household plumbing. Rubber can deform, deteriorate, or eject when the line is exposed to normal water pressure. Use a listed compression cap, push-to-connect cap, threaded plug, or approved permanent fitting designed for the connection.
Should I cap the line at the refrigerator or under the sink?
Cap the line at the most accessible sound connection, usually the shut-off valve or the tube end under the sink. Capping near the refrigerator can protect the loose tube during appliance removal, but leaving a long pressurized dead leg is less desirable when the line will never be used again.
When should a plumber cap the refrigerator line?
Call a plumber when the shut-off valve will not close, the tubing enters a finished wall, the connection is corroded, the line is damaged, or a permanent branch removal is required. Professional help is also appropriate when restoring water pressure produces a leak that cannot be isolated confidently.
Can I reuse the old compression ferrule?
Reuse is generally unwise after a ferrule has been tightened and removed, especially if it has visible grooves, flattening, or corrosion. Install the new ferrule supplied with the cap when possible. A damaged ferrule can leak even when the nut feels tight.
The Bottom Line
To cap a refrigerator water line, close the supply, relieve pressure, disconnect the tubing, cut back to a clean square end when required, install a material-compatible cap, and pressure-test it with a dry towel. The exact keyword, how to cap water line for refrigerator, describes a simple repair, but reliable results depend on tube measurement, fitting compatibility, accessible placement, and a careful leak check.