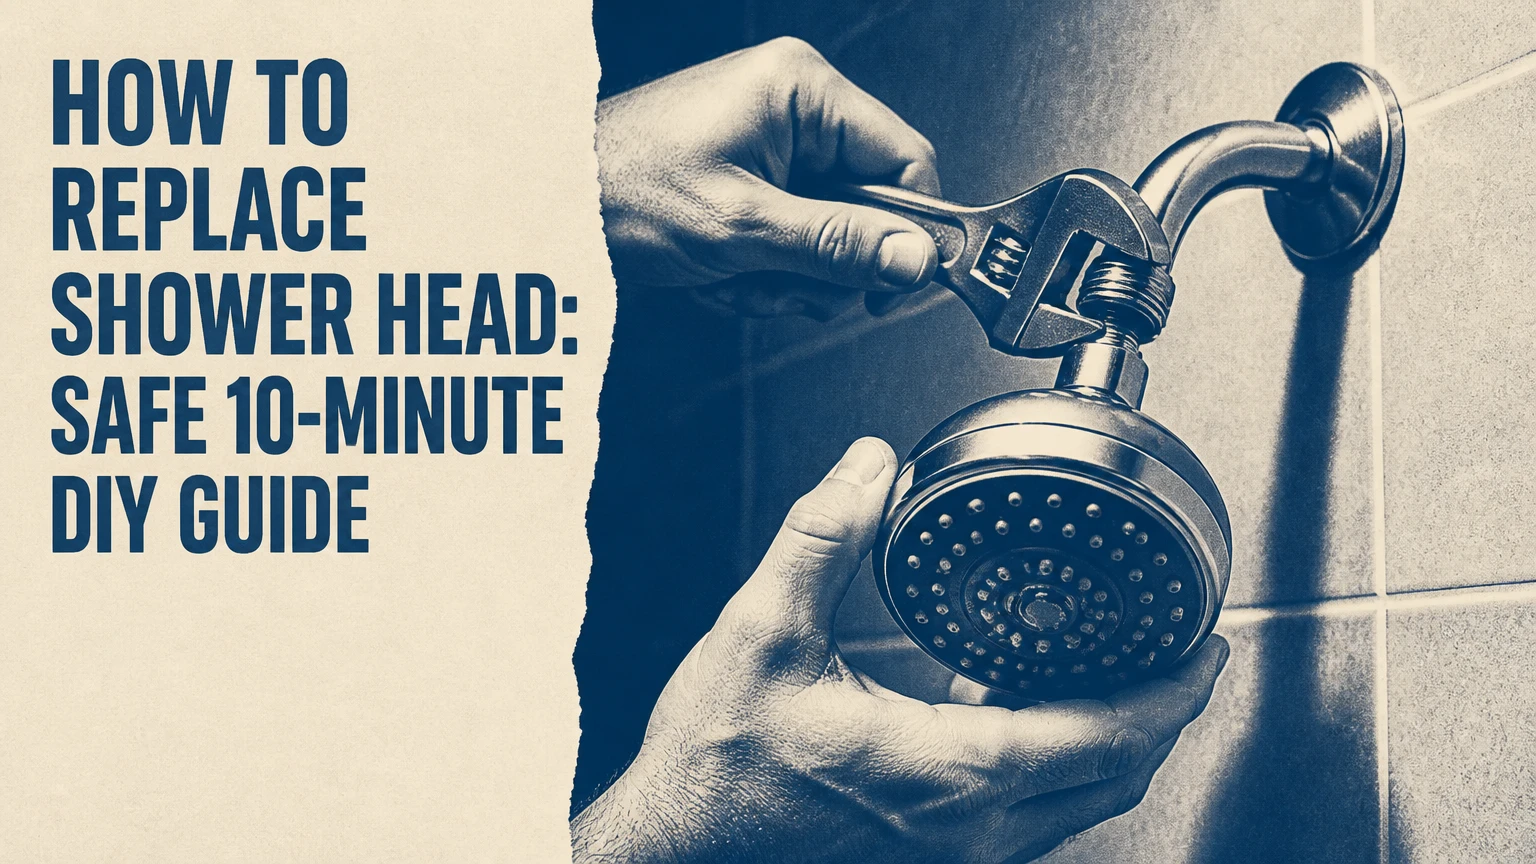
To replace a shower head, shut off the shower valve, protect and hold the shower arm, unscrew the old fixture, clean the male threads, install the supplied washer and new head, then test for leaks. A basic replacement typically takes 10-20 minutes, and success depends most on preventing the shower arm from twisting inside the wall.
Key Facts at a Glance
- Most North American shower heads connect to a standard 1/2-inch NPT shower arm.
- A shower head replacement normally requires no whole-house water shutoff.
- A rubber washer usually seals a shower-head connection; PTFE tape seals tapered pipe threads.
- The U.S. federal maximum flow rate for a new shower head is 2.5 gallons per minute (GPM).
- EPA WaterSense-labeled shower heads use no more than 2.0 GPM under the current specification.
- Hand-tight installation followed by about one-quarter wrench turn prevents many cracked fittings and leaks.
Before You Start
A basic fixed-head replacement needs a new shower head, one adjustable wrench, a clean rag, a small brush, and replacement PTFE tape. Keep two spare 1/2-inch rubber washers nearby because old washers often remain stuck inside the shower head nut or fall unnoticed during removal.
Tools and Materials
| Item | Typical quantity | Purpose | Substitute |
|---|---|---|---|
| Replacement shower head | 1 | New spray fixture | Manufacturer-approved head |
| Adjustable wrench | 1 | Loosen and snug metal nuts | Tongue-and-groove pliers |
| Clean rag | 1-2 | Protect chrome or painted finishes | Soft microfiber cloth |
| PTFE thread-seal tape | 1 roll | Seal tapered pipe threads | Pipe joint compound approved for potable water |
| Rubber washer | 1 installed, 2 spare | Seal head or hose connection | Correct manufacturer washer |
| Nylon or brass brush | 1 | Clean scale and old tape | Old toothbrush |
| Flashlight | 1 optional | Inspect wall flange and threads | Phone light |
| Small container | 1 optional | Catch residual water | Shallow bowl |
The shower control valve usually stops water at the fixture, so turning off the house main is unnecessary for a standard shower-head swap. Close the main valve if the control valve leaks, cannot shut off flow, or the work involves removing the shower arm from the wall.
Check Compatibility Before Buying
A standard replacement shower head usually fits a 1/2-inch male shower arm, but “universal” does not mean every bathroom connection is identical. The head may fit the arm while its weight, hose, diverter, or required positioning makes the installation unsuitable.
| Check | Common value | Why it matters | What to do |
|---|---|---|---|
| Shower-arm outlet | 1/2-inch male NPT | Matches most replacement heads | Confirm product specifications |
| Handheld hose length | 60-72 inches | Determines reach to a seat or tub | Choose 72 inches for accessibility |
| Rain-head diameter | 8-12 inches | Affects coverage and weight | Verify arm strength and clearance |
| Rated flow | 1.5-2.5 GPM | Controls water use and spray feel | Select by pressure and preference |
| Connection washer | 1/2-inch flat rubber | Seals many head nuts | Confirm it is included |
| Wall support | Secured drop-ear elbow | Carries arm and head load | Stop if the arm moves in the wall |
A new shower head will not correct a defective shower valve, a blocked supply line, or genuinely low household pressure. A filter head also cannot soften hard water; it may reduce selected contaminants, but cartridge performance depends on the media, water chemistry, and replacement schedule.
Which Shower Head Should You Buy?
The best replacement depends on the shower arm position, available pressure, cleaning needs, and user mobility. A fixed head is the simplest and least leak-prone choice, while a handheld head adds reach but introduces hose, bracket, and washer connections that require additional inspection.
| Shower head type | Typical price | Typical flow | Best use | Main limitation |
|---|---|---|---|---|
| Fixed wall mount | $15-$80 | 1.5-2.5 GPM | Small stalls and simple upgrades | Limited reach |
| Handheld with hose | $25-$120 | 1.5-2.5 GPM | Families, cleaning, seated bathing | More leak points |
| Rain head | $40-$250 | 1.5-2.5 GPM | Direct overhead coverage | Can feel weak at low pressure |
| Dual-head combo | $60-$300 | 1.75-2.5 GPM | Fixed and targeted spray | Bulky and higher total demand |
| Filtered head | $25-$150 | 1.5-2.5 GPM | Chlorine or sediment concerns | Cartridge needs replacement |
Flow Rate and Pressure Are Different
Flow rate measures the volume of water delivered per minute; pressure measures the force available to move that water through the fixture. A lower-flow shower head can feel strong because of nozzle design and air induction, but no shower head can create unlimited pressure when the supply line or valve is restricted.
The U.S. Department of Energy identifies 2.5 GPM as the federal maximum for shower heads manufactured for the U.S. market. EPA WaterSense states that “WaterSense labeled showerheads use no more than 2.0 gallons per minute (gpm),” while maintaining performance requirements for spray force and coverage.
| Rated flow | Water used in a 10-minute shower | Water used in a 15-minute shower | Practical interpretation |
|---|---|---|---|
| 1.5 GPM | 15 gallons | 22.5 gallons | Lowest typical consumption |
| 1.75 GPM | 17.5 gallons | 26.25 gallons | Balanced low-flow option |
| 2.0 GPM | 20 gallons | 30 gallons | WaterSense threshold |
| 2.5 GPM | 25 gallons | 37.5 gallons | Highest federal flow limit |
At 2.0 GPM, a household replacing a 2.5 GPM head can save 5 gallons during a 10-minute shower. Actual savings depend on shower duration, temperature, household count, and whether the old fixture truly delivered its labeled rate.
How Long and How Much Does Replacement Take?
A basic shower-head replacement costs about $15-$80 for the fixture and takes 10-20 minutes when the old connection is accessible and free of corrosion. A first-time installation with scale, seized threads, or a handheld diverter commonly takes 30-45 minutes, excluding wall repair or plumbing work.
| Installation condition | Typical time | Typical material cost | DIY difficulty |
|---|---|---|---|
| New fixed head on clean arm | 10-15 minutes | $15-$80 | Easy |
| Corroded or scaled head | 20-45 minutes | $20-$100 | Moderate |
| Handheld hose and bracket | 20-40 minutes | $25-$120 | Easy to moderate |
| Dual-head diverter system | 30-60 minutes | $60-$300 | Moderate |
| Damaged arm or hidden leak | 1-3 hours or more | $50-$500+ | Plumber recommended |
A plumber’s price varies by region, access, service minimum, and whether the shower arm or concealed fitting must be repaired. A simple fixture swap often costs more in labor than in parts, so DIY is practical when the wall-side pipe is stable and the existing head can be removed without excessive force.
How to Replace Shower Head Step by Step
The following sequence applies to a standard fixed head and most handheld kits that attach to an existing 1/2-inch shower arm. The critical safety rule is to hold the shower arm while turning the old head, because force transferred into the wall can loosen the concealed drop-ear elbow.
Step 1: Shut Off the Shower Water
Turn the shower control fully off and wait until the existing head stops dripping. Do not rely on a diverter position that continues sending water to a tub spout, because residual flow can obscure a connection leak during testing.
Checkpoint: No water flows when the shower control is opened briefly.
Common mistake: Starting with the shower control partly open, which creates spray and makes the work area difficult to grip.
Step 2: Protect and Stabilize the Shower Arm
Wrap a clean rag around the shower arm near the wall. Grip the protected arm with one hand or a second wrench, keeping pressure close to the wall, while placing the adjustable wrench on the old head’s connecting nut.
A strap wrench is the safest option for polished, painted, or plastic fixtures because it distributes force without sharp jaws. Never use the decorative wall flange as the structural support; the flange hides the opening but does not necessarily secure the pipe.
Checkpoint: The shower arm remains motionless while the head turns.
Common mistake: Holding only the old shower head, which can rotate the threaded arm and damage the fitting behind the wall.
Step 3: Remove the Old Shower Head
Turn the head’s connection counterclockwise when facing the connection. Apply steady pressure rather than sudden jerks, and stop if the entire shower arm begins rotating or the wall opening widens.
For a seized metal fixture, apply a small amount of penetrating oil to the exposed connection, wait according to the product label, and keep oil away from shower surfaces and drinking-water components. Plastic heads usually crack before they release, so replacement is preferable to excessive force.
Checkpoint: The old fixture comes off while the shower arm and wall flange stay aligned.
Common mistake: Gripping the spray face or swivel joint instead of the hexagonal connection nut.
Step 4: Clean the Shower-Arm Threads
Remove old PTFE tape, gasket fragments, rust flakes, and mineral scale from the exposed male threads. Use a nylon brush and a damp cloth; avoid deep scratches that can create leak paths or damage a plated finish.
Inspect the first several thread turns with a flashlight. Flattened, cross-threaded, severely corroded, or unusually short threads may prevent a reliable replacement, especially when the new head has a shallow connection nut.
Checkpoint: The threads are visible, clean, dry, and free of loose debris.
Common mistake: Leaving old tape in the grooves, which can prevent the new fixture from seating straight.
Step 5: Install the Correct Washer
Look inside the new shower head’s female connection nut. Place the supplied flat rubber washer inside the nut if the manufacturer specifies one, and make sure the washer lies flat rather than tilted against the threads.
A washer seals by compressing between two faces. PTFE tape does not replace a missing washer in a hose or swivel connection, and adding tape to a washer-sealed swivel can prevent proper seating.
Checkpoint: The washer stays in the nut when the head is held upside down.
Common mistake: Installing two old and new washers together, which can create an uneven seal and reduce the available thread engagement.
Step 6: Apply PTFE Tape Only Where Needed
Wrap PTFE tape around the shower arm’s male tapered threads in the clockwise direction when looking directly at the pipe end. Use three to five tight, overlapping wraps, leaving the first thread mostly clear so tape cannot enter the water passage.
Many fixed shower-head connections use a washer as the primary seal, but tape on the arm threads is commonly helpful when the manufacturer permits it. Do not wrap tape around a hose end that seals with a flat washer, and do not use tape to compensate for damaged threads.
Checkpoint: The tape sits in the thread valleys without extending beyond the end of the arm.
Common mistake: Wrapping counterclockwise, which causes the tape to bunch up as the head threads onto the arm.
Step 7: Install and Align the New Head
Thread the new fixture clockwise by hand. Keep the head straight for the first several turns so the female threads do not cross-thread the shower arm, then tighten until the washer contacts the sealing face.
Cover the connection nut with a rag and use the wrench for approximately one-quarter additional turn. Align a fixed head so its spray face points into the shower, but do not loosen it to achieve alignment if doing so breaks the seal.
Checkpoint: The head is secure, aligned, and the connection nut has not been forced.
Common mistake: Using a wrench for the entire installation, which can crack plastic housings or deform decorative collars.
For a handheld system, install the diverter onto the shower arm first, then attach the hose to the diverter and the wand to the hose. Put one flat washer in each hose end, check that the hose is not twisted, and mount the wand where it can be reached without leaning.
Step 8: Test Every Connection
Turn on the shower slowly while standing outside the direct spray path. Inspect the main head connection, diverter joints, hose ends, and handheld connection for at least 60 seconds.
Dry each joint with a tissue after the visual inspection. A dry tissue reveals a slow seep that may not form a visible drop immediately.
Checkpoint: No joint produces a fresh wet mark, drop, or spray during operation and after shutoff.
Common mistake: Testing only the front of the head and missing a hose-end leak behind the diverter.
Step 9: Flush the Fixture
Run clean water through the new head for 30-60 seconds with the spray directed into the shower drain. This clears installation debris from the inlet screen and verifies that every nozzle is receiving water.
Remove the head and rinse its screen only if the manufacturer’s instructions permit it. Do not remove a flow restrictor merely to increase spray force, because doing so can violate local requirements, increase water use, and change the fixture’s certified performance.
Checkpoint: Spray is even, the flow-control screen is clear, and the shower control shuts off normally.
Common mistake: Assuming weak spray always means the restrictor is defective before checking the inlet screen and household pressure.
Common Mistakes and How to Fix Them
Correct the failure at the connection where it occurs instead of adding force to every joint. Most new-fixture leaks come from a displaced washer, cross-threading, wrong sealant, or movement of the concealed arm support.
| Symptom | Likely cause | Corrective action | Stop-work condition |
|---|---|---|---|
| Leak at fixed-head nut | Missing washer or dirty face | Reinstall washer and clean surfaces | Damaged female nut |
| Leak at hose end | Tilted or doubled washer | Fit one flat washer per end | Split hose collar |
| Head will not start by hand | Cross-threaded connection | Remove and restart straight | Crushed or missing threads |
| Shower arm rotates | Loose wall-side elbow | Stop and inspect access | Arm turns with wall movement |
| Weak spray after installation | Clogged screen or low supply pressure | Rinse screen and compare fixtures | Valve or pipe blockage suspected |
| Water sprays sideways | Clogged rubber nozzle | Clean according to instructions | Cracked spray plate |
Leak From the Main Threaded Connection
A leak from the shower-arm connection usually comes from a washer problem, poor thread engagement, old tape, or a damaged sealing surface. Remove the head, dry every part, inspect the washer for flattening, and reinstall with the correct seal method.
Use fresh tape in three to five clockwise wraps if the manufacturer uses a tapered threaded seal. If the connection uses a captive washer, confirm the washer contacts the flat seat before tightening; extra tape cannot correct a missing or tilted gasket.
Weak Water Pressure After Replacement
Weak spray after installing a new head usually results from a clogged inlet screen, a low-flow design, a partially closed valve, or a pre-existing supply problem. Unscrew the head, rinse the small screen, and compare the flow with the old fixture before changing any internal restrictor.
A bucket test gives a useful measurement: collect shower water for 15 seconds and multiply the gallons by four. For example, 0.5 gallon in 15 seconds equals 2.0 GPM. This measures actual flow at that moment, not static water pressure.
The Shower Arm Moves in the Wall
A moving shower arm indicates possible movement of the concealed drop-ear elbow or supply pipe. Stop tightening the shower head, because additional torque can break a fitting behind tile or drywall and create a hidden leak.
Remove the wall flange only if it can be done without damaging the finish, then inspect the opening with a flashlight. Access through the opposite side of the wall is often required to secure the elbow properly; silicone around the flange may hide movement but is not a structural repair.
The New Head Drips After Shutoff
A few residual drops can drain from the shower head after the valve closes, especially from a large rain head or hose. Continuous dripping after several minutes points to a shower-valve cartridge or control-valve problem, not necessarily a defective shower head.
Replace or service the valve cartridge when water continues entering the shower with the control fully off. A new head cannot stop upstream water flow.
Special Situations
Installing a Handheld Head in a Rental
A renter can usually replace the existing head with a hand-held model that uses the original shower arm and does not require drilling. Keep the original fixture, avoid permanent wall anchors, and restore the previous head before moving if the lease requires the original fittings.
A suction bracket is convenient but may release on textured tile or damp grout. A removable over-the-arm bracket creates less wall damage, while a permanently anchored slide bar provides better support but may require landlord permission.
Improving a Low-Pressure Shower
A low-pressure bathroom needs diagnosis before buying a “pressure-boosting” head. Check the actual flow, clean the inlet screen, confirm the valve is fully open, and compare another fixture; a specialized nozzle may improve spray velocity but cannot increase water supplied by a restricted pipe.
Rain heads are a poor choice for many low-pressure systems because their larger faceplates spread the same available flow across more outlets. A compact 1.5-2.0 GPM head with focused nozzles generally feels stronger than an oversized overhead model.
Choosing for Limited Mobility
A handheld shower with a 60-72-inch hose, reachable bracket, and easy-to-operate control is usually safer than a fixed head for a seated user. Position the bracket at a usable height, keep the hose clear of feet and wheels, and choose a lightweight wand that can be controlled with wet hands.
A handheld shower head does not replace grab bars or a stable shower seat. Accessibility hardware must be anchored to structural support and installed according to applicable building requirements.
Replacing a Head on a Tub-Shower Diverter
A tub-shower diverter changes where water flows but normally does not alter the shower-head replacement sequence. Test both tub and shower outlets after installation because a new head can expose a weak diverter washer or a valve that does not fully redirect flow.
If water continues running strongly from the tub spout while the shower is selected, inspect the diverter or valve rather than restricting the shower head. The symptom indicates upstream flow loss.
When Should You Call a Plumber?
Call a plumber when the shower arm spins with the wall, the wall becomes wet, the pipe threads are broken, the shutoff valve does not stop water, or removing the old fixture requires force that risks concealed plumbing. Professional help is also appropriate when the replacement requires opening tile, relocating an arm, or adding a ceiling supply.
A plumber is not normally needed for a clean, accessible 1/2-inch connection with a stable arm. Stop immediately when resistance transfers into the wall, because the cost of repairing a hidden leak can exceed the price of the shower fixture by hundreds of dollars.
How to Maintain the New Shower Head
Clean mineral buildup from rubber spray nozzles every one to three months in hard-water areas. Follow the manufacturer’s cleaning instructions; acidic descaling solutions can damage brass finishes, plated surfaces, seals, or internal filter media when used too often or at excessive strength.
Replace a filter cartridge on the manufacturer’s schedule or when flow and odor change, commonly every two to six months depending on water quality and household use. A clogged cartridge reduces flow gradually and can make a new shower head appear defective.
Do not use a metal pick to enlarge spray holes. Enlarging nozzles changes the designed flow rate and can damage the faceplate, while gentle wiping preserves the original spray pattern.
FAQ
Do All Shower Heads Fit Every Shower Arm?
Most shower heads sold for North American homes fit a 1/2-inch male NPT shower arm, but specialty systems may use adapters, proprietary mounts, or different regional standards. Check the product connection specification, included diverter, washer type, and arm position before buying. A compatible thread does not guarantee adequate structural support for a heavy rain head.
Do You Need PTFE Tape to Install a Shower Head?
PTFE tape is often useful on the shower arm’s tapered male threads, but it is not a substitute for a flat rubber washer. Hose ends and many swivel connections seal through washers, so tape can interfere with seating. Follow the fixture instructions, wrap three to five turns clockwise, and keep tape away from the pipe opening.
Can a New Shower Head Increase Water Pressure?
A new shower head can improve perceived spray force through nozzle geometry, aeration, or a focused pattern, but it cannot create additional supply pressure. Clean the inlet screen, measure flow with a bucket, and inspect the valve before blaming the fixture. Large rain heads commonly feel weaker because they distribute flow across a wider spray face.
Why Does a Shower Head Leak Only When the Water Is Running?
A running-only leak usually indicates a poor seal at the head nut, hose washer, diverter, or threaded connection. Dry the joint, operate the shower, and identify the first point that becomes wet. Refit one flat washer, clean the sealing surfaces, or renew the approved thread seal rather than tightening every connection harder.
Can You Replace a Shower Head Without Turning Off the Main Water?
Yes, a functioning shower control normally stops water for a shower-head replacement, so the main house valve remains open. Close the main valve only when the local valve leaks, the fixture cannot stop flow, or the work extends to the shower arm, valve, or concealed supply piping.
How Often Should You Replace a Shower Head?
Replace a shower head when its spray remains uneven after cleaning, the housing or hose is cracked, the fixture leaks at a damaged joint, or its flow no longer suits household needs. A fixed head may last many years, while filter cartridges and flexible hoses require more frequent replacement because their seals and media wear sooner.
The Bottom Line
How to replace shower head work is a manageable DIY task when the connection is standard, the shower arm is stable, and the replacement washer is installed correctly. Allow 10-20 minutes for a basic fixed head, use controlled hand force, test every joint, and stop when the concealed pipe moves. A clean 1/2-inch connection needs careful technique more than specialized plumbing equipment.