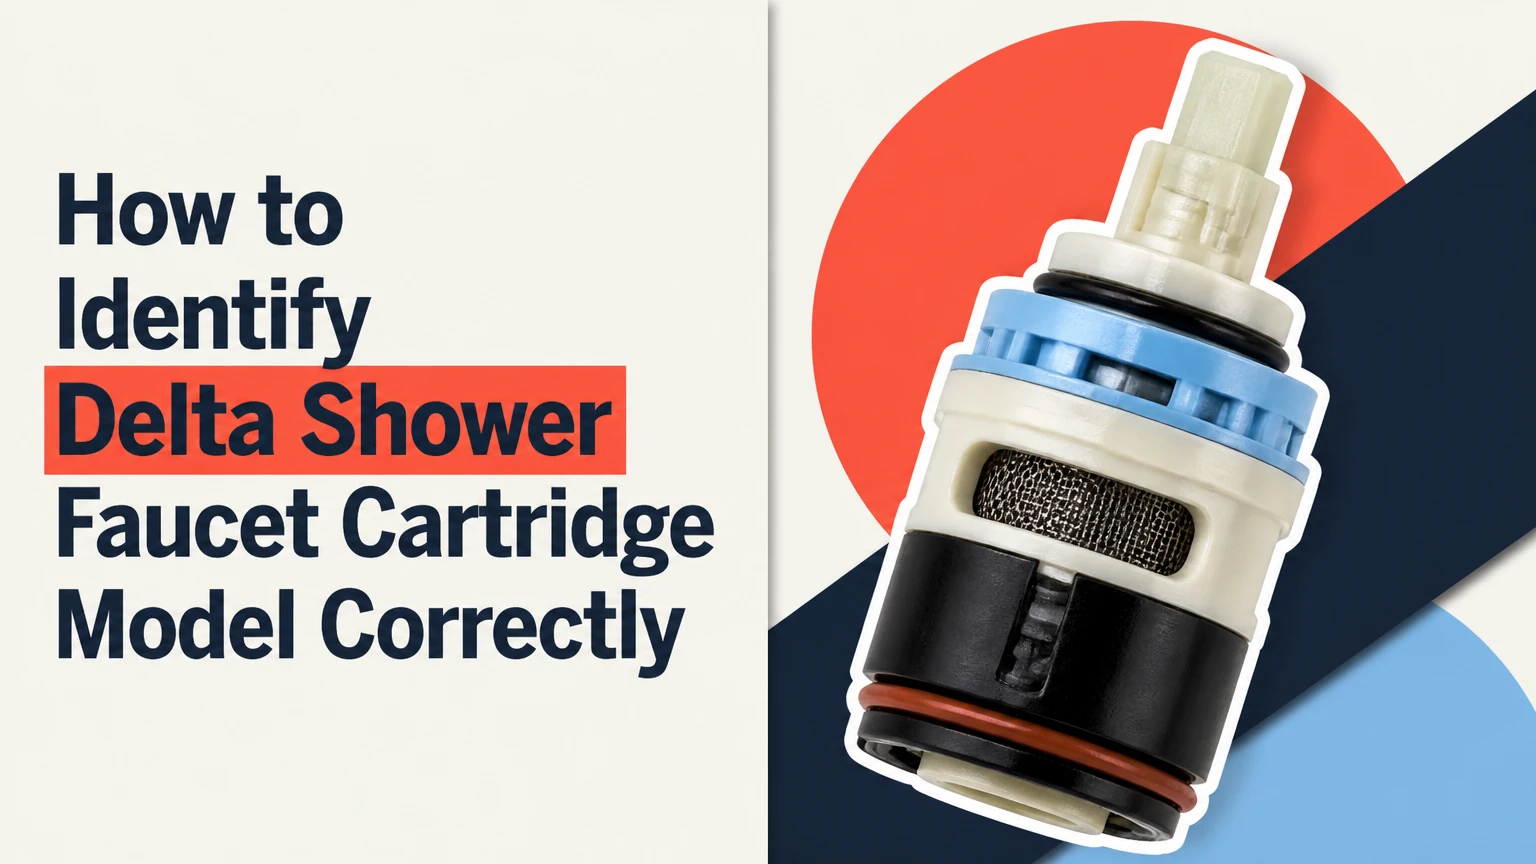
To identify a Delta shower faucet cartridge model, first read the trim plate and classify the handle, then confirm the valve generation, installation date, and physical cartridge features. The most reliable identification combines the Delta series with the cartridge’s shape, cap, length, alignment pins, and seals because appearance alone can misidentify compatible-looking parts.
Key Facts at a Glance
- Delta RP19804 generally belongs to older Monitor 1300/1400 valves, while RP46074 is used in many later MultiChoice 13/14 valves.
- A single handle that rotates from off through temperature usually indicates a 13/14 Series pressure-balance control.
- Separate volume and temperature controls usually indicate a 17 Series or 17T Series valve, but the cartridge number still requires confirmation.
- Cap color helps identify a Delta cartridge, but color is not a reliable standalone test because revisions and aftermarket parts vary.
- The trim model and the concealed rough-in valve are related but different identification targets.
- A typical DIY replacement takes 30-90 minutes and commonly costs about $60-$150 for an OEM cartridge, depending on the family.
What Is a Delta Shower Cartridge?
A Delta shower cartridge is the removable internal valve component installed inside the brass rough-in valve behind the wall. The cartridge controls water flow and temperature by positioning internal ports, a pressure-balancing spool, or a thermostatic element against the hot and cold supply passages.
The visible handle and escutcheon are trim. The brass valve body is the permanent rough-in assembly. The cartridge sits between them, which explains why a trim model number does not automatically equal the cartridge part number.
Delta uses different cartridge designs for different control systems. A pressure-balance cartridge responds to changes in hot and cold pressure, while a thermostatic cartridge regulates temperature through a temperature-sensing element. Delta’s official service-parts pages group common tub and shower cartridges by families such as 13/14 Series, 17 Series, and 17T Series.
A worn cartridge commonly causes a steady shower drip, difficult handle movement, temperature instability, low flow through one outlet, or water that remains hot or cold regardless of handle position. A cartridge cannot correct every plumbing fault. Damaged valve-body seats, blocked supply passages, an incorrectly installed cartridge, or a defective tub-spout diverter can create similar symptoms.
How Do You Identify a Delta Cartridge Without Removing It?
Identify a Delta cartridge without removal by recording the trim markings, counting the handles, observing the control movement, and estimating the installation period. These clues identify the cartridge family, but a removed-cartridge comparison or official Delta lookup is safer before ordering a part.
Step 1: Photograph the Trim Plate
Turn off the shower and inspect the escutcheon, handle hub, and decorative sleeve with a flashlight. Look for “Monitor,” “13/14,” “17 Series,” “17T,” “TempAssure,” “MultiChoice,” or a small model label.
Do not assume that every Delta trim plate carries a readable model number. Chrome wear, repainting, replacement trim, and hard-water deposits can hide text. Photograph the entire trim assembly, the handle from the front and side, and any visible lettering before disassembly.
Delta’s support guidance directs owners toward the product identification and parts-search tools. Those tools work best when paired with clear photos and the control configuration rather than a vague description such as “old Delta shower.”
Step 2: Classify the Handle Operation
Use the control layout as the first mechanical filter.
| Visible control | Typical Delta family | What the control does | Identification confidence |
|---|---|---|---|
| One lever rotates from off through cold to hot | 13/14 Series | Turns flow on and adjusts temperature together | High for family, low for exact cartridge |
| One lever controls volume, with a separate temperature dial | 17 Series | Volume and temperature operate independently | High for family, exact part still needs verification |
| One lever or dial uses a thermostatic temperature scale | 17T Series | Thermostatic temperature regulation, often with separate volume control | High for family, exact part still needs verification |
| Single lever with a rounded ball handle | Legacy 600 Series | Ball-and-seat mixing with one handle | High for legacy design |
| Two independent hot and cold handles | Two-handle valve or nonstandard configuration | Hot and cold flow controlled separately | Do not order a single-handle cartridge |
A single rotating lever is not enough to prove RP46074. A 13/14 handle can be installed on different generations of Delta rough-in valves, and replacement trim can obscure the age of the valve.
Step 3: Use Installation Date as a Clue
Ask when the valve was installed, not merely when the bathroom was remodeled. A bathroom renovated in 2018 may still contain a 1990s rough-in valve.
The approximate date can separate common candidates:
| Approximate valve period | Likely design clue | Common candidate | Important limitation |
|---|---|---|---|
| Before about 1993 | Rounded ball assembly and separate rubber seats | RP212 or related 600 Series ball parts | Part revisions and faucet style matter |
| About 1993 to March 2006 | Monitor pressure-balance valve | RP19804 | Confirm the valve and cartridge geometry |
| March 2006 onward | MultiChoice 13/14 valve | RP46074 | Not every later Delta valve uses this part |
| 2006 onward with independent temperature control | 17 or 17T system | RP46463 or RP47201 | Control layout must be distinguished |
The dates are useful field clues, not universal manufacturing boundaries. A plumber may have replaced the rough-in valve, cartridge, or trim at a different time.
Which Delta Cartridge Model Matches Each Valve Family?
The most common Delta cartridge candidates are RP19804, RP46074, RP46463, RP47201, and legacy 600 Series ball assemblies. The correct choice depends on valve family, control function, body dimensions, and revision, so the table should narrow the search rather than replace a final fit check.
| Delta part or assembly | Typical valve family | Control type | Recognizable construction | Typical identification caution |
|---|---|---|---|---|
| RP19804 | Older Monitor 1300/1400 | Single-handle pressure balance | Older cartridge profile with white upper plastic and generation-specific lower geometry | Do not substitute solely because the handle says 13/14 |
| RP46074 | MultiChoice 13/14 | Single-handle pressure balance | White body, dark gray upper cap on many genuine versions, elongated alignment features | Verify the MultiChoice rough-in and bottom pin arrangement |
| RP46463 | MultiChoice 17 | Separate volume and temperature control | Dual-function cartridge assembly with distinct control functions | Do not confuse it with a single-control 13/14 cartridge |
| RP47201 | MultiChoice 17T, TempAssure | Thermostatic | Longer assembly with thermostatic control element | Trim appearance and temperature scale should agree |
| RP212 or related ball assembly | Legacy 600 Series | Single-handle ball mixing | Rounded ball, cam, rubber seats, and springs | It is not a modern cylindrical cartridge |
Delta part numbers can change through revisions and packaging updates. Compare the official product page, the valve family, and the removed part where possible. A retail listing that says “universal Delta cartridge” may describe aftermarket compatibility rather than a genuine universal fit.
What Should You Check on the Removed Cartridge?
Check the removed cartridge’s overall length, cap shape and color, stem design, alignment tabs, bottom ports, O-ring positions, and any stamped or molded markings. The bottom geometry is especially valuable because it must align with the permanent valve body.
Before removing anything, shut off the water at the bathroom service stops if present, or at the home’s main shutoff. Open the shower valve to release pressure, cover the drain, and place a towel over the work area. A dropped retaining clip can disappear behind the wall or into the drain.
Record these measurements and features:
- Overall length: Measure from the cartridge shoulder to the end of the stem or body, using the same reference points on both parts.
- Upper cap: Note white, gray, black, or translucent plastic, plus the cap diameter and shape.
- Stem: Record whether the stem is short, extended, splined, keyed, or designed for an adapter.
- Lower end: Photograph alignment pins, tabs, ports, and rubber seals.
- Retainer: Identify a bonnet nut, retaining clip, or threaded ring.
- Markings: Search the plastic body for RP numbers, arrows, “H,” or molded manufacturer marks.
Color is supporting evidence only. Sunlight, mineral deposits, replacement parts, and aftermarket plastics can change the apparent color. A gray cap should not independently determine whether the cartridge is RP46074 or another Delta assembly.
How Do You Remove a Delta Cartridge Safely?
Remove a Delta cartridge by shutting off water, taking off the handle and trim, removing the retaining hardware, and pulling the cartridge straight out without twisting the valve body. The job typically takes 30-45 minutes when the cartridge is free, but corrosion or a seized cartridge can extend the work to 1-2 hours.
Before You Start
| Item | Typical requirement | Why it matters |
|---|---|---|
| Water shutoff | Main valve or service stops | Prevents uncontrolled wall-cavity leakage |
| Hex key | Commonly 1/8-inch or 3/32-inch | Removes many Delta handle set screws |
| Screwdriver | Phillips or flat, depending on trim | Removes escutcheon screws |
| Pliers or wrench | Medium channel-lock pliers or adjustable wrench | Removes sleeve or bonnet hardware |
| Silicone grease | Small amount, potable-water-rated | Protects replacement O-rings |
| Replacement part | Genuine or verified compatible Delta cartridge | Prevents fit and seal errors |
Step 1: Shut Off Water and Test the Valve
Close the water supply and open the shower handle. Wait until flow stops completely. If water continues flowing, the shutoff is not closed or another supply remains active.
Success checkpoint: No water exits when the handle is opened.
Common mistake: Beginning removal with the water supply pressurized, which can eject the cartridge or flood the wall cavity.
Step 2: Remove the Handle and Trim
Loosen the handle set screw with the correctly sized hex key, then pull the handle straight off. Remove the decorative sleeve and escutcheon according to the trim design, keeping each screw in a labeled container.
Success checkpoint: The cartridge retaining nut or clip is visible without forcing the trim.
Common mistake: Using an oversized hex key that rounds the set screw.
Step 3: Remove the Retainer
Delta valves may use a bonnet nut, retaining clip, or threaded retaining ring. Remove only the hardware that holds the cartridge, and photograph the arrangement before extraction.
Use controlled pressure on the nut. If mineral scale locks the threads, apply an appropriate penetrating product around the exterior hardware and allow time for it to work. Do not strike the exposed valve body or use excessive leverage against copper piping.
Success checkpoint: The retainer is fully clear and the cartridge can move.
Common mistake: Pulling on the cartridge while a retaining clip remains installed.
Step 4: Extract and Document the Cartridge
Pull the cartridge toward the room, keeping the force aligned with the valve bore. A cartridge puller is safer than improvised prying when the stem breaks or the body is seized.
If the cartridge breaks, remove every fragment before installing a replacement. Photograph the old cartridge from the front, side, and bottom, then clean mineral debris from the valve opening with a soft brush.
Success checkpoint: The valve bore is empty, clean, and free of broken plastic.
Common mistake: Twisting aggressively and damaging the brass valve body or internal alignment surfaces.
Step 5: Flush, Lubricate, and Install
With the cartridge removed, shield the opening with a towel and briefly open the water supply to flush loose debris only if the valve can discharge safely into the shower area. Shut the water off again, inspect the new O-rings, apply a thin film of silicone plumbing grease, and align the cartridge exactly as specified by the manufacturer.
The hot-side marking and orientation vary by cartridge design. Follow the instruction sheet for that part rather than relying on a generic rule about placing an “H” in one direction.
Success checkpoint: The cartridge seats fully without hammering, the retainer threads by hand, and the handle moves smoothly before final tightening.
Common mistake: Forcing a cartridge that does not seat. Stop and recheck the generation, alignment, and valve bore.
What Is the Difference Between RP19804 and RP46074?
RP19804 and RP46074 are common single-handle pressure-balance cartridges associated with different Delta valve generations. RP19804 is commonly linked to older Monitor 1300/1400 valves, while RP46074 is commonly linked to MultiChoice 13/14 valves made from approximately 2006 onward.
| Decision factor | RP19804 | RP46074 |
|---|---|---|
| Common family | Monitor 1300/1400 | MultiChoice 13/14 |
| Typical generation | Approximately 1993 to March 2006 | Approximately March 2006 onward |
| Handle behavior | One control for flow and temperature | One control for flow and temperature |
| Main identification clue | Older body and lower alignment geometry | Later body and elongated alignment features |
| Interchangeability | Not automatically interchangeable | Not automatically interchangeable |
| Best confirmation | Old cartridge and valve-body comparison | MultiChoice identification plus physical comparison |
The two parts may look similar in an online photograph, but similar length and color do not prove interchangeability. The valve-body geometry, seals, alignment pins, and retaining arrangement determine whether the cartridge seats and seals.
A common professional rule is simple: never force a replacement cartridge into a Delta valve. Brass threads and internal sealing surfaces are repairable only with increasing labor once damaged.
Does a Dripping Shower Prove the Cartridge Is Wrong?
A dripping shower does not prove that the cartridge model is wrong. A worn cartridge is a common cause, but debris, damaged valve-body surfaces, incorrect orientation, a missing seal, or an active supply problem can produce the same symptom after replacement.
| Symptom after replacement | Likely cause | Correct first response |
|---|---|---|
| Constant drip from shower head | Debris, damaged O-ring, scratched valve bore, or defective cartridge | Remove, inspect, clean, lubricate, and verify orientation |
| Handle binds or will not turn | Bonnet overtightened, cartridge misaligned, or wrong part | Loosen retainer slightly and recheck fit |
| Temperature reverses | Cartridge installed in the wrong orientation | Shut off water and follow the part’s orientation instructions |
| Low flow from one outlet | Debris in cartridge or supply passage | Flush safely and inspect inlet screens or ports |
| Tub spout and shower head run together | Tub-spout diverter or piping restriction | Test or replace the diverter before replacing the cartridge again |
| Water never reaches the selected temperature | Incorrect cartridge family or pressure-balance issue | Confirm valve type and hot/cold supply operation |
A tub spout diverter cannot usually be repaired by changing the shower cartridge. The cartridge controls mixing and flow through the valve; the diverter routes water between the spout and shower outlet.
What If the Delta Cartridge Is Stuck?
A stuck Delta cartridge requires gradual extraction, not greater twisting force. Remove the retainer, protect the trim, apply a purpose-made cartridge puller when possible, and stop if the valve body begins moving inside the wall.
Hard-water scale often bonds the cartridge O-rings to the valve bore. Repeated straight pulling with a puller is safer than levering against the finished wall, while penetrating fluid should remain outside potable-water passages unless its instructions permit that use.
Escalate to a plumber when the cartridge stem breaks below the wall surface, the brass valve body rotates, the retaining threads strip, or the wall must be opened. A cartridge puller typically costs about $20-$50, while wall repair and valve-body replacement can exceed the original cartridge cost by several hundred dollars.
How Much Does Identification and Replacement Cost?
Identifying a Delta cartridge costs nothing if the trim and old part are accessible. A typical OEM replacement costs approximately $60-$150, and a straightforward DIY installation takes 30-45 minutes; seized hardware can raise the time to 1-2 hours.
| Expense or time item | Typical range | Main cost variable |
|---|---|---|
| Photo and trim inspection | $0, 10-20 minutes | Accessibility and readable markings |
| Common pressure-balance cartridge | $60-$90 | RP19804 versus RP46074 and seller |
| 17 Series cartridge | $70-$120 | Genuine RP46463 availability |
| 17T thermostatic cartridge | $110-$150 | Thermostatic element and supplier |
| Cartridge puller | $20-$50 | Tool quality and valve condition |
| DIY replacement time | 30-45 minutes | Free cartridge versus seized cartridge |
| Plumber service call | Often $150-$400 before parts | Region, access, and emergency timing |
Prices are typical retail and service ranges, not fixed Delta prices. Confirm the current part number and warranty eligibility through Delta’s official service-parts pages before purchasing.
Should You Buy an OEM Delta Cartridge?
Buy an OEM Delta cartridge when the valve is concealed, the replacement is difficult to return, or the household depends on reliable temperature control. A verified aftermarket cartridge can reduce cost, but dimensional differences in O-rings, stems, caps, or alignment features can cause stiffness and slow leaks.
Delta’s warranty and support policies can depend on the original purchaser, product category, and proof of purchase. Contact Delta Faucet support with the trim photos, cartridge photos, installation date, and retailer information rather than assuming every replacement will be free.
Use this documentation checklist:
- Full front photograph of the trim
- Close-up of every logo or series marking
- Handle and control-layout photograph
- Approximate rough-in installation date
- Old cartridge front, side, and bottom photographs
- Measurements of length and alignment features
- Symptom description, including whether the leak occurs with the valve off
This record helps Delta support, a plumbing supplier, or a local plumber identify the part without repeated disassembly.
What Mistakes Should You Avoid?
The most expensive Delta cartridge-identification mistakes involve confusing trim with rough-in hardware, trusting cap color alone, forcing a similar cartridge, and replacing a cartridge when the symptom comes from the diverter or valve body.
- Ordering from the trim name alone: “Monitor” identifies a product family, not always a precise replacement cartridge.
- Assuming all 13/14 cartridges fit: Older Monitor and later MultiChoice valves can require different parts.
- Using color as proof: Plastic color changes across revisions, lighting conditions, and aftermarket products.
- Installing without a bottom comparison: Alignment pins and port geometry must match the valve body.
- Overtightening the bonnet: Excess compression can make the handle bind against the cartridge shell.
- Skipping orientation instructions: An inverted cartridge can reverse the hot and cold response.
- Replacing the cartridge for a diverter fault: Water from both outlets points first toward the tub spout or piping.
- Ignoring the valve body: Deep scoring, corrosion, or damaged seats may prevent a new cartridge from sealing.
One useful field rule is to separate identification from diagnosis. First establish which cartridge fits. Then establish whether the cartridge is actually the cause of the plumbing symptom.
When Should You Call a Plumber?
Call a plumber when the water cannot be isolated, the cartridge breaks inside the valve, the brass body moves in the wall, or the valve body itself appears damaged. Professional help is also appropriate when the installation has no accessible shutoff and the home’s main valve does not fully stop flow.
A plumber is usually unnecessary for a clearly labeled, freely removable cartridge with accessible shutoff valves. A plumber becomes the safer option when extraction could damage concealed copper, soldered connections, waterproofing, tile, or the wall framing.
Frequently Asked Questions
Can I identify a Delta cartridge from a photograph?
A photograph can often identify the Delta family, especially when it shows the trim plate, handle layout, stem, cap, and bottom alignment features. A front-only photograph is usually insufficient because RP19804 and RP46074 can appear similar from the handle side. Include a ruler and several angles for a reliable comparison.
Is RP46074 a universal Delta cartridge?
RP46074 is widely used in Delta MultiChoice 13/14 applications, but “universal” does not mean it fits every Delta shower valve. Older Monitor valves, 17 Series valves, 17T thermostatic valves, and legacy 600 Series ball faucets use different internal designs. Confirm the rough-in family before ordering RP46074.
Where is the Delta shower model number located?
The model number may appear on the trim packaging, installation paperwork, receipt, product label, or Delta support records. The visible escutcheon often shows a series name rather than the complete model number. If no label remains, photograph the trim and removed cartridge, then use Delta’s Product Identifier and parts-search tools.
Can a new cartridge fix reversed hot and cold water?
A new cartridge can correct reversed temperature behavior only when the original cartridge was incorrectly oriented or defective. If the hot and cold supply lines are physically reversed at the valve, replacing the cartridge will not correct the plumbing configuration. Verify orientation first, then test the supply connections.
Why is my Delta handle stiff after cartridge replacement?
A stiff Delta handle usually results from a dry or damaged O-ring, mineral debris in the valve bore, a misaligned cartridge, or an overtightened bonnet nut. Shut off water, remove the retainer, inspect the fit, apply a thin film of silicone plumbing grease, and tighten the retaining hardware only enough to secure the cartridge.
Does a two-handle Delta shower use one of these cartridges?
A two-handle Delta shower may use separate hot and cold valve components rather than a single-handle Monitor cartridge. Do not order RP19804 or RP46074 without identifying the individual valve design. Two-handle trim, ceramic-disc assemblies, and non-Delta valves require a separate parts search.
The Bottom Line
To identify a Delta shower faucet cartridge model, combine four evidence types: trim markings, handle behavior, valve age, and the removed cartridge’s geometry. Use RP19804, RP46074, RP46463, RP47201, or a legacy ball assembly only after the valve family and physical features agree. When the evidence conflicts, stop before forcing a part and verify the cartridge through Delta’s official support and service-parts resources.