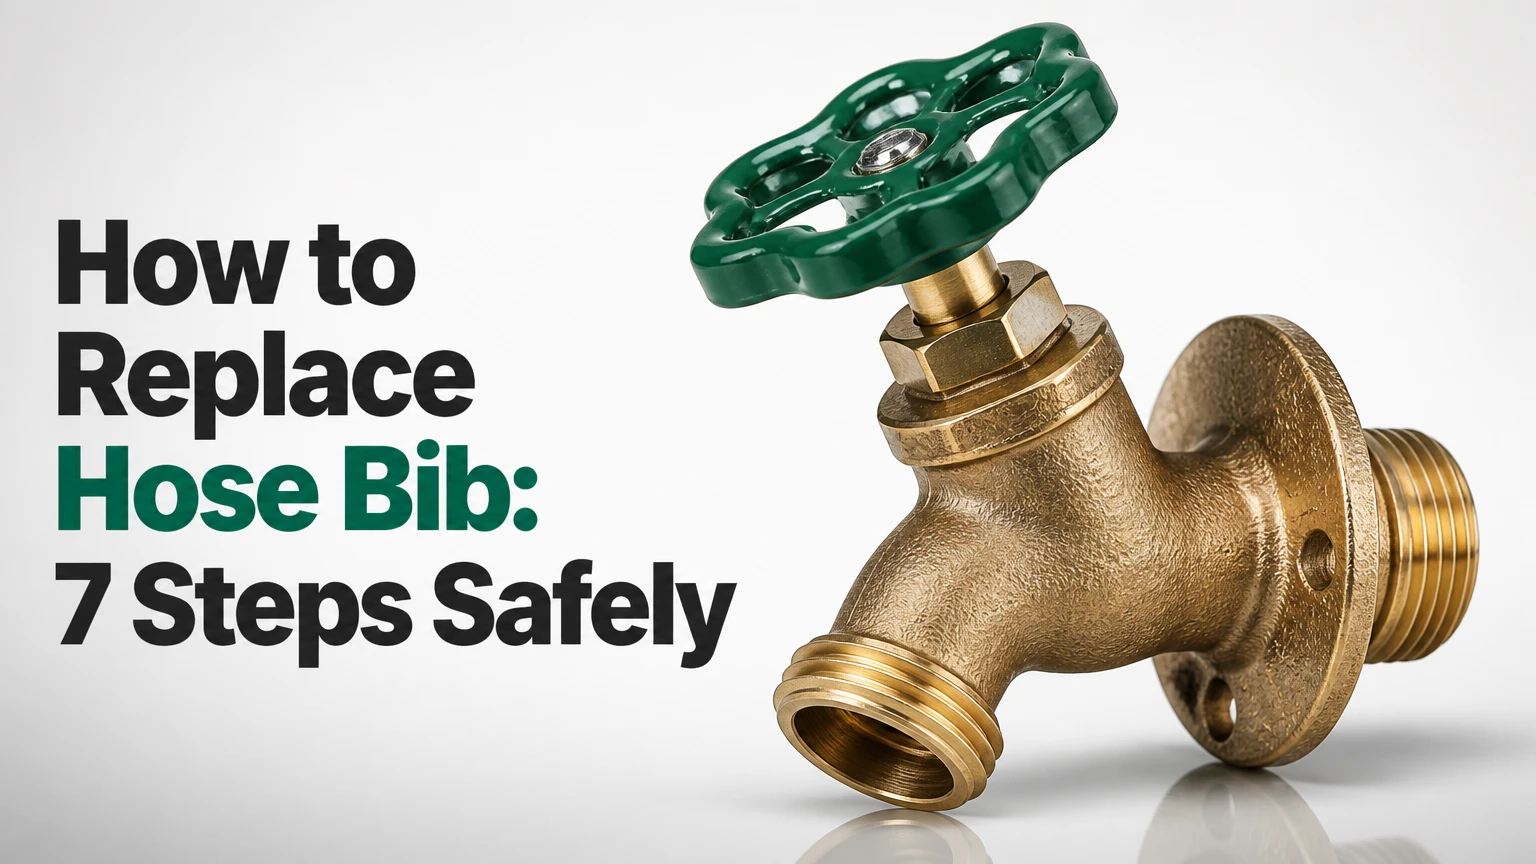
To replace a hose bib, shut off and drain the water line, remove the old outdoor faucet while stabilizing the supply pipe, install a matching valve with approved thread sealant, and test every joint under pressure. A threaded replacement usually takes 1-3 hours, while soldered, concealed, or freeze-damaged connections often require greater access or a plumber.
Key facts at a glance
A hose bib, spigot, sillcock, or outdoor faucet is a valve that supplies water to a garden hose connection.
A threaded hose bib can usually be replaced with two wrenches, PTFE tape or pipe compound, and a correctly sized valve.
Frost-proof sillcocks must slope slightly downward toward the outside so the barrel can drain after shutoff.
A hose left attached during freezing weather can prevent drainage and damage a frost-proof sillcock.
Typical DIY materials cost $15-$45; professional replacement commonly costs $150-$350 or more.
Water leaking inside the wall when the faucet runs indicates a potentially split pipe or sillcock barrel, not a simple washer problem.
What Is a Hose Bib?
A hose bib is an exterior water valve with a threaded outlet for attaching a garden hose. “Spigot,” “outdoor faucet,” “bibcock,” and “sillcock” are common names, although a sillcock often refers specifically to a wall-mounted hose bib and a frost-proof sillcock has an extended internal barrel.
The visible valve contains a handle, stem, body, outlet threads, and often an anti-siphon or vacuum-breaker device. The inlet connection sits behind the exterior wall or connects to an exposed pipe. The inlet is commonly 1/2 inch or 3/4 inch, but the hose outlet usually uses a different garden-hose thread standard, so measure the plumbing connection rather than relying on the outlet size.
A conventional hose bib closes near the handle. A frost-proof model closes farther inside the building, usually several inches behind the exterior wall, and drains the outdoor barrel when the handle is shut. The design reduces freeze exposure, but it cannot protect a line that lacks insulation, has the wrong slope, or remains connected to a frozen hose.
How Does a Hose Bib Work?
A traditional hose bib uses a threaded stem and rubber washer to stop water flow. Turning the handle clockwise drives the washer against an internal seat; turning it counterclockwise lifts the washer and opens the passage.
A leak from the spout while the handle is closed usually points to a worn washer, damaged valve seat, or faulty stem assembly. A leak around the handle usually involves the packing nut, O-ring, or stem seal. A leak at the wall connection points to the inlet threads, solder joint, compression fitting, or concealed pipe.
A frost-proof sillcock uses the same basic shutoff principle, but the stem extends through a long barrel. The actual valve seat sits inside the warmer portion of the wall. A frost-proof replacement must match the required length and must be installed with the outlet angled downward. The barrel cannot drain correctly if it slopes inward or if a hose, splitter, or timer traps water at the outlet.
Should You Repair or Replace the Hose Bib?
Replace the complete hose bib when the body is cracked, the valve seat is damaged, the mounting flange is corroded, or the faucet leaks inside the wall. Repair only when the leak is clearly limited to a replaceable washer, packing seal, or vacuum-breaker component and the valve body remains sound.
The symptom provides a useful first diagnosis:
| Leak or failure location | Likely cause | Repair or replacement response | Urgency |
|---|---|---|---|
| Spout with handle closed | Worn washer or seat | Replace washer or complete stem | Low if no wall leak |
| Around handle | Loose packing nut or failed O-ring | Tighten 1/4 turn or replace packing | Moderate |
| Hose connection | Damaged washer or cross-threaded hose | Replace hose washer or hose-end fitting | Low |
| Valve body crack | Freeze damage or corrosion | Replace complete hose bib | High |
| Behind wall during operation | Split barrel or concealed joint | Shut off water and investigate immediately | High |
| Inlet threads | Failed seal, damaged threads, or movement | Reseal or replace fitting | Moderate to high |
Replacing a cheap, heavily corroded valve is often more reliable than rebuilding it. Internal repair kits vary by brand, and a replacement washer cannot correct a cracked brass body or a distorted seat.
Which Replacement Hose Bib Should You Buy?
Choose a frost-proof sillcock for any location exposed to repeated freezing temperatures, provided the wall depth and pipe arrangement allow the correct model. Choose a standard hose bib for a protected, nonfreezing location or for a warm climate where the valve and connected pipe will not freeze.
Before buying, record the following:
- Existing valve type: standard or frost-proof.
- Inlet connection: female thread, male thread, sweat, PEX, CPVC, or push-to-connect.
- Pipe size: commonly 1/2 inch or 3/4 inch.
- Frost-proof length: commonly 4, 6, 8, 10, 12, or 14 inches.
- Wall material and thickness.
- Anti-siphon or vacuum-breaker requirement.
- Location of the interior shutoff and pipe access.
| Hose bib type | Typical length | Best installation setting | Main limitation |
|---|---|---|---|
| Standard threaded brass | 2-4 inches | Warm climates and protected walls | Outdoor water remains near the wall |
| Frost-proof threaded | 4-14 inches | Freezing climates with threaded stub-out | Length and pitch must match wall depth |
| Frost-proof sweat | 4-14 inches | Copper supply lines with torch access | Requires soldering and heat protection |
| Frost-proof push-fit | 4-14 inches | Accessible copper, PEX, or CPVC | Requires clean, supported pipe and compatible fitting |
| PEX barb or crimp | 4-14 inches | Accessible PEX systems | Requires the correct crimp or expansion tool |
| Frost-proof compression | 4-14 inches | Certain exposed copper connections | Less suitable for concealed or moving pipe |
An anti-siphon device protects potable water from backward flow through a submerged hose or attached equipment. The International Association of Plumbing and Mechanical Officials lists ASSE 1011 as a standard covering hose-connection vacuum breakers, while local plumbing codes and the valve manufacturer determine the required installation. Do not remove an integral vacuum breaker merely because it drips during pressure relief.
How Do You Measure the Replacement?
Measure the pipe diameter at the inlet, not the garden-hose outlet, and measure the existing frost-proof barrel from the exterior mounting surface to the valve connection. A replacement sillcock that is too short may leave the shutoff in a freezing zone; one that is too long may bottom out or fail to fit the interior piping.
Photograph the connection before removing anything. If the inlet disappears into a wall, locate an interior access panel, basement ceiling, crawlspace, or utility chase before purchasing the replacement.
What Tools and Materials Do You Need?
A typical threaded replacement needs two adjustable wrenches or one adjustable wrench and one pipe wrench, a wire brush, PTFE tape or compatible pipe joint compound, a bucket, rags, a screwdriver, and the replacement hose bib. Copper, PEX, and concealed installations require additional tools and fittings.
Before you start
Typical time: 1-3 hours for an accessible threaded valve.
Difficulty: Moderate for threaded work; advanced for soldering or concealed piping.
Typical DIY materials: $15-$45.
Minimum tools: two wrenches, wire brush, screwdriver, bucket, flashlight, and rags.
Possible additions: tubing cutter, deburring tool, PEX crimper, PEX rings, push-fit depth gauge, torch, solder, heat shield, or access-panel materials.
Prerequisite: a working main shutoff or branch shutoff that stops the outdoor line.
Do not begin by twisting the exterior valve without identifying what holds the pipe behind the wall. A pipe wrench can transmit enough torque to rotate a copper, PEX, or galvanized connection inside a finished wall.
How to Replace a Hose Bib
The following seven steps apply to the common threaded connection. Sweat, PEX, and push-fit variations appear after the main procedure because their removal and installation methods differ.
Step 1: Shut Off the Water Supply
Close the interior branch shutoff if one exists; otherwise close the home’s main water valve. Open the outdoor hose bib fully and open a nearby indoor faucet to relieve pressure.
Confirm that water has stopped before loosening the valve. Place a bucket below the faucet and keep towels available because the line may retain several ounces of water.
Success checkpoint: The outdoor faucet stops flowing after the line drains, and no pressure returns when the handle remains open.
Common mistake: Closing only the outdoor handle does not isolate the water supply. The pipe remains pressurized behind the valve.
Step 2: Remove Attachments and Inspect Access
Remove the hose, splitter, timer, spray nozzle, and insulation cover. Examine the mounting screws, wall flange, pipe direction, corrosion, and any signs of water staining inside the building.
If the valve is frost-proof, identify its total length and the location of the actual inlet. A crack may be invisible outside but release water into the wall when the faucet opens.
Success checkpoint: You can see the connection type and have a plan to support the supply pipe from the opposite side.
Common mistake: Treating a frost-proof sillcock as a short exterior fitting can lead to buying the wrong length or missing a concealed freeze failure.
Step 3: Stabilize the Supply Pipe
Position one wrench on the hex portion of the supply fitting, valve adapter, or accessible pipe. Position the second wrench on the hose bib body, using the largest solid wrench surface available.
Hold the supply side stationary while turning the old hose bib counterclockwise. If the pipe begins moving, stop immediately and gain access from inside rather than applying more force.
Success checkpoint: The old valve turns while the pipe behind the wall remains completely still.
Common mistake: Using one wrench allows torque to travel into hidden joints. That can create a leak that appears only after the wall is closed.
Step 4: Unscrew and Remove the Old Valve
Turn the hose bib counterclockwise until it separates from the male threaded stub-out. Remove mounting screws as needed, and support the valve so its weight does not bend the pipe.
If the valve will not move, apply penetrating oil only to the exposed metal threads and wait according to the product label. Do not heat a pipe near wood, siding, insulation, plastic, or unknown sealants.
Success checkpoint: The old valve is removed without rotating, bending, or pulling the supply pipe.
Common mistake: Forcing a seized valve can break a galvanized nipple or copper adapter. A plumber may need to open the wall and replace the fitting rather than risk hidden damage.
Step 5: Clean and Prepare the Threads
Brush old pipe compound, rust, and debris from the male threads. Wipe the threads dry and inspect their crests for flattening, cracks, or severe corrosion.
Apply three to four wraps of PTFE tape clockwise when facing the end of the male pipe. Clockwise wrapping keeps the tape from unwinding as the new valve threads on. Alternatively, apply a thin, continuous coat of pipe joint compound rated for the pipe material and potable-water use.
Do not put PTFE tape on compression threads or on the straight garden-hose outlet threads. Those connections seal with a rubber washer, not with thread tape.
Success checkpoint: The first thread remains visible, the tape follows the thread direction, and no loose tape extends into the water passage.
Common mistake: Excessive tape can prevent full engagement or fragment inside the valve. Four neat wraps are preferable to a thick bundle.
Step 6: Install and Orient the New Hose Bib
Start the new valve by hand and turn it clockwise. The valve should make several smooth turns before wrench tightening; resistance on the first turn indicates possible cross-threading.
Use two wrenches again. Tighten until the valve is sealed and the outlet points downward, stopping before the brass body cracks or the hidden fitting moves. A frost-proof sillcock should usually pitch slightly downward toward the exterior, following the manufacturer’s installation instructions.
Secure the mounting flange to the wall with suitable screws. Do not use the mounting screws to pull a misaligned pipe into place, because that places constant stress on the connection.
Success checkpoint: The valve is stable, points downward, and the supply pipe has not shifted.
Common mistake: Tightening until the handle or outlet reaches a preferred angle can over-stress the fitting. Sealant creates the seal; extreme torque does not.
Step 7: Restore Water and Test Under Pressure
Close the new hose bib, then open the main or branch shutoff slowly. Watch the inlet connection, valve body, packing nut, and wall penetration while the line repressurizes.
Open and close the hose bib two or three times. Run water for 30-60 seconds, shut the valve, and inspect again. Dry the connection with a tissue because a tissue reveals small leaks more clearly than a wet hand.
Success checkpoint: No fresh moisture appears after pressurization, operation, or shutoff.
Common mistake: Testing only while water flows can miss a slow pressure leak at the threaded inlet. Inspect both with the valve open and with it closed.
How Do Connection Types Change the Job?
Threaded replacements are the most accessible DIY option because the old valve unscrews and the new valve installs with sealant. Sweat, PEX, CPVC, and push-fit connections require different preparation and should not be treated as interchangeable.
| Existing connection | Removal method | Replacement requirement | DIY risk |
|---|---|---|---|
| Male threaded copper or brass | Two-wrench unscrewing | Matching female-inlet valve | Hidden pipe rotation |
| Copper sweat | Cut or desolder copper | Sweat valve, press fitting, or adapter | Heat and fire damage |
| PEX barb | Cut tubing and remove clamp | Matching PEX barb and new ring | Inadequate crimp or short tubing |
| CPVC solvent weld | Cut pipe | CPVC-compatible valve or transition fitting | Brittle pipe and poor solvent bond |
| Push-to-connect | Release clip and pull fitting | Clean, square pipe to marked insertion depth | Partial insertion or unsupported pipe |
| Galvanized steel | Unscrew fitting if accessible | New nipple, adapter, or transition | Corroded pipe may break |
How Do You Replace a Hose Bib on PEX?
Cut PEX square with a PEX cutter, remove the old clamp or fitting, and install a valve with the correct PEX barb and approved crimp or expansion connection. Leave enough straight tubing for the fitting and support the valve so movement does not stress the PEX joint.
A PEX crimp ring must sit over the barb area, and the crimp tool must match the ring size. A go/no-go gauge, when supplied for the fitting system, verifies the crimp. A push-fit valve can work on compatible PEX, but the pipe must be clean, round, fully inserted to the manufacturer’s depth mark, and restrained against movement.
How Do You Replace a Soldered Hose Bib?
Cut the copper pipe with a tubing cutter, clean and deburr the pipe, then sweat a new valve or install a threaded transition fitting. Protect wood and insulation with a heat shield, remove residual water from the pipe, and follow the valve manufacturer’s soldering instructions.
Soldering fails when water remains in the pipe because the joint cannot reach the required temperature. Press-fit fittings avoid open flame, but they require clean, fully inserted copper and adequate access for the pressing tool. A concealed joint should remain accessible where local code requires service access.
Can You Replace a Hose Bib Without Soldering?
You can avoid soldering when the existing connection accepts a threaded, push-to-connect, compression, or PEX replacement. A push-fit valve is not a universal shortcut: the fitting must be approved for the specific pipe material, and the pipe must have sufficient exposed length for full insertion.
Push-fit fittings are useful in tight spaces, but they can be bulky behind siding or within a shallow wall cavity. A threaded adapter is often easier to service later, while a properly soldered joint provides a compact permanent connection when installed by a skilled worker.
What Does Hose Bib Replacement Cost?
Typical DIY replacement costs $15-$45 for a standard threaded or basic frost-proof valve, while professional replacement commonly costs $150-$350 or more. Access, pipe damage, soldering, wall repair, regional labor rates, and permit requirements create most of the price variation.
| Replacement situation | Typical materials | Typical labor time | Typical total cost |
|---|---|---|---|
| Threaded standard bib | $15-$30 | 1-2 hours DIY | $15-$45 DIY |
| Threaded frost-proof bib | $25-$60 | 1-3 hours DIY | $25-$75 DIY |
| PEX or push-fit valve | $25-$70 | 1-3 hours DIY | $25-$90 DIY |
| Soldered copper valve | $30-$80 | 2-4 hours professional | $150-$400 |
| Concealed freeze-damaged line | $50-$200 materials | 3-8 hours professional | $350-$1,200 or more |
| Wall opening and finish repair | $20-$150 materials | 1-4 additional hours | $75-$500 additional |
These are typical planning ranges, not a contractor quotation. Get a written estimate when the valve connects to a concealed line, when drywall or masonry must be opened, or when the home has no accessible shutoff.
How Do You Prevent a Hose Bib From Freezing?
Remove hoses, splitters, timers, and nozzle attachments before freezing weather, then close the interior shutoff and open the exterior faucet to drain the line. Frost-proof equipment reduces risk only when the barrel can drain and the supply pipe remains protected.
The most reliable winter routine is:
- Disconnect every hose and accessory.
- Close the interior isolation valve if available.
- Open the outdoor valve until flow stops.
- Leave the exterior handle open if the manufacturer’s instructions permit.
- Insulate vulnerable indoor piping, not only the exterior faucet.
- Close the outdoor valve after drainage where the design requires it.
A hose attached to a frost-proof sillcock can trap water inside the barrel. Ice expansion may split the barrel or the internal valve body, and the resulting leak may discharge inside the wall the next time the faucet is used.
Why Does a New Hose Bib Still Leak?
A new hose bib usually leaks because the wrong connection was sealed, the threads were crossed, the old fitting moved, or the valve was tightened without supporting the supply pipe. The leak location identifies the corrective action more reliably than the age of the valve.
| New leak location | Diagnostic test | Corrective action |
|---|---|---|
| Inlet threads | Dry tissue around threaded joint | Remove, clean, reseal, and reinstall |
| Hose outlet | Inspect hose washer | Install a new flat rubber washer |
| Packing nut | Observe leak only while handle turns | Tighten 1/4 turn, then replace packing if needed |
| Vacuum breaker | Drips during flow or pressure change | Check manufacturer-approved replacement part |
| Behind wall | Leak appears only when valve opens | Shut off water and inspect concealed piping |
| Valve body | Moisture from casting or seam | Replace complete valve |
A hose connection does not need PTFE tape when the hose washer is present and seated correctly. Tape on the hose outlet can prevent the washer from compressing properly and may damage plastic hose fittings.
When Should You Call a Plumber?
Call a plumber when the supply pipe twists, the connection is concealed, the pipe is severely corroded, water enters the wall, or the replacement requires soldering near combustible materials. Shut off the water immediately if a leak continues after the outdoor valve is closed.
DIY replacement is a poor choice when the home lacks a dependable main shutoff, the exterior valve is connected to a shared branch, or opening the wall could damage finished tile, masonry, electrical wiring, or insulation. A professional can add an interior isolation valve, replace a damaged stub-out, and pressure-test the repair.
Do not ignore a leak that appears only while the faucet runs. That pattern commonly indicates a split frost-proof barrel or concealed joint, and repeated use can saturate insulation and framing before the damage becomes visible.
Common Mistakes and How to Fix Them
| Mistake | Immediate symptom | Recovery |
|---|---|---|
| One wrench used during removal | Pipe rotates inside wall | Stop, expose the pipe, and counter-hold the supply |
| Valve cross-threaded | New valve wobbles or binds immediately | Remove and restart by hand with undamaged threads |
| Too much PTFE tape | Valve stops before proper engagement | Remove excess tape and apply three to four wraps |
| Brass body over-tightened | Cracked casting or distorted inlet | Replace the valve and inspect the adapter |
| Frost-proof valve slopes inward | Barrel retains water after shutoff | Reorient or reinstall with exterior drainage pitch |
| Hose left attached in winter | Spring leak inside wall | Shut off water and replace the damaged sillcock |
One practitioner rule prevents many expensive repairs: never use the exterior valve as the reaction point for loosening itself. The wrench holding the supply side must resist the removal torque, and that support may require access from inside the building.
Another counterintuitive point is that a frost-proof faucet can fail even when the faucet itself is correctly installed. The connected hose is often the obstruction that prevents drainage, so winter maintenance matters as much as valve selection.
FAQ
What Size Hose Bib Is Standard?
A hose bib’s plumbing inlet is commonly 1/2 inch or 3/4 inch, while its garden-hose outlet uses a separate hose-thread dimension. Measure the existing pipe or fitting and match the replacement inlet exactly. Do not select a valve from the outlet appearance alone, because inlet and outlet sizes describe different connections.
How Long Does Hose Bib Replacement Take?
An accessible threaded hose bib usually takes 1-3 hours for inspection, removal, installation, and testing. A soldered copper valve may take 2-4 hours, while a concealed freeze-damaged connection can require several hours plus wall opening and repair. Access is the largest time variable.
Can a Frost-Free Sillcock Be Installed Vertically?
A frost-free sillcock should normally be installed with the outlet sloping slightly downward toward the exterior, not with the barrel pitched inward. The exact permitted orientation depends on the manufacturer, but inward slope can retain water and increase freeze damage. Follow the model’s installation instructions.
Why Does the Hose Bib Drip After I Turn It Off?
A drip from the spout after shutoff usually indicates a worn stem washer, damaged seat, or incomplete closure. A drip around the handle points instead to packing or an O-ring. Replacing the complete hose bib is sensible when the body is corroded or replacement parts are unavailable.
Is a Hose Bib Vacuum Breaker Supposed to Leak?
A vacuum breaker may release a small amount of water during pressure changes or when it operates against backflow conditions. Continuous leaking usually indicates debris, a failed internal component, or an installation problem. Clean or replace the device only with a manufacturer-approved part, and do not remove required backflow protection.
Can I Leave a Hose Connected to a Frost-Proof Faucet?
Do not leave a hose connected to a frost-proof faucet during freezing weather. The hose, timer, or splitter can block drainage from the faucet barrel, allowing trapped water to freeze and split the valve. Disconnect every attachment before winter and drain the line through the exterior faucet.
The Bottom Line
To replace a hose bib safely, identify the inlet connection and frost-proof length first, shut off and drain the supply, stabilize the pipe with a second wrench, and test the new valve under pressure. A threaded replacement is usually manageable for a careful DIYer, but hidden movement, soldered joints, and water inside the wall justify professional repair. Use the correct frost-proof sillcock in freezing climates, maintain its downward drainage pitch, and remove hoses before winter.