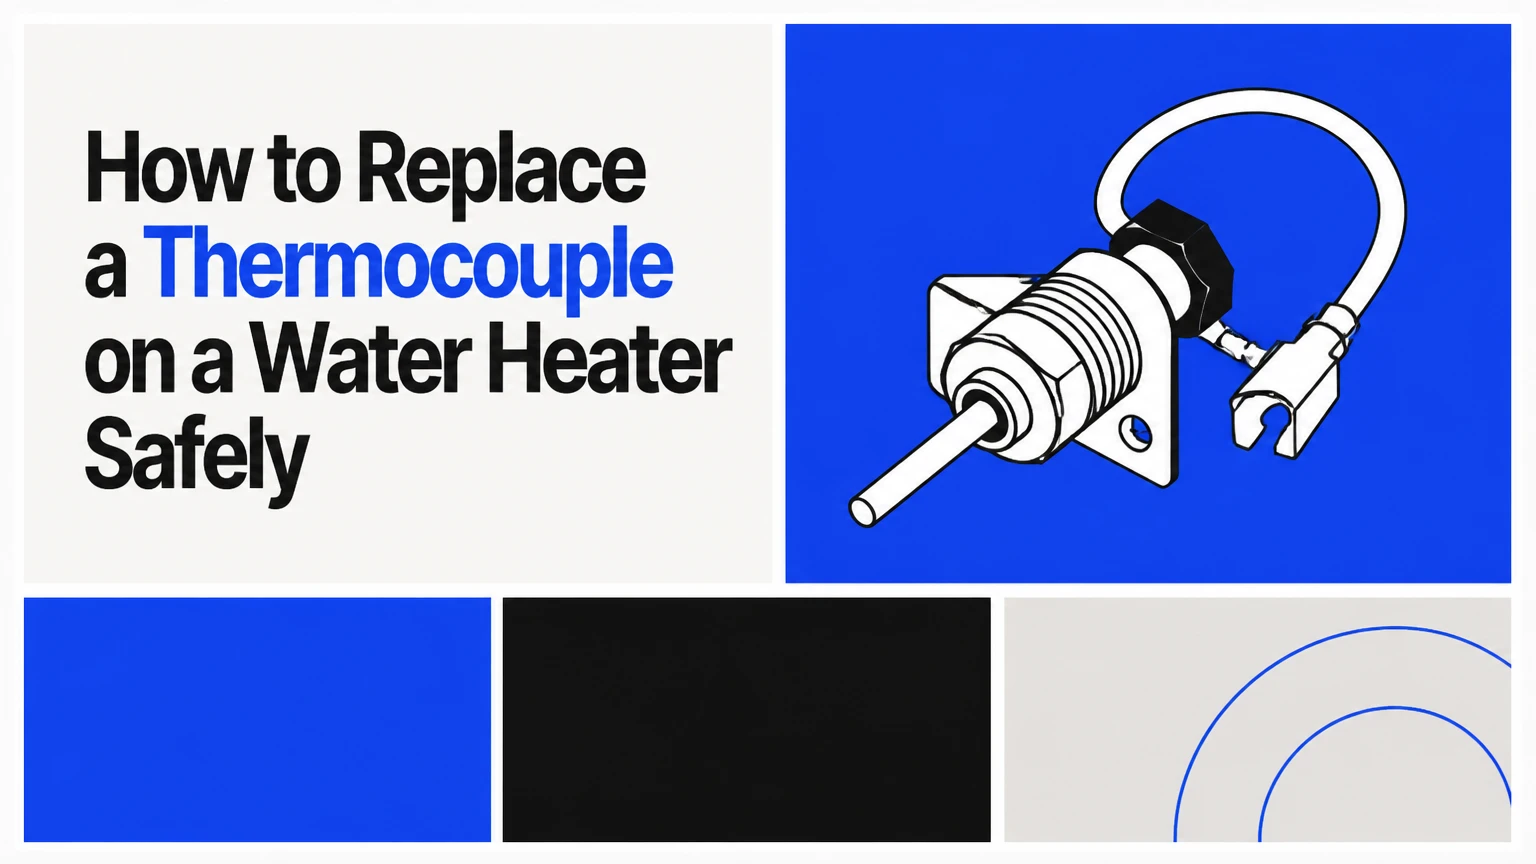
To replace a thermocouple on a water heater, shut off the gas, let the burner cool, remove the burner assembly if required, exchange the flame sensor, reconnect every fitting, test for leaks, and relight the pilot. The repair usually takes 30-60 minutes, and correct probe placement inside the blue pilot flame determines success.
Key Facts at a Glance
A standard water-heater thermocouple produces a small electrical signal that keeps the pilot safety valve open.
A healthy heated thermocouple commonly produces about 20-30 millivolts in an open-circuit test, but the appliance manual controls the final specification.
A thermopile is a different, higher-output sensor that commonly produces hundreds of millivolts and requires a model-specific replacement.
Typical DIY parts cost $15-$40; professional service commonly costs $125-$250, depending on location and access.
Gas odor, a damaged combustion door, stripped brass threads, or a yellow flame requires stopping the repair and calling a qualified technician.
Never bypass a thermocouple, thermal cutoff, flame sensor, or gas-valve safety circuit.
What Does a Water-Heater Thermocouple Do?
A water-heater thermocouple detects whether the pilot flame is present and generates the voltage needed to hold the gas control valve’s safety magnet open. When the pilot goes out, the thermocouple cools, its output falls, and the spring-loaded safety valve closes the gas supply to the pilot.
A standard thermocouple contains dissimilar metal conductors joined at a probe tip. Heat at the junction creates voltage through the Seebeck effect. The signal is small, but it is sufficient for the pilot-safety electromagnet in many standing-pilot gas controls.
The sequence is simple:
- You press and hold the gas-control knob in the pilot position.
- Gas reaches the pilot burner.
- The ignited pilot flame heats the thermocouple tip.
- The heated sensor generates millivolts.
- The gas valve holds open after you release the knob.
- If the flame disappears, the sensor cools and the valve closes.
A thermocouple does not regulate water temperature, measure tank temperature, or ignite the pilot. The thermostat and gas control perform those functions. The thermocouple is a flame-presence safety device.
Which Sensor Does Your Water Heater Use?
A standard thermocouple has a single copper-colored lead and a probe positioned beside the pilot. A thermopile, sometimes called a millivolt generator, generally has a larger probe or multiple wires and powers a more demanding gas-control circuit.
| Sensor system | Typical output | Common identifying feature | Correct replacement approach |
|---|---|---|---|
| Standard thermocouple | 20-30 mV open circuit | One copper lead with threaded nut | Universal or OEM part with matching connector |
| Thermopile generator | 250-750 mV, model dependent | Larger probe or two-wire lead | Exact model-compatible thermopile |
| Flame rod sensor | Electrical signal, not thermoelectric mV | Usually a single insulated wire and metal rod | Manufacturer-specific flame-sensor part |
| Sealed burner assembly | Manufacturer-specific | Sensor integrated with burner door or bracket | Complete OEM assembly when specified |
The AI Overview’s 500-750 mV thermopile range is a useful general reference, not a universal pass-fail rule. Some controls specify different minimums, and a thermopile’s loaded output can differ substantially from its open-circuit output. Use the water-heater service manual for the exact test.
An electric water heater does not use a gas thermocouple. It has heating elements, thermostats, high-limit switches, and electrical wiring. Do not buy a gas thermocouple for an electric model.
How do you choose the correct replacement?
Choose a thermocouple by appliance model, connector thread, probe bracket, lead length, and routing requirements. A 24-inch universal part may fit many standing-pilot heaters, but “universal” does not guarantee the correct connector or probe geometry.
Record the following before removal:
- Water-heater manufacturer and model number
- Fuel type, natural gas or propane
- Existing lead length and connector style
- Probe shape and mounting clip
- Whether the sensor passes through a thermal cutoff switch
- Whether the burner door uses a gasket or sealed-combustion design
Buy a replacement at least as long as the original, but avoid excessive slack. Common lengths include 18, 24, and 30 inches. Do not splice a thermocouple lead, substitute ordinary copper wire, or sharply bend the capillary-style lead.
Before You Start
A typical thermocouple replacement requires 30-60 minutes, basic hand tools, a compatible sensor, and a leak-detection solution. The work is suitable only for a conventional gas water heater with accessible fittings and an intact combustion chamber.
| Requirement | Typical specification | Practical note |
|---|---|---|
| Replacement thermocouple | $15-$40 | Match model, connector, length, and bracket |
| Wrenches | 3/8-inch, 7/16-inch, 1/2-inch | Use the size that fits without rounding nuts |
| Screwdriver | Phillips or flathead | Needed for access-door screws |
| Leak detector | Commercial fluid or soap solution | Never use a flame to find a leak |
| Digital multimeter | Millivolt DC range | Optional for basic replacement, useful for diagnosis |
| Cooling period | At least 20 minutes | Wait longer if the burner or door remains hot |
Before touching the heater, identify the manual gas shutoff valve on the supply pipe. A lever parallel with the pipe commonly indicates open, while a lever perpendicular to the pipe commonly indicates closed, but valve designs vary.
Stop immediately if you smell gas, hear hissing, see damaged tubing, find a cracked burner door, or cannot identify the gas shutoff. Do not operate electrical switches near a strong gas odor. Leave the area, call the gas utility or emergency service from a safe location, and follow local instructions.
How to Replace a Thermocouple on a Water Heater
The replacement sequence has six stages: isolate the fuel, disconnect the valve connections, remove the burner assembly, exchange and position the probe, reassemble and leak-test, then relight and verify combustion. The most important success factor is not tightening force; it is placing the new tip in the correct part of the pilot flame.
Step 1: Shut Off Gas and Cool the Heater
Turn the gas-control knob to OFF, then close the manual gas shutoff valve on the supply pipe. Allow the burner compartment and connected metal parts to cool for at least 20 minutes before opening the access area.
Do not rely on the control knob alone. The control knob stops normal gas operation, while the manual shutoff isolates the appliance from the supply line.
Success checkpoint: The control is OFF, the manual valve is closed, and no burner flame remains.
Common mistake: Starting while the burner assembly is hot can burn skin, damage a replacement lead, or ignite vapors during later testing.
Step 2: Photograph and Identify the Connections
Remove the outer access cover and take a clear photograph of the burner and gas-control connections. Identify the thermocouple nut, pilot-tube fitting, and main burner-tube fitting before loosening anything.
The thermocouple connection is usually a small nut attached directly to the underside or side of the gas control. The pilot tube is a narrow metal tube, and the main burner tube is larger. Never confuse the thermocouple lead with a gas tube.
Success checkpoint: You can trace the old sensor from the gas valve to the pilot bracket, and every connection is documented.
Common mistake: Pulling on the copper lead instead of loosening its valve nut can kink or fracture the internal conductor.
Step 3: Disconnect the Old Thermocouple
Use the correctly sized open-end wrench to loosen the thermocouple nut at the gas control valve. Turn only the nut, not the valve body or the lead. After the nut is free, release the lead from clips or retainers along its route.
Most basic replacements do not require disconnecting the main burner tube or pilot tube. Some burner trays slide out only after those connections are removed, while other heaters permit access without disturbing gas tubing. Follow the manufacturer’s service instructions.
Success checkpoint: The old thermocouple is electrically and mechanically free, with no bent gas tubing or damaged valve threads.
Common mistake: Using an adjustable wrench with excessive force can round the soft brass nut. A flare-nut wrench is preferable when the fitting permits it.
Step 4: Remove and Replace the Flame Probe
Locate the old probe beside the pilot burner. Release it from the retaining clip by pulling or twisting in the direction permitted by the bracket, then install the new probe in the same orientation and depth.
Route the replacement lead along the original path with broad curves. Keep the lead away from the main burner flame, sharp sheet-metal edges, and surfaces that can pinch it when the door closes. Do not coil it tightly or create a sharp 90-degree bend.
The top portion of the probe must sit in the pilot flame. Many conventional systems place roughly the upper 3/8-1/2 inch in the blue flame, but the bracket and appliance manual take priority over a generic measurement.
Success checkpoint: The probe is secure, the lead is unstrained, and the pilot flame will contact the upper probe when lit.
Common mistake: Positioning the sensor beside the flame rather than inside it causes low output even when the new part is electrically sound.
Step 5: Reassemble and Leak-Test the Connections
Reconnect the thermocouple nut by hand until the threads engage smoothly. Tighten it with a wrench only enough to seat the connection according to the manufacturer’s instructions. Thermocouple nuts commonly need a modest final tightening, not the force used on a water-pipe fitting.
If you removed the pilot or burner tubing, start every fitting by hand. Do not apply pipe thread sealant to a thermocouple connection, and do not use thread tape where the fitting design does not call for it.
Open the manual gas valve, then apply approved leak-detection fluid or a soap-and-water solution to each disturbed gas fitting. Watch for at least 60 seconds. Growing bubbles indicate leakage.
| Test result | Meaning | Required response |
|---|---|---|
| No bubbles for 60 seconds | No visible leak at that moment | Wipe fluid away and proceed |
| One stable foam bubble | Possible trapped air or poor observation | Clean, reapply, and retest |
| Growing or multiplying bubbles | Active gas leak | Close gas valve and stop |
| Gas odor after testing | Possible leak or residual gas | Close valve, ventilate safely, call for help |
If bubbles grow, close the manual gas valve and do not light the pilot. A slight retightening may correct a fitting, but repeated leakage, cross-threading, or a damaged flare requires a qualified gas technician. Never test a gas connection with a match or lighter.
Success checkpoint: Every disturbed fitting remains bubble-free, and the burner door and gasket are correctly installed.
Common mistake: Lighting the pilot before leak testing creates an avoidable ignition hazard.
Step 6: Relight the Pilot and Verify Operation
Follow the lighting instructions printed on the water heater. A common procedure is to turn the control to PILOT, press and hold the knob, operate the piezo igniter, and continue holding the knob for 30-60 seconds after the pilot ignites.
Release the knob slowly. The pilot should remain steady. Turn the control to ON only after confirming that the pilot stays lit, then observe the main burner through the sight glass or approved viewing area.
A healthy pilot is generally steady and blue, with the thermocouple tip immersed in its hottest region. A lazy yellow flame, flame rollout, soot, repeated ignition failure, or unusual burner noise is not a successful repair.
Success checkpoint: The pilot remains lit after release, the main burner ignites smoothly, and no gas odor is present.
Common mistake: Releasing the knob after only 5-10 seconds may not give the sensor enough time to produce stable voltage.
How Can You Test a Thermocouple?
A thermocouple can be tested with a digital multimeter set to DC millivolts, but the test must match the manufacturer’s procedure. An open-circuit reading around 20-30 mV is typical for a heated standard sensor; a low reading suggests a sensor, flame, connection, or positioning problem.
For an open-circuit test:
- Shut off gas and let the assembly cool before disconnecting the sensor.
- Disconnect the thermocouple from the gas valve.
- Place one meter probe on the thermocouple copper lead and the other on the probe tip.
- Heat the tip in the pilot flame while holding the gas control in the pilot position.
- Read the DC millivolt output after the sensor has heated for about 60 seconds.
Do not hold the probe by hand in the flame. Avoid shorting the meter probes against the burner.
| Open-circuit reading | Likely interpretation | Next diagnostic action |
|---|---|---|
| Below 10 mV | Very weak or failed sensor | Check flame contact, clean connection, replace sensor |
| 10-19 mV | Marginal output | Compare with manual, inspect pilot and lead |
| 20-30 mV | Typical healthy range | Suspect gas valve, connection, or loaded-circuit fault |
| Above 30 mV | Possible healthy output | Verify appliance-specific specification |
| 250-750 mV | Likely thermopile range | Use thermopile procedure, not thermocouple procedure |
Open-circuit voltage alone cannot prove that the gas valve’s electromagnet is healthy. A sensor can produce acceptable voltage without maintaining the required voltage under load, and a loose, dirty, or over-tightened connection can interrupt the signal.
Why Does the Pilot Still Go Out After Replacement?
A pilot that goes out after a new thermocouple is installed does not prove the replacement part is defective. The most common alternative causes are poor flame contact, a restricted pilot orifice, a draft, a tripped thermal cutoff, a damaged lead, or a failing gas-control valve.
| Symptom after replacement | Most likely cause | Safe next step |
|---|---|---|
| Pilot dies while knob is held | No pilot gas, air, blocked orifice, weak supply | Stop and inspect according to manual |
| Pilot dies immediately on release | Sensor not heated or poor connection | Recheck position and connector |
| Pilot dies after several minutes | Draft, overheating, TCO, venting fault | Stop operation and call a technician |
| Yellow or lifting pilot flame | Dirty orifice, incorrect gas pressure, combustion fault | Do not operate until diagnosed |
| Good 25 mV reading, valve drops out | Gas-control electromagnet or loaded connection | Professional gas-valve diagnosis |
| No millivolt output | Open lead, wrong sensor, failed probe | Check continuity and replacement match |
A steady blue pilot flame must directly heat the thermocouple tip. Soot on the probe can reduce heat transfer, but repeated soot formation usually signals combustion, venting, or gas-pressure trouble rather than a simple dirty sensor.
Some sealed-combustion heaters include a thermal cutoff switch in the burner-door circuit. A tripped switch can mimic a failed thermocouple. Reset only a clearly identified resettable device if the appliance manual authorizes it; never bypass the switch or continue operating if the chamber overheated.
What should you do if a fitting is stripped?
Stop if a brass thermocouple or gas fitting spins, cross-threads, leaks, or cannot be tightened without force. A stripped gas-control port may require replacement of the valve, and forcing the nut can create a leak that is harder to detect after reassembly.
Do not use epoxy, oversized washers, pipe sealant, or thread tape to repair a damaged flare or thermocouple connection. Gas-control components require the correct fitting geometry and approved replacement parts.
Variations and Limits
Sealed-combustion water heaters often use a burner-door gasket, sight glass, thermal cutoff, and integrated sensor arrangement. Removing the door or disturbing the gasket can compromise combustion containment, so the exact service procedure matters more than a generic universal-thermocouple guide.
Propane heaters may use different orifices, gas pressures, and burner assemblies from natural-gas heaters. The thermocouple principle is similar, but fuel conversion components must never be improvised.
Some manufacturers sell the sensor as part of a complete burner assembly. If the model manual specifies an OEM assembly, install that assembly rather than forcing a universal probe into a bracket designed for a different flame pattern.
A water heater under warranty may require an authorized part or service provider. Photograph the model and serial label before buying parts, because a low-cost universal sensor can still be the wrong repair.
Common Mistakes and How to Fix Them
- Replacing the wrong sensor: Confirm whether the heater has a thermocouple, thermopile, flame rod, or integrated burner assembly before ordering.
- Leaving the tip outside the flame: Reinstall the probe at the original bracket depth, with the upper tip inside the blue pilot flame.
- Kinking the lead: Replace a sharply kinked or crushed sensor rather than trying to straighten it repeatedly.
- Cross-threading the valve: Remove the nut, inspect the threads, and restart it by hand. Stop if it does not turn smoothly.
- Skipping leak testing: Close the gas valve, apply leak fluid to every disturbed joint, and observe for growing bubbles.
- Ignoring flame color: A yellow, unstable, or lifting flame indicates a combustion problem that a new thermocouple will not cure.
A useful practitioner rule is to change only one variable at a time. If the pilot remains unreliable, record the flame appearance, millivolt result, connection condition, and timing of shutdown before replacing another component.
Time, Cost, and Repair Decision
A straightforward conventional replacement commonly takes 30-60 minutes and costs $15-$40 for the part. Professional service commonly totals $125-$250, while a gas-control valve, sealed burner assembly, or venting repair can increase the bill substantially.
| Repair situation | Typical part cost | Typical labor time | DIY suitability |
|---|---|---|---|
| Universal standard thermocouple | $15-$25 | 30-45 minutes | Reasonable for experienced homeowners |
| OEM thermocouple | $25-$50 | 45-60 minutes | Depends on access and instructions |
| Thermopile generator | $30-$80 | 45-90 minutes | Model-specific procedure required |
| Gas-control valve diagnosis or replacement | $100-$350 part | 1-3 hours | Licensed technician recommended |
| Sealed burner-door assembly | $75-$250 | 1-2 hours | Use manufacturer procedure |
The lowest-cost repair is not always the safest option. Hire a qualified professional when the heater is sealed combustion, the gas odor persists, a fitting is damaged, the pilot flame is abnormal, the thermal cutoff trips again, or the gas valve appears faulty.
FAQ
Can I clean a thermocouple instead of replacing it?
Cleaning may remove light surface contamination, but it will not repair an open circuit, internal damage, or a weakened junction. Turn off gas, let the sensor cool, and follow the manufacturer’s cleaning instructions. If the pilot remains unreliable after correct cleaning and positioning, replacement or professional diagnosis is appropriate.
How long does a water-heater thermocouple last?
A thermocouple often lasts several years, but service life varies with burner cycles, flame quality, corrosion, lead stress, and combustion conditions. A sensor that fails repeatedly within months points to a larger problem, such as a dirty pilot orifice, excessive heat, poor venting, or a defective gas control.
Can a universal thermocouple fit every gas water heater?
No. Universal thermocouples fit many conventional standing-pilot systems, but connector threads, lengths, brackets, burner access, and thermal-cutoff arrangements differ. Match the model and existing configuration first. Thermopiles, flame rods, and integrated burner assemblies generally require model-specific parts.
Why does the pilot stay lit only while I hold the knob?
The pilot stays lit only while the knob is held when the safety circuit has not established sufficient holding voltage. Causes include a misaligned or failed thermocouple, weak pilot flame, loose connection, tripped cutoff, damaged wiring, or a failing gas-valve magnet. Test in that order rather than assuming the sensor is the only fault.
Is replacing a thermocouple dangerous?
The repair involves combustible gas, hot surfaces, and combustion equipment, so incorrect work can cause fire, explosion, carbon-monoxide exposure, or a gas leak. A homeowner should stop when gas odor, damaged fittings, abnormal flame, sealed-door damage, or unclear instructions are present. Never bypass a safety control.
Conclusion: How to Replace a Thermocouple on a Water Heater Successfully
To replace a thermocouple on a water heater successfully, identify the sensor type, shut off and cool the appliance, install a model-compatible probe, place its tip correctly in the pilot flame, hand-start every fitting, leak-test before ignition, and verify stable pilot and burner operation. A replacement sensor cannot correct a blocked pilot, poor combustion, failed gas valve, or damaged safety circuit.