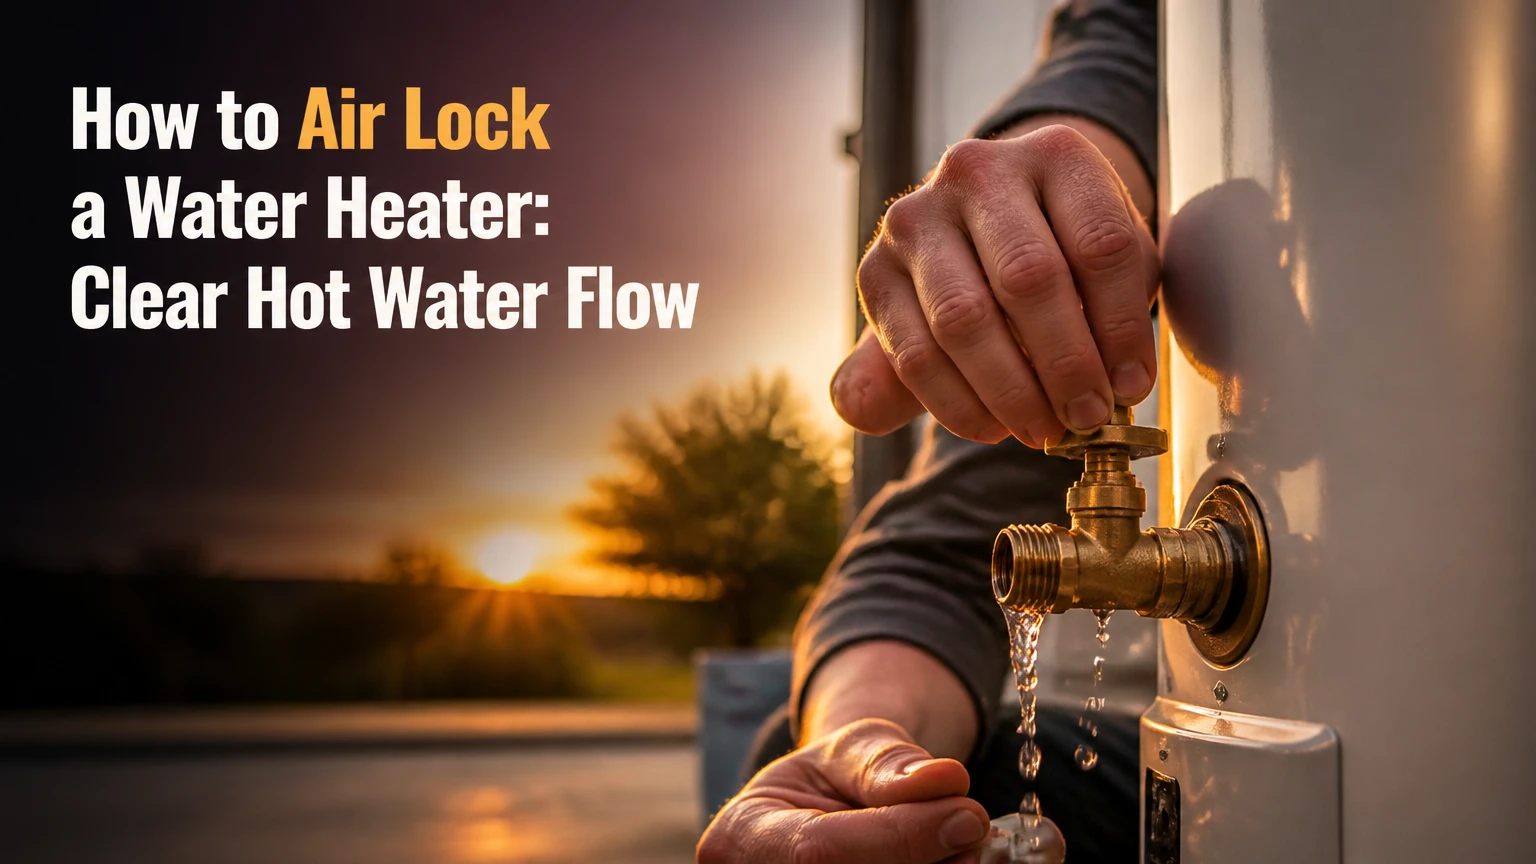
To clear an air lock in a water heater system, turn off the heater, open the affected hot-water fixture, and briefly force water backward through a compatible mixer tap or hose connection. Restore normal flow, then refill and restart the heater according to its manual. The safest method depends on the plumbing system, pressure, and heater type.
Key Facts at a Glance
An air lock usually sits in a hot-water pipe, not inside the storage tank itself.
A mixer-tap reverse-flow purge often takes 15-30 seconds and needs no special tool.
An electric heater must be completely full before power returns, or an exposed element can fail rapidly.
A T&P relief valve is a safety device, not a routine air-bleeding point.
A tankless heater needs a different procedure because its heat exchanger and flow sensor require continuous water flow.
If the fault returns after purging, inspect for a leak, check-valve problem, pipe sag, cartridge fault, or scale restriction.
What Is an Air Lock in a Water Heater System?
An air lock is a trapped pocket of air that interrupts water movement through a hot-water line. The bubble commonly forms at a pipe’s highest point, a sharp upward loop, a flexible-pipe sag, or a section opened during maintenance; incoming water then compresses the air instead of producing a steady stream.
A storage water heater can remain full while the hot-water outlet pipe contains air. That distinction matters because draining and refilling the tank may introduce air into the distribution piping without creating an empty tank. In a gravity-fed installation, the bubble may stop flow from a cylinder to one or more outlets. In a pressurized municipal installation, a pressure imbalance, blocked cartridge, or closed valve can produce identical symptoms.
How Does Trapped Air Stop Hot Water?
Water pressure moves the liquid column until pressure on both sides of the air pocket becomes nearly equal. The air pocket then behaves like a flexible plug, producing sputtering, a weak stream, or no hot water at all while cold water remains normal.
An air lock is more likely after a tank drain, supply interruption, plumbing alteration, or rapid refill. A high-point pipe with no effective vent is the usual physical location. The same symptom can also come from a clogged aerator, thermostatic cartridge, shutoff valve, sediment-filled outlet, or failed tempering valve, so purging is a diagnosis, not proof.
How Do You Confirm the Problem Is an Air Lock?
An air lock is likely when one or more hot fixtures sputter, hiss, or stop after plumbing work while cold flow remains strong. Open the affected outlet briefly and compare it with another hot fixture; the pattern helps separate a local fixture restriction from a distribution-pipe problem.
Use these observations before connecting anything:
| Observation | Likely location | First check | Typical next action |
|---|---|---|---|
| One hot tap weak, other hot taps normal | Faucet or branch pipe | Aerator, cartridge, angle stop | Clean fixture before purging |
| Every hot tap weak after draining | Main hot outlet or high point | Heater isolation valve, refill state | Purge the hot distribution line |
| Hot flow pulses with air after supply outage | Hot branch or high loop | Recent shutoff work | Use a mixer purge or fixture bleed |
| Cold and hot both weak at one outlet | Faucet or supply branch | Aerator and shutoff valves | Do not assume an air lock |
| No hot flow, heater makes normal heat | Hot outlet pipe or mixing valve | Outlet valve and tempering valve | Purge, then inspect the valve |
| No hot flow and heater does not heat | Heater control or fuel supply | Breaker, gas valve, error code | Follow heater troubleshooting, not air-lock steps |
A useful practitioner rule is to test the nearest hot fixture and the farthest hot fixture separately. If only one branch fails, forcing mains pressure through the entire system adds risk without solving the local restriction.
How to Air Lock a Water Heater Safely
The most suitable DIY procedure is usually the mixer-tap method because it uses a short, controlled pressure reversal. Separate hot and cold taps may require a dedicated hose connection, while a tankless heater, open-vented cylinder, well pump, or unusual cross-connection requires extra caution.
Before You Start
| Requirement | Typical value | Why it matters |
|---|---|---|
| DIY working time | 5-15 minutes | Covers one or two purge attempts |
| Professional diagnostic time | 30-60 minutes | Includes flow testing and inspection |
| DIY equipment cost | $0-$25 | Existing cloth, hose, or adjustable wrench |
| Plumber cost, typical US range | $100-$250 | Varies by region, access, and repair scope |
| Purge burst | 5-10 seconds | Limits pressure and overflow risk |
| Mixer pressure hold | 15-20 seconds | Gives the bubble time to move |
| Required prerequisite | Cold supply open | Reverse flow needs a live cold-water source |
Have an absorbent cloth, flashlight, small bucket, and adjustable wrench available. A washing-machine hose can connect some fixtures, but it is not automatically safe for every tap, thread, or pressure arrangement. Never improvise a connection that can detach under mains pressure.
Before touching the plumbing, identify the heater type:
| Heater type | Safe initial control | Main air-lock concern | Restart condition |
|---|---|---|---|
| Electric storage tank | Switch breaker or isolator off | Dry-firing the element | Tank fully full, hot tap steady |
| Gas storage tank | Set control to vacation or follow manual | Burner must not operate during work | Pilot and controls restored per manual |
| Tankless gas | Close gas control only as manual directs | Flow sensor and heat exchanger need flow | No error code, uninterrupted water flow |
| Tankless electric | Turn off breaker or service disconnect | Elements can energize with poor flow | Manufacturer filling and reset sequence |
| Open-vented cylinder | Isolate heat source | Header tank and vent can overflow | Steady outlet flow and normal venting |
| Indirect cylinder | Disable boiler or heat source | Stored hot water may remain scalding | Heating controls restored after checks |
Step 1: Turn Off the Heater and Prevent Scalding
Turn off the electrical breaker or local isolator for an electric heater. For gas and boiler-connected equipment, use the manufacturer’s shutdown procedure rather than closing random gas or water valves. Let recently heated water cool, or use gloves and a bucket because trapped water can exceed 120°F (49°C).
Do not drain the tank to clear a pipe air lock unless the manufacturer’s procedure specifically requires it. Draining creates more air, wastes water, and can turn a simple distribution fault into a refill problem.
You’ll know this step is complete when: the heater cannot call for heat and the affected outlet produces water that can be handled safely.
Common mistake: switching off a nearby wall switch while leaving a second electrical isolator energized. Confirm the correct breaker or disconnect.
Step 2: Open the Affected Hot Fixture
Open the affected hot tap fully. Remove the aerator only if it is visibly clogged, because a blocked aerator can make the symptom appear to be an air lock. Place a cloth over the outlet if splashing is likely.
For a whole-house interruption, open the highest or farthest hot fixture first, then open additional hot outlets. Do not open the T&P relief valve. The relief valve protects against excessive temperature and pressure, and repeated manual lifting can cause it to leak afterward.
You’ll know this step is complete when: the hot side is open and there is a clear escape route for air and water.
Common mistake: closing the hot outlet while applying reverse pressure. Without an open escape path, the bubble cannot move predictably.
Step 3: Use the Mixer-Tap Reverse-Flow Method
Use this method only with a single-handle or two-handle mixer tap whose hot and cold inlets share one outlet. Press a thick wet cloth firmly over the spout, or use your palm if you can maintain a complete seal without placing fingers near hot water. Open the hot side fully, then open the cold side slowly for 15-20 seconds.
Cold mains pressure may travel backward through the mixer and into the hot line, displacing the trapped air toward the heater or another open outlet. Close the cold side first, wait a few seconds, then remove the seal and close the hot side. Repeat once if the flow improves but still sputters.
You’ll know this step worked when: the hot stream becomes continuous, air stops hissing, and flow remains stable for at least 30 seconds.
Common mistake: holding the cold side open for minutes. A short burst is more controlled and reduces leakage, pressure stress, and unwanted cross-flow.
Step 4: Purge Multiple Fixtures in Sequence
If several hot fixtures are affected, open the farthest hot tap first and then work toward the heater. Leave each outlet open until its stream becomes steady, but stop if flow does not improve after 2-3 minutes. Close fixtures in the reverse order, from the nearest outlet to the farthest.
This procedure helps after a normal refill because it gives displaced air several escape routes. It cannot reliably remove a bubble trapped behind a closed valve, a failed check valve, or a pipe loop that has no usable outlet.
You’ll know this step worked when: every tested hot fixture delivers a steady stream without repeated bursts of air.
Common mistake: opening every tap simultaneously and assuming more flow always means more clearing force. Multiple outlets can reduce the pressure available to move a stubborn bubble.
Step 5: Refill and Restart the Heater
Keep a hot tap open while confirming that the heater’s cold-water supply valve is open. Wait until water runs continuously without sputtering, then close the tap. Restore electrical, gas, or boiler controls only after the tank or heat exchanger has been filled according to the manufacturer’s instructions.
For an electric storage heater, the tank must be full before the breaker is turned on. A heating element exposed to air can overheat and fail. For a gas or tankless model, follow the ignition, purge, and error-reset steps in the installation manual rather than repeatedly cycling controls.
You’ll know this step worked when: hot flow is steady, the heater operates without an error code, and no valve or fitting leaks.
Common mistake: restoring power immediately after water first appears. Early flow can still contain air, leaving the element or flow sensor inadequately wetted.
When Should You Use a Hose Instead of a Mixer Tap?
Use a hose-based reverse-pressure purge only when the fixture and plumbing arrangement are designed for a secure connection, the cold supply and hot line are compatible, and local plumbing rules permit the temporary cross-connection. A loose hose can spray, detach, or create an unsanitary connection between hot and cold supplies.
A washing-machine hose is sometimes used between a cold mains tap and a hot tap with separate connections. Turn the heater off, open the affected hot tap, secure both hose ends, open the hot side, and apply cold pressure in bursts of 5-10 seconds. Close the cold side first, inspect for leaks, and test the hot outlet.
Do not use this method on an unknown closed-loop system, a high-pressure commercial installation, a boiler circuit, or a gravity-fed header arrangement without professional guidance. The AI Overview’s suggestion that reverse flow will push air “back into the header tank” applies only to certain open-vented layouts. A typical sealed US domestic water system has no header tank for that air to enter.
| Purge method | Equipment | Typical duration | Suitable system | Principal risk |
|---|---|---|---|---|
| Mixer-tap seal | Cloth or hand | 15-20 seconds | Compatible domestic mixer | Incomplete seal or cartridge damage |
| Separate-tap hose | Rated hose and secure fittings | 5-10-second bursts | Compatible dual-tap fixture | Detachment and cross-connection |
| Fixture purge | Several hot outlets | 2-10 minutes | Distribution line after refill | Water waste and limited pressure |
| Professional isolation purge | Test hoses and valves | 30-60 minutes | Complex or recurring faults | Requires trained diagnosis |
The hose method is not automatically stronger in a useful way. It is stronger in pressure, which is precisely why an unsecured connection or inappropriate system can suffer damage.
What If the Water Heater Is Tankless?
A tankless water heater can experience air in its water path after installation, service, draining, or a supply interruption, but a no-flow symptom more often involves a closed isolation valve, clogged inlet filter, scale, failed flow sensor, or control error. Do not treat a tankless unit like a storage tank.
Turn off the electrical disconnect and gas supply only as specified by the manual. Open a hot fixture, confirm the cold isolation valve is open, and inspect the manufacturer-provided service valves and inlet filter. If the unit has a built-in purge or flushing arrangement, use that procedure with the specified cleaning solution and flow direction.
| Tankless symptom | More likely cause | User check | Service threshold |
|---|---|---|---|
| No hot flow, cold flow normal | Closed hot isolation valve | Handle alignment | Call if valve will not open |
| Flow starts, then heater errors | Low flow or sensor issue | Inlet filter and aerator | Service if code returns |
| Sputtering after installation | Air in line or incomplete purge | Open hot fixture steadily | Purge per manual |
| Hot water temperature fluctuates | Scale or low flow | Filter and multiple fixtures | Descale if maintenance is due |
| Water leaks at service ports | Loose cap or valve seal | Visible inspection only | Shut down and call a professional |
Never run a tankless burner or electric heating module with uncertain water flow. The unit’s safeguards may prevent damage, but repeated error resets do not repair the underlying restriction.
Why Does the Air Lock Keep Coming Back?
A recurring air lock usually indicates an unresolved plumbing fault rather than a difficult bubble. Common causes include a suction-side leak on a pumped system, a loose fitting that admits air, a pipe sag that recreates a high pocket, a failing check valve, or repeated draining without controlled refilling.
Inspect visible joints for dampness, but remember that an air leak can admit air without releasing enough water to leave a wet mark. Check flexible tubing for unsupported dips, verify that shutoff valves open fully, and compare the timing of the fault with water outages or pump cycling.
A recurring fault can also be misdiagnosed sediment. Scale in a faucet cartridge, tempering valve, tank outlet, or tankless heat exchanger can restrict hot flow while producing hiss-like noise. Purging cannot dissolve that obstruction.
| Repeating symptom | Probable fault | Diagnostic clue | Corrective direction |
|---|---|---|---|
| Air returns after every outage | Refill or high-point problem | Begins after supply restoration | Controlled refill and pipe inspection |
| Air appears near a pump | Suction-side leak | Pump sounds rough or loses prime | Professional pump and fitting test |
| Hot weak, cold strong permanently | Cartridge, valve, or scale | No recent drain or outage | Clean or replace restriction |
| Flow improves when pipe is lifted | Unsupported pipe sag | Flexible tubing forms a dip | Re-support and correct gradient |
| Several fixtures fail after maintenance | Main hot branch air | Failure begins immediately after work | Purge branch, inspect isolation valves |
| Heater cycles with low flow | Filter, sensor, or scale | Tankless error code appears | Service according to manual |
Common Mistakes and How to Fix Them
Leaving an Electric Heater Energized
A dry electric element can fail when it heats without surrounding water. Turn off the breaker before purging and restore it only after a steady, air-free hot stream confirms the tank is full.
Using the T&P Relief Valve as a Bleed Point
The temperature-and-pressure relief valve is engineered to discharge dangerous excess pressure or temperature. It is not a routine vent, and manually operating an older valve can leave it dripping. Replace a leaking relief valve with the correct rated part rather than forcing it shut.
Creating an Uncontrolled Cross-Connection
Connecting cold and hot fixtures with a hose can allow backflow if the arrangement lacks suitable protection. Use only secure, clean, rated components, keep the purge brief, and stop immediately if a fitting shifts or leaks.
Assuming Every Weak Stream Is an Air Lock
A faucet aerator, cartridge, tempering valve, inlet screen, or shutoff valve can cause the same complaint. Test another hot outlet before applying reverse pressure.
Refilling Too Quickly
Opening the main supply abruptly can trap air in high loops and cause water hammer. Refill gradually with a high hot outlet open, then check every fixture before restarting the heater.
Repeating the Same Purge Indefinitely
Two controlled attempts are reasonable for a recent refill-related fault. If the symptom persists, further pressure reversal wastes water and can hide a mechanical restriction.
How Can You Prevent Future Air Locks?
Prevent air locks by controlling refills, supporting hot-water piping, and providing an approved venting or purging arrangement at high points where the system design requires one. Automatic air-admittance valves are not universal replacements for correctly graded pipework, and local code may restrict their use on hot-water systems.
Use this maintenance sequence after service:
- Turn off the heat source before draining.
- Open the highest hot fixture before refilling.
- Reopen the cold supply slowly.
- Keep the outlet open until water runs steadily.
- Inspect joints, valves, and flexible tubing.
- Test the nearest and farthest hot fixtures.
- Restart the heater under its manual’s procedure.
A practical installer’s rule is that every intentional high point should have a deliberate way for air to leave. Retrofitting a vent without understanding the system can introduce a leak or contamination path, so a plumber should design additions to open-vented or recirculating systems.
How Much Does Clearing an Air Lock Cost?
A simple DIY purge typically costs $0-$25 and takes 5-15 minutes. A plumber’s diagnostic visit commonly costs $100-$250 in the United States, while repairs involving a failed valve, pipe alteration, pump, or tankless descaling can raise the total to $250-$800 or more.
Prices vary by location, access, emergency timing, and whether the technician finds a separate fault. A successful purge should not be billed as a water-heater replacement. Ask whether the quote includes flow testing, valve inspection, leak detection, and any required parts.
| Service scope | Typical time | Typical US cost | What the price may include |
|---|---|---|---|
| DIY mixer purge | 5-15 minutes | $0-$10 | Cloth, bucket, basic inspection |
| DIY hose purge | 10-20 minutes | $10-$25 | Rated hose or replacement washer |
| Plumber diagnosis | 30-60 minutes | $100-$250 | Flow test and visual inspection |
| Valve or cartridge repair | 1-2 hours | $175-$450 | Part, labor, and testing |
| Tankless flush | 45-90 minutes | $150-$400 | Descaling equipment and solution |
| Pipe or pump repair | 1-4 hours | $250-$800+ | Access, fittings, labor, and testing |
These are typical planning figures, not fixed prices. A concealed leak or damaged heater may require a separate estimate.
When Should You Call a Plumber?
Call a licensed plumber when reverse-flow purging fails twice, the relief valve leaks, water appears near electrical components, a gas odor is present, the system is commercial or high pressure, or the air lock returns repeatedly. Professional help is also appropriate when you cannot identify the heater’s isolation valves.
Stop immediately and leave the area if you smell gas. Do not operate electrical switches near standing water. A plumber can measure pressure, isolate branches, test check valves, inspect pipe gradients, clean cartridges and inlet screens, and determine whether scale is impersonating an air lock.
Open-vented cylinders, well-pump systems, solar thermal systems, boiler loops, and shared-building plumbing require system-specific procedures. The correct purge direction in one design can force water into an overflow or create a contamination risk in another.
FAQ
Can I Clear an Air Lock Without Turning Off the Water Heater?
You should turn off the heat source before purging because water flow may be interrupted or air may remain near a heating element. Electric storage heaters carry the greatest dry-fire risk. Gas and tankless units also require their manufacturer’s shutdown and restart procedure before you manipulate the plumbing.
Does Opening All Hot Taps Remove an Air Lock?
Opening several hot taps can release air introduced during a normal refill, especially when the farthest or highest outlet opens first. The method will not reliably clear air trapped behind a closed valve, a check valve, or a badly sagging pipe. If flow remains absent after several minutes, investigate the restriction.
Can a Water Heater Air Lock Damage the Unit?
An air lock in a hot distribution pipe usually does not damage a storage tank by itself. Damage can occur when an electric element is energized while the tank is not full, or when a tankless unit operates with inadequate flow. Turning off the heat source first prevents the most common user-caused damage.
Why Does Cold Water Work but Hot Water Does Not?
Cold water can remain normal when the obstruction is in the hot outlet pipe, a tempering valve, a hot-side cartridge, or the heater’s outlet connection. A trapped air pocket is one possibility. Compare multiple hot fixtures and inspect the heater isolation valve before using reverse pressure.
Can I Use an Air Compressor to Blow Out the Hot-Water Line?
Do not inject compressed air into ordinary domestic plumbing unless a qualified professional has designed the procedure. Compressed air stores far more energy than a brief water-pressure pulse, can damage fixtures or valves, and may create unsafe cross-connections. Use controlled water pressure or the manufacturer’s purge method instead.
How Long Should I Wait Before Restarting the Heater?
Wait until the affected hot outlet produces a continuous stream without sputtering, then follow the heater manual’s filling and restart instructions. For an electric storage heater, steady water from a hot tap is the practical confirmation that the tank has filled, but inspect for leaks before restoring power.
The Bottom Line
To clear an air lock in a water heater system, shut off the heat source, open the affected hot fixture, and use a short mixer-tap reverse purge when the plumbing is compatible. A fixture purge can clear air after refilling, while a secure hose method may help separate-tap systems. If the fault persists, diagnose valves, scale, pipe sags, leaks, and tankless flow controls instead of repeatedly forcing pressure. Include the exact keyword naturally in your troubleshooting notes: knowing how to air lock a water heater is useful only when the fault is truly trapped air and the procedure matches the system.