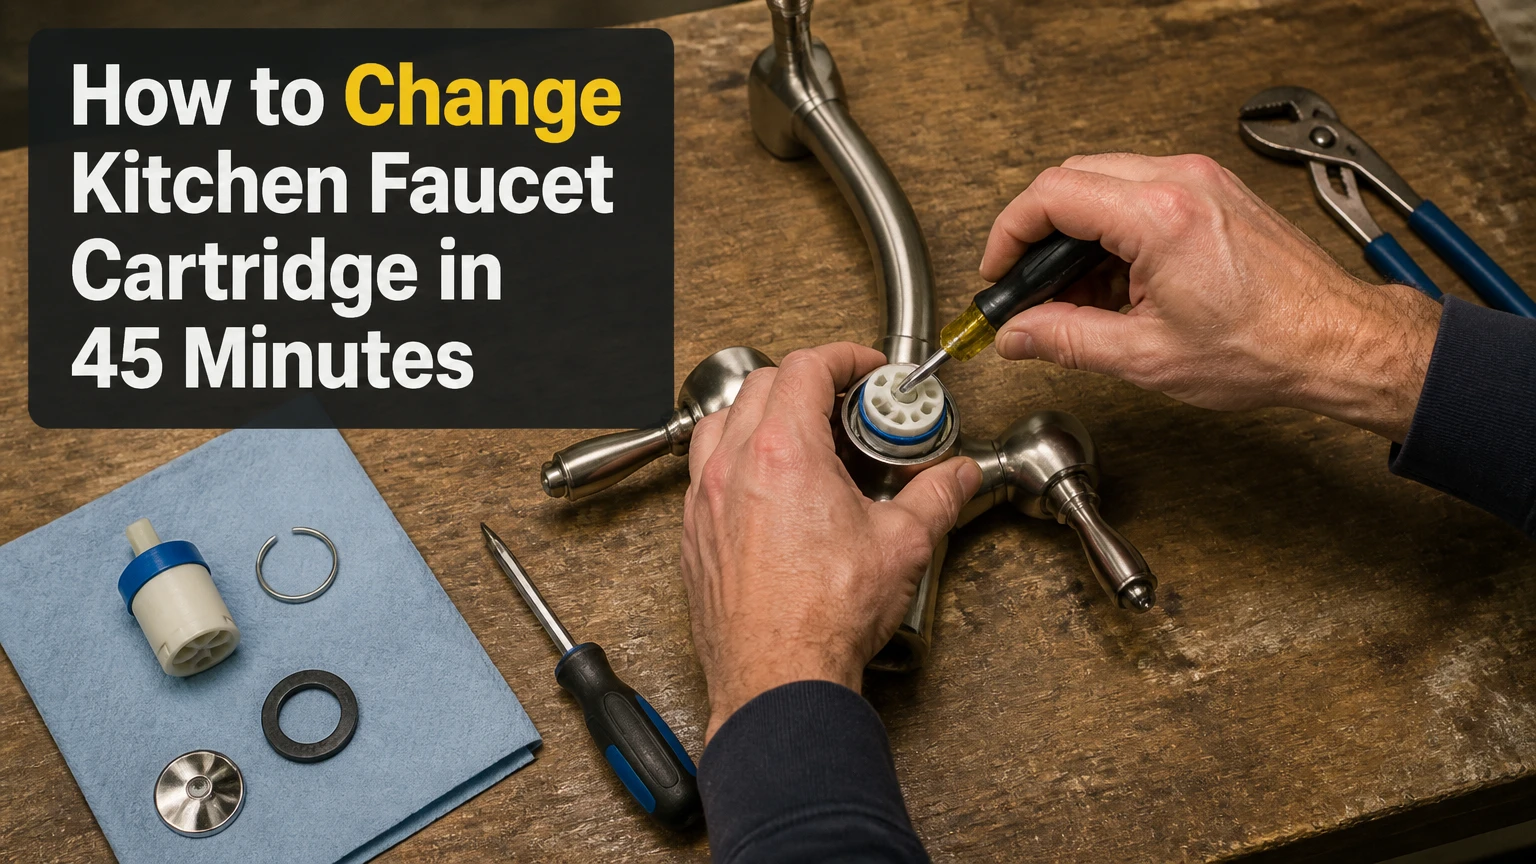
To change a kitchen faucet cartridge, shut off both supply valves, remove the handle and retaining hardware, pull out the old valve, clean the housing, install the correctly matched replacement, then flush and test the faucet. A standard single-handle repair takes 20-45 minutes; corrosion, hard-water scale, or a seized cartridge can extend the job to 90 minutes.
Key Facts at a Glance
A faucet cartridge controls water flow and hot-cold temperature mixing inside the handle assembly.
The replacement cartridge must match the faucet brand, model, valve body, and orientation.
Typical DIY parts cost $10-$50, while professional service commonly costs $100-$250 plus parts.
Pure silicone plumber’s grease is suitable for cartridge O-rings; petroleum jelly and WD-40 can damage rubber.
Removing the aerator before flushing prevents loosened debris from clogging the screen.
A leak from the spout often indicates a cartridge or valve-seal problem, while a leak below the sink usually involves a supply connection or hose.
Before You Start
A cartridge replacement is usually a moderate DIY plumbing repair, provided the shutoff valves work and the faucet body remains securely mounted. The most important preparation step is identifying the exact replacement part before dismantling the faucet, because cartridges with similar shapes may have different stems, tabs, lengths, or hot-cold orientations.
Time, Cost, and Difficulty
| Task condition | Typical time | Typical DIY cost | Difficulty |
|---|---|---|---|
| Accessible single-handle faucet | 20-45 minutes | $10-$50 | Moderate |
| Two-handle faucet, one cartridge | 30-60 minutes | $10-$60 | Moderate |
| Mineral-bound cartridge | 60-90 minutes | $25-$90 | Moderate to high |
| Professional replacement | 30-90 minutes onsite | $100-$250 labor | Not applicable |
The figures above are typical North American ranges, not fixed prices. Brand-specific parts, regional labor rates, cabinet access, corrosion, and whether the plumber replaces shutoff valves can change the final cost substantially.
Tools and Materials
Gather the following before turning off the water:
- Correct replacement cartridge, one
- Hex keys, commonly 3/32-inch or 1/8-inch
- Phillips and small flathead screwdrivers
- Adjustable wrench or channel-lock pliers
- Needle-nose pliers
- Cartridge puller matched to the faucet brand, if available
- Pure silicone plumber’s grease, a pea-sized amount
- Old towel, two
- Small container for screws and clips
- Old toothbrush or nylon brush
- White vinegar for light mineral deposits
- Flashlight and camera phone
- Sink-drain stopper or folded towel
Do not substitute automotive grease, penetrating oil, or petroleum jelly for silicone grease inside a potable-water faucet. Moen, Delta, Kohler, and other manufacturers can specify different lubricants and extraction methods, so the product manual remains the final authority.
What Does a Faucet Cartridge Do?
A kitchen faucet cartridge is a replaceable valve assembly that regulates water volume and temperature. In a single-handle faucet, handle movement rotates or lifts a cartridge stem, which aligns internal openings with hot and cold water ports; in a two-handle faucet, each cartridge usually controls one water supply.
The cartridge sits inside a machined valve body. Rubber O-rings seal the cartridge against the housing, while ceramic discs, a plastic sleeve, a brass stem, or rubber seats control the water path. A worn cartridge may cause dripping from the spout, a loose or stiff handle, weak temperature control, or water escaping around the handle.
A cartridge is not the same as an aerator, diverter, supply valve, or flexible hose. Replacing the cartridge cannot correct a cracked faucet body, a failed pull-down hose, a leaking shutoff valve, or a damaged valve seat.
Which Cartridge Type Is in Your Faucet?
The faucet design and manufacturer determine the cartridge mechanism. Ceramic disc, ball, plastic sleeve, and brass sleeve valves have different internal parts, so a universal-looking replacement is safe only when its dimensions and interface match the original valve body.
| Cartridge or valve type | Common construction | Typical service life | Common failure symptom |
|---|---|---|---|
| Ceramic disc | Two polished ceramic discs | 10-20+ years | Drip after debris or disc damage |
| Ball valve | Slotted metal or plastic ball with seals | 3-5 years | Spout drip or leaks around the ball |
| Plastic sleeve cartridge | Molded polymer body and O-rings | 2-5 years | Sticking, cracking, or handle leak |
| Brass sleeve cartridge | Brass body with rubber seals | 5-10 years | Seized stem or mineral binding |
Lifespan depends heavily on water quality, usage, installation, and filtration. Hard water can shorten service life by depositing scale on seals and moving surfaces, while sediment from plumbing work can score ceramic discs or obstruct inlet screens.
How Do You Find the Correct Replacement?
Find the brand and model number on the faucet base, escutcheon, handle, instruction booklet, or receipt, then compare that information with the manufacturer’s parts diagram. If the model is unknown, remove the handle and photograph the installed cartridge before ordering, but do not remove the cartridge if doing so would leave the household without a reliable shutoff.
Measure the cartridge length, body diameter, stem shape, tab position, and number of seals. Manufacturer part numbers such as Delta RP46074 or Moen 1224 identify specific designs, but similar-looking cartridges are not automatically interchangeable. A plumbing-supply counter can often match a removed cartridge, although the faucet brand and model produce a more reliable result.
How to Change Kitchen Faucet Cartridge
The following procedure applies primarily to single-handle cartridge faucets. Read the manufacturer’s instructions first, especially for faucets with concealed retaining pins, threaded sleeves, ceramic disc modules, or warranty-backed parts.
Step 1: Shut Off Both Water Supplies
Turn the hot and cold shutoff valves clockwise until they stop, then open the faucet handle fully to release pressure and drain standing water. Place a towel inside the cabinet and plug the sink drain so that a small screw or retaining clip cannot enter the plumbing.
You’ll know it worked when: water stops flowing within several seconds and only a small residual amount drains from the spout.
Common mistake: Assuming a closed handle isolates the water. The handle controls the cartridge, not the supply pressure, so both under-sink valves must be closed.
If a shutoff valve will not turn, leaks at its stem, or continues passing water, stop before loosening the cartridge hardware. The supply may require a building-level shutoff and valve replacement.
Step 2: Remove the Handle
Look for a red-blue temperature cap, logo button, or small plug covering the handle screw. Lift the cap carefully with a thin flathead screwdriver, then loosen the set screw with the correct hex key or screwdriver.
Pull the handle straight upward or outward, following the faucet’s movement path. Wrap the jaws of pliers with a cloth if the handle is stuck, and protect the faucet finish with a second cloth.
You’ll know it worked when: the handle comes away without bending the stem or scratching the decorative surface.
Common mistake: Using the wrong hex-key size. A rounded set screw may require an extractor, a replacement screw, or manufacturer-specific disassembly.
Step 3: Remove the Decorative Cover and Retainer
Unscrew the dome, bonnet, trim sleeve, or retaining ring by hand. If pliers are necessary, wrap the part in cloth and apply controlled force rather than squeezing the finish directly.
Under the decorative cover, identify either a threaded retaining nut or a U-shaped retaining clip. Turn the nut counterclockwise with an adjustable wrench, or pull the clip sideways with needle-nose pliers while keeping one finger over it.
You’ll know it worked when: the cartridge is visible and no retaining hardware remains engaged with its shoulder or tabs.
Common mistake: Losing the retaining clip inside the cabinet. Store every small component in the container immediately.
Step 4: Photograph the Cartridge Orientation
Before extracting the old valve, photograph the front, side, stem, and alignment tabs. Mark the front of the valve body with removable tape if the original orientation is difficult to see.
Some cartridges install with a specific tab facing forward. Others can be rotated 180 degrees to reverse hot and cold operation. The manufacturer’s orientation marks take precedence over assumptions based on handle position.
You’ll know it worked when: the replacement cartridge can be compared directly with the old one before installation.
Common mistake: Treating a cartridge as symmetrical. A visually similar part may have offset inlet ports or an asymmetric alignment key.
Step 5: Pull Out the Old Cartridge
Grip the cartridge stem and pull vertically while gently twisting, but avoid levering against the faucet’s decorative body. For a Moen-style brass cartridge or any valve that resists steady hand pressure, use a compatible cartridge-puller tool.
A puller attaches to the stem or cartridge body and transfers force along the valve axis. That method reduces the risk of bending the faucet body, breaking the stem, or damaging the retaining threads.
You’ll know it worked when: the entire cartridge comes out, including the body and seals, without fragments remaining inside the valve housing.
Common mistake: Pulling only the stem. If the stem separates from the cartridge body, remove the remaining shell with the correct extractor rather than forcing a screwdriver into the valve.
Step 6: Clean and Inspect the Valve Housing
Wipe the valve body with a clean cloth and use a nylon brush or toothbrush to remove loose scale. Light mineral deposits can be softened with white vinegar, but keep acidic cleaner away from finished surfaces and rinse the housing afterward.
Inspect the bore, inlet openings, retaining threads, and sealing surfaces. A deep scratch, cracked valve body, damaged seat, or obstructed inlet can prevent a new cartridge from sealing.
You’ll know it worked when: the bore is free of loose debris and the new cartridge can enter without catching on scale.
Common mistake: Scraping aggressively with a steel screwdriver. Gouges in the brass or plated valve body can create a permanent leak path.
Step 7: Lubricate and Install the New Cartridge
Apply a thin film of pure silicone plumber’s grease to the cartridge O-rings, not a heavy coating across the entire valve. Align the tabs, slots, and inlet openings exactly as shown in the manufacturer’s diagram or your orientation photograph.
Press the cartridge straight down until it is fully seated. Do not hammer it into place. If the cartridge stops partway, remove it and look for a twisted O-ring, debris, or a misaligned tab.
You’ll know it worked when: the cartridge shoulder sits at the same height as the original and the retaining hardware can engage normally.
Common mistake: Installing a dry O-ring. Dry rubber can roll, pinch, or tear as the cartridge enters the valve body.
Step 8: Reinstall the Retainer and Handle
Install the retaining clip in its original groove or thread the retaining nut down by hand before using a wrench. Tighten until secure, then apply only modest additional force; excessive torque can deform plastic parts, bind the stem, or damage ceramic components.
Replace the bonnet, trim sleeve, and handle. Tighten the handle screw firmly without stripping it, then reinstall the temperature cap or index button.
You’ll know it worked when: the handle moves through its normal range without grinding, wobbling, or contacting the trim.
Common mistake: Testing the faucet without the retaining hardware installed. Water pressure can lift an unsecured cartridge and cause a sudden leak.
Step 9: Flush and Test the Faucet
Remove the aerator from the spout before restoring water. Open the faucet handle, turn both shutoff valves on slowly, and let water run for about one minute to purge air and loosened debris.
Close the faucet and check the cartridge area, handle base, supply connections, and cabinet floor. Reinstall the aerator after flushing and test hot, cold, and mixed-water operation.
You’ll know it worked when: the faucet delivers steady flow, the handle controls temperature correctly, and no water appears around the handle or below the sink.
Common mistake: Leaving the aerator installed during flushing. Debris can clog its screen and make a successful cartridge repair appear to have low water pressure.
How Does a Two-Handle Faucet Change the Procedure?
A two-handle kitchen faucet normally has separate hot and cold cartridges, so a leak may require replacing one valve rather than a single central mixer cartridge. Shut off both supplies, remove the affected handle, expose its retaining nut or clip, replace the cartridge, and repeat the process on the second side only if symptoms indicate a second failure.
| Faucet arrangement | Cartridge count | Temperature control | Typical repair approach |
|---|---|---|---|
| Single-handle mixer | 1 | One lever mixes hot and cold | Replace central cartridge |
| Two-handle mixer | 2 | Separate hot and cold handles | Diagnose each side separately |
| Bridge faucet | 2 | Separate valves with shared spout | Replace affected valve |
| Pull-down faucet | Usually 1 | One lever plus spray diverter | Check cartridge and hose separately |
A two-handle faucet that drips only from the hot side usually does not justify replacing the cold-side cartridge automatically. Replacing both can be reasonable when the faucet is old and both valves have similar wear, but the second replacement adds parts cost and another opportunity for a damaged seal.
What If the Cartridge Will Not Come Out?
A stuck cartridge usually results from mineral scale, compressed O-rings, corrosion, or pressure on the valve body. Use a cartridge puller designed for the faucet, apply controlled twisting force, and never pry against the decorative faucet shell because plated housings can crack or deform.
For light scale, apply white vinegar to a cloth around the exposed cartridge area and allow limited contact time, then rinse and retry. Do not leave acidic cleaner inside an unknown faucet indefinitely, and do not apply heat near plastic components, sealants, or an installed sink.
Stop and call a plumber when the cartridge breaks below the retaining shoulder, the valve body rotates in the sink, the shutoff valves cannot isolate water, or extraction force begins moving the faucet mounting hardware. A broken cartridge inside an open valve can turn a small repair into a cabinet flood.
When Is the Cartridge Not the Problem?
A cartridge replacement will not fix every kitchen faucet leak. Diagnosis should begin with the leak location, because water from the spout, handle, base, hose, and supply connection points to different components.
| Leak or symptom location | More likely cause | First diagnostic action | Cartridge replacement likelihood |
|---|---|---|---|
| Spout drips when closed | Worn cartridge or valve seals | Close and reopen handle several times | High |
| Water rises around handle | Cartridge O-ring or retaining area | Dry handle base and observe | High |
| Water leaks from spray hose | Hose, connection, or diverter | Inspect hose while spraying | Low |
| Water leaks under sink | Supply line or shutoff valve | Dry connections and pressurize briefly | Low |
| Low flow at spout | Clogged aerator or inlet screen | Remove and clean aerator | Medium |
| Handle is stiff but dry | Scale or cartridge wear | Check movement with water off | Medium |
A clogged aerator is a simpler repair than a cartridge. A leaking flexible hose requires hose or connection service, while water escaping from the faucet base may indicate a body O-ring or mounting problem rather than the internal valve.
Common Mistakes and How to Fix Them
Installing a Similar, Wrong Cartridge
A replacement that fits the stem but not the valve body can leak, reverse temperature, or restrict flow. Compare the old and new parts by length, diameter, seals, tabs, stem geometry, and manufacturer part number before applying force.
Reversing Hot and Cold
Hot and cold water can reverse when a cartridge is installed backward or when the handle orientation is changed. Remove the retaining hardware, rotate the cartridge 180 degrees only if the manufacturer permits that orientation, and retest.
Using Petroleum Lubricant
Petroleum jelly and automotive grease can swell or degrade some rubber seals and leave unsuitable residue in a drinking-water fitting. Use a thin layer of faucet-compatible silicone grease instead.
Overtightening the Retaining Nut
Excessive torque can compress the cartridge unevenly and make the handle stiff. Tighten until the retaining hardware is secure, then test handle movement before adding force.
Skipping the Valve-Body Inspection
A new cartridge cannot seal against a gouged, cracked, or debris-filled housing. If the bore is damaged, replacing the faucet or valve body may be more reliable than installing repeated cartridges.
Forgetting the Warranty
Several faucet manufacturers offer limited lifetime warranties for residential products and may provide replacement cartridges directly. Check the brand’s warranty and model information before buying a part, particularly when the faucet is under warranty.
When Should You Call a Plumber or Replace the Faucet?
Call a plumber when water cannot be isolated, the cartridge breaks during extraction, the valve body is damaged, or cabinet access prevents safe tool control. Consider replacing the complete faucet when the body is corroded, the model is discontinued, several components leak, or repair parts approach the cost of a new faucet.
| Situation | Repair cartridge | Replace faucet | Hire plumber |
|---|---|---|---|
| Spout drip, accessible parts | Yes | Not usually | Optional |
| Seized cartridge and working shutoffs | Try puller | If valve damage appears | Recommended if extraction fails |
| Cracked valve body | No | Yes | Usually |
| Failed under-sink shutoffs | No | Maybe | Yes |
| Multiple leaks on a 15-year-old faucet | Sometimes | Often economical | Optional |
| Active leak with no working isolation | No | Not first step | Yes |
A cartridge repair is most economical when the faucet body is sound and the correct part costs less than about one-third of a comparable replacement faucet. That rule is a practical budgeting guideline, not a universal threshold, because installation difficulty and warranty value also affect the decision.
How Much Time and Money Does Replacement Take?
A standard DIY cartridge replacement generally costs $10-$50 for the valve and takes 20-45 minutes after the correct part is available. A professional repair commonly costs $100-$250 in labor plus parts, with higher charges when the plumber must replace seized shutoff valves, remove a damaged faucet, or work in restricted cabinet space.
| Expense category | Typical range | Main cost variable | Reduction strategy |
|---|---|---|---|
| Plastic replacement cartridge | $10-$25 | Brand and model | Confirm part number |
| Ceramic or brass cartridge | $20-$60 | Material and manufacturer | Use warranty support |
| Cartridge puller | $20-$60 | Brand-specific design | Rent or borrow tool |
| Professional labor | $100-$250 | Region and access | Provide model number |
| Complete replacement faucet | $80-$500+ | Finish and features | Compare repair cost |
Prices vary by country and retailer. The BDT figures sometimes quoted online are not interchangeable with United States pricing, and imported cartridges can cost more because shipping and local availability affect the total.
Expert Rules That Prevent Repeat Failures
The retaining hardware is a structural part of the repair. A cartridge that seems correctly installed can still lift under pressure if the retaining clip or nut is missing, cross-threaded, or insufficiently engaged.
The original cartridge is a better diagnostic record than a generic chart. Photographing its orientation and comparing its physical dimensions prevents errors that occur when a parts diagram covers several revisions of the same faucet model.
Debris often causes the second failure. If plumbing work, water-main maintenance, or a shutoff-valve replacement recently occurred, flush the supply and clean the aerator before blaming a newly installed cartridge.
Do not force a cartridge past an O-ring. A cartridge that stops halfway has encountered resistance for a reason. Removing it to correct alignment is faster and safer than repairing a torn seal or damaged valve bore.
FAQ
Can I replace a faucet cartridge without turning off the water?
No. The faucet handle does not isolate supply pressure, so the hot and cold shutoff valves must be closed before the retaining hardware is removed. If the under-sink valves fail, shut off the appropriate building or main supply and confirm that the faucet stops flowing.
How do I know whether my faucet has a cartridge or a ball valve?
A cartridge faucet usually has a cylindrical valve with a stem and retaining nut or clip. A ball faucet contains a rounded ball under a cap and commonly uses springs and rubber seats. The faucet model number or manufacturer parts diagram provides the most reliable identification.
Why does my faucet still drip after installing a new cartridge?
The cartridge may be misaligned, incompletely seated, damaged during installation, or installed in a scratched valve housing. A twisted O-ring, loose retainer, obstructed inlet, or incorrect replacement part can produce the same symptom, so inspect those points before buying another cartridge.
Can vinegar damage a kitchen faucet cartridge?
Brief contact with diluted white vinegar can soften light mineral scale, but prolonged exposure may affect finishes, seals, or unknown materials. Apply vinegar to a cloth or limited area, rinse thoroughly, and follow the faucet manufacturer’s cleaning instructions.
Should I replace both cartridges in a two-handle faucet?
Replace only the failed cartridge when the other handle operates normally and the faucet is relatively new. Replacing both can be sensible on an older faucet when the cartridges have similar wear, because the second valve may fail soon and the disassembly work is already underway.
How often should a kitchen faucet cartridge be replaced?
There is no fixed replacement interval. Plastic sleeve cartridges may last 2-5 years, ball valves commonly last 3-5 years, brass sleeve cartridges often last 5-10 years, and ceramic disc cartridges can last 10-20 years or longer when debris and scale are controlled.
The Bottom Line
To change a kitchen faucet cartridge successfully, identify the exact valve, shut off and depressurize both supplies, document the original orientation, remove the retaining hardware, extract the cartridge without prying against the faucet body, clean the housing, lubricate the new seals with silicone grease, and flush the faucet before testing. The correct replacement part and a controlled extraction matter more than speed.