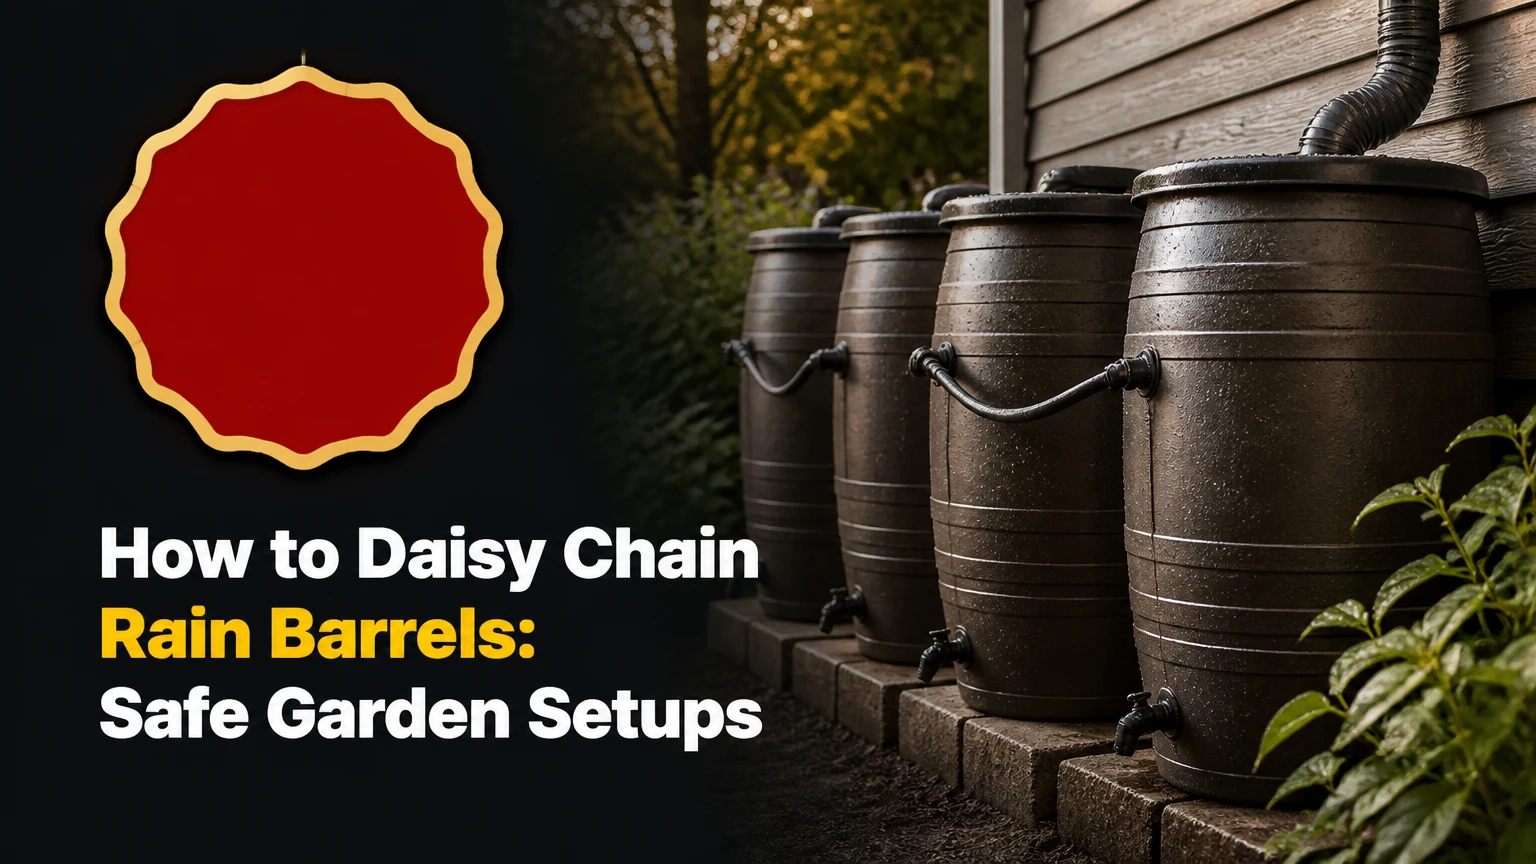
To daisy chain rain barrels, route a downspout into the first barrel, then connect neighboring barrels with either upper overflow pipes or lower equalizing pipes. Build every barrel on a level, load-rated base, use screened inlets and a final overflow, and test each joint before a storm. A three-barrel setup typically takes 2-4 hours.
Key facts at a glance
A 1,000-square-foot roof produces approximately 623 gallons from 1 inch of rain before collection losses.
A full 55-gallon barrel weighs about 459 pounds, excluding the container and platform.
Bottom-linked barrels share water at nearly the same level and can drain through one outlet.
Top-linked barrels fill sequentially and preserve water below a failed upper connection.
A final overflow must discharge at least several feet from the foundation or into a suitable drainage area.
Rain barrel water is generally non-potable unless it receives treatment validated for drinking-water use.
What Does Daisy Chaining Rain Barrels Mean?
Daisy chaining rain barrels means connecting two or more storage barrels so one downspout supplies a larger combined reservoir. The barrels may connect near their tops, where water cascades from one container to the next, or near their bottoms, where water equalizes across the network.
A single 55-gallon barrel often fills quickly during a moderate storm. Connecting three barrels creates approximately 165 gallons of nominal storage, although screens, air space, sediment, and overflow configuration reduce usable capacity. The arrangement is useful for hand watering, garden beds, container plants, and some low-pressure drip systems.
The University of Wisconsin Division of Extension identifies rain barrels as a way to collect roof runoff for later landscape use. That purpose has limits: stored water can contain bird droppings, roofing residue, algae, and insect debris, so a household rain barrel should not supply drinking, bathing, cooking, or livestock water without a properly designed treatment system.
A useful design distinction is often missed. Barrel capacity determines how much water you can store, but connector size and overflow routing determine whether the system handles intense rainfall without backing up.
How Does a Linked Barrel System Work?
A linked rain barrel system works through gravity, hydrostatic pressure, and controlled overflow. Water moves from a higher water surface toward a lower one, while connected containers with open air paths settle toward a common level.
In a bottom-linked design, water entering barrel one travels through a low pipe or hose into adjacent barrels. The containers fill together when the linking passages are large enough and air can escape. The water level will equalize, but barrels do not necessarily fill at the exact same speed if hoses are narrow, fittings are partially blocked, or the containers sit at different elevations.
In a top-linked cascade, barrel one fills first. Water then passes through an overflow port near its upper rim into barrel two, and the sequence continues. Each barrel retains water below its overflow connection, which makes this design more tolerant of a failed link.
Water pressure at a hose bib comes from elevation, not from the barrels magically creating pressure. A full barrel with the outlet 2 feet above a garden bed provides roughly 0.87 pounds per square inch of static pressure, which is enough for hand watering but usually insufficient for long soaker hoses or conventional sprinklers.
Bottom-linked equalization
Bottom linking provides one-point extraction and uses the full network more conveniently. It also creates the largest failure consequence because a broken low fitting can drain every connected barrel down to the break.
Use a shutoff valve at each barrel or in each branch. Isolation valves let you remove one container, repair a fitting, or limit losses without emptying the entire reservoir. For three or more barrels, a manifold is usually easier to service than a long chain of improvised hose connections.
Top-linked cascading
Top linking is simpler when barrels have molded overflow ports or when the ground is not perfectly uniform. The first barrel acts as a sediment-catching stage, while later barrels receive water after the heaviest debris settles.
Every barrel still needs a screened, insect-resistant opening or vent. A sealed barrel cannot accept water efficiently because trapped air resists incoming flow. Top links also need enough capacity to pass stormwater faster than the downspout supplies it.
Which Connection Type Should You Use?
Choose a bottom-linked system for convenient, simultaneous filling and one-point draw-off; choose a top-linked system for simpler retrofits, easier isolation, and better tolerance of a minor leak. The best choice depends on maintenance access, site slope, water demand, and how much water a failed fitting could release.
| Decision factor | Bottom-linked equalizer | Top-linked cascade | Practical recommendation |
|---|---|---|---|
| Typical connection height | 2-4 inches above barrel base | 2-4 inches below rim | Follow the fitting manufacturer’s template |
| Fill pattern | Nearly simultaneous | Sequential | Use bottom links for shared storage |
| Main failure consequence | Network can drain | Usually one upper transfer fails | Use isolation valves on bottom systems |
| Water collection point | One manifold outlet | Separate barrel outlets | Choose bottom links for a single hose bib |
| Sediment exposure | Sediment can reach low links | Sediment settles mainly in first barrel | Add a first-flush diverter either way |
| Installation difficulty | Moderate, more drilling | Low to moderate | Use top links for a first installation |
| Uneven ground tolerance | Low | Moderate | Level the base before either design |
| Best typical use | 2-4 barrels and regular irrigation | 2-3 barrels and occasional hand watering | Match the system to access and maintenance |
A bottom connection does not increase total rainfall. It only makes available storage act more like one tank. A top connection does not make the first barrel unusable, but it requires separate draw-off if water remains trapped below the next overflow port.
How Many Barrels Do You Need?
Most homeowners should begin with two or three barrels, because that capacity balances storage, weight, cost, and maintenance. Four 55-gallon barrels hold 220 gallons nominally, but the additional platform length and overflow volume require more careful structural planning.
Estimate roof yield with this practical formula:
Collected gallons = roof catchment area in square feet × rainfall in inches × 0.623 × collection efficiency
Use 0.75-0.90 as a typical collection-efficiency range for a sound gutter and downspout system. For example, a 1,000-square-foot roof receiving 1 inch of rain yields about 623 gallons before losses and approximately 467-561 gallons after typical collection losses. A three-barrel, 165-gallon system will therefore overflow during that event.
| Roof area | Rainfall event | Theoretical yield | Typical collected yield at 75-90% |
|---|---|---|---|
| 500 sq ft | 0.5 inch | 156 gallons | 117-140 gallons |
| 1,000 sq ft | 1 inch | 623 gallons | 467-561 gallons |
| 1,500 sq ft | 1 inch | 935 gallons | 701-842 gallons |
| 1,000 sq ft | 2 inches | 1,246 gallons | 935-1,121 gallons |
Storage capacity should reflect use between storms. A gardener using 20 gallons per week may need only 110-165 gallons, while a vegetable garden using 100 gallons weekly will empty a three-barrel system rapidly unless rainfall is frequent.
What Materials and Tools Are Required?
A typical three-barrel installation needs three food-grade barrels, one screened inlet, two inter-barrel links, a final overflow, and a load-rated platform. Use bulkhead fittings or purpose-built linking kits rather than relying on sealant around a drilled hole.
Before you start
| Item | Typical quantity or specification | Typical cost |
|---|---|---|
| Food-grade 55-gallon barrels | 2-3 containers | $25-$90 each |
| Bulkhead fittings | 2 per bottom-linked barrel junction, or 1 per overflow port | $8-$15 each |
| Linking hose or PVC | 3/4-1.5 inch inside diameter | $15-$60 |
| Stainless hose clamps | 2 per flexible connection | $2-$5 each |
| Downspout diverter | 1 per collection point | $20-$50 |
| First-flush diverter and screen | 1 set | $20-$80 |
| Pavers, gravel, or concrete base | Full barrel footprint | $30-$150 |
| Ball valves and adapters | 1 isolation valve per branch | $8-$25 each |
Budget approximately $150-$350 for a careful three-barrel DIY system when barrels, fittings, base materials, and filtration are purchased new. A minimal setup using reclaimed food-grade containers may cost $75-$150, while decorative commercial barrels commonly push the total above $400.
You will also need a tape measure, marker, drill, correctly sized hole saw, adjustable wrench, screwdriver, level, shovel, gravel tamper, and bucket. Dry-fit the fittings before drilling every barrel.
How Do You Daisy Chain Rain Barrels Step by Step?
Install the system in eight controlled stages: inspect the barrels, prepare the base, position the containers, drill and fit the links, connect the downspout, add filtration, route the overflow, and perform a leak test. The foundation is the factor that most determines long-term success.
Step 1: Confirm local rules and barrel safety
Check municipal stormwater, plumbing, and rainwater-use rules before installation. Requirements differ by jurisdiction, and some areas regulate overflow discharge, mosquito prevention, connection to potable plumbing, or use of rainwater inside buildings.
Use only barrels with documented food, beverage, or agricultural contents. Reject containers that held solvents, pesticides, petroleum products, or unknown chemicals, even if they appear clean.
Success checkpoint: The barrel history is known, the intended irrigation use is permitted, and every opening can be covered against insects.
Common mistake: Treating a recycling symbol as proof of food-grade history. The symbol identifies plastic resin, not the chemical previously stored in the container.
Step 2: Build a level, load-rated base
Select a location beside the downspout with enough room to inspect every fitting. Excavate soft soil, place 2-3 inches of compacted gravel, and install concrete pavers or a continuous slab across the entire footprint.
A full 55-gallon barrel contains about 459 pounds of water. Three barrels therefore hold approximately 1,377 pounds before adding plastic, fittings, platforms, and dynamic movement from people or hoses.
Keep the barrel bases level and fully supported. Do not place a filled barrel on stacked loose cinder blocks, narrow pallets, or isolated bricks that can tip or punch into soil.
Success checkpoint: A long level shows no meaningful slope, and every barrel rests on a solid surface without rocking.
Common mistake: Elevating barrels before confirming platform stability. Height improves hose pressure, but a high unstable tank is more dangerous than a low stable one.
Step 3: Position and orient the barrels
Set the containers in their final positions before drilling. Leave approximately 4-6 inches between barrels for hoses, valves, and hand access, while keeping the run short enough to avoid sagging.
Place the first barrel beneath the downspout diverter. Position the final barrel where its overflow can discharge downhill toward a planted area, drain inlet approved for the purpose, or other safe outlet.
For bottom linking, align barrel bases closely. For top linking, minor elevation differences are manageable, but the receiving barrel’s overflow must remain lower than the source barrel’s transfer point.
Success checkpoint: Each outlet, valve, and inspection opening remains reachable without moving a full container.
Common mistake: Designing around empty barrels and discovering that full barrels block the cleanout or overflow route.
Step 4: Drill and install bulkhead fittings
Mark bottom-link holes approximately 2-4 inches above the lowest practical point, or place top overflow holes approximately 2-4 inches below the rim. Follow the exact hole diameter specified for the selected bulkhead, because a nominal 1-inch fitting may require a hole larger than 1 inch.
Drill slowly with a sharp hole saw and remove plastic shavings from the tank. Install the gasket on the correct side specified by the fitting manufacturer, generally inside the barrel against the tank wall, then tighten the locknut by hand and add only a small wrench turn.
Success checkpoint: The fitting sits squarely, the gasket is flat, and the barrel wall is not crushed or distorted.
Common mistake: Applying excessive torque. A deformed plastic wall can leak more than a properly hand-tightened fitting.
Step 5: Connect the barrels
Use UV-resistant reinforced hose, flexible pond hose, or rigid PVC rated for the application. A 3/4-inch inside diameter is a practical minimum for short garden systems; 1-inch or 1.5-inch lines transfer stormwater more readily and reduce restriction.
Install a full-port ball valve at each bottom-linked branch when possible. Secure flexible hose with stainless-steel clamps, keep the line continuously sloped or supported, and avoid sharp bends that trap leaves or air.
For a bottom-linked chain, connect the first barrel to the second and the second to the third, or use a manifold with similarly sized branches. For a top-linked chain, connect each overflow port to the next barrel’s screened inlet or overflow receiver.
Success checkpoint: Water can pass through every link without a kink, sag, loose clamp, or unsupported fitting.
Common mistake: Using thin 1/2-inch tubing because it fits a garden connector. Narrow tubing can make barrel one overflow while the remaining barrels stay nearly empty.
Step 6: Install the inlet screen and first flush
Fit a leaf screen or gutter filter upstream of the first barrel. Add a first-flush diverter when the roof accumulates dust, pollen, bird droppings, or heavy organic debris; the device temporarily captures the initial runoff before cleaner water enters storage.
Screen every tank opening with corrosion-resistant mesh. Mosquitoes can enter through uncovered vents, and a sealed lid without a screened air path can restrict inflow.
Success checkpoint: Leaves remain outside the tank, the first runoff can be discarded, and insects cannot pass through the inlet or vent.
Common mistake: Adding chlorine, bleach, or random pond treatments to irrigation water. Chemical treatment can harm plants, soil organisms, pets, or downstream waterways.
Step 7: Route the final overflow
Install an overflow on the last barrel, and size it at least as large as the incoming transfer line. Direct water several feet away from the foundation, preferably through solid pipe or a securely clamped hose with a visible discharge point.
A final overflow is not optional. Three 55-gallon barrels can receive more water than they store during a single storm, even when the barrels were empty at the beginning.
Success checkpoint: Overflow water cannot run beneath the platform, erode its base, enter a crawlspace, or collect against siding.
Common mistake: Allowing the overflow to discharge beside the first barrel. Saturated soil can undermine the base and create a tipping hazard.
Step 8: Test, label, and secure the system
Add several gallons of water to the first barrel, inspect every fitting, then fill gradually while watching transfer performance. Open each isolation valve, check the water level in every barrel, and test the final overflow with a hose.
Secure tall or lightweight barrels against wind and accidental impact. Label the water as non-potable and keep hoses from entering indoor plumbing unless a code-compliant air gap and approved backflow protection are installed.
Success checkpoint: No joint leaks, every connected barrel receives water, and the overflow exits at the intended location.
Common mistake: Waiting for the first major storm to reveal a blocked link or poorly supported platform.
What Is the Best Pipe Size for Rain Barrels?
Use a 3/4-inch inside-diameter line for a short, low-flow garden connection, but choose 1-inch to 1.5-inch hose or PVC when a downspout serves a large roof or intense rainfall is common. The pipe must pass water quickly enough that the inlet barrel does not overflow prematurely.
Pipe diameter is only one restriction. A small bulkhead, clogged screen, kinked hose, or undersized diverter can limit the entire system even when the downstream pipe is large. Match the transfer opening, hose, valve, and overflow as a complete flow path.
Do not assume pressure-rated irrigation pipe is automatically suitable for every fitting. Verify compatibility between plastic threads, rubber gaskets, hose barbs, PVC cement, and the barrel wall thickness.
Can Rain Barrels Sit on a Slope?
Rain barrels should sit on a level, continuous, load-rated base, even when the surrounding yard slopes. A sloped site can work if the base is excavated and constructed as a level terrace, but placing barrels directly on an incline increases tipping and connection stress.
Bottom-linked barrels are especially sensitive to elevation differences. The lowest barrel can fill higher than the others, and rigid pipe may experience twisting as the containers settle. Flexible connections reduce stress but should not substitute for a stable foundation.
A retaining wall, compacted gravel terrace, or reinforced concrete pad may be appropriate for larger systems. For IBC totes or tanks exceeding several hundred gallons, use an engineer-reviewed or manufacturer-approved foundation rather than residential pavers alone.
How Do You Prevent Leaks, Mosquitoes, and Bad Odors?
Prevent leaks with correctly sized bulkheads, flat gaskets, restrained hoses, and isolation valves. Prevent mosquitoes with screened openings and tight lids, while first-flush diversion and seasonal cleaning reduce organic odors.
Inspect the system at the start of the rainy season and after major storms. Remove leaves from screens, flush sediment from the first barrel, check clamps for corrosion, and verify that the overflow remains open.
A practical maintenance schedule looks like this:
| Maintenance task | Typical interval | Acceptance check |
|---|---|---|
| Clear gutter and inlet screen | Every 1-3 months | No leaf mat blocks inflow |
| Inspect hose clamps and bulkheads | Monthly during wet season | No seepage or wall distortion |
| Remove first-barrel sediment | Every 6-12 months | Bottom sludge remains below link |
| Test final overflow | Before each rainy season | Water exits away from foundation |
| Drain before hard freeze | Before temperatures below 32°F | No trapped water in fittings |
| Clean tank interior | Every 1-2 years | No odor, heavy algae, or sludge layer |
What if the first barrel fills but the others stay empty?
A full first barrel with empty downstream barrels usually indicates a blocked screen, closed valve, kinked hose, inadequate venting, or an incorrectly installed gasket. Test each link with a bucket of clean water before dismantling the full system.
For a bottom-linked setup, open the highest accessible vent or lid so air can leave the network. Do not loosen a pressurized fitting while the tank is full. Close the inlet, drain the affected barrel below the fitting, then inspect the passage for leaves and plastic shavings.
What if a bottom fitting leaks?
Close the inlet and isolate the affected barrel before repairing a bottom fitting. Drain water below the hole, remove the fitting, clean both surfaces, inspect the gasket for curling or cracks, and reinstall it squarely.
Silicone sealant is not a substitute for a correctly compressed gasket. Exterior sealant can slow a minor seep, but it rarely fixes a distorted barrel wall, wrong hole size, or cross-threaded adapter.
What if the water smells or looks black?
Bad-smelling or dark rain barrel water usually contains decomposing organic matter, stagnant sediment, algae, or contaminated roof runoff. Empty the tank, rinse the interior, clean the inlet and first-flush device, and improve screening before refilling.
Do not use foul-smelling water on edible leaves shortly before harvest. Direct it to ornamental landscaping or dispose of it according to local wastewater rules, then correct the contamination source.
What Alternatives Work Without Drilling Barrels?
A commercial bottom-linking kit avoids custom hole placement, while a diverter-and-overflow arrangement can connect factory-made barrels without modifying their walls. A single larger tank may also provide more reliable storage than several small barrels.
| Alternative | Typical capacity | Typical cost | Best use | Main limitation |
|---|---|---|---|---|
| Two-barrel top cascade | 100-110 gallons | $100-$250 | Beginner garden | Separate draw-off |
| Commercial linked barrels | 100-300 gallons | $250-$700 | Finished landscaping | Higher purchase price |
| Single 200-gallon tank | 150-250 gallons usable | $250-$800 | Compact footprint | Less modular |
| 275-gallon IBC tote | 275 gallons nominal | $150-$500 used | Homestead irrigation | Needs strong foundation and screening |
| Pump-fed storage tank | 200-1,000 gallons | $500-$2,000+ | Drip or hose pressure | Requires power and maintenance |
IBC totes and large tanks require more rigorous structural planning. A full 275-gallon tote contains about 2,294 pounds of water, so a timber frame or elevated platform must be designed for the load rather than improvised from household blocks.
Rainwater collection also has roof-material constraints. Avoid using runoff for edible crops when the roof, flashing, coatings, or gutters may contribute lead, copper, asphalt residue, or other contaminants, and consult local health or extension guidance for testing.
What Does a Three-Barrel System Cost and Weigh?
A basic three-barrel system commonly costs $150-$350 and weighs about 1,400 pounds when full, before the platform and containers are included. Installation normally takes 2-4 hours for an experienced DIYer, excluding concrete curing or construction of a retaining structure.
Costs rise when the site needs excavation, anchoring, decorative barrels, a first-flush diverter, freeze protection, or a pump. A low-cost system can function well, but savings should come from sourcing suitable barrels, not from undersizing the base, fittings, or overflow.
| System size | Nominal storage | Water weight | Typical DIY materials cost | Typical installation time |
|---|---|---|---|---|
| 2 x 55 gallons | 110 gallons | 918 pounds | $100-$250 | 1.5-3 hours |
| 3 x 55 gallons | 165 gallons | 1,377 pounds | $150-$350 | 2-4 hours |
| 4 x 55 gallons | 220 gallons | 1,836 pounds | $225-$500 | 3-6 hours |
| 1 x 275-gallon IBC | 275 gallons | 2,294 pounds | $150-$500 | 3-8 hours |
Expert Rules That Prevent Expensive Failures
A low outlet is not automatically a high-pressure outlet. Elevating a barrel 8-12 inches creates useful clearance for a watering can, but it does not produce sprinkler pressure. Use a pump when the irrigation emitter requires pressure the gravity head cannot provide.
The first barrel should be the dirtiest stage. Sending unfiltered roof runoff directly into every barrel distributes sediment throughout the network and makes cleaning harder. A screened inlet and first-flush diverter preserve downstream capacity.
Isolation valves are cheaper than emergency water loss. Bottom-linked systems are convenient, but one failed low fitting can release the entire stored volume. A valve at each branch converts a catastrophic drain into a localized repair.
Flexible hose reduces stress but can hide blockages. Rigid PVC gives clean routing and high flow, while flexible hose tolerates small alignment changes. Support either material and provide unions or removable clamps for cleaning.
FAQ
Can I connect rain barrels with garden hoses?
You can connect rain barrels with reinforced, UV-resistant garden hose when the hose has a suitable inside diameter and secure fittings. Avoid thin expandable hose, aquarium tubing, and ordinary low-quality vinyl because kinks, sunlight, and low flow can prevent equalization. Use stainless clamps on barbed adapters and support every long horizontal run.
Should rain barrels be connected at the top or bottom?
Bottom connections are preferable when one outlet should access nearly all stored water and the barrels can share a stable, level base. Top connections are preferable when simple installation, independent storage, or easier isolation matters more. Neither design replaces a screened inlet, a vent, or a safe final overflow.
Can I drink water from daisy-chained rain barrels?
Do not drink untreated rain barrel water. Roof runoff can contain animal waste, microbes, metals, roofing compounds, and chemical residues; a potable system requires source assessment, filtration, disinfection, backflow protection, and testing that meet local requirements.
How far should rain barrel overflow be from the house?
Route overflow at least several feet from the foundation, using a discharge point that cannot erode the barrel base or flow toward doors, crawlspaces, or basement walls. The exact distance depends on soil, grade, foundation drainage, and local stormwater rules, so extend the outlet farther on clay soil or flat sites.
Should I drain rain barrels in winter?
Drain and disconnect rain barrels before hard freezes if the container or fittings are not freeze-rated. Expanding ice can split plastic walls, bulkhead gaskets, valves, and rigid PVC. Store removable hoses indoors, leave the tank open to dry, and reconnect only after freezing conditions have passed.
Can one downspout fill four rain barrels?
One downspout can supply four rain barrels, but the available roof runoff, transfer-pipe diameter, overflow capacity, base strength, and water demand must support the system. Four 55-gallon barrels store 220 gallons and weigh approximately 1,836 pounds when full, so the platform and overflow require deliberate design.
The Bottom Line
Daisy chaining rain barrels works best when the storage volume, connector diameter, foundation, and overflow are designed as one system. Use bottom links for shared water and single-point draw-off, or top links for simpler staged filling and easier isolation. Build on a level load-rated base, use food-grade containers, screen every opening, and test the final overflow before the first heavy storm. Those steps answer how to daisy chain rain barrels safely while preventing the failures that waste water or damage a foundation.