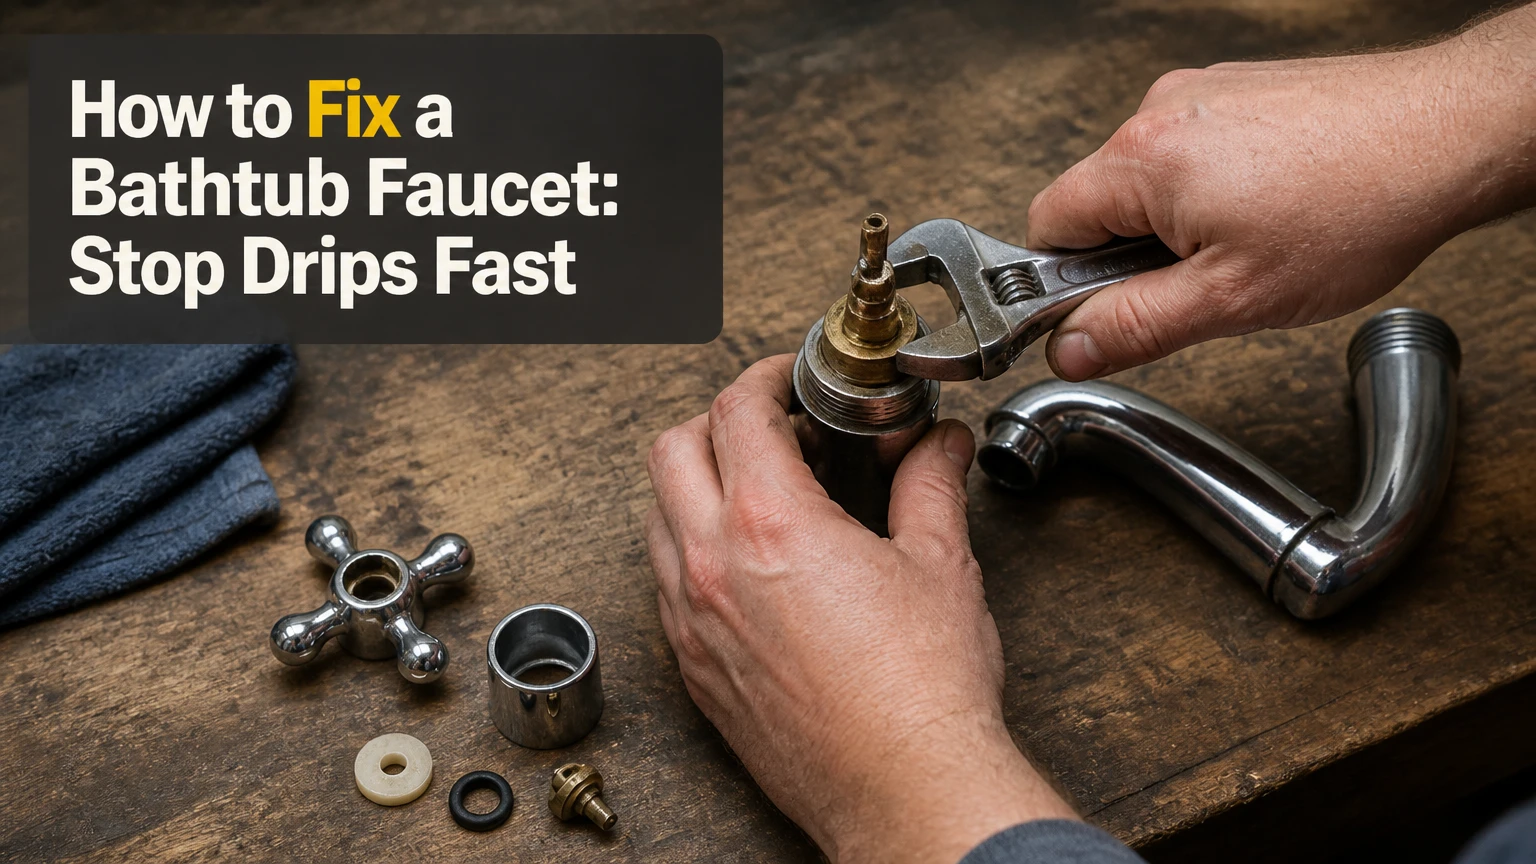
To fix a bathtub faucet, first identify where water escapes and whether the valve uses compression stems, a cartridge, or another mechanism. Shut off the supply, remove the handle and trim, replace the failed washer, O-ring, cartridge, or valve component, then restore water slowly and test for leaks. Most repairs take 1-3 hours.
Key Facts
A bathtub faucet dripping from the spout usually has a worn internal washer, seat, cartridge, or valve seal.
A leak from behind the handle commonly indicates a failed stem packing, cartridge O-ring, or valve-body seal.
Exact cartridge matching matters because similar-looking cartridges can differ in length, splines, orientation, and seal spacing.
Typical DIY repair parts cost $5-$40, while professional repairs commonly cost $150-$400.
A cartridge puller reduces damage risk when mineral scale has seized the cartridge inside the brass valve body.
A leak inside the wall requires immediate attention because the visible fixture may hide structural water damage.
Before You Start the Repair
A bathtub faucet repair normally requires 1-3 hours, basic hand tools, and a replacement part matched to the faucet brand and valve. The deciding factor is diagnosis: replacing a cartridge will not correct a damaged valve body, failed supply connection, or leaking pipe behind the wall.
| Requirement | Typical value | Why it matters |
|---|---|---|
| DIY time | 1-3 hours | Corrosion and seized handles can double removal time |
| Basic parts cost | $5-$40 | Covers washers, O-rings, springs, seats, or common cartridges |
| Professional repair | $150-$400 | Includes typical diagnostic and labor charges |
| Difficulty | Moderate | Handle removal and part matching create most problems |
| Water shutoff | 1 valve or main supply | No repair should begin with pressurized plumbing |
| Tub protection | 1 cloth plus drain plug | Prevents scratches and lost screws |
Tools and Materials
Prepare a Phillips screwdriver, small flathead screwdriver, Allen keys, adjustable pliers, needle-nose pliers, a flashlight, an old toothbrush, a cloth, and plumber’s silicone grease. Add a cartridge puller for a single-handle cartridge valve, penetrating oil for corroded fasteners, replacement seals, and a tub-spout wrench if the spout also needs repair.
Use only grease labeled for plumbing O-rings and potable-water or hot-water applications. Petroleum jelly can soften or swell rubber seals, while automotive grease may contain additives that damage faucet elastomers.
Safety and Access Checks
Locate individual bathroom shutoffs behind an access panel, in a nearby closet, or below the tub. Many shower-tub valves have no local shutoff, so the home’s main valve may be the only option.
Open the faucet after shutting off water. A strong continuing flow means the shutoff is not closing, which changes the repair from a simple fixture job into a supply-control problem. Do not remove a retaining clip or cartridge while pressure remains in the valve.
Call a plumber before disassembly if water appears from the wall, the valve body moves when the handle turns, the copper pipe twists with the spout, or the shutoff cannot stop the flow. Those conditions can turn a small repair into a concealed flood.
How Does a Bathtub Faucet Work?
A bathtub faucet mixes hot and cold water inside a valve body, controls the outlet flow, and often uses a diverter to send water either to the tub spout or showerhead. The handle moves a stem, cartridge, ball, or ceramic disks that align or block internal water passages.
The visible spout is only the outlet. The pressure-bearing control valve is usually behind the wall and connected to hot and cold supply pipes. In a single-handle design, one cartridge controls both temperature and volume; in a two-handle design, separate hot and cold valves feed a shared outlet.
A diverter may be located on the tub spout, on the valve trim, or in a separate valve. Pulling a spout knob or rotating a diverter redirects water upward, but a worn diverter usually affects shower flow rather than causing a constant drip from the closed tub spout.
The repair target is therefore the failed sealing surface, not automatically the entire faucet. Mineral deposits, worn rubber, damaged ceramic surfaces, and loose packing each produce different symptoms.
Which Faucet Type Needs Repair?
The handle arrangement and movement usually identify the repair mechanism. Two handles that turn several rotations commonly indicate compression stems, while a single lever that rotates or pulls generally operates a cartridge, pressure-balancing cartridge, ball, or ceramic-disk valve.
| Faucet mechanism | Typical appearance | Common failure | Usual repair |
|---|---|---|---|
| Compression stem | Two handles, multiple turns | Washer, valve seat, packing | Replace washer, seat, or stem |
| Cartridge valve | One or two handles, quarter-turn movement | Cartridge seals or cartridge body | Replace exact cartridge |
| Ball valve | Single lever, dome cap | Springs, seats, ball, O-rings | Rebuild or replace ball assembly |
| Ceramic disk valve | Single lever, short smooth travel | Disk seals or contaminated disks | Replace cartridge or disk unit |
| Pressure-balancing valve | Single control, shower-tub trim | Cartridge, balancing spool | Service manufacturer-specific cartridge |
Bathtub installations most often use compression stems or cartridge-style shower valves. Ball faucets are more common at sinks, and ceramic-disk mechanisms are less common behind tub walls than cartridge and pressure-balancing designs.
How Do You Match the Replacement Part?
Match the manufacturer, model family, cartridge length, stem shape, spline count, orientation tabs, and seal locations. Remove the old part before buying whenever possible, then photograph the valve and take the component to a plumbing supplier.
The handle cap, escutcheon, trim plate, or cartridge itself may carry a brand name. A generic cartridge that looks similar can still leak because its ports or seals sit a few millimeters away from the original positions.
How to Fix a Bathtub Faucet Step by Step
The following process applies primarily to a single-handle cartridge bathtub faucet. A two-handle compression repair uses the same preparation and testing principles, but its internal washer and stem removal differ.
Step 1: Shut Off Water and Protect the Tub
Close the bathroom isolation valves or the home’s main water valve, then open the tub faucet until water stops and pressure releases. Cover the drain with a cloth or plug and place another towel over the tub surface to catch tools.
You will know the step worked when no water flows from the spout after 30-60 seconds with the handle open. A continuing trickle may be residual water, but sustained pressure indicates a leaking shutoff.
Common mistake: Leaving the drain open allows a retaining clip, screw, or spring to disappear into the waste line.
Step 2: Remove the Handle
Pry off the index cap with a thin flathead screwdriver, or locate the set screw under the lever. Remove the Phillips, hex, or slotted screw and pull the handle straight from the valve stem.
Apply penetrating oil to a corroded screw and wait 10-15 minutes. For a seized handle, use a handle puller rather than levering against tile or the escutcheon.
You will know the step worked when the valve stem or cartridge stem is exposed without bending the trim plate. Do not heat a plastic handle or use an open flame.
Common mistake: Excessive force can break the stem or loosen the valve body behind the wall.
Step 3: Remove the Escutcheon and Sleeve
Unscrew the decorative sleeve or remove the escutcheon screws, then slide the trim away from the wall. If the plate is sealed with caulk, cut the perimeter carefully with a utility knife.
Inspect the exposed valve for a retaining clip, threaded bonnet nut, cartridge sleeve, or packing nut. Photograph the assembly before removing small parts.
You will know the step worked when the cartridge chamber and retaining hardware are visible. Keep screws in a labeled container.
Common mistake: Cutting deeply into the wall joint can damage waterproofing or the finished wall surface.
Step 4: Remove the Retaining Hardware
Pull a U-shaped retaining clip straight upward with needle-nose pliers, or loosen the bonnet nut with an adjustable wrench. Keep the clip aligned because a bent or incompletely seated clip can allow the cartridge to eject under pressure.
Do not pry against delicate valve-body edges. If mineral deposits prevent clip movement, apply a small amount of penetrating oil to the exposed metal and work it gently.
You will know the step worked when the cartridge is no longer mechanically locked. Never pull a cartridge before removing its retainer.
Common mistake: Losing the clip creates a dangerous reassembly failure even when the new cartridge fits.
Step 5: Extract the Cartridge
Pull the cartridge straight outward. If it will not move by hand, rotate the stem slightly if the manufacturer permits, then use a brand-compatible cartridge puller.
A stuck cartridge often results from scale on the seals or corrosion between the cartridge and brass valve body. Stabilize the valve body while pulling; twisting the entire valve can stress soldered or threaded connections behind the wall.
You will know the step worked when the old cartridge exits without gouging the valve bore. Stop if the valve body shifts or the wall connection begins to move.
Common mistake: Channel-lock pliers can crush the stem and leave the cartridge body trapped inside the valve.
Step 6: Inspect and Clean the Valve Body
Use a flashlight to inspect the brass or composite valve bore for scratches, cracks, broken seal fragments, or heavy scale. Remove loose deposits with a soft toothbrush and wipe the chamber with a clean cloth.
Do not use a metal pick aggressively inside the sealing bore. A deep scratch can create a permanent bypass path that a new cartridge cannot seal.
You will know the step worked when the bore is clean, smooth, and free of debris. Replace a visibly cracked valve body rather than installing repeated cartridges.
Common mistake: Installing a new cartridge over old rubber fragments can cause an immediate drip.
Step 7: Install the Exact Cartridge
Compare the new cartridge with the old one before insertion. Align the locating tabs, hot-cold orientation, stem flats, and port openings exactly as the manufacturer specifies.
Apply a thin film of plumber’s silicone grease to the cartridge’s rubber seals. Do not coat ceramic faces or pack the chamber with grease. Press the cartridge fully into the valve body without hammering it.
You will know the step worked when the cartridge sits at the same depth as the original and the retaining clip slides completely into place.
Common mistake: Installing the cartridge backward can reverse hot and cold water or prevent full shutoff.
Step 8: Reassemble the Trim and Handle
Reinstall the retaining clip or bonnet nut before replacing the sleeve and escutcheon. Refit the handle, tighten its screw firmly without stripping it, and replace the index cap.
Apply a narrow bead of bathroom-rated silicone around the top and sides of an escutcheon when required by the installation instructions. Leave the bottom edge open where appropriate so a concealed seep can drain visibly instead of remaining trapped.
You will know the step worked when the handle operates smoothly through its intended range and the trim sits flat against the wall.
Common mistake: Caulking every edge can hide a valve leak until the wall has already absorbed water.
Step 9: Restore Water and Test
Open the supply valve slowly, then operate the faucet through cold, warm, and hot positions. Allow water to run for 30-60 seconds to flush debris and air before closing the handle.
Check the spout tip, handle stem, escutcheon perimeter, and nearby wall for moisture. Repeat the test with the diverter engaged, because pressure changes can expose a seal that did not leak during initial flow.
You will know the repair worked when the spout stops dripping within a few seconds after shutoff and the handle does not leak during operation.
Common mistake: Opening the main supply abruptly can send debris into the new cartridge.
How Do You Repair a Two-Handle Faucet?
A two-handle compression bathtub faucet is usually repaired by replacing the worn rubber washer, damaged valve seat, or complete stem assembly. Turn off water, remove the handle and packing hardware, unscrew the stem, replace the washer with the same diameter and thickness, and inspect the seat before reassembly.
A compression handle typically requires several turns to open. The rubber washer presses against a valve seat when closed, so a constant spout drip usually indicates a washer that has hardened, cracked, or lost its sealing edge.
If the seat is pitted, a new washer may provide only temporary relief. Replace the removable seat with the correct seat wrench, or replace the stem when the seat is integral or the threads are damaged.
| Symptom | Likely part | Typical action | Typical part cost |
|---|---|---|---|
| Cold-side drip | Cold stem washer | Replace washer or stem | $2-$20 |
| Hot-side drip | Hot stem washer | Replace washer or stem | $2-$20 |
| Leak around handle | Packing or O-ring | Replace packing or stem seal | $3-$25 |
| Drip after new washer | Pitted seat | Replace seat or stem | $8-$35 |
| Hard-to-turn handle | Corroded stem threads | Replace stem assembly | $15-$50 |
Do not overtighten a compression handle to stop a drip. Excess torque damages the washer and seat, making the next repair more expensive.
What If the Faucet Leaks from a Different Location?
The leak location narrows the diagnosis, but water can travel along trim and make the apparent location misleading. Dry the area completely, operate the faucet, and watch the first point where moisture returns.
| Leak location | Most likely cause | First repair | Escalation sign |
|---|---|---|---|
| Spout tip when closed | Washer, cartridge, seat | Replace internal seal or cartridge | New part still drips |
| Around handle | Stem packing or O-ring | Replace packing or cartridge seal | Water enters wall opening |
| Escutcheon edge | Valve leak or failed seal | Remove trim and inspect | Damp drywall or flooring |
| Spout-to-wall joint | Loose connection or failed seal | Identify slip-on or threaded type | Pipe moves behind wall |
| Showerhead while tub runs | Diverter restriction or valve issue | Inspect diverter and cartridge | Flow remains split |
| Inside wall | Supply pipe or valve body | Shut off water immediately | Any continuing hidden flow |
Why Does the Tub Spout Drip After Shutoff?
A tub spout that drips after shutoff has an internal valve-sealing failure, not usually a loose handle. Compression faucets need a washer or seat repair, while cartridge, ball, and ceramic-disk valves generally need the correct cartridge, seats, springs, or seals.
A few drops caused by water draining from the spout can stop within several seconds. A persistent drip that continues for minutes indicates pressurized water bypassing the closed valve.
Why Is Water Leaking Behind the Handle?
Water behind the handle commonly comes from a failed cartridge O-ring, stem packing, loose bonnet nut, or cracked valve component. Remove the handle and trim, dry the area, and observe whether moisture begins at the stem or enters from the wall opening.
A loose decorative plate does not cause a pressurized leak by itself. Tightening trim may hide the water path while allowing the valve cavity and framing to remain wet.
Why Is Tub Water Pressure Low?
Low tub flow usually comes from a clogged spout outlet, mineral deposits in the diverter, a partially closed shutoff, debris in the valve cartridge, or a supply restriction. Remove and inspect the tub spout only after determining whether it is threaded or slip-on.
If shower flow is also weak, inspect the valve cartridge, pressure-balancing spool, and supply screens. If only the tub outlet is weak, the diverter or spout is the stronger suspect.
Can You Repair the Tub Spout Separately?
You can replace a bathtub spout separately when the spout is damaged, its diverter fails, or its outlet is blocked, provided the pipe connection remains sound. A slip-on spout is secured by a set screw, while a threaded spout turns onto a male pipe adapter.
Close the water supply before loosening the spout. For a slip-on model, loosen the underside set screw and pull the spout straight off. For a threaded model, turn it counterclockwise while supporting the pipe connection.
Do not twist aggressively if the pipe moves inside the wall. A damaged adapter or broken pipe can require wall access, and a new spout will not solve that underlying failure.
When Is Replacement Better Than Repair?
Replacing a faucet or trim is more practical when the valve body is cracked, the cartridge is discontinued, the trim is severely corroded, or repair parts approach the cost of a new compatible assembly. Replacing only the visible trim does not fix a failed concealed valve.
A complete valve replacement is a larger project because it may require access from the back of the wall, soldering or threaded pipe work, waterproofing, and a pressure-balancing or thermostatic control. A new pressure-balancing valve can reduce temperature swings when another fixture flushes, but it does not eliminate the need for correct installation.
| Decision condition | Repair choice | Typical cost range | Typical time |
|---|---|---|---|
| Washer or O-ring failure | Replace seal | $5-$25 | 30-90 minutes |
| Standard cartridge failure | Replace cartridge | $20-$80 | 1-3 hours |
| Seized cartridge | Cartridge plus puller | $50-$140 | 2-4 hours |
| Damaged tub spout | Replace spout | $25-$120 | 30-90 minutes |
| Failed concealed valve | Valve replacement | $300-$1,200+ | 4-12 hours |
| Cosmetic trim upgrade | Replace trim kit | $100-$500+ | 1-3 hours |
These are typical consumer and trade ranges, not guaranteed quotes. Regional labor rates, wall access, brand availability, and corrosion can change the final price substantially.
Common Mistakes and How to Fix Them
Forcing the Handle or Cartridge
Stop when the valve body moves, the stem bends, or the wall connection flexes. Use the correct handle puller or cartridge puller, because leverage applied to the trim can damage concealed plumbing.
Guessing the Cartridge
Remove the old cartridge and compare physical dimensions, stem geometry, retaining method, and orientation. Brand names alone are insufficient because one manufacturer may use several cartridge families.
Using Petroleum Lubricant
Clean petroleum jelly from rubber seals and replace it with a thin film of faucet-grade silicone grease. Excess lubricant can migrate into ports and trap debris.
Leaving the Retaining Clip Partially Seated
Push the clip fully into both slots and confirm that the cartridge cannot move outward. A partially seated clip can release under supply pressure.
Ignoring a Failed Shutoff
If the local valve does not stop flow, close the main supply and repair or replace the shutoff before continuing. Do not rely on a barely closed valve while removing a pressurized cartridge.
Hiding a Wall Leak with Caulk
Remove trim and locate the first wet point before resealing. Caulk is a water-management detail, not a repair for a leaking valve, pipe, or cartridge.
How Much Does Bathtub Faucet Repair Cost?
A basic bathtub faucet repair typically costs $5-$40 for DIY seals or a common replacement part, $50-$140 when a specialty cartridge puller and cartridge are needed, and $150-$400 for a standard professional repair. Concealed valve replacement commonly costs more because wall access and pipe work add labor.
A renter with a two-handle compression faucet may need only a washer and screwdriver. A homeowner with a seized single-handle cartridge should budget for the exact cartridge, puller, silicone grease, and possible replacement trim if corrosion damages the finish.
Labor prices vary by region and service window. Ask for a written estimate that separates diagnostic time, parts, access work, wall repair, and disposal.
FAQ
Can I Stop a Bathtub Faucet Drip Temporarily?
You can reduce damage temporarily by closing the fixture’s isolation valve or the home’s main supply, but tightening the handle is not a reliable repair. Place a container under the spout only as a short-term measure, then repair the failed washer, cartridge, or valve seal.
How Do I Remove a Bathtub Faucet Handle Without a Screw?
Look for a concealed set screw under the lever, a decorative cap hiding a center screw, or a threaded handle retaining nut. A handle puller is safer than prying against tile when mineral scale has bonded the handle to the stem.
How Do I Know Which Cartridge to Buy?
Identify the brand on the handle, escutcheon, or cartridge, then compare the removed part’s length, stem shape, spline count, ports, tabs, and seal positions. Manufacturer parts diagrams and plumbing suppliers are more reliable than visual similarity alone.
Can a Landlord Require a Plumber for a Leaking Faucet?
A renter should report a leaking bathtub faucet to the landlord or property manager before disassembly, especially when the valve is behind a finished wall. Lease terms and local housing rules determine responsibility, while concealed leaks should be reported immediately.
Why Does a New Cartridge Still Leak?
A new cartridge can leak when the valve bore is scratched, debris remains inside, the retaining clip is incomplete, the cartridge is misoriented, or the replacement part is incorrect. Remove the trim, shut off water, and inspect installation before buying another cartridge.
Is a Dripping Tub Faucet Wasting Much Water?
The amount depends on drip size and frequency, but a persistent leak wastes treated water and can stain the tub or damage surrounding materials. Repairing the valve also prevents mineral deposits from building on the spout and reduces the chance that a minor seal failure becomes a concealed leak.
The Bottom Line
To fix a bathtub faucet, diagnose the leak location and faucet mechanism before buying parts. Replace a washer in a compression stem, replace the exact cartridge in a cartridge valve, service the seals in compatible ball or ceramic-disk units, and inspect the valve body for damage. Shut off water completely, protect the drain, avoid forcing seized parts, and call a plumber when the valve, shutoff, or pipe behind the wall is involved. A careful diagnosis is what makes how to fix a bathtub faucet a predictable repair rather than a trial-and-error replacement.