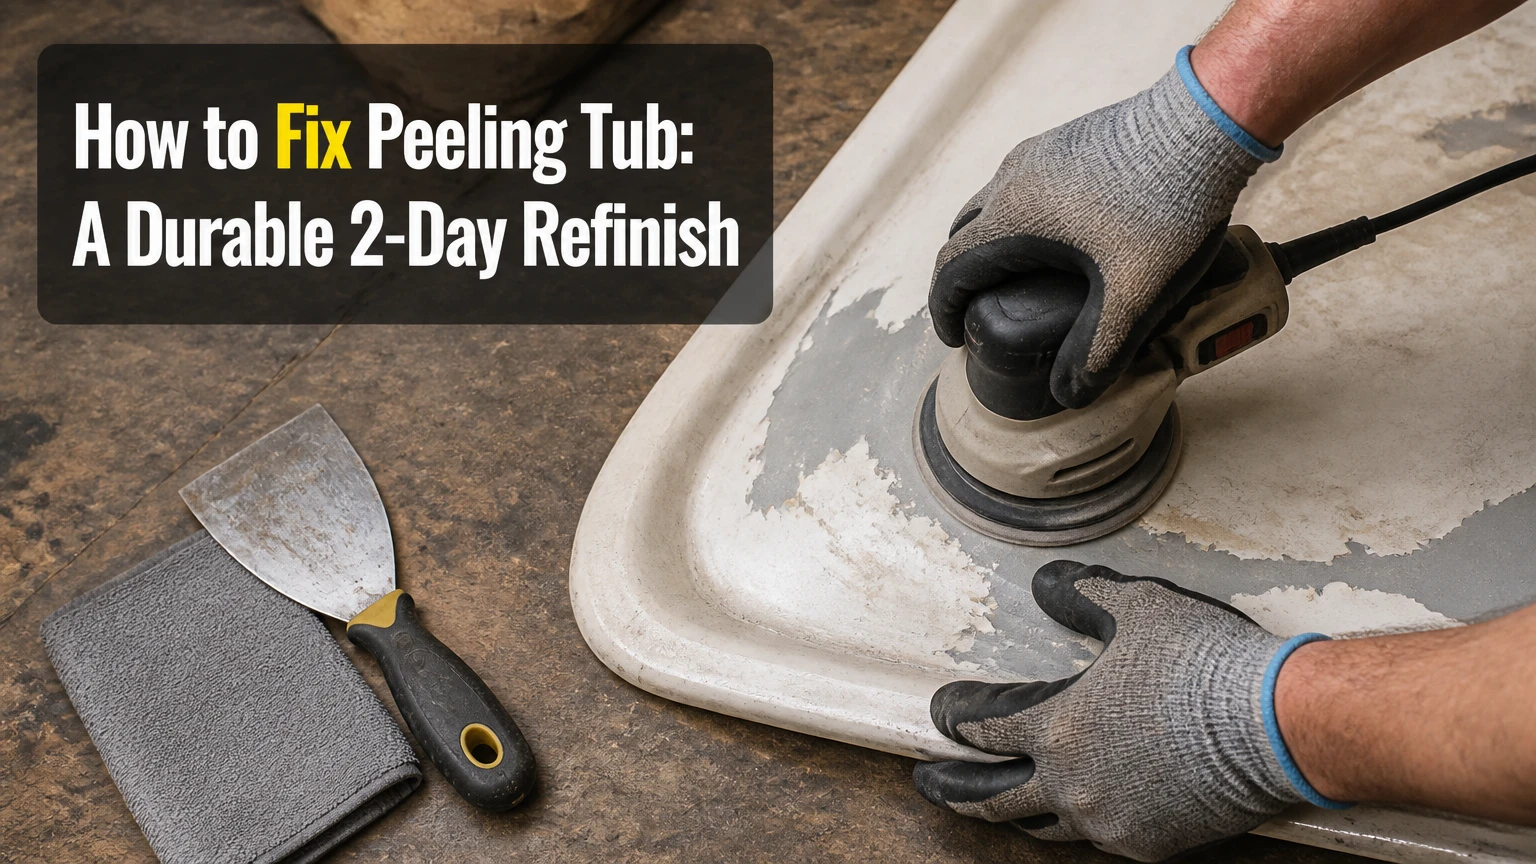
To fix a peeling tub, remove every loose and poorly bonded coating, repair substrate damage, clean and dry the surface, then apply a compatible two-part bathtub coating. The process usually takes 1-2 working days plus 48-72 hours of curing, and preparation determines whether the new finish lasts or peels again.
Key facts at a glance
A new coating applied over peeling bathtub paint will usually fail with the old layer.
DIY refinishing commonly costs $75-$250 in materials, excluding tool replacement and ventilation equipment.
A professional bathtub refinish typically costs $350-$900 in the United States, depending on preparation and location.
Fiberglass or acrylic tubs that flex, crack, or feel soft need structural repair or replacement rather than cosmetic coating.
Do not mix bleach, acids, solvents, or drain chemicals; chemical reactions can release dangerous vapors.
Keep water off a newly refinished tub for the product’s full cure period, commonly 48-72 hours.
Why Does Tub Refinishing Peel?
Bathtub refinishing peels when the applied coating loses adhesion to the original surface or to an older aftermarket coating. Common causes include silicone residue, soap film, trapped moisture, insufficient abrasion, incompatible products, excessive coating thickness, poor ventilation, and movement in a flexible fiberglass or acrylic tub.
Factory porcelain enamel is fused to steel or cast iron at high temperature. Reglazing is different: a contractor or homeowner applies a liquid coating over the existing surface. That coating depends on surface preparation and chemical compatibility, so a failed reglaze cannot be treated like damaged factory porcelain.
Peeling often begins at the drain, caulk line, overflow cover, corners, or areas repeatedly exposed to standing water. Those locations retain moisture and commonly contain silicone residue, which prevents primers and resins from bonding.
What a Peeling Tub Usually Means
A peeling tub generally has a failed aftermarket finish rather than a damaged factory enamel surface. Large sheets, curled edges, bubbles, and multiple detached layers indicate delamination, while an isolated pinhole or chip may be repairable without stripping the entire tub.
Inspect the exposed area before buying materials. A hard, glossy, mineral-like surface suggests porcelain enamel. A gray metallic surface may be steel or cast iron. A dull, slightly flexible surface usually indicates fiberglass or acrylic.
Do not confuse peeling paint with rust. Orange staining around a chip can indicate exposed steel, and a soft spot can indicate substrate failure. Coating over either condition hides the problem without correcting it.
How to Identify the Tub Surface
Identify the tub material before selecting a stripper, primer, repair filler, or topcoat. A refrigerator magnet usually sticks strongly to steel and cast iron, but it will not stick to fiberglass, acrylic, or most coatings, so the test is only an initial clue.
| Surface | Practical identification clue | Main repair risk | Suitable finish approach |
|---|---|---|---|
| Porcelain-enamel steel | Magnet attracts; exposed edge looks metallic | Rust at chips; thin walls can dent | Compatible epoxy or professional urethane |
| Porcelain-enamel cast iron | Magnet attracts; very heavy, rigid rim | Rust under failed coating; difficult removal | Full preparation and compatible resin |
| Fiberglass | Magnet does not attract; translucent or layered edge | Flexing, cracks, delamination | Repair and reinforce before coating |
| Acrylic | Magnet does not attract; warmer, plastic feel | Heat damage and movement | Acrylic-compatible repair system |
| Old aftermarket glaze | Uneven thickness, solvent-sensitive, lifts in sheets | New coating bonds to failed layer | Strip unstable coating completely |
Press gently near the peeling area with a fingertip. If the floor or wall flexes visibly, a surface coating is not the first repair. Fiberglass repair requires attention to the laminate, support, water damage, and crack movement.
Can You Paint Over Peeling Tub Paint?
You should not paint over peeling tub paint because the remaining layer is a weak bond under the new finish. The only reasonable exception is a small, isolated chip in an otherwise stable professionally applied coating, and even that repair needs feather-sanding, compatible filler, primer, and a matching topcoat.
Test the surrounding finish with a sharp scraper. If the coating lifts beyond the visibly damaged area, continue removing it. Tap lightly around the repair with a plastic tool; hollow sounds, raised edges, or blistered sections indicate hidden separation.
A spot repair is unsuitable when peeling covers more than a few isolated areas, reaches the drain or caulk joint, or exposes multiple old coatings. In those cases, the repair may look acceptable for weeks while water migrates beneath the surrounding finish.
Before You Start
| Requirement | Typical specification |
|---|---|
| Working time | 6-10 hours across 1-2 days |
| Cure time | 48-72 hours, according to product label |
| DIY material cost | $75-$250 |
| Recommended temperature | 65-85°F, unless the label specifies otherwise |
| Ventilation | Exhaust fan ducted outdoors; cross-ventilation where possible |
| Respiratory protection | Product-specific respirator with correctly rated cartridges |
| Essential tools | Plastic scraper, abrasive pads, wet/dry sandpaper, vacuum, lint-free cloths |
Read the coating manufacturer’s safety data sheet before opening chemicals. A bathroom exhaust fan alone may not provide adequate protection, particularly when solvent-based products are sprayed or used in a small room.
Protect adjacent tile, flooring, fixtures, and the drain opening. Remove the drain trim when practical; coating over a drain flange often creates a brittle ring that cracks when the trim is serviced.
How to Fix a Peeling Tub Step by Step
A durable bathtub refinish requires 13 controlled steps: diagnose, strip, repair, clean, abrade or etch as directed, rinse, dry, mask, prime, coat, inspect, cure, and recaulk. Preparation takes longer than application, and the success checkpoint is a uniformly clean, dry, mechanically sound surface.
Step 1: Stop Using the Tub
Stop bathing and remove bath mats, bottles, suction cups, and drain stoppers. Allow the tub to dry for at least 24 hours if moisture has entered the peeling area, especially around the drain or perimeter joint.
You’ll know it worked when: no water remains in the drain recess, corners, or under lifted edges.
Common mistake: beginning removal while the substrate is damp. Moisture can remain under apparently dry flakes.
Step 2: Determine the Failure Boundary
Scrape the damaged area with a plastic scraper and mark the point where the finish becomes firmly bonded. Expand the inspection at least 2-3 inches beyond visible peeling, because edges often conceal undercut delamination.
You’ll know it worked when: firm coating transitions directly to sound substrate without a raised or hollow edge.
Common mistake: stopping at the visible boundary and leaving a thin ring that later lifts.
Step 3: Remove the Old Coating
Use the stripping method specified for the existing coating and substrate. Some bathtub systems require a dedicated methylene-chloride-free stripper, while others rely on sanding; never assume that a household paint stripper is safe for fiberglass, acrylic, plastic drains, or nearby tile.
Scrape softened material with plastic tools. Use a vacuum rated for the dust generated by sanding, and follow the coating and stripper labels for containment and disposal.
You’ll know it worked when: all loose coating is gone and no flexible film remains.
Common mistake: using a metal scraper aggressively on porcelain, which can create scratches that require additional repair.
Step 4: Treat Rust, Cracks, and Soft Areas
Remove surface rust from exposed steel, then use the coating system’s specified rust treatment or metal primer. Do not coat over perforation, active leaks, or deep corrosion.
For fiberglass and acrylic, repair cracks with a compatible reinforcement and filler system. A crack that opens when someone stands in the tub will reopen through a new decorative coating.
You’ll know it worked when: the substrate is rigid, filled, and flush without movement under light hand pressure.
Common mistake: using automotive body filler below a waterline without confirming chemical and moisture compatibility.
Step 5: Degrease and Wash
Clean with the manufacturer-approved degreaser, then scrub the surface with a non-shedding abrasive pad. Remove body oils, soap scale, mineral deposits, wax, silicone, and bath-product residue.
Rinse repeatedly. Do not mix cleaners. In particular, never combine bleach with acids, ammonia, or solvent products.
You’ll know it worked when: water sheets across the surface rather than forming isolated beads. Beading usually indicates remaining contamination.
Common mistake: treating a rough surface as clean. Abrasion can hide grease inside scratches, so cleaning must precede final sanding.
Step 6: Remove Silicone Completely
Cut out old silicone caulk with a plastic or non-marring scraper. Remove the thin residue with a silicone-compatible remover, then clean again according to the refinishing system’s instructions.
Silicone contamination is one of the most persistent causes of fish eyes and edge peeling. Do not rely on fresh caulk to cover residue.
You’ll know it worked when: the joint feels clean and no rubbery film rolls under a fingernail.
Common mistake: sanding silicone into the surface. Sanding spreads contamination instead of removing it.
Step 7: Abrade or Etch the Surface
Follow the product label on whether to use mechanical abrasion, chemical etching, or both. A common DIY preparation uses 180-220 grit wet/dry abrasive paper for stable coatings and a dedicated etching product for compatible porcelain surfaces.
Acid etching is not a universal step. It can damage metal fixtures, plumbing finishes, tile grout, skin, and lungs, and it does not replace degreasing. Use chemical-resistant gloves, eye protection, ventilation, and the neutralization and disposal procedure stated by the manufacturer.
You’ll know it worked when: the surface has a uniform dull profile with no glossy islands.
Common mistake: applying resin to glossy porcelain or old glaze because it feels smooth and clean.
Step 8: Rinse, Neutralize, and Dry
Rinse until the specified residue is gone, and neutralize only when the product instructions require it. Remove standing water with a wet vacuum or clean towels, then allow the tub to dry fully.
Do not use a heat gun on fiberglass, acrylic, plastic drains, or solvent residue. Forced heat can distort plastics, accelerate unsafe vapor release, or damage the substrate. Ambient drying and controlled ventilation are safer.
You’ll know it worked when: the drain, overflow, corners, and caulk line are dry after a final inspection with a bright light.
Common mistake: assuming a towel-dry surface is moisture-free around the drain flange.
Step 9: Apply the Compatible Primer
Use the primer named by the coating manufacturer, not a generic wall primer. Mix only the amount usable within the stated pot life, and record the time mixing begins.
| Coating system | Typical working property | Best substrate or use | Main limitation |
|---|---|---|---|
| Two-part epoxy | 30-60 minute pot life; 48-72 hour cure | Small DIY roller applications | Can yellow or become brittle under harsh use |
| Acrylic urethane | 20-45 minute pot life; 24-72 hour cure | Professional sprayed refinishing | Requires strict ventilation and spray control |
| One-part tub paint | 2-6 hour recoat window | Small cosmetic touch-ups | Lower durability and greater peeling risk |
| Gelcoat repair resin | Often 15-30 minute working time | Fiberglass spot repairs | Requires correct catalyst and finishing technique |
Apply a thin, even primer film. Thick primer can trap solvent and create soft areas beneath the topcoat.
You’ll know it worked when: coverage is continuous, dry according to the label, and free of craters or glossy contamination spots.
Common mistake: using a primer that is chemically incompatible with the topcoat.
Step 10: Mix and Apply the First Topcoat
Combine the two components at the exact ratio specified by the manufacturer. A small deviation can leave epoxy soft, sticky, or prone to early failure.
Use a high-density foam roller or the application tool named by the system. Work in manageable sections, maintain a wet edge, and apply thin coats rather than trying to hide every color variation at once.
You’ll know it worked when: the film is continuous and smooth without runs, dry edges, or exposed primer.
Common mistake: overworking coating after it begins to set, which creates texture and roller marks.
Step 11: Apply the Recoat
Apply the next coat within the stated recoat window. A typical interval is 1-4 hours, but temperature, humidity, product chemistry, and film thickness change the timing.
If the first coat misses the window, follow the label’s sanding and cleaning instructions before recoating. Do not guess.
You’ll know it worked when: the second film covers consistently and does not drag the first coat from the surface.
Common mistake: applying a heavy coat to compensate for thin coverage. Thick resin sags, retains solvent, and cures unevenly.
Step 12: Inspect and Cure
Inspect the wet surface from several angles for runs, lint, bubbles, and fish eyes. Correct only defects the product instructions permit correcting; aggressive brushing can make a small defect larger.
Keep the bathroom closed but ventilated as directed. Dry-to-touch does not mean ready for bathing. Typical light handling may be possible after 24 hours, while water exposure commonly requires 48-72 hours and full chemical cure can take longer.
You’ll know it worked when: the coating is firm, odor has reduced substantially, and the label’s full cure period has elapsed.
Common mistake: testing the finish with a shower after one night.
Step 13: Recaulk and Reinstall Trim
After full cure, reinstall the drain and overflow components without scraping the new finish. Apply a continuous bead of 100% bathroom silicone at the tub-to-tile joint, unless the coating manufacturer specifies another sealant.
Allow the silicone to cure according to its label, often 24 hours before water exposure. Tool the bead once, keep its width consistent, and avoid smearing it over the fresh coating.
You’ll know it worked when: the joint is continuous, bonded at both edges, and free of gaps.
Common mistake: sealing before the coating has cured, which can trap solvent and complicate future repairs.
Which Repair Option Fits a Peeling Tub?
A full strip and recoat suits a rigid tub with a sound substrate, while professional reglazing offers better spray control and preparation. A liner or replacement is more appropriate when the tub flexes, has structural damage, or needs a predictable long-term result despite heavy rental use.
| Option | Typical U.S. cost | Typical downtime | Expected service range | Best condition |
|---|---|---|---|---|
| DIY refinishing kit | $75-$250 | 2-4 days including cure | 1-5 years | Small bathroom, rigid tub, careful preparation |
| Professional reglazing | $350-$900 | 24-72 hours | 5-10 years | Sound tub needing uniform finish |
| Acrylic liner | $1,000-$3,000 | 1-2 days | 10-20 years | Stable tub with cosmetic damage |
| Tub replacement | $1,500-$6,000 or more | 2-7 days | 15-30 years | Structural damage or major remodel |
These are typical U.S. planning ranges, not fixed quotations. Labor rates, tub size, access, demolition, plumbing changes, hazardous-material procedures, and local demand can change the final price substantially.
When Is Professional Reglazing Better?
Professional reglazing is usually better when peeling affects most of the tub, when spray equipment is required, or when the bathroom cannot be safely ventilated for solvent products. Ask contractors which coating system they use, how they prepare the substrate, what cure period they require, and whether the warranty specifically covers peeling.
A five-year anti-peeling warranty has value only if its exclusions are clear. Some warranties exclude silicone contamination, standing water, abrasive cleaners, structural movement, and customer-caused damage.
When Should You Replace the Tub?
Replace the tub when the substrate is perforated, the floor flexes, fiberglass damage extends through the laminate, water has reached the framing, or repeated refinishing has created excessive coating thickness. Replacement also makes sense when plumbing, accessibility, or bathroom layout already require demolition.
A liner can cover cosmetic damage, but a poorly fitted liner can trap water between the insert and the original tub. Replacement provides the cleanest structural solution, although it costs more and often requires tile, trim, flooring, and plumbing work.
How Long Does a Refinished Tub Last?
A DIY refinished tub commonly lasts 1-5 years, while professionally reglazed surfaces often last 5-10 years when the substrate is rigid, preparation is thorough, and maintenance uses nonabrasive products. Heavy use, standing water, flexing, harsh chemicals, and poor ventilation shorten every coating’s life.
Treat those figures as typical planning ranges rather than guarantees. A lightly used guest bathroom may exceed them, while a family tub with abrasive bath products may fail sooner.
The coating is not as impact-resistant as factory porcelain enamel. Dropped metal objects, suction-cup mats, sharp toys, and abrasive brushes can create chips that allow water beneath the finish.
What Maintenance Prevents New Peeling?
Use a nonabrasive, pH-neutral bathroom cleaner and a soft microfiber cloth after the coating has fully cured. Rinse away bath oils and shampoo, dry standing water, and avoid bleach, powdered scouring products, steel wool, abrasive pads, and aggressive acidic limescale removers unless the coating manufacturer approves them.
Do not use suction-cup safety mats on a refinished surface unless the refinisher specifically allows them. The cups can retain water and exert localized stress when removed.
| Maintenance action | Recommended interval | Reason |
|---|---|---|
| Rinse soap residue | After each bath or shower | Reduces chemical and moisture exposure |
| Dry drain and corners | Daily during regular use | Limits standing water at vulnerable edges |
| Clean with soft cloth | Weekly | Removes film without scratching |
| Inspect caulk joint | Monthly | Finds gaps before water enters the edge |
| Avoid abrasive products | Every use | Prevents scratches and early dulling |
Common Problems After a Tub Refinish
| Symptom | Likely cause | Correct response |
|---|---|---|
| Bubbles or blisters | Moisture, solvent, or air trapped beneath coating | Allow cure, identify moisture source, sand and repair per system |
| Fish-eye craters | Silicone, oil, wax, or grease contamination | Do not brush them flat; cure, strip affected area, clean, and recoat |
| Runs or curtains | Excessively thick application | Cure fully, level with compatible abrasive, and apply a thin repair coat |
| Rough texture | Dust, lint, overspray, or poor atomization | Cure, wet-sand with approved grit, then polish or recoat |
| Peeling at drain | Moisture, old silicone, or movement | Remove trim, strip edge, dry substrate, and reseal correctly |
| Rust bleeding through | Active corrosion or exposed steel | Remove rust and prime metal before recoating |
Do not sand or polish a soft coating. If a fingernail leaves a mark after the stated cure period, contact the coating manufacturer or installer because the mix ratio, temperature, or solvent release may be wrong.
Expert Rules That Prevent Repeat Failure
- The drain edge deserves separate preparation. A tub can have a sound field coating and still fail at the drain because the metal flange, old sealant, and standing water create a different bonding problem.
- More coating does not equal more durability. Film thickness above the product’s specification can increase solvent retention, sagging, brittleness, and delayed cure.
- A flexible substrate defeats a rigid finish. If a fiberglass floor moves under normal load, repairing the laminate and its support matters more than selecting a harder topcoat.
- Silicone is a contaminant before it becomes a seal. Remove old silicone before refinishing, then apply new silicone only after the coating has reached its specified cure stage.
When Should You Avoid a DIY Refinish?
Avoid DIY refinishing when the bathroom has inadequate outdoor ventilation, when household members have respiratory sensitivity, when the tub has structural movement, or when the existing coating cannot be identified and safely removed. Professional containment is safer for solvent-heavy systems and spray applications.
Do not use a refinishing kit to repair a leak, rotten subfloor, mold-damaged framing, or a cracked drain assembly. Those defects require plumbing or building repair first.
Renters should obtain written permission before altering a tub. Landlords should compare repeated touch-up costs with a professionally fitted liner or replacement, particularly in high-turnover properties where cure delays create additional vacancy costs.
FAQ
Can I fix only one peeling spot on a bathtub?
You can repair one spot when the surrounding coating is firmly bonded, the damage is small, and the substrate is sound. Test beyond the visible chip, feather the edge, clean silicone contamination, use compatible filler and primer, and accept that a color or gloss mismatch may remain.
Is epoxy or urethane better for a bathtub?
Two-part epoxy is often practical for small DIY roller applications, while acrylic urethane is common in professional spray systems because it can produce a thin, uniform finish. The better choice is the complete system with compatible cleaner, primer, topcoat, and documented cure instructions.
Can I use regular wall paint on a peeling tub?
Regular wall paint is unsuitable for a bathtub because it is not designed for continuous water, abrasion, cleaners, or immersion. Use a coating specifically labeled for tubs and showers, and follow its substrate and primer requirements.
How soon can I shower after refinishing a tub?
Wait for the full water-exposure cure period on the product label, commonly 48-72 hours. A finish that feels dry after 24 hours may still be chemically soft, and early showering can cause dullness, fingerprints, bubbling, or adhesion failure.
Why is my tub peeling again around the caulk?
Peeling around caulk usually results from silicone residue, trapped moisture, movement, or coating applied over the joint. Remove the failed edge, eliminate old silicone, dry the substrate, repair the coating, and apply a new compatible silicone bead after the finish cures.
Is refinishing a fiberglass tub worth it?
Refinishing is worthwhile when the fiberglass tub is rigid, dry, and cosmetically worn. It is not a reliable solution for flexing floors, deep laminate cracks, soft areas, or water damage, because substrate movement will transfer stress to the new finish.
The Bottom Line
To fix a peeling tub, strip the failing coating rather than painting over it, repair rust or structural damage, remove silicone and residue, prepare the correct substrate, and apply a compatible two-part bathtub finish in thin coats. Allow the full cure period before water exposure, then maintain the surface with nonabrasive products. If the tub flexes, leaks, or has serious corrosion, replacement or structural repair is safer than refinishing.