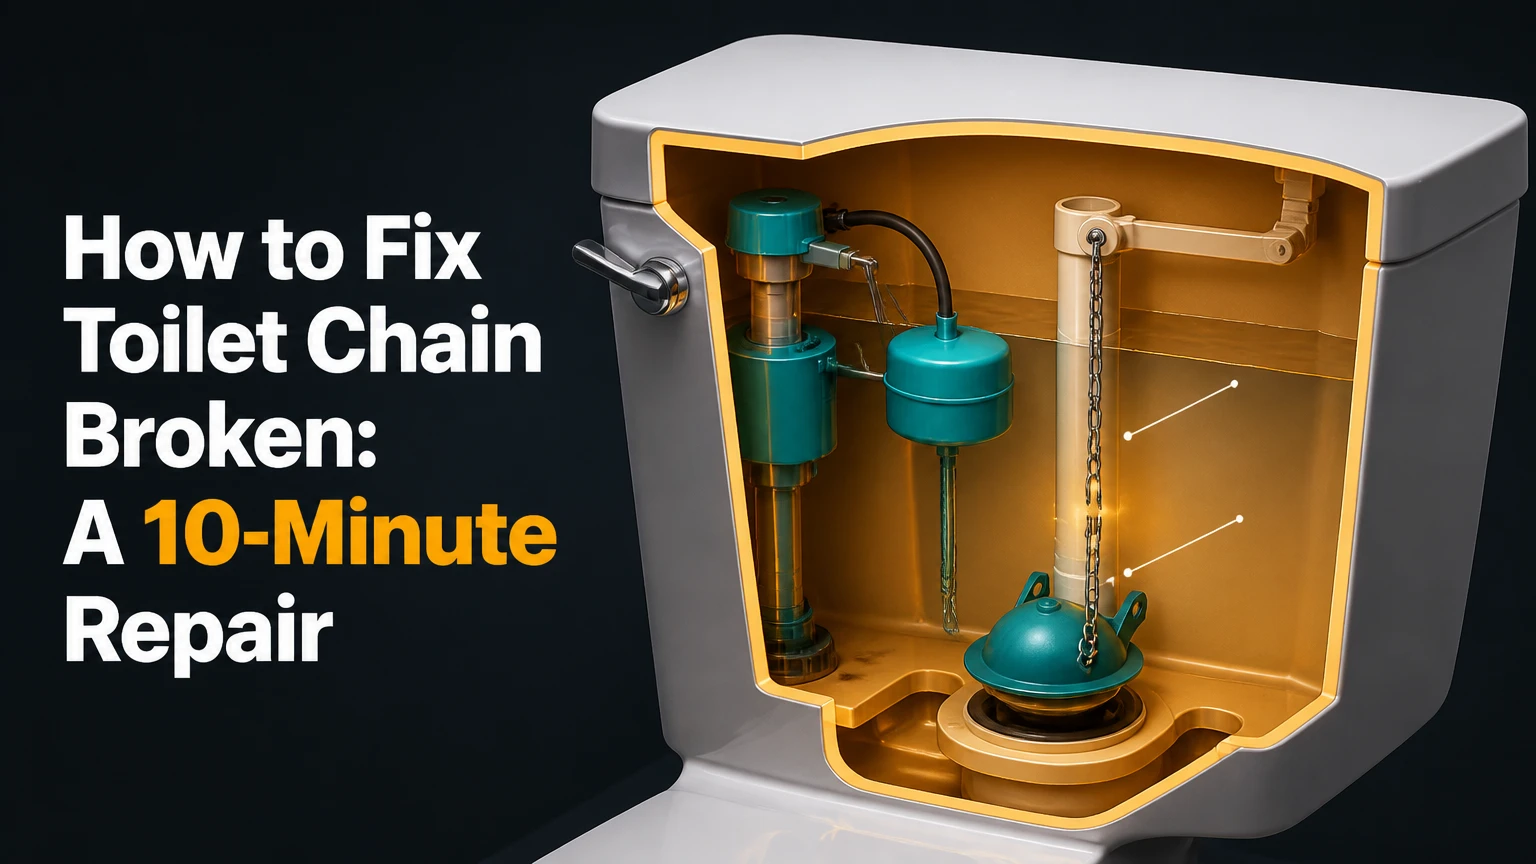
To fix a broken toilet chain, reconnect or replace the chain between the flush-handle trip lever and the flapper, leaving about 1-2 links, or 1/4-1/2 inch, of slack when the handle rests. Shut off the water, empty the tank, attach the new chain vertically, and test the seal. Most repairs take 5-10 minutes and cost $2-$10.
Key Facts at a Glance
A toilet flapper chain connects the tank’s trip lever to the rubber flapper at the flush valve.
A correctly adjusted chain has slight slack at rest and pulls the flapper fully open during a flush.
A chain that is too tight can cause continuous running and a hidden water leak.
A chain that is too loose may prevent the flapper from lifting high enough for a complete flush.
Stainless steel replacement chains typically cost $2-$5, while a complete flapper assembly commonly costs $5-$15.
Shut off the water before working in the tank if the supply valve operates normally.
What Does a Toilet Flapper Chain Do?
A toilet flapper chain transfers movement from the flush handle to the flapper. The handle rotates a metal or plastic trip lever inside the tank, the lever pulls the chain, and the chain lifts the rubber seal so tank water can enter the bowl through the flush valve.
The main parts are easy to identify. The flush handle passes through the tank wall and connects to the trip lever. A hook or hole at the end of the lever holds the chain. The opposite chain end attaches to a loop on the flapper, which normally covers the flush-valve opening.
When the handle is released, the trip lever drops and the flapper falls back onto its seat. The tank then refills through the fill valve. If the chain remains tight, the flapper cannot seal correctly, even when every other toilet component is working.
A broken chain usually produces one of two symptoms: the handle moves without flushing, or the toilet flushes only when someone manually lifts the flapper. A detached hook is simpler to repair than a rusted chain that has lost several links.
What You Need Before Starting
Prepare the replacement part and tools before opening the tank. A basic repair needs adjustable pliers, a rag, and either a spare chain, a universal flapper chain, or a complete flapper assembly with an attached chain.
| Item | Typical quantity or specification | Purpose |
|---|---|---|
| Replacement chain | 1 chain, usually 8-12 inches | Replaces rusted or broken links |
| Universal flapper | 1 unit, commonly 2 inches | Replaces a worn flapper and chain together |
| Adjustable pliers | 1 pair, 6-10 inches | Opens hooks and adjusts chain links |
| Wire cutters | 1 pair rated for light-gauge chain | Removes excess stainless steel links |
| Rag or towel | 1 piece, about 12 x 18 inches | Protects the floor and catches drips |
| Bucket | 1 container holding 2-5 quarts | Catches water if the supply valve leaks |
The repair is low difficulty and normally requires no tank removal. A universal chain costs approximately $2-$5, and a universal flapper with a chain often costs $5-$15 at a hardware store. Prices vary by brand, toilet design, and location.
Before proceeding, check whether the toilet has a conventional flapper. A dual-flush toilet may use a canister seal, push buttons, or a rigid lift rod instead of a chain. A chain repair method does not apply to every flush-valve design.
How to Fix Toilet Chain Broken in Six Steps
The most reliable repair is to replace a visibly damaged chain rather than reuse brittle metal. The work follows six actions: shut off water, empty the tank, remove the old chain, attach the replacement, adjust slack, and test the flush. Correct slack determines whether the repair seals and lifts properly.
Step 1: Shut Off the Toilet Water Supply
Turn the clockwise shutoff valve on the wall or floor behind the toilet until it stops. Do not force a valve that is seized, leaking around its stem, or attached to a corroded pipe. If the local valve cannot close, use the home’s main shutoff or call a plumber before opening the tank.
Remove the tank lid with both hands and place it on a folded towel. Push the flush handle once to lower the water level. Hold the handle down for several seconds so most tank water leaves through the flush valve.
A small amount of water remaining around the flapper is normal. The tank does not need to be perfectly dry for a chain replacement.
You will know this step worked when: the tank stops refilling after the flush and the water level sits below the flapper.
Common mistake: turning the handle clockwise too hard. A brittle angle-stop valve can break or begin leaking when forced.
Step 2: Identify the Broken Connection
Inspect both ends of the chain with a flashlight. Determine whether the chain broke in the middle, slipped off the trip-lever hook, detached from the flapper loop, or pulled the flapper’s rubber attachment ear apart.
A detached chain can often be reattached without buying parts. A chain with rust flakes, stretched links, sharp bends, or a missing section should be replaced. If the flapper’s loop has torn away, replacing only the chain will not produce a durable repair.
The trip lever should point generally downward or slightly upward when the handle is at rest, depending on the toilet model. The chain should hang from a lever hole that places it directly above the flapper loop.
You will know this step worked when: you can name the failed part and confirm that the flapper itself still covers the flush-valve opening.
Common mistake: assuming every no-flush problem is a broken chain. A cracked handle, disconnected trip lever, or detached flapper can create the same symptom.
Step 3: Remove the Old Chain
Unhook the chain from the trip lever and the flapper. Use pliers to open an S-hook or C-clip rather than twisting the flapper’s rubber ears. If mineral deposits have locked the hook, cut the chain with light-duty wire cutters and remove every loose metal piece from the tank.
Do not pull hard on a plastic flapper. Older rubber becomes brittle, and an attachment ear can tear away from the flapper body. If the flapper falls apart during removal, install a compatible replacement rather than trying to glue the rubber.
Wipe sediment from the area around the flush valve. Chain replacement cannot correct a flapper that has hardened, warped, or accumulated mineral deposits on its sealing surface.
You will know this step worked when: no old chain fragments remain, and the flapper moves freely on its hinges or mounting ears.
Common mistake: leaving a cut link in the tank. Loose metal can lodge under the flapper and create a continuous leak.
Step 4: Attach the Replacement Chain
Attach one end of the new chain to the flapper loop. Attach the other end to a hole in the trip lever directly above the flapper. Use the supplied hook or clip, and close the clip enough that ordinary handle movement cannot release it.
Choose the lever hole that keeps the chain as vertical as possible. A diagonal chain pulls the flapper sideways, which can cause incomplete lifting or make the chain rub against the overflow tube.
If the replacement chain includes a rubber or plastic connector, position that connector above the flapper rather than under the sealing edge. The chain must not touch the flapper seat when the flapper closes.
You will know this step worked when: the chain is connected at both ends, hangs freely, and does not contact the overflow tube or flush-valve rim.
Common mistake: attaching the chain to the far end of a long trip lever. That position can increase handle resistance and cause the chain to pull at an angle.
Step 5: Adjust Chain Slack
Set the handle and trip lever at rest, then inspect the chain. Leave approximately 1/4-1/2 inch of slack, or roughly 1-2 loose links, between the resting lever and flapper. The exact amount varies because flapper shape, lever geometry, and chain-link size differ across toilets.
Pull the handle slowly. The trip lever should lift the flapper high enough to stay open while water leaves the tank. If the chain remains loose and the flapper barely moves, shorten it by moving the hook one or two links lower on the chain.
If the chain becomes taut before the handle reaches its normal stopping point, lengthen it by moving the hook higher. A taut chain applies constant force to the flapper and can prevent a watertight seal.
| Chain condition at rest | Toilet symptom | Correct adjustment |
|---|---|---|
| 0 links of slack | Toilet runs or leaks intermittently | Move hook 1-2 links higher |
| 1-2 loose links | Full lift with reliable seal | Keep current position |
| 3-5 loose links | Weak or incomplete flush | Move hook 1-2 links lower |
| Tail below flapper | Chain catches under seal | Cut excess links after testing |
You will know this step worked when: the chain has visible slack at rest and becomes nearly straight only when the handle is pulled.
Common mistake: cutting the chain before testing. Adjust first, flush several times, then remove only the excess tail.
Step 6: Restore Water and Test the Seal
Open the supply valve counterclockwise. Let the tank fill until the fill valve shuts off, then flush the toilet at least three times. Watch the chain, flapper, tank water level, and bowl for abnormal movement.
A successful repair produces a complete flush, a quiet refill, and a flapper that settles evenly on the flush-valve seat. Add a few drops of food coloring to the tank after it refills and wait 10-15 minutes without flushing. Colored water in the bowl indicates a leak that may come from the flapper, chain tension, or a damaged valve seat.
Replace the tank lid only after the chain has passed the test. A lid can press against a tall lever or prevent a handle from returning fully.
You will know this step worked when: the handle returns normally, the toilet stops running within seconds of filling, and no colored tank water reaches the bowl.
Common mistake: testing only one flush. A chain can work once and then catch under the flapper after repeated movement.
Should You Replace the Chain or the Entire Flapper?
Replace only the chain when the flapper is flexible, clean, undamaged, and less than several years old. Replace the flapper and chain together when the rubber is stiff, cracked, misshapen, chlorine-damaged, or unable to seal after correct chain adjustment.
Rubber age matters because the chain is only the lifting link. A new chain cannot repair a flapper that leaks around its seat. The Environmental Protection Agency’s WaterSense program identifies leaking toilets as a significant source of household water waste, and a toilet that cycles periodically should be tested rather than ignored.
| Repair option | Typical price | Expected work time | Best situation | Main limitation |
|---|---|---|---|---|
| Reattach existing chain | $0 | 2-5 minutes | Hook detached from an intact chain | Brittle chain may fail again |
| Stainless steel chain | $2-$5 | 5-10 minutes | Rusted or broken metal chain | Requires length adjustment |
| Silicone strap | $4-$10 | 5-10 minutes | Chain tangles or chemically treated tank | Rubber degrades with harsh cleaners |
| Flapper and chain kit | $5-$15 | 10-20 minutes | Aged or leaking flapper | Generic fit may be imperfect |
| Plumber service call | $75-$150 typical minimum | 30-90 minutes | Seized valve or complex tank issue | Local labor rates vary |
A complete flapper kit is usually the better value when the existing flapper is more than five years old or has been exposed to in-tank bleach. A chain-only repair is appropriate when the seal passes the food-coloring test and the rubber remains supple.
Do not use ordinary glue on a flapper or attach a permanent paperclip. Adhesives soften in tank water, and improvised metal can rust, snag the seal, or scratch the flush-valve seat.
Which Toilet Chain Material Should You Choose?
Stainless steel is the best general-purpose replacement because it resists rust and tolerates ordinary tank water. Brass resists corrosion as well, while plastic avoids rust but can snap more easily; silicone straps reduce tangling but are less suitable for tanks exposed to strong cleaning chemicals.
| Chain or connector type | Typical service life | Approximate price | Strength and weakness |
|---|---|---|---|
| Stainless steel link chain | 3-8 years in ordinary water | $2-$5 | Strong, rust-resistant, can kink |
| Brass link chain | 3-8 years in ordinary water | $3-$8 | Corrosion-resistant, may deform |
| Plastic link chain | 1-4 years | $2-$6 | Rust-free, lower pull strength |
| Silicone or rubber strap | 2-5 years | $4-$10 | Quiet and tangle-resistant, chemical-sensitive |
The quoted service lives are typical field ranges, not guarantees. Water chemistry, chlorine tablets, mineral deposits, flush frequency, and chain tension change the result.
A polymer strap is useful when a metal chain repeatedly hooks around the flapper. It is not a universal upgrade because chlorine and concentrated in-tank cleaners can accelerate rubber deterioration. The tank should contain clean water, not a chemical cleaning solution.
Why Does the Toilet Keep Running After Chain Repair?
A toilet keeps running after chain repair when the chain is too short, the flapper is not sealing, the fill valve is set incorrectly, or water is spilling into the overflow tube. Correct chain slack rules out constant lifting, but it does not prove that the rubber seal or flush valve is sound.
First, lift the chain gently without pulling the flapper. If the running stops when the flapper is pressed down, inspect chain tension and the flapper seat. Move the hook one link higher if the chain is taut at rest.
If the chain has slack and the toilet still runs, add food coloring to the tank. Color entering the bowl confirms a flapper or flush-valve leak. If the tank water rises into the overflow tube instead, adjust or replace the fill valve because the chain is not the cause.
Chemical tablets can distort or weaken rubber components. Remove the tablet, flush the tank several times, and inspect the flapper before installing a new chain.
Why Must You Hold the Handle Down?
Holding the handle down usually means the chain is too long, the flapper is too heavy, or the flush handle cannot lift the lever far enough. Shorten the chain by moving its hook one or two links lower, then test whether the flapper stays open through most of the flush cycle.
A normal flapper needs enough lift to allow rapid tank discharge. If the chain has several inches of slack, the handle may move without lifting the flapper high enough. The flapper then drops immediately, producing a weak flush that works only while the handle is held down.
A worn flapper can create the same symptom. If shortening the chain leaves no slack at rest, stop and replace the flapper or inspect the trip lever geometry. A chain should never be used as a permanent tension spring.
The best adjustment balances two conditions: the flapper opens fully when the handle moves, and the chain relaxes when the handle returns.
What If the Chain Catches Under the Flapper?
A chain catches under the flapper when excess length loops beneath the rubber seal or when the chain hangs diagonally across the flush-valve opening. Remove the excess tail after confirming the correct attachment link, then reposition the chain so it falls vertically.
Cut only the unused portion below the chosen hook. Leave enough spare links for one future adjustment, but do not leave a long tail inside the tank. Inspect the flapper underside for chain marks, nicks, or embedded sediment.
If the chain still catches, move the attachment point to a different trip-lever hole. Some handles have multiple holes because lever geometry differs between toilet models. The correct hole produces a straight pull with minimal side movement.
A short, vertical chain is safer than a long chain folded into loops. The flapper must close by gravity without encountering an obstruction.
What Are the Common Repair Mistakes?
The most damaging mistakes are zero slack, excessive chain length, wrong attachment geometry, and improvised metal repairs. Each mistake has a specific recovery method, so a failed first test does not require replacing the toilet.
- Leaving the chain taut: Move the hook higher until 1-2 links hang loose at rest. Constant tension can cause a slow leak.
- Cutting too much chain: Use a replacement chain or a new hook if the flapper cannot lift fully. Do not compensate by bending the trip lever.
- Ignoring the flapper: Perform the food-coloring test after adjustment. A chain cannot seal a hardened or cracked flapper.
- Using a corroding paperclip: Treat wire as an emergency measure only, and replace it with a stainless chain as soon as possible.
- Installing a universal flapper without checking fit: Compare the old flapper diameter, hinge style, and chain location before discarding the original.
- Forcing a seized supply valve: Close the main water supply and arrange valve repair if the local stop will not operate safely.
One practitioner rule prevents many callbacks: adjust the chain before cutting it. The correct length depends on the handle’s lever ratio and the flapper’s height, not on a universal measurement.
Another useful rule concerns tank cleaners. A clean tank with untreated water generally protects rubber parts better than a tank containing bleach tablets, even when the tablet is marketed for maintenance.
How Much Does Toilet Chain Repair Cost?
A DIY toilet chain repair typically costs $0-$15 and takes 5-20 minutes, while a plumber commonly charges a $75-$150 minimum service fee before parts and local labor adjustments. Reattaching a detached hook is free, but a worn flapper or failed shutoff valve increases the total.
| Scenario | Parts cost | Typical time | Likely total |
|---|---|---|---|
| Reattach detached hook | $0 | 2-5 minutes | $0 DIY |
| Replace stainless chain | $2-$5 | 5-10 minutes | $2-$5 DIY |
| Replace flapper and chain | $5-$15 | 10-20 minutes | $5-$15 DIY |
| Replace fill valve and flapper | $15-$35 | 30-60 minutes | $15-$35 DIY |
| Plumber replaces chain or flapper | $5-$25 parts | 30-90 minutes | $75-$175 typical |
Local pricing changes with access, emergency timing, and regional labor rates. A chain repair does not justify an emergency call unless the toilet cannot be isolated and is wasting water or threatening an overflow.
Call a plumber when the shutoff valve will not close, the tank bolt or supply connection leaks, the flush valve is cracked, or the toilet continues overflowing after the water supply is isolated. These conditions exceed a simple chain adjustment.
Can You Fix a Broken Chain Without Replacing It?
You can fix a broken toilet chain without replacing it only when the chain has detached from a hook or has a usable intact link near the break. Reconnect the existing chain with its original C-clip or S-hook, confirm 1-2 links of slack, and replace the chain if any link is rusted or distorted.
A temporary connection using a stainless split ring may work better than a paperclip because it resists corrosion and has a defined closed shape. Even that repair should be checked after several flushes.
Do not use copper wire, twist ties, string, or a bare steel paperclip as a long-term part. These materials can corrode, unravel, or wedge beneath the flapper. A $2-$5 stainless replacement chain is safer and usually faster than repeatedly repairing a weak link.
What If the Toilet Has a Dual-Flush Button?
A dual-flush toilet may not use a conventional flapper chain. Many dual-flush tanks use a canister valve, two push rods, or a cable assembly, so forcing a chain onto the mechanism can damage the flush button or valve.
Remove the lid and identify the actuator design before buying parts. If two rods extend from the button assembly, adjust their height according to the manufacturer’s instructions. If a cable connects the button to a flush tower, replace the matching cable rather than a standard flapper chain.
The same diagnostic principle still applies: the actuator must open the flush valve fully and release without holding the seal open. The correct replacement depends on the toilet manufacturer and flush-valve model.
When Should You Call a Plumber?
Call a plumber when the water shutoff cannot isolate the toilet, the supply connection leaks, the flush valve or tank is cracked, or a correctly adjusted chain does not stop the leak. A professional is also appropriate when the toilet uses an unfamiliar proprietary actuator or when a property’s water damage risk is high.
A broken chain alone is a straightforward homeowner repair. A seized shutoff valve is different because forcing it can create a pressurized leak behind the toilet. Turn off the home’s main supply if necessary and avoid using the toilet until the valve is safe.
For rental properties, document the broken component and notify the landlord before replacing a proprietary part. For commercial restrooms, isolate the fixture and repair it promptly because repeated flushing can turn a small chain failure into a significant water-waste problem.
FAQ
Can a toilet chain be too short?
Yes. A toilet chain is too short when it remains taut while the flush handle is at rest or when the flapper cannot settle fully onto its seat. Move the hook one or two links higher to create approximately 1/4-1/2 inch of slack, then test for running water and a complete flush.
How long does a toilet flapper chain last?
A toilet flapper chain typically lasts 3-8 years in ordinary tank water, although chlorine tablets, mineral deposits, rust, and constant tension can shorten its life. Replace the chain when links are brittle, discolored, stretched, or difficult to move, even if the toilet still flushes.
Is stainless steel better than plastic for a toilet chain?
Stainless steel is generally better for a standard toilet because it tolerates repeated pulling and resists rust. Plastic chains cost a similar amount and cannot corrode, but lower-cost plastic links can break under tension. Choose silicone when tangling is the recurring problem rather than corrosion.
Can a broken toilet chain cause a water leak?
A broken toilet chain can cause a leak indirectly if chain fragments lodge under the flapper or if a replacement chain is adjusted too tightly. A detached chain usually prevents flushing rather than creating a leak. Food coloring in the tank provides a simple way to confirm flapper leakage.
Should you replace the flapper when replacing the chain?
Replace the flapper with the chain when the rubber is cracked, stiff, warped, stained by chemical cleaner, or older than several years. Keep the existing flapper when it remains flexible, seals during a 10-15 minute food-coloring test, and has undamaged chain attachment ears.
Can a toilet run if the chain is too long?
A toilet can flush weakly or fail to open fully when the chain is too long, but continuous running more often results from a chain that is too short or a damaged flapper. Shorten a loose chain gradually, then inspect the flapper if the bowl continues receiving water.
The Bottom Line
To fix toilet chain broken problems, reconnect or replace the chain, attach it vertically, and leave 1-2 links of slack at rest. A stainless steel chain costs about $2-$5 and usually restores operation within 5-10 minutes. If the toilet still runs after adjustment, test the flapper and fill valve instead of adding more chain tension.