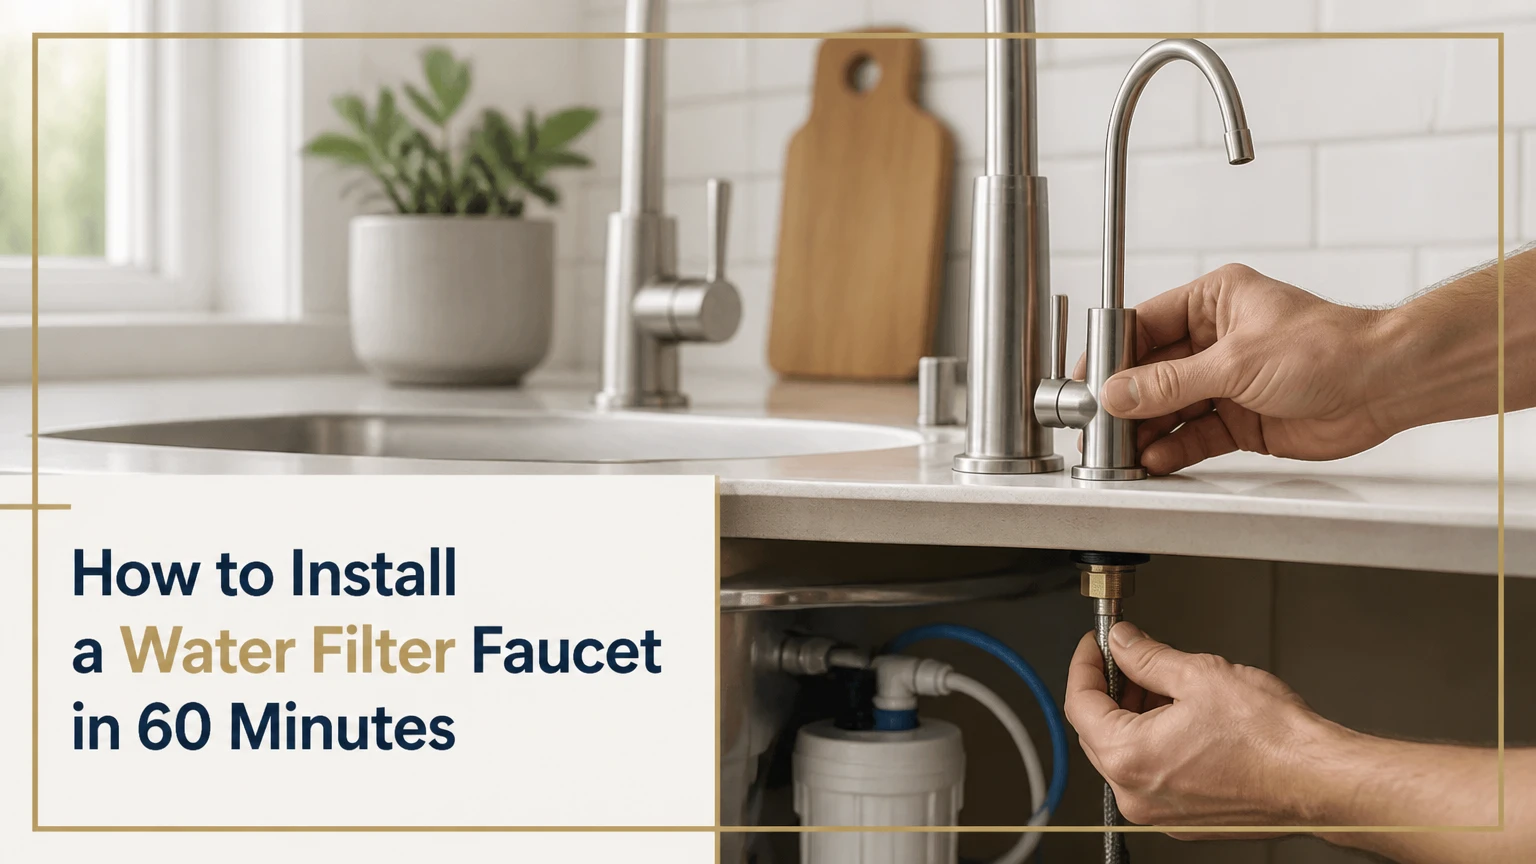
To install a water filter faucet, mount the dedicated tap, connect its tubing to the filtered-water outlet, and supply the filter from the cold-water line through a compatible adapter. A typical under-sink installation takes 45-90 minutes and requires a wrench, tubing cutter, bucket, and the faucet manufacturer’s connection parts.
Key Facts at a Glance
- A dedicated water filter faucet normally dispenses filtered cold water through tubing separate from the main faucet.
- Most under-sink systems use a cold-water T-adapter, but reverse osmosis systems also require a drain connection, storage tank, and air-gap or non-air-gap configuration.
- Typical point-of-use filter faucets deliver approximately 0.5-1.0 gallons per minute, while many RO faucets deliver less.
- Faucet-hole diameters are not universal. Measure the supplied shank and follow the faucet manual before drilling.
- PTFE tape belongs on compatible tapered pipe threads, not on compression nuts, flat-washer fittings, or push-to-connect tubing.
- Carbon filters often need 5-15 minutes of flushing, while RO systems may need a complete tank-fill and discard cycle.
What Does a Water Filter Faucet Do?
A water filter faucet is a separate or integrated tap that delivers treated drinking water at the sink. A dedicated faucet connects to the outlet of an under-sink filter, while a three-way faucet combines filtered and unfiltered water in one fixture with separate internal passages.
The faucet does not remove contaminants by itself unless the model contains an internal cartridge. In a conventional under-sink arrangement, the filter housing performs treatment, the tubing carries treated water, and the faucet controls delivery. The arrangement reduces the chance that filtered water will mix with the ordinary hot or cold supply inside the fixture.
A water filter faucet is useful when the household wants filtered water without routing all kitchen water through a cartridge. It is not a substitute for testing the incoming water or selecting a cartridge certified for the contaminant of concern. NSF certification claims must match the specific contaminant and standard, not merely the word “filtered” on packaging.
How Does the Plumbing Arrangement Work?
An under-sink filter system diverts cold water into a filter inlet, sends treated water through dedicated tubing, and discharges that water from the filter faucet. The main kitchen faucet usually remains connected to the ordinary hot and cold supplies.
The normal flow path is:
- Cold water leaves the shut-off valve.
- A T-adapter sends one branch to the main faucet.
- The second branch feeds the filter inlet.
- The filter cartridge or membrane treats the water.
- Filter outlet tubing runs to the small faucet.
- Opening the filter faucet releases treated water.
Activated carbon reduces chlorine and many taste- and odor-producing compounds. Sediment cartridges trap particles. Reverse osmosis membranes reduce dissolved solids and several contaminant categories, but RO systems require specific pressure, a drain saddle, and often a storage tank.
Water pressure is a design constraint. Many under-sink systems operate within a typical 40-80 PSI supply range, but the filter manual controls the permitted minimum and maximum. A faucet with a 0.5 GPM restrictor can appear defective when the actual limitation is the cartridge, membrane, or system pressure.
Which Faucet Type Fits Your Installation?
The best faucet type depends on whether you can drill, whether the filter is under the sink, and whether appearance or easy removal matters most. A dedicated tap is usually the simplest permanent DIY installation, while a faucet-mounted filter avoids plumbing and countertop modification.
| Faucet type | Typical cost | Installation condition | Typical flow or limitation |
|---|---|---|---|
| Dedicated secondary faucet | $30-$150 | Requires spare hole or new 1/2-1 3/8 inch hole | About 0.5-1.0 GPM |
| Three-way filtered faucet | $150-$500+ | Replaces main faucet and needs compatible supply paths | Filtered flow often 0.5-1.0 GPM |
| Faucet-mounted filter | $20-$80 | Screws onto a compatible aerator thread | Restricted by diverter and cartridge |
| RO drinking-water faucet | $40-$150 separately | Requires RO outlet, usually 1/4-inch tubing | Often 0.2-0.8 GPM |
| Countertop filter dispenser | $50-$300 | Requires no under-sink plumbing | Depends on reservoir and filter design |
Dedicated Secondary Faucet
A dedicated faucet is the most predictable option for a standard under-sink carbon block or ultrafiltration system. The faucet normally uses a mounting shank, a washer, a retaining nut, and a 1/4-inch or 3/8-inch water tube.
Choose it when an unused soap-dispenser or sprayer hole exists. A new hole is possible in stainless steel and some solid-surface countertops, but drilling porcelain, ceramic, tempered glass, or certain engineered-stone products carries a high cracking risk.
Three-Way Faucet
A three-way faucet replaces the main kitchen fixture and keeps hot, ordinary cold, and filtered water in separate passages. The filtered handle must connect to the filter outlet, not to the ordinary cold supply.
Three-way models reduce countertop clutter, but installation is more involved because the supply hoses, mounting hardware, internal channels, and filter tubing must all match. A three-way faucet is a poor choice when the cabinet has insufficient room for the larger body or when the filter manufacturer prohibits the fixture.
Faucet-Mounted Filter
A faucet-mounted filter attaches to the existing aerator through a diverter. It is usually the best rental option because the device can be removed without drilling or altering the shut-off valve.
Compatibility is limited. Pull-out, pull-down, spray-head, proprietary, and recessed aerator faucets often cannot accept a standard faucet-mounted adapter. Check the faucet’s thread type before purchase.
Before You Start
A typical dedicated-faucet installation costs $30-$150 for the faucet, $20-$200 for a basic filter kit, and $0-$100 for adapters or a hole saw. Professional labor commonly adds a local service charge plus approximately 1-2 hours of plumbing work, but rates vary substantially by location.
| Item | Typical requirement | Why it matters |
|---|---|---|
| Installation time | 45-90 minutes | Drilling and cramped cabinets add time |
| Difficulty | Moderate DIY | Tubing and thread matching require care |
| Adjustable wrench | 1 | Supply and retaining-nut connections |
| Basin wrench | 1 | Reaching a faucet mounting nut |
| Tubing cutter | 1 | Producing square push-fit tube ends |
| Bucket and towels | 1 each | Catching residual supply water |
| Flashlight | 1 | Inspecting cabinet connections |
| PTFE tape | 1 roll | Only for compatible tapered threads |
| Hole saw | 1, correct material type | Required if no accessory hole exists |
Confirm four prerequisites before disconnecting anything:
- The filter kit includes an inlet adapter, outlet tubing, shut-off or isolation valve, and compatible faucet connection.
- The faucet shank fits the countertop thickness and drilled-hole diameter.
- The under-sink shut-off valve works and closes fully.
- The filter housing has enough vertical clearance for cartridge replacement.
Turn off the cold shut-off valve and open the ordinary faucet briefly. If the valve does not stop the water, stop the installation and arrange a valve repair before removing the supply line.
How to Install a Water Filter Faucet Safely
A standard installation has eight stages: plan the location, prepare the faucet, create or use a mounting hole, install the faucet, fit the cold-water adapter, connect the filter, flush the cartridge, and inspect for leaks. The factor that most determines success is compatibility among the faucet shank, tubing diameter, filter outlet, and adapter threads.
Step 1: Confirm the Faucet and Filter Connections
Read the faucet and filter manuals before cutting tubing. Identify the filter inlet, filtered outlet, faucet tube size, adapter thread, and any included inline shut-off valve.
Common tube sizes include 1/4 inch and 3/8 inch outside diameter. Tube size is measured across the outside, not the inside. A 1/4-inch outlet cannot be made reliable by forcing it into a 3/8-inch push fitting.
You will know it worked when: every connection has a named destination and matching size.
Common mistake: confusing the filter inlet with the filtered outlet, which sends untreated water to the drinking faucet.
Step 2: Choose and Inspect the Mounting Location
Position the faucet on the sink deck or countertop where the spout clears the basin and the handle can move freely. Look underneath for reinforcing ribs, drawers, plumbing, electrical wiring, and the filter housing.
Existing accessory holes often measure about 1-3/8 inches, but the correct diameter varies by model. Measure the faucet shank and gasket, then use the manufacturer’s stated hole range.
You will know it worked when: the faucet can rotate without striking the backsplash, main faucet, or wall.
Common mistake: placing the faucet directly above a cabinet divider, leaving too little room to tighten the retaining nut.
Step 3: Drill the Faucet Hole When Necessary
Use a bi-metal hole saw for many stainless-steel sinks and a diamond hole saw designed for granite or solid-surface materials. Do not assume that a general-purpose steel bit is suitable for stone or porcelain.
Mark the center with masking tape, protect the basin, and drill at low speed with light pressure. Water cooling may be appropriate for a stone-rated diamond bit, but follow the bit manufacturer’s instructions and keep electrical tools away from standing water.
Porcelain-coated steel and ceramic sinks can chip. Tempered glass should not be drilled on site. For an expensive stone slab, a countertop fabricator is safer than a first-time DIY attempt.
You will know it worked when: the shank passes through without binding and the sealing washer sits flat.
Common mistake: drilling before checking the faucet’s required hole diameter.
Step 4: Mount the Filter Faucet
Place the escutcheon or top gasket over the hole, then lower the faucet shank and tubing through the deck. Under the counter, install the lower rubber washer and metal support washer in the order shown by the manual.
Thread the retaining nut by hand until it is fully engaged. Hold the faucet straight from above while tightening the nut with a basin wrench or the supplied tool. Tighten enough to compress the gasket evenly; excessive force can distort the deck or crack a plastic mounting nut.
You will know it worked when: the faucet remains aligned and the base gasket contacts the deck continuously.
Common mistake: relying on plumber’s putty where the faucet manual specifies a rubber gasket. Putty can interfere with the intended seal.
Step 5: Install the Cold-Water T-Adapter
Close the cold shut-off valve, place a bucket beneath the connection, and disconnect the cold flexible supply hose. Install a T-adapter only if its inlet thread matches the shut-off valve and its outlets match the existing hose and filter tube.
Reconnect the main faucet hose to the adapter’s original-faucet branch. Connect the filter inlet to the remaining branch, using the supplied tubing or a compatible compression connection.
PTFE tape is appropriate only for a compatible tapered pipe-thread joint. Do not apply tape to compression threads, flare connections, faucet shanks, flat-washer unions, or push-to-connect tube ends. Those connections seal through a washer, cone, or internal O-ring.
You will know it worked when: the main faucet still has its original cold-water path and the filter has a separate inlet branch.
Common mistake: using an adapter with the wrong gender or thread standard, then forcing the connection until the valve body twists.
Step 6: Cut and Connect the Filter Tubing
Cut every tube end square with a sharp tubing cutter. Push the tube into each quick-connect fitting to the marked insertion depth, then pull gently to confirm that the collet has gripped it.
Route tubing in wide curves rather than sharp bends. Keep the tube away from cabinet hinges, disposal motors, hot supply lines, and the filter housing’s moving cartridge bowl.
If a push-fit connection leaks, shut off the water, remove the tube, inspect the O-ring, recut the end, and reinsert it. Wrench-tightening a plastic push fitting usually damages the fitting instead of improving the seal.
You will know it worked when: the tube cannot pull out by hand and no section is kinked.
Common mistake: cutting a tube diagonally, leaving one side too short to seal against the internal O-ring.
Step 7: Connect the Filter Outlet to the Faucet
Connect the filter outlet to the faucet’s dedicated tube. Carbon and ultrafiltration systems commonly use a direct outlet line, while RO systems may use a post-filter line from the storage tank or an automatic shut-off assembly.
An RO faucet connection is not interchangeable with a conventional carbon-filter connection. RO systems may also need a feed valve, drain saddle, storage tank, flow restrictor, and air-gap arrangement. Follow the RO manufacturer’s flow diagram rather than connecting the faucet to the membrane outlet by guesswork.
You will know it worked when: the faucet receives water only after the filter outlet is connected and the filter isolation valve is open.
Common mistake: connecting the faucet to the RO membrane waste line, which sends reject water to the sink or cabinet.
Step 8: Open the Water, Flush, and Test
Open the cold shut-off valve slowly while watching every connection. If no leak appears, open the filter faucet and flush according to the cartridge instructions.
A new carbon cartridge commonly needs 5-15 minutes of flushing to remove air and carbon fines. An RO system often needs one or more full tank cycles, with the first tank discarded, because the membrane, carbon stages, tubing, and storage tank require a longer startup procedure.
Record the installation date and initial pressure or flow if the system provides a gauge. Inspect the cabinet again after 15 minutes and once more the next day.
You will know it worked when: the water runs clear, the faucet stops sputtering, and all dry paper towels remain dry.
Common mistake: judging the system by the first black or cloudy carbon-filter water and assuming the cartridge is defective.
What Are the Most Common Installation Failures?
Most leaks and low-flow complaints result from incorrect connection geometry, damaged O-rings, or incomplete flushing rather than a faulty faucet. Correct diagnosis starts by identifying whether the problem occurs at the faucet base, a threaded joint, a tube fitting, the cartridge, or the spout.
| Symptom | Likely cause | Corrective action |
|---|---|---|
| Leak at push fitting | Angled cut, shallow insertion, damaged O-ring | Recut square, insert fully, replace fitting if damaged |
| Leak at compression nut | Tube not seated or nut overtightened | Reseat tube and tighten according to manual |
| Leak at tapered thread | Missing or unsuitable sealant | Depressurize, clean threads, apply approved PTFE tape |
| Leak at faucet base | Gasket displaced or deck hole oversized | Recenter gasket and verify hole specification |
| Low flow after installation | Kinked tube, closed valve, clogged cartridge | Open valve, straighten tube, inspect cartridge |
| Sputtering for several minutes | Air in housing or tubing | Continue the specified flush cycle |
| Persistent drip from spout | Faucet cartridge or valve seat fault | Replace the faucet cartridge or contact manufacturer |
| Bad taste after flushing | New media, stagnant water, wrong cartridge | Flush again and verify cartridge orientation |
A useful practitioner rule is to place a dry paper towel beneath every connection during the first pressure test. A towel detects a slow seep that may not form a visible droplet on a dark cabinet floor.
Do not tighten every fitting as far as possible. Plastic filter heads, quick-connect housings, and retaining nuts can crack under excessive torque, producing a delayed leak that appears hours after installation.
Which Installation Variations Need Extra Planning?
Different sink materials and filtration technologies change the installation method. The faucet mounting procedure stays similar, but the water path, drilling risk, and commissioning process can differ substantially.
Reverse Osmosis Systems
Reverse osmosis requires more than a faucet and cold-water adapter. The system normally includes sediment and carbon prefilters, a membrane, a post-filter, a storage tank, and a drain connection; some compact units use a tankless pump and electrical supply instead.
Check the manufacturer’s minimum feed pressure. If household pressure falls below the specified level, RO production slows and the automatic shut-off may not close correctly. Never connect an RO faucet until the waste line and tank line are identified from the installation diagram.
Granite, Quartz, and Solid-Surface Counters
Stone and solid-surface counters need a material-appropriate diamond tool, stable support, and controlled drilling. Quartz products can contain resins that discolor or chip when overheated.
If the countertop is already installed, confirm that the proposed hole will not cross a seam, sink cutout, backsplash support, or undermount-sink flange. A fabricator should drill high-value stone when the required bit, cooling method, or access is uncertain.
Stainless-Steel Sinks
Stainless steel is generally easier to drill than stone, but thin-gauge sinks can deform around the hole. A step bit or bi-metal hole saw can work when the diameter matches the faucet specification.
Support the metal and deburr the opening before mounting. A sharp burr can cut tubing or prevent the gasket from lying flat.
No Spare Hole
If no spare hole exists, use a faucet-mounted filter, drill an approved location, replace the main faucet with a three-way model, or install a countertop dispenser. Do not drill a sink marked tempered glass, and do not drill through a structural countertop support without professional guidance.
Dedicated Faucet or Three-Way Faucet?
A dedicated faucet usually wins for low-cost retrofits, while a three-way faucet wins when the kitchen needs one integrated fixture and the budget supports a more complex installation. The choice depends on drilling, cabinet access, replacement cost, and whether filtered water must remain isolated from ordinary water.
| Decision factor | Dedicated secondary faucet | Three-way faucet | Faucet-mounted filter | RO faucet |
|---|---|---|---|---|
| Hardware cost | $30-$150 | $150-$500+ | $20-$80 | $40-$150 |
| New hole required | Often yes | Usually no | No | Often yes |
| Filter compatibility | Carbon, UF, some RO | Approved systems only | Brand-specific | RO-specific |
| DIY time | 45-90 minutes | 90-180 minutes | 5-15 minutes | 90-180 minutes |
| Main faucet replacement | No | Yes | No | No |
| Filtered-water path | Separate faucet tube | Internal separate passage | Diverter and cartridge | Storage or post-filter line |
| Best fit | Budget retrofit | Renovated kitchen | Rental or temporary use | Dissolved-solids reduction |
A three-way faucet does not automatically provide better filtration. Its advantage is fixture integration, while filtration quality still depends on the cartridge or RO system connected to it.
How Much Time and Maintenance Should You Expect?
A dedicated water filter faucet installation typically takes 45-90 minutes without drilling and 90-150 minutes when drilling, fitting an RO system, or correcting incompatible plumbing. Filter replacement commonly takes 5-20 minutes, depending on housing access and whether the cartridge requires a pressure-relief procedure.
| Task | Typical interval | Typical duration | Verification |
|---|---|---|---|
| Inspect tubing and fittings | Monthly | 3-5 minutes | No moisture or discoloration |
| Replace carbon cartridge | 6-12 months | 5-15 minutes | Flow restored and cartridge flushed |
| Replace sediment cartridge | 6-12 months | 5-15 minutes | Pressure drop reduced |
| Replace RO membrane | 2-5 years | 20-60 minutes | Performance matches system specification |
| Sanitize RO storage system | 6-12 months | 30-60 minutes | Sanitizer fully flushed |
| Check faucet aerator | Every 6-12 months | 5 minutes | No debris or restricted stream |
Replacement intervals depend on water quality, household volume, cartridge capacity, and the manufacturer’s rated gallons. A household should replace a cartridge based on the stated capacity or time limit, whichever comes first, rather than waiting for taste or flow to deteriorate.
When Should You Hire a Plumber?
Hire a plumber when the shut-off valve will not close, the supply connection is corroded, the installation requires a new branch line, the counter material is high-risk, or the system needs an electrical booster pump. A professional is also appropriate when a concealed leak could damage cabinetry or flooring.
A basic dedicated faucet is within many homeowners’ abilities when the valve works, the filter kit includes the correct adapter, and the mounting hole already exists. Stop immediately if the valve, copper stub-out, or wall connection twists while loosening the supply line.
Filtered drinking water should not be connected to a hot-water line. Local plumbing rules may also govern air gaps, drain connections, backflow protection, and reverse osmosis discharge, so local requirements take priority over a generic installation diagram.
FAQ
Can I Install a Water Filter Faucet Without Drilling?
Yes, use a faucet-mounted filter, a countertop dispenser, or an existing sink accessory hole. A permanent dedicated faucet normally needs a hole, although some sink decks include a factory-punched opening hidden beneath a cover. Measure the opening before buying because accessory holes are not standardized across every sink and faucet.
Does a Water Filter Faucet Need Its Own Shut-Off Valve?
A separate inline shut-off valve is strongly recommended because it isolates the filter during cartridge replacement and leak repairs. The household cold-water shut-off can stop the inlet, but it also disables the ordinary faucet’s cold supply and is less convenient for routine maintenance.
Can I Connect Any Filter to Any Drinking-Water Faucet?
No. The faucet, tubing, pressure range, and outlet connector must be compatible with the filter system. A conventional carbon filter may use 1/4-inch tubing, whereas another system uses 3/8-inch tubing or a proprietary connector. Reverse osmosis faucets require an RO-compatible outlet and must not connect to the waste line.
Why Does My New Filter Faucet Have Weak Pressure?
Weak flow usually results from a closed isolation valve, kinked tubing, an incompletely inserted tube, trapped air, a clogged cartridge, or insufficient supply pressure. RO faucets naturally flow more slowly than ordinary kitchen faucets because the membrane and storage system restrict production and delivery.
Should Filtered Water Come From the Cold Line?
Yes, most under-sink filtration systems are designed for cold water only. Hot water can damage carbon cartridges, membranes, seals, and plastic housings, while heat can also alter treatment performance. Connect the filter inlet to the cold supply unless the manufacturer explicitly specifies another arrangement.
How Do I Know the Filtered Water Is Safe?
Use a cartridge certified for the contaminant you need to reduce, follow its replacement schedule, and test the source water when contamination is possible. Faucet installation confirms plumbing function, not treatment performance. A clear stream and normal taste do not prove removal of lead, PFAS, bacteria, nitrate, or dissolved solids.
The Bottom Line
To install a water filter faucet, mount the correct faucet, connect a compatible cold-water T-adapter, route square-cut tubing from the filter outlet, and flush the system before drinking. Expect 45-90 minutes for a straightforward dedicated-faucet job, but use a plumber for failed shut-off valves, high-risk countertops, concealed plumbing, or complex RO installations.