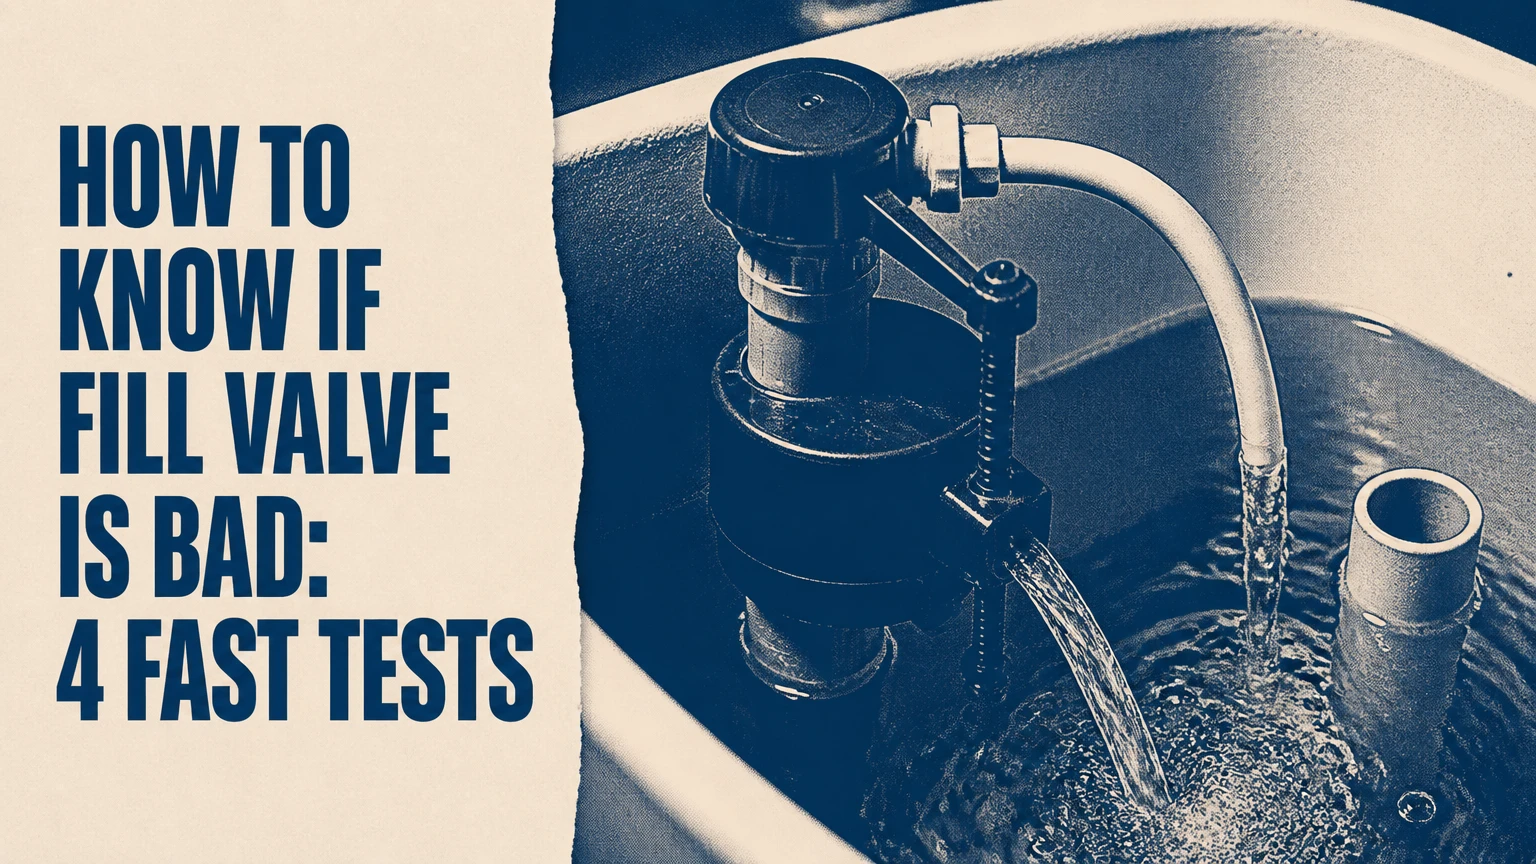
A toilet fill valve is probably bad when water continues flowing after the tank reaches its set level, the valve stops only when you lift the float, or the valve refills slowly despite an open supply stop. A wet valve base indicates a separate seal or body leak. These tests distinguish a failed fill valve from a flapper, adjustment, supply, or overflow problem.
Key Facts at a Glance
A healthy toilet fill valve shuts off completely before water reaches the top of the overflow tube.
Water in the bowl during a dye test usually identifies a leaking flapper, not a defective fill valve.
Lifting the float should stop incoming water within a few seconds; continued flow points to a clogged or failed shutoff mechanism.
A slow refill can result from a closed supply stop, clogged screen, low pressure, or a restricted valve.
Most standard replacement fill valves cost about $10-$30 and take 20-40 minutes to install.
The refill tube must discharge above the overflow tube opening, not sit below the tank waterline.
How to Know If a Fill Valve Is Bad
The fastest diagnosis combines three observations: the tank water level, the behavior of the float, and whether water enters the bowl. A fill valve is defective when it cannot stop incoming supply water at the correct level after adjustment and cleaning, whereas a flapper is defective when tank water leaks into the bowl after filling.
Remove the tank lid and identify the components. The fill valve is usually near the left side of the tank, where the supply line connects underneath. The flush valve and flapper sit near the center, while the overflow tube is the open vertical tube attached to the flush valve.
A toilet may have more than one fault. For example, a worn flapper can make the fill valve run periodically, while a high float setting can make water run continuously into the overflow tube. Diagnose the leak path before buying parts.
What Does a Toilet Fill Valve Do?
A toilet fill valve admits fresh water after a flush and shuts it off when the float reaches the adjusted height. A small refill tube sends part of that incoming water into the overflow tube so the bowl receives enough water for the next flush.
During a flush, the flapper opens and the tank level falls. The float drops with the water, opening the fill valve seal. As the tank refills, the float rises and moves a diaphragm, piston, or mechanical linkage toward its closed position.
The fill valve is not the same part as the flush valve. The fill valve controls incoming water; the flush valve releases tank water into the bowl. Confusing these parts leads to incorrect replacement and wasted troubleshooting time.
Which Signs Point to a Failed Fill Valve?
The strongest signs are continued inlet flow at a correct waterline, failure to shut off when the float is lifted, repeated hissing without bowl leakage, and a leak from the valve’s tank connection. A slow refill alone does not prove failure because supply restrictions and sediment can produce the same symptom.
| Symptom observed | Most likely cause | Confirmation test | Typical remedy |
|---|---|---|---|
| Water runs constantly into overflow | Float set too high or valve seal worn | Lower float, then lift it manually | Adjust or replace fill valve |
| Toilet runs every 5-20 minutes | Leaking flapper or flush gasket | Dye test, 15-20 minutes | Replace flapper or flush seal |
| Refill takes more than 2-5 minutes | Closed stop, clogged screen, low pressure | Check stop and measure flow | Open, clean, or replace |
| High-pitched squeal during refill | Restricted inlet or vibrating diaphragm | Partly close stop briefly | Clean screen or replace valve |
| Water leaks below tank | Shank washer, locknut, or cracked body | Dry-hand inspection during refill | Replace seal or valve |
| Float rubs tank or flush tower | Misalignment or wrong valve position | Move float through full travel | Reposition or replace |
A worn fill valve often becomes more obvious when water pressure changes. A valve that shuts off at night but runs during high-demand periods may have a marginal diaphragm, sediment inside the inlet, or excessive household pressure.
How Do You Test a Toilet Fill Valve?
Test a toilet fill valve in this order: inspect the overflow level, perform a dye test, lift the float, and inspect the valve base. The sequence takes about 10 minutes and prevents replacing a fill valve when the actual problem is a flapper or supply restriction.
Step 1: Check the Waterline and Overflow Tube
A correctly adjusted tank waterline typically sits about 1 inch below the top of the overflow tube, or at the manufacturer’s marked waterline. If water enters the overflow continuously, lower the float slightly and observe whether the valve shuts off.
Turn the adjustment screw clockwise by one-half turn at a time on a modern float-cup valve. Older ballcocks usually adjust with a screw at the float arm or by changing the rod position. Do not bend a plastic rod.
You will know the adjustment worked when the incoming stream stops and the water remains below the overflow opening. The common mistake is lowering the float so far that the tank lacks enough water for a full flush.
Step 2: Lift the Float Manually
With the tank filling, gently raise the float to the height where the valve should close. A functioning valve should stop incoming water within roughly 1-3 seconds, although a brief pressure equalization sound can continue.
If water keeps flowing strongly while the float is fully raised, the valve diaphragm, piston, or internal seal is clogged, damaged, or worn. If lifting the float stops the flow but the automatic float does not rise, the float may be stuck, waterlogged, or rubbing the tank wall.
Never force the float upward against a brittle arm. Excessive force can bend an older ballcock linkage or damage the valve cap.
Step 3: Perform the Bowl Dye Test
Add several drops of food coloring to the tank, or use a toilet dye tablet, and wait 15-20 minutes without flushing. Colored water appearing in the bowl indicates that tank water is passing through the flapper or flush-valve seal.
The dye test does not directly test fill-valve shutoff. It tests whether the tank is losing water after filling. When the bowl remains clear but the fill valve continues to hiss, the fill valve or its adjustment becomes the leading suspect.
Avoid placing cleaners containing bleach or chlorine tablets in the tank. Rubber flappers, refill seals, and diaphragm components can deteriorate faster in concentrated chemical water, creating a leak that falsely appears to be a fill-valve problem.
Step 4: Inspect the Valve Base and Supply Connection
Dry the underside of the tank around the fill-valve shank, rubber washer, locknut, and supply-line coupling. Run the water for a minute, then flush and refill while checking for fresh moisture.
Water at the tank-side locknut usually indicates a displaced shank washer, loose connection, or cracked fill-valve body. Water at the supply-line coupling may indicate a bad compression washer or connector. Water emerging from the porcelain itself requires a different repair and may justify replacing the tank or toilet.
Turn the shutoff clockwise immediately if water sprays or the connection cannot be controlled. A toilet supply stop that will not close is a reason to use the home’s main shutoff before disassembly.
Is the Fill Valve or Flapper Bad?
A leaking flapper makes the fill valve restart periodically, while a defective fill valve keeps admitting water after the tank has reached its set level. The dye test identifies the first condition; the manual float-lift test identifies the second.
| Diagnostic result | Fill valve condition | Flapper condition | Correct next action |
|---|---|---|---|
| Dye appears in bowl after 20 minutes | May be normal | Leaking | Replace or clean flapper |
| Water reaches overflow opening | Misadjusted or failing | Usually unrelated | Adjust float, then test valve |
| Float lifted, water still enters | Failing or obstructed | Unrelated | Clean inlet or replace valve |
| Float lifted, flow stops, tank later drops | Usually functional | Leaking | Replace flapper or flush seal |
| Water around valve shank | External valve seal problem | Unrelated | Replace washer or valve |
| Tank never refills fully | Restricted or misadjusted | Possibly leaking | Check stop, screen, float, and flapper |
This distinction matters financially. A $5-$15 flapper can solve intermittent running, while replacing a $10-$30 fill valve will not stop water that is escaping through the flush valve.
Why Is the Toilet Fill Valve Slow, Noisy, or Intermittent?
A slow, noisy, or intermittent toilet fill valve may have sediment in its inlet screen, a partially closed supply stop, a damaged diaphragm, or unstable water pressure. The symptom becomes evidence of valve failure only after the supply path is open and clean.
| Behavior | Check first | Useful threshold or observation | Likely repair |
|---|---|---|---|
| Refill exceeds 5 minutes | Supply stop and hose | Stop handle fully counterclockwise | Open stop or replace hose |
| Squeal at partial flow | Stop and inlet screen | Noise changes when stop moves | Clean screen or replace valve |
| Shuddering or vibration | Diaphragm and pressure | Vibration follows valve opening | Replace valve; inspect pressure |
| Runs after every flush | Float movement | Float catches on wall or tower | Reposition float |
| Starts at random intervals | Bowl dye test | Water level falls without flushing | Replace flapper |
| Stops only with stop valve closed | Valve seal | Flow continues at full float height | Replace fill valve |
A typical residential supply pressure around 40-60 psi supports normal toilet operation. Pressure substantially above 80 psi can contribute to noise and premature wear, so a pressure-reducing valve or plumber’s pressure test may be appropriate.
The refill tube also causes misleading symptoms. If the tube is pushed below the tank waterline, it can siphon water from the tank and make the fill valve restart. The tube should clip above the overflow opening with an air gap.
Can You Clean or Repair a Bad Fill Valve?
Cleaning and adjustment can restore a fill valve blocked by sediment, but a cracked body, failed diaphragm, waterlogged float, or persistent shutoff failure usually requires replacement. Standard modern fill valves are inexpensive enough that internal rebuilding is rarely practical.
Shut off the supply, flush the toilet, and hold the lever down to drain the tank. Place a towel beneath the valve, remove the cap according to the manufacturer’s design, and briefly open the supply stop to flush debris into a bucket.
Do not disassemble a pressurized valve. Do not use a knife or metal pick on a rubber diaphragm. If cleaning restores shutoff but the valve fails again within days, sediment or degraded rubber has probably damaged the sealing surface.
A fill valve is worth replacing when it is older than about 5-7 years, the valve body leaks, replacement diaphragms are unavailable, or adjustment cannot produce a stable waterline. Lifespan varies with water hardness, disinfectant chemistry, usage, and component quality.
Which Fill Valve Type Fits Your Toilet?
Float-cup valves fit most modern gravity toilets, while older ballcocks, dual-flush valves, and proprietary concealed-tank mechanisms require closer matching. “Universal” generally means adjustable for common tank dimensions, not compatible with every toilet design.
| Valve type | Float or sensor | Typical use | Main failure pattern | Replacement note |
|---|---|---|---|---|
| Float cup | Sliding plastic cylinder | Modern gravity toilet | Clogged screen or diaphragm | Often adjustable from 8-13 inches |
| Ballcock | Rod and hollow ball | Older gravity toilet | Waterlogged ball or worn linkage | Measure tank clearance |
| Diaphragm | Internal rubber diaphragm | Older metal or plastic valve | Hardened or torn seal | Match model when possible |
| Floatless | Pressure or sensor mechanism | Compact specialty tank | Sediment-sensitive sensor | Use manufacturer-specific part |
| Dual-flush valve | Specialized float and control | Two-button flush tank | Incorrect fill height or seal | Match dual-flush system |
Measure the valve’s adjustable height, tank opening, supply connection, and clearance around the flush tower. In North American toilets, the tank connection commonly uses a 7/8-inch ballcock thread, but specialty toilets can use different connections.
The refill rate must also suit the toilet. A valve that fills a 1.28-gallon-per-flush tank too slowly may be inconvenient, while an excessively forceful stream can create noise and splash if the refill tube is positioned incorrectly.
How Do You Replace a Defective Fill Valve?
Replace a standard fill valve by shutting off water, draining the tank, disconnecting the supply line, removing the old locknut, installing the new washer and valve, and adjusting the waterline. Typical DIY time is 20-40 minutes, and the main risk is overtightening the plastic shank against porcelain.
Before You Start
| Requirement | Typical value | Practical detail |
|---|---|---|
| Time | 20-40 minutes | Add 15 minutes for corroded fittings |
| Part cost | $10-$30 | Standard adjustable replacement valve |
| Tools | 2 items | Adjustable wrench and sponge or towel |
| Water shutoff | 1 valve | Toilet stop or household main |
| Target waterline | 1 inch below overflow | Follow the tank’s marked line first |
| Skill level | Basic DIY | Stop if the tank or supply fitting cracks |
Step 1: Shut Off and Drain the Tank
Turn the toilet’s supply stop clockwise until it stops. Flush while holding the lever down, then sponge out remaining water below the valve opening.
You will know the tank is ready when no water flows from the supply connection after the stop is closed. The common mistake is assuming a stuck stop is closed when the tank continues refilling.
Step 2: Remove the Old Valve
Disconnect the supply line under the tank and remove the plastic or metal locknut. Hold the valve inside the tank so it does not rotate against the porcelain.
Discard the old rubber shank washer if the replacement includes one. Do not reuse a flattened washer with a new valve because it can leak around the tank opening.
Step 3: Install and Align the New Valve
Set the new rubber washer inside the tank, place the valve through the opening, and tighten the locknut from below by hand plus approximately one-quarter turn with pliers. Keep the valve upright and position the float away from the tank wall and flush tower.
You will know the valve is aligned when the float travels freely from its lowest to highest position. The common mistake is overtightening, which can crack the porcelain or distort the plastic shank.
Step 4: Connect the Refill Tube and Supply Line
Clip the refill tube above the overflow tube opening, leaving a visible air gap. Connect the supply line without cross-threading, then open the stop slowly and inspect both connections.
The valve should refill the tank without spraying, vibrating, or sending the refill tube underwater. A continuous stream into the overflow tube means the float needs adjustment or the valve is not shutting off.
Step 5: Adjust and Test Three Flushes
Set the waterline to the tank manufacturer’s mark, usually below the overflow tube. Flush the toilet three times, checking the valve base and supply coupling after each refill.
The job is complete when the valve stops cleanly, the bowl receives refill water, the tank reaches the correct line, and no connection remains damp after 10 minutes.
What Does Fill Valve Replacement Cost?
A standard DIY fill-valve replacement typically costs $10-$30 and takes 20-40 minutes. A plumber commonly charges about $100-$250 for a straightforward visit, with regional labor rates, access, emergency timing, and seized fittings creating the largest variation.
| Replacement scenario | Typical part cost | Typical labor or time | Cost factor |
|---|---|---|---|
| Standard DIY valve | $10-$30 | 20-40 minutes | Existing stop works |
| DIY valve plus supply line | $20-$50 | 30-60 minutes | Old connector replaced |
| Plumber, easy access | $100-$175 | 15-30 minutes | No corrosion or leak |
| Plumber, seized connection | $175-$250 | 30-90 minutes | Stop or line requires work |
| Dual-flush proprietary valve | $25-$90 | 30-75 minutes | Model-specific component |
| Concealed tank repair | $150-$400 | 1-3 hours | Access panel or trim removal |
A constantly running toilet can waste substantial water, but the exact amount depends on the flow rate and whether water enters the bowl or overflow. The U.S. Environmental Protection Agency states that household leaks can waste more than 10,000 gallons annually, and toilets are a common source of that loss.
What Situations Need a Different Diagnosis?
A toilet with a dual-flush tower, concealed tank, frozen float, or high household pressure may not respond to a standard fill-valve procedure. Identify the design before ordering a replacement, because proprietary seals and access requirements change the repair.
- Dual-flush toilet: Check the manufacturer’s fill-height mark and confirm that the refill tube does not interfere with the flush tower.
- Concealed tank: Use the access panel and model number rather than removing wall or cabinet trim blindly.
- Frozen float: Mineral scale can bind a sliding cup; clean the shaft, but replace the valve if movement remains rough.
- Hard-water area: Sediment can clog inlet screens repeatedly; install or maintain upstream filtration if debris recurs.
- High-pressure home: Measure pressure with a hose-bib gauge. Pressure over 80 psi deserves plumbing evaluation.
- Corroded shutoff: Do not force a decades-old stop with pliers. The stem or packing can fail and cause an uncontrolled leak.
- Cracked porcelain: A tank crack is not a fill-valve repair. Shut off water and replace the damaged tank or toilet.
An honest limitation is important: a fill-valve replacement cannot correct a cracked tank, blocked drain, weak flush caused by the toilet’s design, or a leaking sewer connection. It only controls the incoming refill supply.
When Should You Call a Plumber?
Call a plumber when the shutoff valve will not close, the tank or supply connection is cracked, water leaks into the wall or floor, household pressure is excessive, or a replacement valve still runs after correct installation. Professional help is also appropriate when a concealed or proprietary toilet lacks an accessible model label.
Stop using the toilet if water reaches the floor, the tank continues filling uncontrollably, or the supply stop cannot control the flow. Close the home’s main shutoff if necessary, then remove standing water to protect flooring and the ceiling below.
A plumber can test pressure, replace a failed angle stop, extract corroded fittings, identify a compatible proprietary valve, and assess whether porcelain damage makes replacement safer than repair.
The Bottom Line
To know if a fill valve is bad, first check whether the tank waterline is above the overflow tube, then lift the float while water is entering. If flow continues with the float fully raised, the fill valve is failing or obstructed. If the bowl turns colored during a 15-20 minute dye test, repair the flapper instead.
Adjustment and sediment flushing can solve minor valve problems. Replace the valve when the shutoff remains unreliable, the body or shank leaks, the float is damaged, or the component is approximately 5-7 years old and replacement parts are unavailable. The correct diagnosis saves the cost of replacing a good part.
Frequently Asked Questions
Can a bad fill valve cause a toilet to leak into the bowl?
A bad fill valve usually does not create the leak path into the bowl, but it can make the leak visible by repeatedly refilling the tank. Colored water in the bowl after 15-20 minutes points to a flapper, flush-valve gasket, or overflow-related problem rather than the fill valve itself.
How long should a toilet tank take to fill?
Most standard gravity toilets refill in about 30 seconds to 2 minutes with normal household pressure and an open supply stop. A refill taking more than 5 minutes suggests a restriction, clogged inlet screen, low pressure, undersized supply line, or failing fill valve.
Are toilet fill valves universal?
Many float-cup fill valves are adjustable and fit common toilets with standard tank openings and 7/8-inch supply connections. Universal does not include every dual-flush, concealed-tank, pressure-assisted, or manufacturer-specific toilet, so measure the valve and check the toilet model first.
Why does my toilet run only at night?
Nighttime running often results from a slow flapper leak that becomes noticeable when the house is quiet, but changing water pressure can also expose a marginal fill-valve seal. Perform the dye test and observe whether the tank level drops before the valve starts again.
Should the refill tube go inside the overflow tube?
The refill tube should clip above the overflow tube opening with an air gap. Submerging the tube can create backflow or siphoning, which may keep the fill valve cycling and can violate plumbing-code requirements intended to protect the potable water supply.
How often should a toilet fill valve be replaced?
Replace a fill valve when it cannot shut off after adjustment and cleaning, leaks at the shank, or has a damaged float or diaphragm. Many valves last approximately 5-7 years, although hard water, sediment, high pressure, and chlorine-based tank cleaners can shorten that interval.