To make tap water colder, run the cold faucet until standing water leaves the branch pipe, then pour the water into a clean container and chill it with ice or refrigeration. For repeated cooling, use a covered refrigerator pitcher; for high demand, install a properly ventilated point-of-use water chiller. A thermometer gives the most reliable result.
Key Facts at a Glance
- Cold tap water commonly becomes warmer after sitting in indoor pipes, especially near exterior walls, attics, garages, and hot-water equipment.
- Flushing removes warm standing water but cannot cool water that enters the home warm from a hot supply line or summer groundwater.
- A clean ice-and-water bath can cool a covered pitcher faster than refrigerator air, often within 10-20 minutes for a small volume.
- A refrigerator pitcher usually needs 2-4 hours to cool fully, depending on starting temperature, container size, and refrigerator temperature.
- Pipe insulation slows heat gain; it does not actively refrigerate water.
- Under-sink chillers require airflow, a suitable electrical outlet, filter maintenance, and installation that follows local plumbing requirements.
How to Make Tap Water Colder
The fastest low-cost method is to flush the cold line, pour the water into a clean glass, and add ice or place the container in an ice bath. The most convenient everyday method is a covered pitcher in a refrigerator. The best solution depends on whether you need one glass immediately, several liters per day, or cold water from multiple fixtures.
Before You Start
| Requirement | Typical specification | Why it matters |
|---|---|---|
| Food thermometer | 32-212°F, 0-100°C range | Confirms actual water temperature |
| Clean container | 1-2 quart, covered | Prevents odors and contamination |
| Ice | 1-2 pounds for a small bath | Provides a colder external medium |
| Refrigerator | 37-40°F, 3-4°C | Keeps stored water safely chilled |
| Time available | 2 minutes to 4 hours | Determines the appropriate method |
| Starting condition | Cold faucet fully open | Avoids mixing hot-line water into the test |
The U.S. Environmental Protection Agency recommends flushing water that has been sitting in household plumbing before drinking or cooking, particularly where lead may be present. The exact flushing time varies with pipe length and flow, so temperature stabilization is more useful than following an arbitrary one-minute rule.
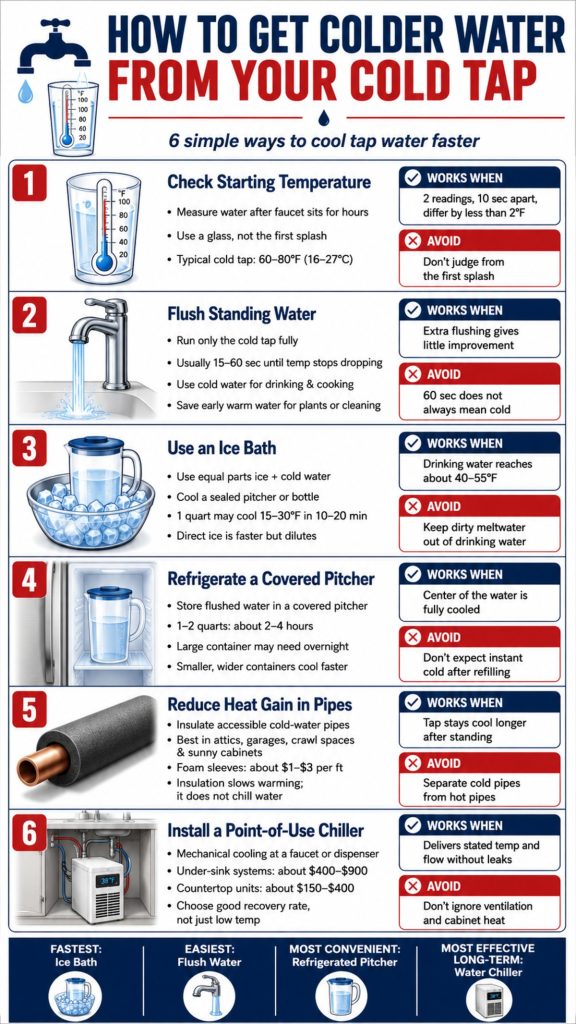
Step 1: Check the Starting Temperature
Measure the cold water after the faucet has been closed for at least several hours. Place a clean thermometer in a glass and record the temperature after the reading stabilizes, rather than measuring the first splash directly at the spout.
A typical indoor cold-tap reading may range from 60-80°F, or 16-27°C, in warm weather. Local conditions can produce lower or higher values. Municipal supply temperature, well depth, season, pipe material, branch-pipe length, and the temperature around the plumbing all affect the result.
You will know the measurement worked when two readings taken 10 seconds apart differ by less than about 2°F.
Common mistake: measuring water immediately after opening the faucet and treating that first temperature as the incoming supply temperature.
Step 2: Flush the Standing Water
Open only the cold faucet fully and let the water run into a container or drain until the temperature stops falling. This often takes 15-60 seconds in a kitchen, but a long branch line, low flow rate, or warm cabinet can require longer.
Use cold tap water for drinking and cooking. The Centers for Disease Control and Prevention states, “Use cold water for cooking, drinking, and making baby formula.” Hot tap water can dissolve lead more readily from plumbing components, and boiling does not remove lead.
A simple conservation practice is to collect the initial warm water for plants, cleaning, or toilet flushing where local water quality conditions make that appropriate. Do not use collected water for drinking if it has contacted a dirty container.
You will know it worked when the temperature reaches a stable point and additional flushing produces little improvement.
Common mistake: assuming a 60-second flush always produces cold water. Flushing cannot reduce the temperature of water already entering the building at 75°F.
Step 3: Use an Ice Bath or Add Ice Safely
For rapid cooling, fill a basin with approximately equal volumes of ice and cold water. Place a sealed, clean pitcher or thin-walled stainless-steel bottle in the bath, keeping the container opening above the slurry.
A 1-quart container commonly cools by 15-30°F in 10-20 minutes, although the result depends on the starting temperature, container shape, ice contact, and stirring. Stir the water inside the container every few minutes if the container is open and the water will be consumed immediately.
Adding clean, commercially made or properly frozen ice directly to a glass is faster, but it changes the water volume and dilutes beverages. Ice should be handled with clean tongs or washed hands, and an ice maker should be cleaned according to its manual.
You will know it worked when the water reaches your preferred temperature, often about 40-55°F for drinking, without requiring the entire container to become surrounded by melted water.
Common mistake: placing an uncovered pitcher in a sink or cooler that contains dirty meltwater. External cooling water should not contact the drinking water.
Step 4: Refrigerate a Covered Pitcher
Pour flushed tap water into a covered glass or food-safe plastic pitcher and place it on a middle refrigerator shelf. A 1-2 quart pitcher typically needs 2-4 hours to cool, while a large full container may need overnight refrigeration.
A refrigerator set near 37-40°F usually produces water in the low-to-mid 40s after sufficient time, but water temperature will not necessarily equal the appliance setting because the pitcher warms the surrounding air and is opened repeatedly. Leave headspace for expansion if the water may freeze, and keep the container away from raw foods.
Use a smaller container when speed matters. A shallow, wide vessel cools more quickly than a large narrow jug because it transfers heat through a greater surface area relative to its volume.
You will know it worked when the pitcher has remained covered and undisturbed long enough for the center of the water to cool, not merely the outer layer.
Common mistake: returning a warm pitcher to the refrigerator repeatedly and expecting immediate cold water. Divide water into two smaller containers for faster turnover.
Step 5: Reduce Heat Gain in the Plumbing
Insulate accessible cold-water pipes with closed-cell foam sleeves, especially where pipes pass through attics, garages, crawl spaces, exterior walls, or cabinets exposed to sunlight. Insulation slows warming during stagnation; it cannot lower the pipe below the temperature of the surrounding water and cannot replace active cooling.
Keep insulation away from electrical wiring, heat-producing equipment, flues, and hot surfaces. Insulate the cold line, not the hot-water line, and do not cover valves or fittings that need inspection. Follow local plumbing and fire-safety requirements when pipes pass through rated assemblies.
Typical foam sleeves cost about $1-$3 per linear foot, with a small accessible project often totaling $20-$100 in materials. Rerouting plumbing is a much larger job, commonly costing hundreds to several thousand dollars depending on wall access and finish repairs.
You will know it worked when the cold tap warms more slowly after standing, not when the first water becomes refrigerator-cold.
Common mistake: insulating a cold pipe beside a hot-water pipe without separating them. Heat transfer can continue through direct contact and shared hot spaces.
Step 6: Install a Point-of-Use Water Chiller
A point-of-use chiller cools water mechanically after the cold supply line branches to a dedicated faucet or dispenser. Compressor models generally provide stronger cooling and higher sustained output than thermoelectric Peltier models, while Peltier units can be smaller and quieter at modest demand.
Typical under-sink systems cost approximately $400-$900 before labor and may deliver around 0.5-2 gallons of chilled water per hour, depending on the model, inlet temperature, reservoir size, and recovery rate. Countertop dispensers commonly cost $150-$400 and may hold 0.5-1 gallon in an internal reservoir.
Provide the manufacturer’s required clearance around the unit. A compressor releases heat into the cabinet, so an enclosed, unventilated space can reduce performance and shorten service life. Use a listed, grounded outlet and install a backflow preventer, pressure regulator, filter, or air gap when required by the product instructions and local code.
You will know it worked when the unit delivers its stated temperature and flow after its initial pull-down period, without leaks, unusual vibration, or a rapidly warming reservoir.
Common mistake: choosing a chiller by its advertised minimum temperature while ignoring recovery rate. A unit that chills one glass well may struggle with a family filling several bottles consecutively.
Which Cooling Method Is Cheapest?
A refrigerator pitcher or direct ice is usually the least expensive approach for drinking water, while pipe insulation offers the lowest operating cost for slowing temperature gain. Active chillers cost more because they use electricity and add plumbing, filtration, heat rejection, or maintenance requirements.
| Method | Typical cost | Typical time | Practical output |
|---|---|---|---|
| Ice in a glass | $0-$5 per bag of ice | 1-3 minutes | 8-20 ounces |
| Ice bath | $0-$5 | 10-20 minutes | 1-2 quarts |
| Refrigerator pitcher | $10-$60 | 2-4 hours | 1-2 quarts per batch |
| Countertop dispenser | $150-$400 | 30-90 minutes initially | 0.5-1 gallon reservoir |
| Under-sink chiller | $400-$900 plus labor | 1-3 hours installation | 0.5-2 gallons per hour |
| Cold-pipe insulation | $20-$100 materials | 1-4 hours | All connected cold lines, slower warming |
Prices are typical U.S. consumer ranges, not fixed quotes. A filtered pitcher may cost more than an ordinary carafe, and replacement filters can add $20-$100 per year depending on capacity and water quality.
Which Method Handles High Volume?
An under-sink compressor chiller or a plumbed dispenser is better for repeated bottle filling than ice or a refrigerator pitcher. A pitcher is more efficient for a few quarts per day because it avoids installation, standby electricity, compressor noise, and filter replacement.
| Household need | Recommended method | Typical capacity | Main limitation |
|---|---|---|---|
| One cold glass now | Ice in glass | 8-20 ounces | Melting changes dilution |
| Two quarts daily | Covered pitcher | 1-2 quarts per batch | Requires advance planning |
| Several bottles daily | Countertop dispenser | 0.5-1 gallon reservoir | Reservoir recovery time |
| Frequent filtered fills | Under-sink chiller | 0.5-2 gallons per hour | Installation and cabinet ventilation |
| Warm pipes in an attic | Cold-pipe insulation | Entire accessible line | Does not actively cool water |
| Cold water at every fixture | Central cooling system | Model-dependent | High cost and complexity |
Whole-house water chilling is rarely sensible in an ordinary residence. A central system must cool water used for showers, toilets, laundry, and irrigation unless the plumbing is redesigned, which adds energy consumption and substantial installation cost for little drinking-water benefit.
What Temperature Should Cold Tap Water Reach?
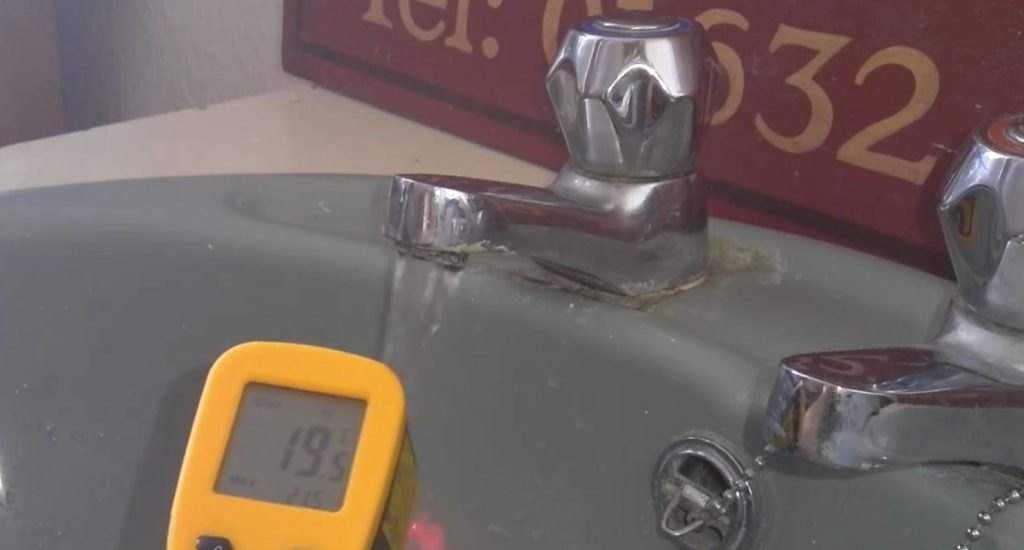
A practical drinking-water target is about 40-55°F, or 4-13°C, although personal preference varies and water does not need to approach freezing. Water below 40°F may taste especially cold but can cause discomfort for some people, while water above 60°F may seem lukewarm even when it is microbiologically safe.
Do not confuse temperature preference with water safety. Cold water can still contain lead, bacteria from poorly maintained devices, or other contaminants, and chilling does not disinfect water. Use an appropriately certified filter when testing or local utility information indicates a contaminant concern.
NSF certification applies to specific contaminant-reduction claims, not to every function of a dispenser. Check the exact NSF/ANSI standard and claim for the cartridge or appliance rather than relying on the word “filtered” alone.
Why Does Cold Tap Water Stay Warm?
Cold tap water stays warm when the water has been sitting in a heated branch pipe, when the incoming supply is warm, or when a plumbing fault allows hot water to cross into the cold line. Long pipe runs through attics and sun-heated walls commonly create the first two conditions.
| Symptom | Likely cause | Useful check | Appropriate response |
|---|---|---|---|
| First water warm, then colder | Standing water in branch pipe | Measure every 15 seconds | Flush until stable |
| Water remains warm for minutes | Hot attic, wall, or garage run | Inspect accessible pipe route | Insulate or reroute |
| All fixtures become warm in summer | Warm municipal or well supply | Compare outdoor and indoor taps | Use ice, pitcher, or chiller |
| One faucet is warm | Local mixing valve or cartridge | Test another cold faucet | Service that fixture |
| Cold line warms when heater runs | Cross-connection | Close heater isolation briefly, if safe | Call a plumber |
| Flow is weak and water warms | Clogged filter or aerator | Remove and inspect screen | Clean or replace component |
A sudden temperature change accompanied by low pressure, discoloration, leaks, or a water-heater problem needs professional diagnosis. Do not dismantle a pressurized plumbing connection merely to test for a cross-connection.
How Can You Keep Cooled Water Safe?
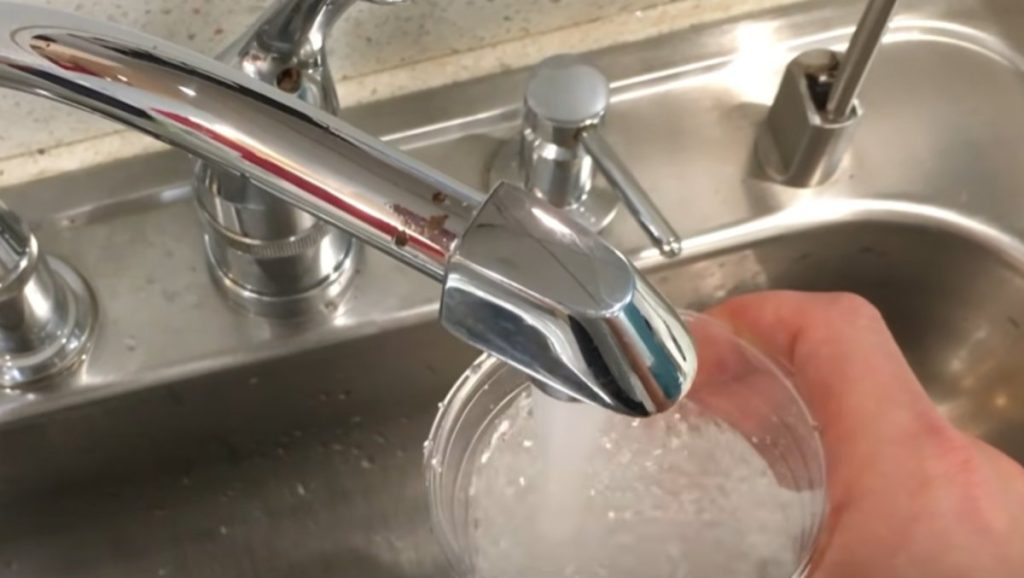
Keep chilled drinking water in a clean, covered container and refrigerate it at 40°F or below. Wash pitchers, reservoirs, lids, and dispensing nozzles regularly, replace filters on schedule, and avoid repeatedly topping off old water without cleaning the container.
The U.S. Food and Drug Administration recommends maintaining refrigerators at 40°F or below for food safety. That temperature is a storage benchmark, not a guarantee that a pitcher’s center has reached 40°F.
Use the following hygiene routine:
- Wash the container with dish detergent and rinse it thoroughly.
- Dry or refill it promptly instead of leaving residue inside.
- Clean removable dispenser parts according to the manual.
- Replace filters at the rated gallon or time interval.
- Discard water that has developed an odor, slime, or unusual taste.
- Keep ice scoops, bottle openings, and faucet nozzles from touching hands or dirty surfaces.
Cooled water is not automatically safer water. Cooling changes temperature, not contaminant concentration.
Variations for Renters and Apartments
Renters can get colder water without modifying plumbing by flushing the cold line, using ice in a glass, or storing a covered pitcher in the refrigerator. A countertop dispenser is the next step when a household needs a reservoir of cold water but cannot install an under-sink appliance.
Apartment plumbing can produce warm water because a long branch line runs through a service shaft or because multiple units share a warm riser. Insulating a small exposed section may help, but a persistent building-wide problem should go to the landlord or property manager.
Avoid attaching an unapproved chiller to a faucet or supply line. Leaks inside a cabinet or behind a counter can cause property damage, and some leases prohibit plumbing alterations or appliances that require continuous water pressure.
Common Mistakes and How to Fix Them
Running the faucet indefinitely
Problem: Water is wasted even though the temperature is no longer improving.
Fix: Measure the water every 15-30 seconds, collect usable initial water, and stop when readings stabilize.
Putting dirty ice into drinking water
Problem: Ice can transfer odors, food residue, or microorganisms from an unclean bin.
Fix: Clean the ice container, use clean tongs, and wash reusable ice molds.
Sealing a warm pitcher in the refrigerator
Problem: A large warm container cools slowly and raises the refrigerator’s workload.
Fix: Start with flushed water, use a smaller pitcher, and leave air space around the container.
Blocking a chiller’s ventilation
Problem: Heat cannot leave the compressor compartment, causing poor cooling or thermal shutdown.
Fix: Follow the clearance dimensions in the installation manual and avoid tightly packed cabinets.
Wrapping the wrong pipe
Problem: Insulating the hot line does nothing to cool cold drinking water.
Fix: Identify the cold supply by testing the pipe after the faucet runs, then insulate only the accessible cold line.
Treating temperature as a contamination test
Problem: Cold water is assumed to be clean because it tastes fresh.
Fix: Use utility reports, accredited laboratory testing, or a certified filter for water-quality questions.
Expert Rules for Better Results
Practitioner rule 1: Cool the smallest useful volume. A 16-ounce glass cools far faster than a 2-gallon container because less water must release heat. Pour only what the household will drink soon, then maintain a small refrigerated reserve.
Practitioner rule 2: Measure the center, not the surface. Refrigerated or ice-bathed water can develop temperature layers. Stir gently before measuring so the thermometer represents the drinkable volume.
Practitioner rule 3: Separate temperature control from water treatment. A chiller, refrigerator, and ice bath change temperature. A filter may reduce selected contaminants. Neither function substitutes for the other.
Practitioner rule 4: Fix heat exposure before buying equipment. If a short cold-water branch runs beside a furnace duct or across a sunny attic, insulation or rerouting may improve the first-draw temperature more cheaply than adding a powered appliance.
FAQ
Can I make tap water colder without ice?
Yes. Run the cold faucet until the temperature stabilizes, then place the water in a covered container in a refrigerator. A 1-2 quart pitcher commonly needs 2-4 hours, while a smaller bottle may cool sooner. An insulated bottle slows warming but does not remove heat as quickly as a refrigerator.
Does leaving the cold faucet running make water colder?
Running the faucet removes warm water that has been sitting in the household branch pipe, but it does not actively cool the incoming supply. Stop when the thermometer reading stabilizes. If the water remains warm after several minutes, the source temperature or pipe location is probably the limiting factor.
Is cold tap water safer than warm tap water?
Cold tap water is generally preferred for drinking and cooking because hot water can dissolve lead from plumbing more readily. Temperature alone does not prove safety, however. Follow local water advisories, test private-well water, and use a certified filter when a contaminant reduction claim is needed.
How can I cool tap water during a power outage?
Use ice in a clean glass, an ice-and-water bath around a sealed container, or a properly maintained cooler. Keep drinking water covered and separate from meltwater. A refrigerator pitcher will gradually warm during an outage, so minimize door opening and follow local food and water safety guidance.
Why is bottled water colder than my tap water?
Bottled water may feel colder because it was refrigerated before purchase, while tap water has equilibrated with warm indoor pipes. The difference does not indicate that bottled water is inherently purer. Chill tap water in a clean covered container, and compare the temperatures with the same thermometer.
Should I buy an under-sink water chiller?
Buy one when a household regularly needs several cold bottles per day and has space, electrical access, and permission for plumbing work. Choose a refrigerator pitcher or countertop dispenser when demand is lower. Check flow rate, recovery time, filter cost, ventilation clearance, noise, and replacement parts before purchasing.
The Bottom Line
To make tap water colder quickly, flush the cold line, pour the water into a clean glass, and use ice or an ice bath. For daily convenience, refrigerate a covered pitcher for 2-4 hours. Insulate exposed cold pipes when heat gain is the problem, and choose a ventilated point-of-use chiller only when household demand justifies its cost and maintenance. The right solution to how to make tap water colder is determined by volume, starting temperature, available time, and whether the water is warm at the faucet or warm at the source.