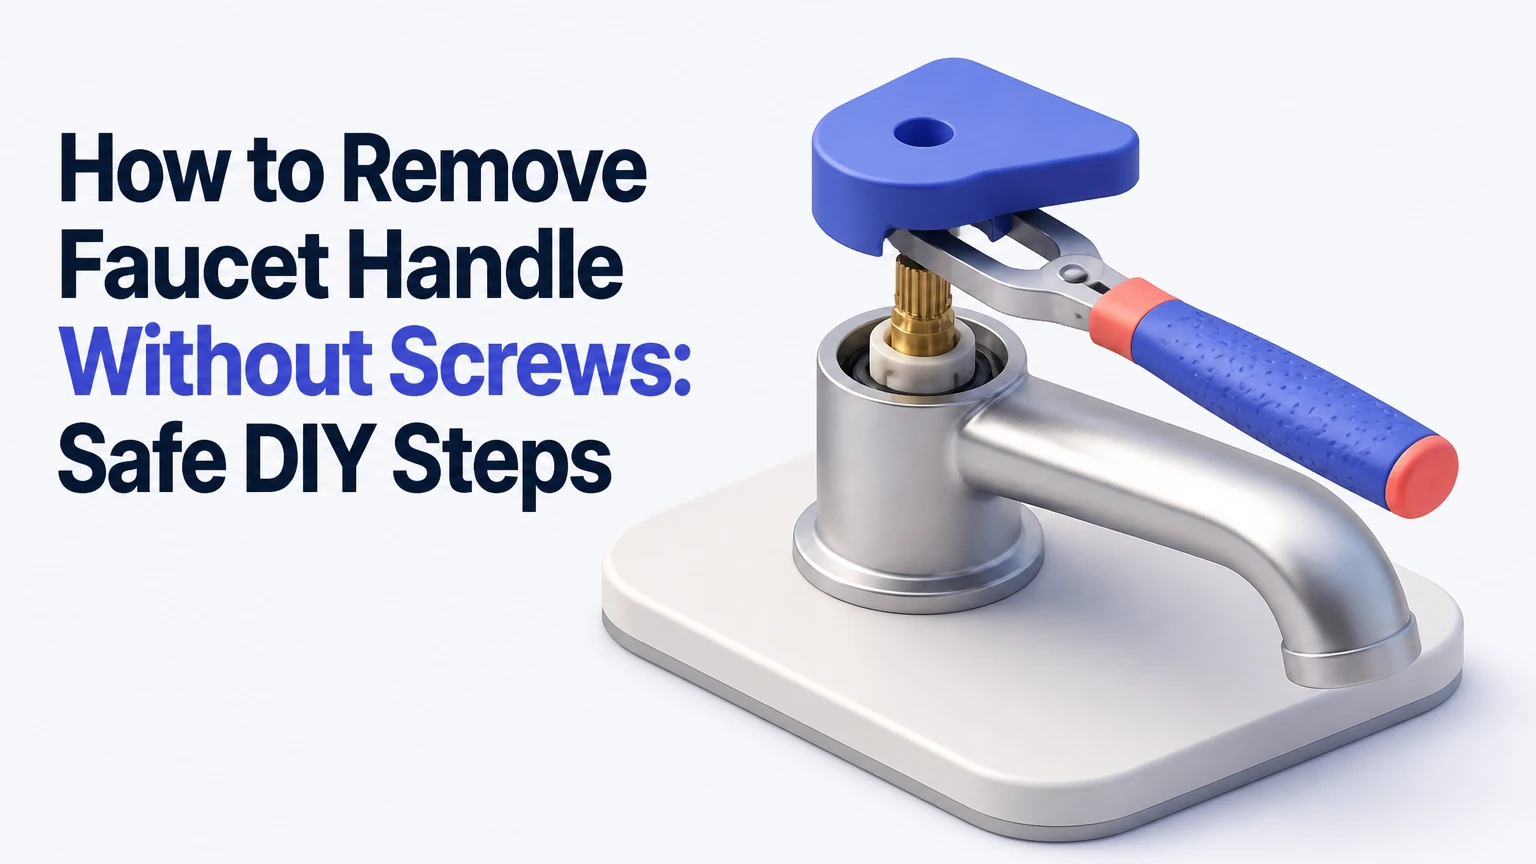
To remove a faucet handle without screws, identify whether the handle uses a hidden set screw, threaded collar, decorative cap, or snap-fit connection. Protect the finish, expose or loosen the attachment, then pull the handle straight from the cartridge stem. Most removals take 15-45 minutes with $5-$30 of basic tools.
Key Facts
A faucet handle with no visible screw usually has a concealed screw, threaded collar, cap, or tension-fit clip.
Handle removal alone normally does not require shutting off the water, but shutoff valves are necessary before removing a cartridge or pressurized faucet component.
The most common hidden set-screw sizes are 3/32 inch, 1/8 inch, 2.5 mm, and 3 mm.
Straight pulling protects the cartridge stem; aggressive side-to-side rocking can damage plastic valve parts.
A rubber strap wrench protects polished, brushed, and matte finishes better than bare pliers.
A faucet handle puller is the safest escalation tool when the fastener is removed but corrosion locks the handle in place.
How Is a Faucet Handle Attached Without Visible Screws?
A screwless-looking faucet handle is attached through a concealed mechanical connection, not permanently fused to the faucet. Manufacturers commonly hide a set screw beneath an index cap, use a threaded skirt, or press the handle onto a splined cartridge stem with an internal clip.
The visible handle may be a lever, knob, cylindrical sleeve, or crystal-style shower control. Its external shape does not reliably identify the attachment method. A seam, removable color button, small underside opening, or threaded base provides better evidence.
The three main mechanisms work differently:
| Attachment mechanism | Where to inspect | Removal motion | Typical hardware |
|---|---|---|---|
| Concealed set screw | Front, rear, side, or underside | Loosen screw, then pull | 3/32-inch or 2.5 mm hex screw |
| Threaded collar | Base seam or decorative skirt | Turn counterclockwise | Brass or stainless threaded sleeve |
| Snap-fit connection | No cap, screw, or obvious seam | Pull straight outward or upward | Spring clip or friction-fit splines |
| Top index cap | Flat top of knob or cross handle | Lift cap, then remove screw | Phillips or slotted central screw |
Delta and Gerber support documentation describes both removable-cap-and-screw handles and threaded handle assemblies, so “no visible screw” does not identify one universal design. The correct first move is diagnosis, not force.
What Should You Do Before Removing the Handle?
Before removing a faucet handle, cover the drain, protect the finish, and decide whether the job ends at the handle or continues to the cartridge. Shut off the hot and cold supply valves if you will remove the cartridge, loosen a valve body, or work on any water-bearing component.
For a handle-only removal, water generally remains contained below the cartridge seal. Turning off both supplies is still sensible when the faucet is old, the handle may break, or the next repair step is uncertain.
Prepare the work area
- Close the drain. Insert the stopper or place a folded towel over the opening. Small index caps and set screws disappear easily.
- Clear the counter or tub ledge. A flashlight, hex-key set, cloth, and parts tray should remain within reach.
- Protect the finish. Use a microfiber cloth around the base. Do not place a steel screwdriver directly against chrome, brushed nickel, polished brass, or matte black coating.
- Photograph the assembly. Take a top, side, and underside photograph before removing any part.
- Check the water plan. Close the shutoff valves clockwise and open the faucet if cartridge work will follow.
The American Society of Plumbing Engineers and manufacturer service instructions treat isolation of water as a prerequisite for valve-component replacement. That precaution is more important than the handle removal itself.
Gather the right tools
| Tool or material | Typical quantity or size | Use | Typical cost |
|---|---|---|---|
| Hex-key set | 1 set, 2.0-4.0 mm and 5/64-1/8 inch | Hidden set screws | $5-$12 |
| Precision screwdriver | 1 flat and 1 Phillips | Caps and central screws | $4-$10 |
| Plastic pick | 1 tool | Lift index buttons without scratching | $3-$8 |
| Microfiber cloth | 1-2 cloths | Finish and drain protection | $2-$6 |
| Rubber strap wrench | 1 small wrench | Threaded collars | $10-$20 |
| Faucet handle puller | 1 adjustable puller | Corroded or seized handles | $12-$25 |
A plastic pick is preferable to a utility knife for decorative caps. A sharp blade can cut a gasket, chip a plated edge, or leave a visible mark when the cap is tightly seated.
Where Is the Hidden Screw on a Faucet Handle?
The hidden screw is usually on the underside, rear, front, or top of the handle, beneath a small plug or red-and-blue index button. Inspect every surface with a flashlight before pulling, because a 2 mm opening can be nearly invisible on a dark or brushed finish.
Search these locations in order
- Handle underside: Look near the rear edge of a lever, especially where the lever joins its hub.
- Front face: Check for a round logo, temperature marker, or matching-finish plug.
- Rear face: Kitchen faucet levers often conceal the opening on the side facing the backsplash.
- Top surface: Traditional knobs may have a removable hot, cold, or brand disc.
- Base seam: A visible joint may indicate a threaded collar rather than a hidden screw.
A cap may be flush, slightly recessed, or held by a small O-ring. Use a plastic pick at the cap seam and lift gradually around the circumference instead of twisting one edge sharply.
How do you know the fastener is exposed?
A set-screw opening is normally a small round or hexagonal recess centered in the handle hub. If the tool enters only a few millimeters and stops against a solid surface, the opening may contain mineral scale, a decorative insert, or the wrong fastener type.
Do not force a hex key that feels loose. A nearly fitting key can round the screw socket before the handle moves.
How Do You Remove a Hidden-Screw Handle?
Remove a hidden-screw faucet handle by lifting its cap, fitting the correct driver fully into the fastener, loosening the screw counterclockwise, and pulling the handle straight off the cartridge stem. The screw usually needs several turns rather than complete removal, but retain it in a parts tray if the handle separates unexpectedly.
Step 1: Locate and clean the access point
Wipe the handle with a damp cloth. Use a wooden toothpick or plastic pick to clear soap residue and mineral deposits from the suspected cap or screw opening.
Success checkpoint: The cap edge or screw recess is visible under direct light.
Common mistake: Scraping the finish with a bare utility blade.
Step 2: Lift the decorative cap
Insert the thinnest plastic pick under one edge. Work around the cap with gentle upward pressure. If the cap has an O-ring, keep it flat and place it with the screw when removed.
Success checkpoint: The cap rises without bending or splitting.
Common mistake: Prying against the faucet body instead of the cap seam.
Step 3: Fit the driver completely
Try the hex key or screwdriver that fills the recess without wobbling. Common sizes include 3/32 inch, 1/8 inch, 2.5 mm, and 3 mm, but the exact size varies by manufacturer.
Success checkpoint: The tool reaches the bottom of the socket and turns the fastener without slipping.
Common mistake: Using a close but undersized metric or imperial key.
Step 4: Loosen the set screw
Turn counterclockwise while applying firm inward pressure. Stop if the key cams out, because repeated slipping can strip the small socket.
Success checkpoint: The fastener backs out or releases the handle after two to ten turns.
Common mistake: Removing the screw with the handle under sideways tension, which can bind the threads.
Step 5: Pull the handle straight
Grip the handle hub with both hands and pull directly along the cartridge-stem axis. For a vertical sink handle, pull upward; for a wall-mounted shower handle, pull outward from the wall.
Success checkpoint: The handle slides off while the cartridge stem remains centered and undamaged.
Common mistake: Twisting the handle aggressively after the screw is loose.
Does the Faucet Handle Twist Off?
A faucet handle twists off only when its base is a threaded collar or skirt. A collar has a visible seam where the lever or knob meets a rounded base, and the complete handle assembly usually turns counterclockwise when viewed from the handle end.
Step 1: Confirm the collar
Hold the lever still and inspect the lower cylindrical section. A continuous seam and knurled or smooth skirt indicate threads, while a small access hole indicates a set screw.
Step 2: Turn by hand
Wrap the collar in a microfiber cloth and rotate counterclockwise. Keep the upper lever stationary so you do not transmit torque into the cartridge or faucet mounting hardware.
Step 3: Add a strap wrench
If hand force fails, use a rubber strap wrench around the collar. Apply short, controlled turns rather than one high-force pull.
Success checkpoint: The collar turns through at least one full rotation and the handle lifts away.
Common mistake: Using channel-lock pliers directly on the finish.
Some collars are reverse-threaded or use a retaining ring, although standard right-hand threads are more common. If counterclockwise force produces no movement after mineral deposits are treated, stop and inspect the manufacturer’s parts diagram before increasing leverage.
Which Removal Method Fits Your Handle?
The best removal method depends on the attachment mechanism, available clearance, finish sensitivity, and corrosion. Hidden-screw removal is cheapest, a strap wrench fits threaded collars, and a puller is the most controlled option for a seized snap-fit handle.
| Handle condition | First method | Best backup | Typical time | Damage risk if misused |
|---|---|---|---|---|
| Cap and hex opening visible | Correct hex key | Penetrant and extractor | 5-15 minutes | Stripped screw |
| Smooth collar with base seam | Hand rotation | Rubber strap wrench | 10-20 minutes | Scratched collar |
| No hardware, light friction fit | Straight hand pull | Faucet puller | 5-15 minutes | Bent cartridge stem |
| Heavy white mineral scale | Vinegar-treated cloth | Puller after descaling | 30-75 minutes | Chipped finish |
| Corroded or stripped screw | Penetrant and exact driver | Screw extractor | 20-60 minutes | Broken fastener |
| Wall shower knob seized to stem | Puller aligned with stem | Plumber or valve repair | 15-60 minutes | Valve-body damage |
The table describes typical residential conditions, not guaranteed manufacturer specifications. Faucet design, water chemistry, age, and access space change the result.
How Do You Remove a Snap-On or Push-Pull Handle?
Remove a snap-on faucet handle by pulling it straight along the cartridge-stem axis after confirming that no cap, set screw, or retaining ring is present. Apply steady force with both hands near the base, and use a handle puller if hand pressure does not release the fitting.
Snap-fit handles often grip splines or ridges on the stem. The plastic or metal handle may feel completely fixed even after years of service, because mineral scale forms between the stem and handle hub.
Use controlled manual force
Wrap the base with a cloth and pull evenly. Do not jerk, rotate violently, or lever against the faucet body. On a shower valve, keep the pull perpendicular to the wall.
If the handle moves a few millimeters and stops, mineral buildup or an internal clip may be catching. Pulling harder can bend the stem without removing the handle.
Use a faucet handle puller
A puller has jaws that grip beneath the handle and a center screw that bears against the cartridge stem. Tighten the center screw gradually so the force lifts the handle rather than bending the valve assembly.
- Open the jaws wide enough to fit under the handle hub.
- Center the forcing screw on the stem.
- Protect the finish with thin cardboard or cloth.
- Tighten the forcing screw one quarter turn at a time.
- Stop when the handle begins moving, then lift it off by hand.
Success checkpoint: The handle rises evenly with no visible movement of the faucet body or wall valve.
Common mistake: Allowing one puller jaw to sit higher than the other, which cocks the handle and loads the stem sideways.
A puller is not appropriate when the handle is a thin decorative shell that could crack under jaw pressure. In that case, consult the model’s service instructions or use a puller designed for that specific handle geometry.
How Do You Treat a Stuck or Corroded Handle?
Treat a stuck faucet handle by removing scale, lubricating the fastener when appropriate, and increasing force in small stages. White vinegar can soften many mineral deposits, while a penetrating oil may help a corroded metal screw, but neither should be applied indiscriminately to every faucet finish or seal.
Mineral deposits
Wrap a cloth dampened with white vinegar around the handle base for 30-60 minutes. Keep vinegar away from natural stone counters, unsealed grout, and sensitive plated finishes unless the manufacturer permits acid cleaners.
After soaking, rinse and dry the area. Tap the handle hub lightly with a plastic or rubber tool, then retry the correct removal method.
Corroded set screws
Apply a small amount of penetrating oil into the screw opening and wait approximately 10-15 minutes. Protect the counter and wipe away runoff immediately, especially around rubber seals and painted finishes.
Penetrating oil is not a substitute for the correct driver. If the socket begins to round, stop and switch sizes rather than applying more torque.
Stripped set screws
A stripped screw requires a sequence:
- Try the next larger compatible hex key only if it seats firmly.
- Use a quality screw extractor sized for the fastener.
- Drill only as a last resort, with the handle protected and the drill centered.
- Replace the damaged screw and inspect the cartridge stem afterward.
A 1/16-inch drill bit may fit some small set screws, but drilling depth must remain shallow. Drilling into the cartridge stem can turn a handle replacement into a valve replacement.
What Should You Inspect After the Handle Comes Off?
After removing the faucet handle, inspect the cartridge stem, retaining hardware, splines, O-rings, and handle hub before installing a replacement. A damaged stem, cracked hub, missing clip, or loose adapter explains why a replacement handle may not fit or may continue to wobble.
Use this checklist:
| Component | What to inspect | Normal finding | Repair implication |
|---|---|---|---|
| Cartridge stem | Bent or cracked metal or plastic | Straight stem with intact splines | Replace cartridge if damaged |
| Set screw | Thread condition and socket | Usable threads and crisp recess | Reuse only if undamaged |
| Handle hub | Cracks, worn splines, scale | Clean bore with defined splines | Replace handle if worn |
| O-ring | Cuts, flattening, brittleness | Flexible, continuous rubber | Replace seal if damaged |
| Retaining clip | Correct position and tension | Clip sits fully in its groove | Refit before handle installation |
| Escutcheon or trim | Scratches and movement | Stable, undamaged trim | Tighten or replace trim as needed |
Do not run the faucet with a loose cartridge-retaining nut or missing clip. A handle can be removed safely while the valve remains intact, but the next service step may expose pressurized water.
Clean only the stem and hub surfaces that the manufacturer identifies as serviceable. Avoid sanding cartridge surfaces, because abrasive debris can enter the valve and cause leaks.
What Changes by Faucet Type?
Faucet type changes where the attachment is hidden and how much clearance exists for a tool. Bathroom lever handles commonly use caps or underside hex screws, kitchen pull-out faucets often use rear or side fasteners, and shower knobs frequently require straight outward removal from a wall valve.
| Faucet type | Likely attachment | Access location | Special concern |
|---|---|---|---|
| Bathroom single-lever | Set screw or cap | Front, side, or underside | Small opening near backsplash |
| Bathroom cross handle | Top index cap and screw | Center of knob | Cap can crack if pried sharply |
| Kitchen pull-out lever | Set screw or threaded assembly | Rear or lower hub | Limited counter clearance |
| Kitchen two-handle | Cap, screw, or collar | Top or side | Hot and cold parts differ |
| Tub or shower knob | Snap fit or central screw | Front center | Wall valve stem can bend |
| Thermostatic shower handle | Set screw or retaining ring | Underside or side | Temperature stop may need alignment |
Manufacturer instructions override general appearance-based guidance. Delta, Gerber, Kohler, and Moen use multiple handle systems across product families, so the faucet brand and model number provide more reliable identification than the handle shape alone.
What Mistakes Damage Faucet Handles?
The most damaging mistakes are using bare pliers, pulling at an angle, forcing an incorrectly sized driver, and drilling before confirming the attachment type. Each mistake applies force to a part that was not designed to receive it.
Avoid direct metal contact
Channel-lock pliers can leave permanent dents on thin metal collars and scratches on chrome or matte black coatings. Use a rubber strap wrench, a thick cloth buffer, or a purpose-built puller.
Avoid sideways force
The cartridge stem is often narrower and weaker than the handle. Sideways rocking can bend a brass stem, fracture a plastic stem, or transmit force to supply connections beneath a sink.
Avoid over-tightening a puller
A puller should create controlled axial force. If the faucet body, trim plate, or wall valve begins moving, release the tool and reassess its alignment.
Avoid incompatible chemicals
Vinegar can damage some natural stone surfaces and may dull vulnerable finishes after prolonged exposure. Penetrating oils can swell certain elastomers and contaminate surfaces that later require clean sealing.
Replace the hidden fastener when needed
A set screw with a rounded socket or heavily corroded threads is a future failure point. Replacing it costs less than repeating the removal process after the handle loosens.
How Much Time and Money Does Removal Take?
A straightforward faucet-handle removal typically takes 5-20 minutes, while mineral buildup, a stripped screw, or a puller can extend the job to 30-75 minutes. Typical DIY tool spending is $5-$30, compared with approximately $75-$150 for a basic plumber service visit, depending on location and follow-on repairs.
| Situation | DIY time | DIY cost | Likely equipment |
|---|---|---|---|
| Exposed cap and good screw | 5-15 minutes | $5-$12 | Hex keys and plastic pick |
| Threaded collar, moderate scale | 10-30 minutes | $10-$20 | Strap wrench and cloth |
| Snap-fit handle, no corrosion | 5-20 minutes | $0-$15 | Puller optional |
| Severe mineral buildup | 30-75 minutes | $5-$15 | Vinegar or approved descaler |
| Stripped or corroded screw | 20-60 minutes | $10-$30 | Penetrant or extractor |
| Valve damage or inaccessible shower trim | 1-2 hours | $75-$150+ | Professional service |
These are typical consumer ranges, not a fixed national price schedule. A plumber may charge more when the cartridge, valve body, supply connection, wall opening, or shutoff valve also requires repair.
When Should You Stop and Call a Plumber?
Call a plumber when the valve body moves, the cartridge stem breaks, the shutoff valve will not close, water begins leaking from the assembly, or drilling is the only remaining removal option. Professional help is also sensible when a shower valve sits behind finished tile and replacement damage would be expensive.
Stop DIY work under these conditions:
- The handle puller is lifting the entire faucet or wall trim.
- The cartridge stem twists instead of the handle moving.
- The set screw is stripped below the handle surface.
- A shutoff valve spins without stopping water.
- The faucet leaks after the handle is removed.
- The fixture is under warranty or installed in a rental property.
- The faucet has no identifiable brand, model, or replacement-part path.
A rental tenant should avoid drilling, aggressive chemicals, and forceful prying. Document the condition, use only finish-safe manual methods, and report a seized handle to the property manager.
How Do You Reinstall or Replace the Handle?
Reinstall or replace the handle by matching the hub to the cartridge-stem splines, aligning the temperature position, tightening the correct fastener, and testing movement before restoring normal use. A handle should sit fully against its stop without wobbling or binding.
- Clean scale from the stem and handle bore.
- Position the cartridge in the intended off position.
- Align the handle with the original photograph.
- Slide the handle straight onto the stem.
- Tighten the set screw securely without excessive torque.
- Refit the index cap or decorative plug.
- Open the shutoff valves gradually if they were closed.
- Test hot, cold, flow, and handle movement.
For a single-lever faucet, the cartridge orientation controls temperature and flow. Installing the handle one spline off can reverse hot and cold positions or prevent the lever from reaching the full off stop.
If a new handle fits loosely, do not compensate with random washers or excess adhesive. Confirm that the replacement matches the faucet’s cartridge stem, adapter, spline count, and manufacturer family.
FAQ
Do I need to turn off the water to remove a faucet handle?
Usually, no. A handle-only repair does not normally open the water passage. Turn off the hot and cold supplies anyway if you may remove the cartridge, if the faucet is damaged, or if the shutoff valves are accessible and reliable.
Why does the handle remain stuck after removing the screw?
Mineral scale, corrosion, and pressure between the handle hub and cartridge stem can keep a handle fixed after the fastener is gone. Apply a suitable descaling treatment, pull straight, and use a faucet handle puller instead of twisting the handle sideways.
Can I use WD-40 on a faucet handle?
A penetrating version of WD-40 may help release a corroded metal set screw, but ordinary water-displacing spray is not a complete corrosion treatment. Keep any oil away from drinking-water pathways, rubber components, stone counters, and finishes that the manufacturer identifies as sensitive.
What size Allen key removes a faucet handle?
Common hidden set-screw sizes include 3/32 inch, 1/8 inch, 2.5 mm, and 3 mm. No universal size exists. Select the key that fills the socket completely, because a loose key can strip the fastener.
How do I remove a faucet handle with no screws and no cap?
Check for a threaded collar or snap-fit connection. A collar turns counterclockwise, while a snap-fit handle pulls straight from the stem. If neither method works with moderate force, use a puller or identify the faucet model before applying more leverage.
Can a faucet handle be permanently stuck?
Yes. Severe corrosion can bond the handle to the stem, and some plastic hubs can deform around splines. A puller often separates the parts, but a damaged cartridge stem or inaccessible valve may require replacement of the cartridge or the complete faucet.
The Bottom Line
To remove a faucet handle without screws, inspect the underside, front, rear, top, and base seam for a hidden attachment system. Remove a cap and loosen the set screw, unscrew a threaded collar, or pull a snap-fit handle straight from the cartridge stem. Use a strap wrench or faucet handle puller when corrosion resists hand removal, and stop before force damages the valve. With the correct method, most how to remove faucet handle without screws repairs take 5-45 minutes and cost $5-$30 in tools.