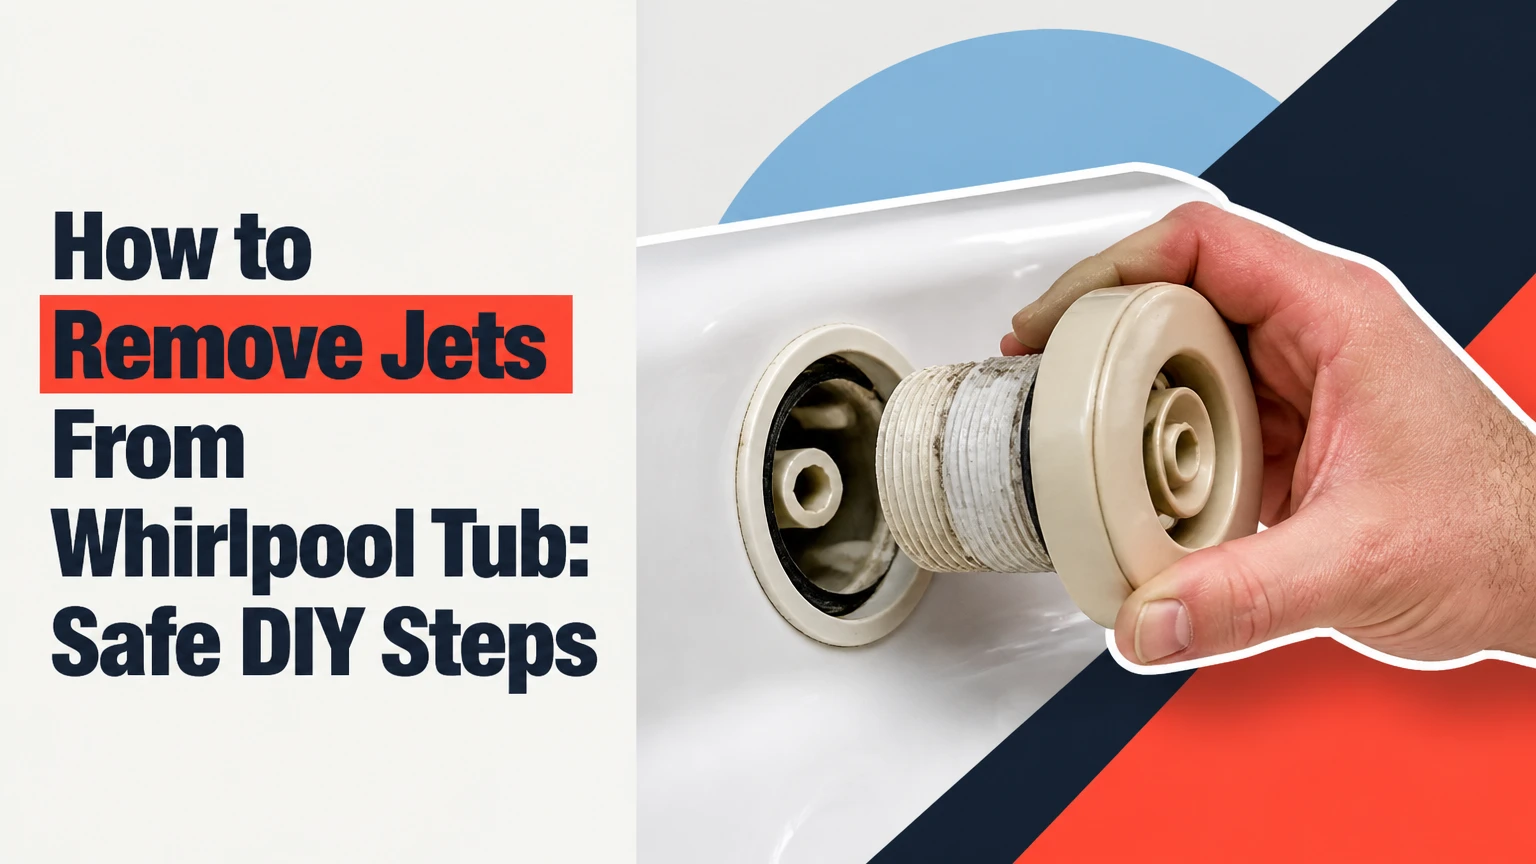
To remove jets from a whirlpool tub, switch off the tub’s GFCI circuit, identify the removable jet insert, then twist, unscrew, or hook-extract the insert according to its retaining mechanism. Most inserts take 5-15 minutes each to remove. The permanently plumbed jet body should remain in place unless the entire system is being professionally deleted.
Key Facts at a Glance
A whirlpool jet insert is removable; the jet body behind the tub shell is usually glued to PVC plumbing.
Twist-lock inserts typically release after counterclockwise rotation past the normal open stop.
Threaded inserts unscrew counterclockwise, but some models use a separate rear retaining ring.
Kohler ProFlex jets generally require the manufacturer’s hooked removal tool and an upward-pointing nozzle.
Never operate the pump while a jet insert is removed or while the tub is empty.
Typical DIY removal costs $0-$15 for cleaning or $15-$50 for a replacement insert, excluding specialty tools.
What Part of a Whirlpool Jet Comes Out?
The removable part is the jet insert, also called the nozzle, trim, or directional eyeball. The jet body remains behind the acrylic or fiberglass shell and connects to the water and air lines with glued PVC fittings.
The insert normally seals against the body with one or more rubber O-rings. The O-ring prevents water from entering the space behind the tub, while the retaining tabs or threads keep the insert seated during pump operation. Removing the insert is therefore a maintenance task. Removing the body is a plumbing and shell-repair task.
A whirlpool system forces pump water through the jet body. The fast water stream draws air through a separate intake path, creating bubbles and a massaging flow. That arrangement explains why an apparently simple front-piece removal can become a leak if the housing or plumbing is disturbed.
How Does a Whirlpool Jet Work?
A whirlpool jet uses a pump, water line, air intake, jet body, and removable insert. The pump sends water through the body, and the insert shapes or redirects the flow while an air path adds bubbles through a venturi effect.
The jet body is not a decorative cap. It is the structural connection between the tub opening and the plumbing. If the body rotates, cracks, or separates from its fitting, water can leak into the cavity below the tub even when the visible insert looks intact.
Practitioner rule: If the visible piece has a directional eyeball, spinning rotor, or decorative ring, treat that piece as the insert until proven otherwise. Do not put a wrench on the fixed flange attached to the tub shell.
Which Jet Type Do You Have?
Identify the retaining mechanism before applying force. The four common designs are threaded, twist-lock, hook-extracted, and flanged faceplate jets, but manufacturers sometimes combine a decorative cover with a separate internal retainer.
| Jet design | Visual clue | Removal action | Typical risk |
|---|---|---|---|
| Threaded insert | Continuous ridges or gripping slots | Turn counterclockwise | Cross-threading or cracked trim |
| Twist-lock insert | Smooth ring with a short rotation stop | Rotate past stop, then pull | Broken locking tabs |
| Hook-extracted insert | Smooth opening and upward-pointing eyeball | Catch inner lip with hooked tool | Scratched shell or bent nozzle |
| Flanged faceplate | Outer ring separate from inner nozzle | Remove cover, then retainer | Faceplate separates from backing |
Visual Tests Before Removal
Turn the jet face gently with dry, gloved fingers. A twist-lock model usually rotates a short distance and stops. A threaded model continues turning through several revolutions. A hook-extracted model often has no useful external grip and requires access through the nozzle opening.
Use a flashlight to inspect the seam. External notches suggest a tool interface, while a thin, even seam around a smooth ring suggests a slip-fit or snap-fit assembly. A brand name molded into the trim, pump label, or tub documentation can confirm the design, but the model number is more reliable than the brand alone.
Do not assume that all jets in one bathroom use the same removal method. Replacement tubs may contain mixed trim, and older generic whirlpool systems often use a decorative faceplate over a separate retaining clip.
Before You Start: Tools, Safety, and Access
Prepare the tub before touching the jet. Turn off the dedicated breaker or disconnect the GFCI-protected supply, verify that the pump cannot start from the wall switch, and drain the tub below the jet opening.
A GFCI reduces shock risk, but it does not make wet electrical equipment safe to handle. Do not rely on the control switch alone. Whirlpool manufacturers commonly require the system to be drained before servicing, and Jacuzzi’s maintenance guidance also emphasizes shutting down and draining spa equipment before work.
| Item | Typical quantity | Purpose | Typical cost |
|---|---|---|---|
| Nitrile or rubber gloves | 1 pair | Grip and skin protection | $2-$8 |
| Microfiber cloth or shelf liner | 1 piece | Protects plastic and shell | $1-$6 |
| Flashlight | 1 | Locates tabs, threads, and retainers | $0-$20 |
| Needle-nose pliers | 1 pair | Internal ribs or retaining ring | $8-$20 |
| Strap wrench | 1 | Protected grip on threaded trim | $12-$25 |
| Silicone plumber’s grease | 1 small tube | Lubricates replacement O-rings | $5-$12 |
| White vinegar | 250-500 mL | Mild scale softening | $2-$5 |
| Manufacturer removal tool | 1 | Required for some Kohler jets | Model-dependent |
Keep towels under the work area and photograph the jet before disassembly. Place each O-ring, clip, and insert in a labeled container. Do not spray penetrating oil, WD-40, or CLR into the plumbing cavity unless the jet manufacturer specifically approves that chemical for the trim and seal materials. Solvents can swell rubber and damage acrylic finishes.
How to Remove Jets From Whirlpool Tub
Follow the method that matches the retaining mechanism. The removal sequence is usually one of three actions: rotate and pull, unscrew, or hook and pull.
Step 1: Isolate the Whirlpool System
Switch off the breaker supplying the pump and confirm that the control panel, wall switch, and air button cannot activate it. Drain the tub, dry the surrounding shell, and place a towel below the jet.
Success checkpoint: The pump is silent and the jet cavity is dry enough to see the retaining mechanism.
Common mistake: Removing a jet with power still available. A person can accidentally activate the pump, and an open jet can spray water into an inaccessible area.
Step 2: Protect the Jet and Confirm the Direction
Put on rubber gloves and wrap the trim with shelf liner or a microfiber cloth. Rotate the face gently in both directions while watching for a stop, repeated clicking, or continuous threading.
Do not begin with pliers on bare plastic. Thin trim rings can deform before the retainer releases.
Success checkpoint: You know whether the jet turns only a fraction of a revolution, spins continuously, or has no external turning action.
Common mistake: Treating a decorative outer ring as the functional retainer. On some older jets, the cover comes off while the structural insert remains inside.
Step 3: Remove a Twist-Lock or Snap-In Jet
Rotate the jet insert counterclockwise toward its fully open position. At the end of its normal travel, apply steady pressure through the protected ring and continue approximately 10-15 degrees, if the design permits it. The tabs should pass their channels or release from the track.
Pull the insert straight out, perpendicular to the tub wall. Keep the insert centered rather than levering one side outward, because side loading can break the rear alignment tabs.
Success checkpoint: The entire insert comes out with its O-ring attached or visible in the housing.
Common mistake: Forcing the jet far beyond the stop. If the trim flexes, creaks, or begins to whiten, stop and confirm the model before applying more torque.
Step 4: Remove a Threaded Jet
Grip the outer rim with a strap wrench or a cloth-protected hand and turn counterclockwise. Continue through the threads until the insert lifts free. If the trim has internal slots, use needle-nose pliers only with light pressure and a cloth barrier.
If the faceplate rotates without rising, inspect the cavity with a flashlight. Some designs have a rear locking ring or support that must be held while the front insert unscrews. A spinning faceplate without outward movement often indicates that the decorative cover has separated from the threaded backing.
Success checkpoint: The insert advances outward with each counterclockwise turn, or the retaining ring is visibly disengaged.
Common mistake: Using a pipe wrench. Its concentrated jaws can crack chrome-plated plastic and transmit force into the fixed jet body.
Step 5: Remove a Kohler ProFlex or Hook-Extracted Jet
Kohler’s published ProFlex removal procedure uses a hooked removal tool. Point the internal eyeball completely upward, insert the hooked end through the opening, catch the inside top lip, brace your thumb against the tub shell, and pull straight back with controlled force.
Kohler’s service instruction is summarized by the direct command to “point the jet upward” before engaging the tool. Use the model-specific Kohler tool, such as the tool identified in Kohler technical document 112032-9, rather than improvising with a screwdriver.
Success checkpoint: The O-ring releases evenly and the jet moves directly backward without scraping the shell.
Common mistake: Catching the edge of the acrylic opening instead of the nozzle lip. Reposition the hook if it slips; do not pry against the tub surface.
Step 6: Inspect the Insert and O-Ring
Place the removed insert on a clean towel and inspect the locking tabs, threads, directional eyeball, rotor, rear ribs, and rubber O-rings. Replace an insert when the tabs are cracked, the threads are stripped, the rotor binds after cleaning, or the O-ring is flattened, cut, brittle, or permanently stretched.
Clean mineral deposits with warm water and a soft nylon brush. Use white vinegar on removable plastic parts for 15-30 minutes when the manufacturer permits it, then rinse completely. Never mix vinegar with CLR, bleach, or another cleaner.
Before installation, apply a thin film of silicone plumber’s grease to the O-ring. Do not use petroleum jelly because petroleum products can degrade some rubber seals.
Success checkpoint: The seal is elastic, continuous, and seated in its groove without twists.
Common mistake: Reusing a visibly flattened O-ring. A jet may appear secure yet leak behind the shell when the pump runs.
Step 7: Reinstall and Test for Leaks
Align the insert with the housing and push it straight in. For a twist-lock model, rotate clockwise until the tabs engage. For a threaded model, start by hand and turn clockwise only after the threads align naturally.
Fill the tub above the jet openings before testing. Restore power, run the pump for 30-60 seconds, and inspect the front seam and the accessible area beneath the tub for drips. Turn off power again before correcting a loose insert.
Success checkpoint: The jet stays seated, the flow is normal, and no water appears behind or below the shell.
Common mistake: Running the pump with the tub empty. The pump can lose its prime, overheat, or draw air through an open jet.
Can You Clean Jets Without Removing Them?
You can clean whirlpool jets without removing the inserts when the goal is routine biofilm and residue reduction rather than seal replacement. Fill the tub with hot water above the highest jet, add approximately 2 cups of white vinegar and 2 tablespoons of dish soap, and run the system for about 15 minutes only if the tub manufacturer permits those ingredients.
Drain the solution, wipe the shell, refill with clean water, and run the pump again for 5-10 minutes to flush the lines. The procedure reaches internal water passages, but it cannot reliably remove scale trapped behind a failed O-ring or a broken rotor.
Renters and owners of brittle, discontinued trim should try non-removal cleaning first. Physical extraction is preferable when a jet leaks, binds, rattles, or must be replaced.
What Should You Do When a Jet Is Stuck?
A stuck whirlpool jet usually results from calcium deposits, a seized O-ring, distorted plastic, or a retaining tab that remains loaded. Apply warm white vinegar around the seam for 15-30 minutes, wipe away loosened scale, and retry with a protected grip.
Use a plastic pick or nylon brush around the visible seam. Avoid heating the jet with a heat gun, striking it, or flooding the cavity with solvent. Acrylic and fiberglass can discolor, soften, or crack, while aggressive force can rotate the jet body behind the shell.
| Symptom | Probable cause | Safe response | Stop condition |
|---|---|---|---|
| Jet will not rotate | Mineral scale or seized seal | Vinegar soak, then protected hand grip | Shell flexes or cracks |
| Faceplate spins freely | Cover separated from retainer | Locate inner ribs or rear ring | Housing begins rotating |
| Jet rotates but will not pull | Tabs still locked | Return to stop and inspect track | Tabs visibly deform |
| O-ring stays in housing | Seal slipped from groove | Remove with plastic pick | Seal cannot be reached |
| Jet leaks after reinstalling | Damaged or twisted O-ring | Replace and grease seal | Leak persists behind shell |
If the faceplate has separated, grip the inner support ribs with needle-nose pliers and turn counterclockwise only when the design is clearly threaded. If the fixed housing rotates with the insert, stop immediately. Access behind the tub may be required to stabilize or replace the body.
Time, Cost, and Tool Guide
Typical DIY removal takes 5-15 minutes per intact jet. Severe mineral buildup can increase that time to 30-120 minutes per jet, while a professional jet-body repair or complete deletion can require several hours and shell refinishing.
| Job | Typical time | Typical DIY cost | Skill level |
|---|---|---|---|
| Remove and rinse one intact insert | 5-15 minutes | $0-$8 | Low |
| Descale one stuck insert | 30-120 minutes | $2-$15 | Low to moderate |
| Replace one jet insert | 15-30 minutes | $15-$50 | Moderate |
| Replace several matching inserts | 1-3 hours | $60-$250 | Moderate |
| Replace a leaking jet body | 3-8 hours | $100-$500 in parts | Advanced |
| Delete and refinish all jets | 1-3 days | $800-$3,000 or more | Professional |
Replacement prices vary with brand, finish, diameter, thread pattern, and whether the part includes an O-ring. Measure the insert diameter, count the locking tabs, photograph the rear, and record the tub model before ordering. A visually similar jet can have a different body depth or retaining system.
Should You Remove or Permanently Delete the Jets?
Remove and clean or replace the inserts when the tub shell and plumbing remain sound. Permanently deleting the system is a remodeling project that involves removing jet bodies, capping or rerouting plumbing, filling shell openings, reinforcing the repair, sanding, and refinishing the tub surface.
| Objective | Recommended route | Typical scope | Main limitation |
|---|---|---|---|
| Remove mold from trim | Extract and clean insert | 15-30 minutes per jet | Lines may still need flushing |
| Fix a weak or broken nozzle | Replace insert | Match model and O-ring | Wrong insert may leak |
| Stop a leak behind shell | Inspect body and plumbing | Access panel or shell access | Often beyond trim repair |
| Create a soaking tub | Professional jet deletion | Plumbing plus fiberglass repair | Color and texture matching |
| Avoid damage in a rental | Non-removal cleaning | Flush and wipe system | Cannot repair broken parts |
Jet deletion is not a sensible shortcut for routine cleaning. The shell repair must withstand water pressure and thermal movement, and a poor color match can remain visible across the entire tub. A licensed plumber or tub refinishing specialist is appropriate when the body is loose, the plumbing is inaccessible, or the shell must be cut.
Common Mistakes and How to Fix Them
- Using metal pliers directly on the trim: Wrap the trim first, use a strap wrench where possible, and replace damaged cosmetic parts rather than tightening harder.
- Pulling at an angle: Re-seat the insert, center your grip, and pull perpendicular to the tub wall. Angled force breaks rear tabs and can chip the shell opening.
- Losing the O-ring: Cover the drain opening with a clean cloth during removal and inspect both the insert and housing immediately after extraction.
- Applying the wrong chemical: Do not combine vinegar, CLR, bleach, or drain cleaner. Rinse between products, and use only a manufacturer-approved descaler on acrylic-compatible parts.
- Ordering by appearance alone: Match the manufacturer, model, diameter, thread or tab pattern, body depth, and finish. A matching chrome finish does not prove compatibility.
- Ignoring movement behind the shell: Stop when the fixed body turns. Stabilizing a loose body may require access from a service panel, and continuing can break the glued plumbing connection.
Variations for Different Situations
If the Tub Has No Service Panel
Remove only the front insert unless a leak diagnosis proves that body access is necessary. A mirror, flashlight, and moisture check below the tub can reveal whether water is escaping behind the shell, but do not cut the wall or tub surround without planning a repairable access opening.
If the Jets Are Old or Discontinued
Photograph the front and rear of the insert, measure the opening and insert diameter, and contact the tub manufacturer or a whirlpool-parts supplier. If no replacement exists, clean the original carefully and preserve the housing. Universal-looking replacements often fail because body geometry is not standardized.
If You Are a Renter
Use non-removal cleaning unless the landlord authorizes disassembly. Report leaks, cracked trim, electrical faults, or a pump that trips the GFCI, since those conditions involve plumbing or electrical equipment rather than ordinary surface maintenance.
FAQ
How do I know whether my whirlpool jet unscrews?
A screw-in jet usually turns continuously through several revolutions and may have visible threads or gripping slots. A twist-lock jet normally rotates only a short distance before clicking past a stop. If the face spins without moving outward, inspect for a separate retaining ring or a decorative cover that has separated.
Can I use WD-40 to loosen a whirlpool jet?
WD-40 is not the preferred lubricant for a whirlpool jet because residue can contact rubber O-rings and contaminate water passages. Start with warm water and white vinegar for compatible plastic trim. Use a small amount of silicone lubricant or silicone plumber’s grease only where the manufacturer permits it.
How do I remove a whirlpool jet when the outer ring is smooth?
First determine whether the smooth ring is twist-lock or hook-extracted. Try gentle rotation with rubber gloves. If it does not rotate and the eyeball points upward, a model-specific hooked removal tool may catch the internal lip. Do not pry against the tub shell with a screwdriver.
Why does my replacement jet leak after installation?
A replacement jet leaks when the O-ring is cut, twisted, flattened, incorrectly sized, dry, or seated in the wrong groove. Remove power, drain below the jet, inspect the body for cracks, apply a thin film of silicone grease, and reinstall the correct insert by hand. Persistent leakage may originate in the body or plumbing.
Can I run the whirlpool with one jet removed?
Do not run the pump with a jet insert removed unless the manufacturer specifically provides a service procedure allowing it. An open jet can alter water flow, introduce air, allow water behind the shell, and contribute to pump priming problems. Keep the system powered off during removal and testing adjustments.
Is removing the jet body the same as removing the jet?
No. Removing the front insert is a maintenance or replacement procedure. Removing the jet body involves the glued water and air plumbing behind the tub shell and may require an access panel, plumbing repair, fiberglass work, and refinishing. Treat body removal as an advanced repair.
The Bottom Line
The safest way to remove jets from a whirlpool tub is to identify the insert’s retaining mechanism, shut off the GFCI circuit, drain the tub, and remove the insert with a protected straight pull or counterclockwise rotation. Leave the permanently plumbed jet body alone unless a professional repair or complete jet deletion is planned.