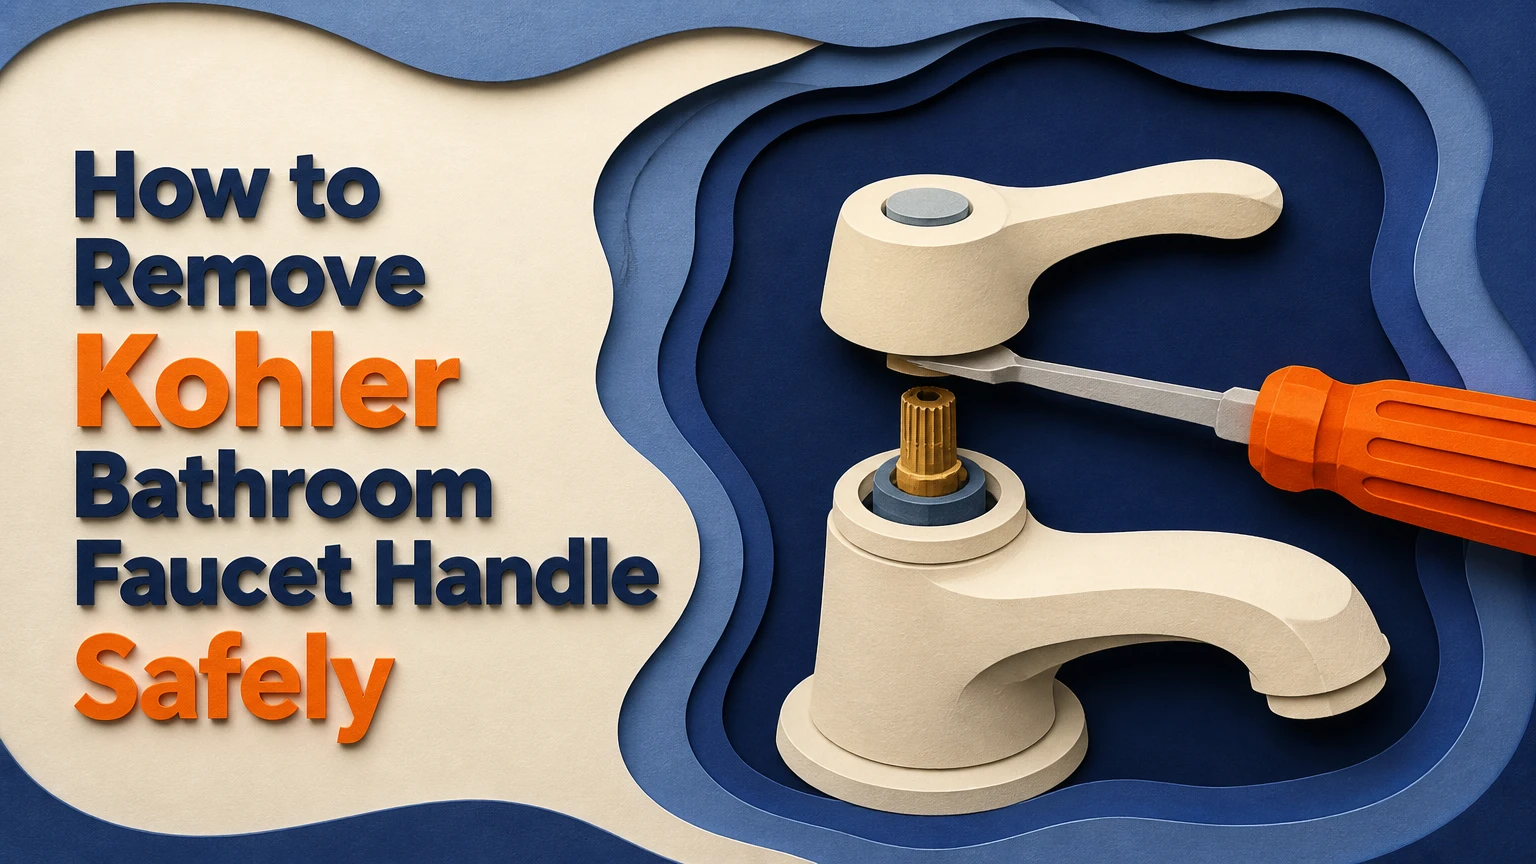
To remove a Kohler bathroom faucet handle, first shut off the water, protect the drain, and identify whether the handle uses a hidden set screw, threaded skirt, or decorative cap. Loosen the correct fastener, then pull the handle straight from the cartridge stem without twisting or levering against the sink.
Key Facts at a Glance
- Most Kohler bathroom faucet handles release through a set screw, threaded base, or concealed center screw.
- A 3/32-inch Allen wrench is common, but some Kohler models use a 1/8-inch hex screw or a different driver.
- Typical removal takes 10-30 minutes, with mineral deposits adding time rather than changing the basic procedure.
- Turning off the faucet’s two under-sink supply valves prevents pressure and accidental flooding.
- A handle puller applies straight upward force and is safer than prying against a porcelain or stone countertop.
- Handle removal and cartridge removal are separate jobs; the bonnet nut usually remains in place until the handle is off.
What should you prepare first?
Prepare a 3/32-inch and 1/8-inch Allen wrench, a small Phillips screwdriver, a thin plastic pry tool, a strap wrench, adjustable pliers, a flashlight, and a towel. Add distilled white vinegar for scale and a faucet handle puller if the handle is corroded or bonded to the cartridge stem.
Kohler faucet parts vary by collection and production year. A Purist lever may use a concealed hex screw, while a Devonshire assembly may release by turning its threaded skirt. Collection names help narrow the method, but the visible fastener determines the correct procedure.
Before-you-start checklist
| Item | Typical specification | Why it matters |
|---|---|---|
| Time | 10-30 minutes | Covers ordinary removal and moderate scale |
| Hex keys | 3/32 inch and 1/8 inch | Covers common concealed set-screw sizes |
| Screwdriver | Phillips #1 or #2 | Removes many cap-hidden center screws |
| Pry tool | 1-2 mm plastic edge | Lifts an index cap without chipping finish |
| Strap wrench | 6-12 inch adjustable | Turns skirts without marking plating |
| Vinegar | 120-240 mL | Softens calcium deposits at the joint |
| Replacement parts | $20-$60 cartridge, typical | Applies when removal leads to cartridge repair |
Close the sink drain with the stopper or place a folded cloth over it. Tiny set screws and index buttons disappear quickly, and a blocked drain also prevents a screwdriver from falling into the trap.
Do not spray penetrating oil into the waterway or around an open drain when a sink basin can collect it. For a drinking-water fixture, keep chemicals on the external metal joint, wipe the area afterward, and follow the product label.
How Is a Kohler Handle Attached?
A Kohler bathroom faucet handle connects the user-facing lever or knob to a cartridge stem through a fastener and, on some models, an adapter. The handle moves the stem, while the ceramic or compression cartridge controls water volume and temperature inside the valve body.
A single-handle faucet normally uses one cartridge and one handle. A two-handle widespread or centerset faucet has separate hot and cold valves, so each handle must be removed independently even when the two handles look identical.
The decorative pieces can conceal several distinct components:
- Handle: The lever or knob you rotate.
- Adapter: A plastic or metal interface that transfers movement to the stem.
- Skirt or shroud: The decorative lower section, sometimes threaded.
- Bonnet nut: The retaining nut that holds the cartridge in the valve body.
- Cartridge stem: The moving shaft connected to the internal cartridge.
Kohler’s official service guidance begins with the basic instruction, “Turn off the water supply.” That instruction applies before cartridge work, not necessarily before merely loosening an external handle, but shutting off the valves remains the safer practice because a damaged stem or loose bonnet can release water.
Which Kohler Handle Type Do You Have?
The safest removal method depends on the visible joint and fastener, not solely on the Kohler collection name. Inspect the rear, underside, front cap, and base of the handle with a flashlight before applying force.
| Handle appearance | Likely retainer | First tool | Typical release motion |
|---|---|---|---|
| Lever with a small side hole | Hex set screw | 3/32-inch or 1/8-inch Allen key | Pull straight up or outward |
| Bell-shaped decorative lower section | Threaded skirt | Hand or strap wrench | Turn skirt counterclockwise |
| Knob with red, blue, or logo cap | Center screw | Plastic pry tool and Phillips screwdriver | Remove cap, then lift knob |
| Lever with underside opening | Hidden screw or clip | Allen key or small screwdriver | Loosen retainer, then pull |
| Handle bonded to stem | Any of the above | Faucet handle puller | Apply vertical extraction force |
Set-screw handles
Set-screw handles have a small threaded hole on the side, back, or underside. The screw may sit parallel to the countertop or point diagonally toward the cartridge stem.
Insert the Allen key fully before turning. A partly engaged key rounds the internal hex, especially when corrosion has formed between the screw and handle. Common sizes include 3/32 inch and 1/8 inch, but the correct size varies by model.
Examples often associated with concealed fasteners include modern Purist, Artifacts, and Components designs. Treat those names as clues, not proof. Verify the hole physically.
Threaded skirt handles
Threaded-skirt handles use a decorative base that unthreads from the valve or handle assembly. The top lever may remain stationary while the lower bell-shaped section turns counterclockwise.
Use both hands first. If the skirt does not move, wrap it with a rubber strap wrench rather than gripping the plated surface with bare channel-lock jaws. Excessive torque can twist the valve body beneath the sink or damage the cartridge.
Devonshire and some traditional Kohler designs use this style. Mineral scale commonly locks the fine threads, so patience matters more than strength.
Plug-button and cap handles
Cap-style handles hide a center screw under a small index button, logo disc, or hot-and-cold indicator. A cap can sit in a shallow recess, making it difficult to identify until you inspect the front of the knob.
Slide a thin plastic pry tool into the cap’s edge and lift one side gently. If a metal screwdriver is the only option, cover its tip with tape and use minimal pressure. Once the screw is visible, remove it with the correctly sized Phillips driver and store the cap and screw together.
Coralais, Alteo, and older traditional knobs may use this arrangement, although the exact retainer still depends on the model.
How to Remove Kohler Bathroom Faucet Handle
Remove a Kohler bathroom faucet handle in four stages: isolate the water, identify the retainer, release the fastener, and extract the handle vertically. The decisive safety rule is to avoid twisting a seized handle because torque transfers into the cartridge stem and can break the valve internally.
Step 1: Shut off the water and protect the sink
Turn both under-sink stop valves clockwise until they are closed. Open the faucet briefly to release line pressure, then close it again and place a towel around the valve body.
For a single-handle faucet, close both hot and cold supplies. For a two-handle faucet, close both supplies even if you are working on only one side, because the open valve can still allow water to enter through the other supply.
Success checkpoint: No water flows from the spout when the handle moves.
Common mistake: Confusing the faucet shutoff with the home’s main water valve. The local stop valves should control the bathroom faucet without shutting down the rest of the house.
Step 2: Locate the retainer
Inspect the handle’s side, rear, underside, and top cap. Use a mirror or phone camera if the faucet is close to the backsplash.
Do not remove the bonnet nut at this stage. The bonnet usually retains the cartridge, while the handle’s set screw, skirt, or center screw holds the external control.
Success checkpoint: You can name the mechanism before selecting a tool.
Common mistake: Assuming every Kohler lever pulls off. A threaded skirt must be unthreaded, and a cap-style knob must have its center screw removed.
Step 3: Release a set-screw handle
Insert the 3/32-inch Allen key into the side or rear hole. If it does not seat fully, try the 1/8-inch key without forcing either tool.
Turn counterclockwise one or two rotations. The screw usually does not need to come completely out. Pull the lever straight upward on a top-mounted handle or straight outward on a horizontal lever, keeping the movement aligned with the cartridge stem.
Success checkpoint: The handle slides off while the screw remains captured in the body.
Common mistake: Pulling before loosening the screw enough. A partially engaged screw can score the stem or deform the adapter.
Step 4: Release a threaded skirt
Hold the upper handle so it cannot rotate, then turn the decorative skirt counterclockwise by hand. Use a strap wrench when scale prevents hand removal.
Place the strap as low as possible on the skirt, where the metal is strongest. Apply short, controlled turns rather than a sudden jerk. Once the threads disengage, lift the handle assembly from the stem.
Success checkpoint: The skirt turns without rotating the valve body or supply tubing below the sink.
Common mistake: Using channel-lock pliers directly on polished chrome, brushed nickel, or matte black surfaces. Tool marks usually cannot be polished out without changing the finish.
Step 5: Release a cap-hidden handle
Protect the cap with a plastic pry tool and lift it from its recess. Remove the exposed center screw counterclockwise with a Phillips screwdriver that fills the cross recess.
Place the cap and screw in a labeled container. Pull the knob vertically, then set the handle aside with any adapter beneath it.
Success checkpoint: The center screw comes out with clean, deliberate turns rather than slipping.
Common mistake: Prying at the cap’s painted logo face. Work around the perimeter and support the surrounding handle.
Step 6: Separate the adapter and decorative sleeve
After the handle is off, slide away any adapter, sleeve, or index ring that is not threaded into the valve. Photograph the order and orientation before removing additional pieces.
If the goal is cartridge replacement, identify the retaining clip or bonnet nut next. Do not remove parts that are unrelated to the cartridge, because reassembly becomes harder when washers and adapters are mixed.
Success checkpoint: The cartridge stem and retaining hardware are visible, with no loose part left on the floor or in the drain.
Common mistake: Mistaking a decorative sleeve for the bonnet. The bonnet nut is usually the substantial retaining component directly around the cartridge.
What if the handle will not come off?
A stuck Kohler faucet handle usually results from mineral scale, corrosion, or a set screw that still contacts the stem. Confirm that the retainer is fully released, then soften deposits before increasing force; a handle puller is safer than twisting the cartridge.
Start with the least aggressive treatment:
- Wrap the joint with a cloth soaked in distilled white vinegar.
- Leave it in place for 20-30 minutes.
- Wipe away softened scale with a nylon brush.
- Reapply the correct wrench or puller.
- Tap the handle lightly with a plastic tool, never a steel hammer.
Penetrating oil can help on an external corroded screw, but oil is not a substitute for the correct Allen key. Keep it away from the faucet opening and rubber seals when possible.
How do you use a handle puller?
Install the puller’s jaws beneath the handle’s lower edge and align the central screw with the cartridge stem. Turn the puller screw gradually so the jaws lift evenly. Protect the countertop with a rigid pad if the tool’s frame could contact porcelain or stone.
A puller is especially useful when the handle cannot be gripped without damaging its finish. Stop if the valve body begins to move, the countertop flexes, or the stem bends.
| Sticking condition | First response | Maximum sensible escalation |
|---|---|---|
| Light white scale | Vinegar wrap, 20 minutes | Strap wrench |
| Rusted set screw | Correct hex key and penetrating oil | Extractor or replacement handle |
| Handle spins but stays attached | Check hidden adapter or clip | Puller after retainer removal |
| Severe corrosion | Photograph and assess parts | Plumber or valve replacement |
| Stem bends during pulling | Stop immediately | Cartridge and valve inspection |
Do not heat the handle with a torch or high-temperature heat gun. Heat can damage plastic cartridges, elastomer seals, countertop caulk, and nearby supply connections.
What comes off after the handle?
The decorative handle, adapter, and sleeve come off before the cartridge retaining hardware. A Kohler cartridge normally remains secured by a bonnet nut or retaining clip, so removing the handle alone does not expose the cartridge fully.
For cartridge service, first note the handle’s neutral position. Then remove the bonnet nut with a protected wrench or remove the retaining clip according to the model’s service instructions. Pull the cartridge straight out using a cartridge tool when necessary.
Kohler cartridges are not universal. Match the replacement by faucet model number, cartridge type, stem configuration, and installation date rather than by appearance alone.
| Repair goal | Parts normally removed | Extra work required |
|---|---|---|
| Tighten loose handle | Set screw or center screw | Reposition handle |
| Replace handle | Fastener and old handle | Match adapter and finish |
| Replace cartridge | Handle, adapter, bonnet, retainer | Extract and orient cartridge |
| Clean scale | Handle and accessible sleeve | Vinegar, nylon brush, rinse |
| Replace valve body | Entire trim and valve assembly | Wall or countertop access |
One practical rule prevents many leaks: never pry against the ceramic sink while the cartridge stem is bearing the load. Use upward extraction around the handle, not sideways force through the stem.
How do single-handle and two-handle faucets differ?
Single-handle Kohler faucets use one control and usually one cartridge, while two-handle faucets require separate removal of the hot and cold controls. The visible removal method can still differ between the two sides, particularly on older widespread installations.
Remove both handles only when the repair requires access to both valves. For a single leaking side, label the hot and cold parts separately because similar-looking adapters may have different orientation marks.
A widespread faucet gives you more room to work around each handle, but its valve bodies may rotate if excessive torque reaches the supply connections. A compact centerset faucet offers less tool clearance and increases the risk of scratching the escutcheon.
Water shutoff variations
If the stop valves are seized, do not force them with a long cheater bar. Close the bathroom branch supply or the home’s main shutoff, then replace the local valves before continuing if they leak or fail to close.
If the faucet has no accessible stops, place a bucket under the connection and have the correct replacement valve ready. Do not begin cartridge removal while the supply remains pressurized.
How much time and money should you expect?
A straightforward Kohler handle removal typically takes 10-15 minutes and costs nothing if the existing fastener and handle remain usable. A scaled or corroded assembly can take 30-60 minutes, while a damaged screw or broken cartridge may raise the repair cost substantially.
These are typical homeowner ranges, not Kohler’s fixed prices. Local labor, finish, faucet age, and parts availability cause the largest differences.
| Job or part | Typical DIY cost | Typical time |
|---|---|---|
| Remove and reinstall handle | $0-$10 | 10-30 minutes |
| New Kohler set screw or cap | $5-$20 | 15-30 minutes |
| Genuine Kohler cartridge | $20-$60 | 30-90 minutes |
| Faucet handle puller | $15-$35 | 20-45 minutes |
| Plumber for seized handle | $100-$300 | 1-2 hours |
| Complete faucet replacement | $100-$500 parts | 2-4 hours |
A $20-$60 cartridge is often less expensive than replacing a functioning faucet. Replacement becomes more reasonable when the valve body is cracked, the finish is deteriorated, or compatible parts are unavailable.
What are the most common removal mistakes?
The most common Kohler handle-removal failures involve the wrong tool, force applied in the wrong direction, or confusion between decorative and retaining parts. Correcting the diagnosis before applying more force usually prevents the most expensive damage.
| Mistake | Result | Corrective action |
|---|---|---|
| Wrong Allen size | Stripped set screw | Use a fully seated key or Torx recovery bit |
| Turning a lever instead of the skirt | Cartridge stem stress | Hold the lever and turn only the base |
| Prying against the sink | Chips or cracks | Use a puller or plastic pry tool |
| Removing bonnet first | Cartridge loosens unexpectedly | Reinstall bonnet, then remove handle |
| Losing cap or adapter | Incomplete reassembly | Label parts in a sealed bag |
| Using bare metal pliers | Scratched finish | Wrap jaws or use a strap wrench |
A slightly oversized Torx bit can sometimes grip a rounded hex recess, but use this only after confirming the screw is replaceable. Driving the bit too deeply can wedge the fastener permanently into a thin handle wall.
Do not use a drill near a porcelain basin unless the handle is already considered disposable and the valve is fully isolated. Metal chips can stain surfaces, and a slipping drill can damage the valve body.
When should you stop and call a plumber?
Stop when the valve body twists, the cartridge stem bends, the shutoff valve leaks, or the handle puller begins stressing the countertop. Professional help is also appropriate when the faucet is installed through a sealed wall or when a broken cartridge has to be extracted from the valve body.
A plumber is usually the safer choice for a corroded assembly with no working shutoff, a cracked valve, a leaking supply connection, or a handle that has fused to the stem. The repair may require valve-body extraction rather than simple handle removal.
Renters should photograph the faucet before disassembly, store every part in a labeled bag, and notify the property manager before replacing proprietary Kohler components. A missing index cap can be inexpensive, but an incorrect cartridge can create a second leak.
How should you reinstall the handle?
Reinstall the Kohler handle by cleaning the stem, returning the adapter to its photographed orientation, aligning the handle with the closed or neutral position, and tightening the original retainer without overtightening. Restore water slowly and test both movement and leakage.
For a set-screw handle, tighten until secure, then stop. Excessive torque can strip the small hex socket or deform the handle.
For a threaded skirt, start the threads by hand to prevent cross-threading. Turn the skirt clockwise until snug, then use only light strap-wrench pressure if the design requires final tightening.
For a cap-style knob, reinstall the center screw before pressing the index button into place. Confirm that the hot and cold indicator is oriented correctly.
Reinstallation checkpoint: The handle operates smoothly through its full range, the trim does not wobble, and no water appears around the stem after the supply valves reopen.
FAQ
Can I remove a Kohler faucet handle without shutting off the water?
You can sometimes remove only an external set-screw handle without shutting off water, but shutting off both supply valves is safer. A damaged cartridge stem, loosened bonnet, or accidental handle movement can release pressurized water beneath the sink, where even a small leak can damage cabinetry.
What size Allen key fits a Kohler bathroom faucet handle?
A 3/32-inch Allen key is common on Kohler bathroom faucet set screws, and some models use a 1/8-inch key. Insert the key fully and test for a firm fit before turning. The faucet model number or Kohler service diagram provides the definitive size when the visible screw is unusual.
Why does my Kohler handle spin but not lift off?
A Kohler handle that spins without lifting may still have a partially engaged set screw, a threaded skirt, or a damaged adapter. Stop rotating the handle, inspect the base and underside, and remove the actual retainer. Continued spinning can wear the cartridge stem without releasing the handle.
Can vinegar damage a Kohler faucet finish?
Short external contact with diluted or distilled white vinegar can soften mineral scale, but prolonged exposure may affect some finishes, seals, or surrounding stone. Apply vinegar to a cloth for 20-30 minutes, rinse thoroughly, and follow the Kohler care instructions for polished, brushed, or matte finishes.
Is a Kohler faucet cartridge universal?
Kohler faucet cartridges are not universal. Cartridge dimensions, stem shapes, retaining methods, and hot-cold orientation vary by model and production year. Identify the faucet model number before buying a replacement, and compare the old cartridge with the manufacturer’s parts diagram.
What is the safest way to remove a completely frozen handle?
The safest method for a completely frozen Kohler handle is to remove its retainer, soften external scale, and use a faucet handle puller for straight upward pressure. Do not twist aggressively, strike the valve with a metal hammer, or apply high heat around plastic cartridges and countertop seals.
The Bottom Line
To remove a Kohler bathroom faucet handle, shut off the water, cover the drain, identify the fastener, and use the matching removal path. A side hole indicates a set screw, a rotating bell-shaped base indicates a threaded skirt, and a decorative button usually conceals a center screw. For a seized handle, protect the finish and use a puller rather than force.