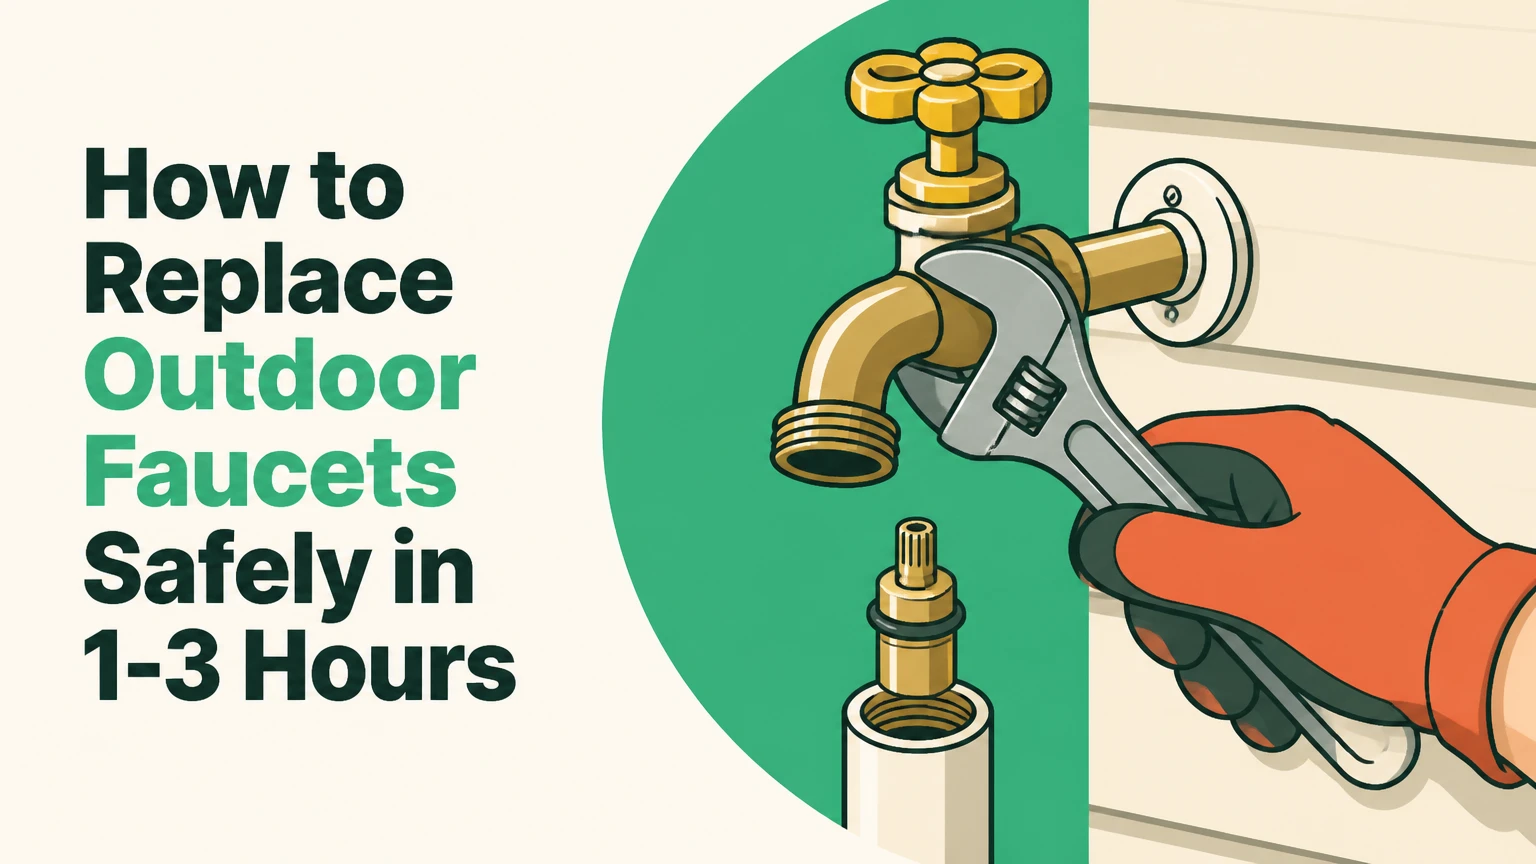
To replace an outdoor faucet, shut off and drain the water, identify the existing inlet connection, remove the old hose bibb with a backup wrench, install a compatible replacement, seal the wall penetration, and pressure-test every joint. A typical threaded replacement takes 1-3 hours and costs about $15-$55 in materials, provided the indoor pipe is accessible and undamaged.
Key facts at a glance
Most residential outdoor faucets use a 1/2-inch or 3/4-inch plumbing inlet and a standard 3/4-inch garden-hose-thread outlet.
A freeze-proof sillcock protects the valve seat only when the faucet slopes slightly downward and the hose is removed before freezing weather.
Always stabilize the indoor supply pipe with a second wrench while loosening or tightening a threaded faucet.
A continuously dripping spigot may need a $3-$10 washer or stem repair rather than complete replacement.
Typical DIY materials cost $15-$55; professional replacement commonly costs $150-$350 when access and local labor rates are included.
A vacuum breaker or anti-siphon device helps prevent contaminated hose water from entering the potable-water system.
What Is an Outdoor Faucet?
An outdoor faucet is an exterior water valve that supplies a garden hose, irrigation equipment, pressure washer, or other outdoor fixture. The same device may be called a spigot, hose bibb, sillcock, or wall hydrant, although “sillcock” often refers specifically to a faucet that passes through a wall.
A conventional hose bibb places its shutoff valve close to the exterior wall. A frost-free sillcock uses a long valve stem so the actual seat sits farther inside the building, where winter temperatures are less severe. An anti-siphon faucet adds a vacuum breaker above the outlet, and some products combine both features.
The replacement method depends primarily on the inlet connection, not the exterior finish. A faucet that looks identical from outdoors may be soldered to copper, threaded into a fitting, pressed onto PEX, or attached with a push-to-connect fitting.
How Does an Outdoor Faucet Work?
An outdoor faucet stops water by pressing a washer, cartridge, or valve disk against an internal seat. Opening the handle retracts that sealing component and allows pressurized water to travel through the valve body and out of the hose outlet.
Traditional compression faucets contain a handle, stem, packing nut, rubber washer, valve seat, spout, and mounting flange. The packing nut seals around the moving stem, while the washer seals the water passage when the handle is closed.
A freeze-proof sillcock moves the seat inward on a 4-inch to 14-inch stem. The exterior body still needs protection from impact, but the water-holding section is less exposed to freezing air. The design is not freeze-proof if a connected hose traps water, the faucet is installed level or upward-sloping, or insulation prevents drainage.
Which Outdoor Faucet Should You Buy?
Choose a freeze-proof, anti-siphon sillcock for a home exposed to regular freezing temperatures, and choose a standard hose bibb only where freezing is rare or the supply line can be fully drained. The replacement must also match the old faucet’s connection type, nominal size, stem length, and mounting arrangement.
| Faucet type | Typical dimensions or feature | Best climate or use | Main limitation |
|---|---|---|---|
| Standard hose bibb | 1/2-inch or 3/4-inch inlet; 3/4-inch GHT outlet | Mild climates; short wall penetrations | Valve remains near exterior cold |
| Freeze-proof sillcock | 4-inch, 6-inch, 8-inch, 10-inch, 12-inch, or 14-inch stem | Homes with freezing winters | Requires downward pitch and hose removal |
| Anti-siphon hose bibb | Integrated vacuum breaker; 3/4-inch GHT outlet | Potable-water protection and current code requirements | Vacuum breaker can require replacement |
| Anti-siphon freeze-proof sillcock | Long stem plus vacuum breaker | Cold climates with hose connections | Must match wall thickness and pipe position |
| Yard hydrant | Free-standing riser; buried supply below frost line | Farms, gardens, and remote watering points | Underground work and drainage are required |
Measure the replacement before removing the old faucet
Record the faucet inlet diameter, connection type, overall stem length, wall thickness, outlet thread, mounting-hole position, and handle orientation. Photograph the exterior and the indoor connection before shutting off the water; that image often reveals whether the new product will fit without opening additional wall material.
Do not select a freeze-proof faucet by exterior appearance alone. Measure from the exterior mounting surface to the indoor pipe connection, then choose a model whose body and stem suit that distance. A stem that ends inside a cold masonry cavity can freeze even when the product is marketed as frost-free.
What connection types are used?
The four common inlet arrangements are threaded, sweat, push-to-connect, and PEX crimp. Threaded replacement is usually the simplest because the faucet can be removed without cutting pipe, while soldered replacement requires heat and a clean, dry copper joint.
| Connection | How to identify it | Tools typically required | Replacement risk |
|---|---|---|---|
| Threaded FIP or MIP | Visible male or female pipe threads | Two wrenches, tape or compound | Hidden pipe can twist |
| Sweat or solder | Copper pipe enters a smooth socket | Torch, flux, solder, emery cloth | Fire and heat damage |
| Push-to-connect | Release collar on copper, PEX, or CPVC fitting | Tubing cutter and depth gauge | Cut must be square and smooth |
| PEX crimp | Copper crimp ring secures PEX adapter | PEX cutter and crimp tool | Incorrect ring or crimp can leak |
| Press fitting | Metal press sleeve around copper or PEX | Manufacturer-specific press tool | Tool cost is high for one repair |
Thread sealant belongs on tapered pipe threads, such as NPT, but not on garden hose threads. Garden hose connections seal with a flat rubber washer inside the hose coupling. Tape on those outlet threads can prevent proper washer compression and may cause a leak.
Can You Repair the Old Faucet Instead?
Repair the existing faucet when the body and threads are sound, but replace it when the valve body is cracked, corroded, damaged by freezing, or permanently loose in the wall. A washer, stem packing, or vacuum-breaker repair commonly costs $3-$20, while a full faucet replacement adds removal and connection work.
Repair is often appropriate when water drips from the spout after closure. Replace the rubber washer at the end of the stem and inspect the valve seat. A leak around the handle usually points to a loose packing nut or worn packing, not a failed faucet body.
Replacement is the safer choice after a freeze split, because a hairline crack may leak only under pressure. Replace a faucet whose inlet threads are rounded, whose anti-siphon assembly is obsolete or damaged, or whose stem length places the valve seat in an unheated wall zone.
What Do You Need Before Starting?
Gather the replacement faucet, two adjustable or pipe wrenches, a screwdriver, a tubing cutter if required, plumber’s tape or approved pipe compound, exterior-rated silicone, mounting screws, a bucket, rags, and a flashlight. Plan 1-3 hours for a threaded installation and substantially longer if you must cut, solder, crimp, or open finished walls.
Before you start
Difficulty: Moderate for threaded work; advanced for soldered or concealed connections
Typical time: 1-3 hours for threaded; 3-6 hours when pipe must be cut or wall access created
DIY materials: $15-$55 for faucet, sealant, screws, and fittings
Typical professional cost: $150-$350, with higher charges for finished-wall repair or buried piping
Prerequisite: Identify the indoor shutoff and confirm that the replacement matches the existing connection
Safety: Wear eye protection; never apply a torch near wood framing, insulation, wiring, or combustible siding
How to Replace a Threaded Outdoor Faucet
A threaded outdoor faucet replacement follows seven actions: shut off, drain, remove, prepare, install, seal, and test. Success depends most on protecting the indoor pipe from twisting, because a damaged fitting behind drywall can turn a simple fixture change into a wall-opening repair.
Step 1: Shut Off the Water Supply
Close the dedicated indoor shutoff valve for the outdoor faucet. The valve is commonly in a basement, crawlspace, utility room, garage, or mechanical closet; if no branch shutoff exists, close the main house valve.
Open the outdoor faucet fully after closing the valve. If water continues flowing at full pressure, the wrong valve is closed or the shutoff has failed.
Checkpoint: Flow should stop within several seconds, followed by a small amount of residual drainage.
Common mistake: Assuming the exterior handle itself isolates the pipe. It does not.
Step 2: Drain the Pipe
Leave the outdoor handle open and place a bucket below the outlet. Open a nearby indoor cold-water tap briefly if the branch line remains pressurized, then allow the exterior pipe to drain completely.
Drainage matters because water trapped in the pipe can spill into the wall during removal. In freezing climates, drainage also confirms that the indoor shutoff and exterior faucet can function as a winterization pair.
Checkpoint: No steady stream exits when the faucet body is loosened slightly.
Common mistake: Removing the faucet before opening the outdoor handle.
Step 3: Remove the Mounting Screws and Old Faucet
Remove the flange screws with a screwdriver or drill. Cut through old caulk around the flange with a utility knife, taking care not to damage siding, flashing, or the wall membrane.
Access the indoor connection. Place one wrench on the stationary pipe or fitting and a second wrench on the faucet hex or body. Turn the faucet counterclockwise while holding the supply fitting completely still.
Checkpoint: The faucet turns without visible movement of the indoor pipe.
Common mistake: Using one wrench and allowing copper, CPVC, or PEX to twist behind the wall.
Step 4: Identify and Prepare the Threads
Compare the old faucet’s inlet with the replacement before applying sealant. Clean dirt, old tape, corrosion, and loose pipe compound from the male threads with a brush, but do not aggressively file away usable thread material.
For tapered NPT threads, wrap three to four layers of PTFE tape clockwise when looking at the pipe end, or apply a thin, continuous coat of pipe joint compound approved for potable water. Keep sealant away from the first thread opening so excess material cannot enter the waterway.
Checkpoint: Tape follows the thread direction and does not unravel as the fitting tightens.
Common mistake: Applying tape to the 3/4-inch garden-hose outlet rather than the plumbing inlet.
Step 5: Install the New Faucet
Push the replacement through the wall opening and hand-tighten it onto the indoor fitting. Stop if the threads feel cross-threaded; backing out and restarting is safer than forcing the connection.
Use the backup wrench on the indoor fitting and the second wrench on the faucet. Tighten until firm, then position the spout downward. Do not use the flange screws to pull a poorly aligned faucet against the wall, because that can bend the body or stress the pipe.
Checkpoint: The spout points down, the flange contacts the wall, and the indoor fitting remains stationary.
Common mistake: Over-tightening brass threads. Excess torque can split a female adapter or distort the faucet body.
Step 6: Fasten and Seal the Flange
Drive corrosion-resistant screws through the flange into solid framing, masonry anchors, or appropriate siding support. Use screws long enough to hold securely without penetrating a hidden cable, pipe, or interior finish.
Apply a continuous exterior-rated silicone bead around the top and sides of the flange. Leave a small drainage opening at the bottom when the faucet design or local building practice requires it, so trapped water can escape rather than enter the wall assembly.
Checkpoint: The faucet does not wobble when the handle turns, and the wall penetration is protected from wind-driven rain.
Common mistake: Caulking over a loose faucet. Sealant cannot replace mechanical support.
Step 7: Restore Water and Test Every Joint
Close the outdoor handle, then reopen the indoor shutoff slowly. Inspect the indoor threaded joint with a dry tissue for at least two minutes, because a tissue reveals seepage before a visible drop forms.
Open the exterior faucet halfway, flush debris for 15-30 seconds, and close it. Check the spout, packing nut, vacuum breaker, flange, and indoor connection again. Repeat the test after five minutes.
Checkpoint: No tissue becomes damp, the handle operates smoothly, and the faucet stops flowing without a continuing drip.
Common mistake: Testing only with the faucet open. Many leaks appear when the valve is closed and pressure reaches the seat.
How Do Soldered, PEX, and Push-Fit Replacements Differ?
A threaded faucet can usually be replaced with hand tools, but soldered, crimped, and push-fit installations require different preparation and failure checks. Choose the method that matches the existing pipe unless you are deliberately converting the connection inside an accessible area.
| Existing pipe | Appropriate replacement approach | Typical preparation | Do-it-yourself warning |
|---|---|---|---|
| Copper with threaded adapter | Screw in matching faucet | Clean threads and support adapter | Adapter may loosen in the wall |
| Bare copper sweat connection | Cut and solder new faucet or adapter | Drain, dry, clean, flux, heat | Water prevents a reliable solder joint |
| PEX tubing | Install matching PEX adapter | Square cut and correct crimp or clamp | Unsupported tubing can flex at the wall |
| CPVC | Use compatible solvent-weld or approved transition fitting | Clean, dry, and observe cure time | Some products are not CPVC-compatible |
| Copper, PEX, or CPVC with push-fit | Use rated push-fit transition | Deburr and mark insertion depth | The tube must reach the fitting stop |
For soldering, remove combustible materials and use a heat shield. A damp pipe can boil water into steam, causing a poor joint and a burn hazard. If the connection is inside a finished wall or close to insulation, a plumber is usually the safer option.
For push-to-connect fittings, cut the tube square, remove burrs, and mark the manufacturer’s insertion depth. Do not bury an untested fitting behind drywall. Pressurize it first and inspect it under both open and closed-faucet conditions.
What If the Faucet Is Stuck?
A stuck outdoor faucet usually results from corrosion, overtightened threads, frozen damage, or a pipe fitting that was never supported during the original installation. Apply penetrating oil only to the external threaded joint, wait according to the product label, and use two opposing wrenches rather than increasing force on one handle.
If the faucet body begins turning with the pipe, stop immediately. Expose more of the indoor connection through an access panel or remove a small, repairable section of wall so the pipe can be held directly.
Do not heat a faucet that may contain trapped water. Steam pressure can eject hot water or damage nearby plastic components. If the faucet is soldered, cut it out only after confirming adequate straight pipe remains for the new fitting.
How Much Does Outdoor Faucet Replacement Cost?
A typical threaded DIY replacement costs $15-$55 and takes 1-3 hours, while a professional service commonly costs $150-$350. Regional labor rates, difficult access, masonry drilling, damaged indoor piping, wall repair, and a required freeze-proof model can move the final price outside those ranges.
| Work scenario | Typical material cost | Typical labor or time | Main cost driver |
|---|---|---|---|
| Washer or packing repair | $3-$20 | 15-45 minutes | Replacement stem or vacuum breaker |
| Threaded hose bibb swap | $15-$55 | 1-3 DIY hours | Faucet size and wall access |
| Freeze-proof sillcock swap | $30-$90 | 1-3 DIY hours | Stem length and indoor fitting |
| Soldered copper replacement | $25-$100 | 2-4 hours | Torch work and fire protection |
| Concealed or freeze-damaged pipe | $50-$250 materials | 3-8+ hours | Wall opening and pipe repair |
| Professional standard replacement | Included in $150-$350 | 30-90 minutes | Service call and regional rates |
The lowest quoted faucet price may exclude an indoor shutoff, a threaded adapter, masonry anchors, or wall repair. Compare the complete job, not only the brass fixture.
Which Wall-Material Variations Matter?
Brick and masonry usually require masonry anchors or a supported mounting block, while vinyl siding, wood siding, and stucco require different fastening and flashing details. The water connection remains the same, but the flange must be supported without crushing the exterior finish or creating a path for rainwater.
| Wall or siding | Recommended support | Seal and fastening concern |
|---|---|---|
| Wood siding | Solid framing or a mounting block | Use exterior screws and protect end grain |
| Vinyl siding | Mounting block or siding-compatible flange | Do not compress the siding excessively |
| Brick or concrete | Masonry anchors and correctly sized bit | Avoid cracking mortar edges and seal the penetration |
| Stucco | Sound substrate and compatible anchors | Prevent cracks around the flange |
| Fiber-cement siding | Pilot holes and framing support | Avoid unsupported screws in the panel alone |
A freeze-proof sillcock should usually slope slightly downward toward the exterior so residual water can drain. Follow the product instructions because some models specify a particular pitch or mounting orientation.
How Should You Winterize the New Faucet?
Remove the hose, close the indoor shutoff, and open the outdoor faucet before freezing weather. A frost-free sillcock still needs this procedure because a connected hose, spray nozzle, or timer can prevent the faucet from draining.
Do not wrap an exterior faucet with insulation while leaving the indoor branch full of water. Insulation can delay freezing but cannot correct a defective shutoff, upward pitch, failed drain, or faucet installed too far into a cold wall.
Check the faucet after the first hard freeze and again in spring. A split body may remain unnoticed until the valve is opened, then release water inside the wall.
Common Mistakes and How to Fix Them
The wrong replacement does not fit
Compare inlet type, nominal diameter, stem length, flange dimensions, and outlet thread before purchase. Return the faucet rather than forcing an adapter combination that leaves a weak or inaccessible joint.
The indoor pipe twists during removal
Stop turning the faucet and expose the connection. Hold the stationary fitting with a backup wrench; if the pipe has already cracked, shut off the main supply and repair the damaged section before installing the new fixture.
The new faucet leaks at the inlet
First determine whether the leak is from plumbing threads, the faucet body, or the hose washer. Depressurize the line, remove the faucet, clean the threads, reapply compatible sealant, and reinstall without excessive torque.
The faucet drips from the spout after closure
Replace the stem washer or cartridge and inspect the valve seat. A damaged seat can destroy a new washer quickly, so replace or reface the seat when the manufacturer provides that option.
Water leaks around the handle
Tighten the packing nut by about one-quarter turn. If the leak continues, replace the packing or stem assembly; tightening repeatedly can make the handle difficult to operate without restoring the seal.
The faucet leaks from behind the flange
The flange is not the water seal. Inspect the indoor connection and the wall penetration separately, then reseal the flange with exterior silicone after repairing the pressurized joint.
When Should You Call a Plumber?
Call a plumber when the supply pipe twists, the connection is concealed in a finished wall, a freeze has split the pipe, soldering is required near combustible materials, or the home has no reliable shutoff. A professional is also appropriate when local plumbing rules require a specific anti-siphon or backflow-protection arrangement.
Stop the project if water cannot be fully shut off, the pipe material is unidentified, or you find mold, wet insulation, or staining inside the wall. A small exterior leak can conceal substantial water damage when the faucet penetrates a heated room or finished basement.
FAQ
Can I replace an outdoor faucet without shutting off the main water?
You can avoid shutting off the main valve only when a dedicated branch shutoff closes completely. The outdoor handle is not an isolation valve, and removing a pressurized faucet can release uncontrolled water into the wall. Test the branch shutoff at the open faucet before loosening any connection.
Are all outdoor faucets a standard size?
Most residential outlets use 3/4-inch garden hose thread, but plumbing inlets commonly use 1/2-inch or 3/4-inch connections. Faucet body length, stem length, thread gender, mounting holes, and pipe material vary, so “standard size” does not guarantee interchangeability.
Can I leave a hose attached to a frost-free sillcock?
No. A hose, timer, or nozzle can trap water inside the sillcock and prevent drainage, allowing freezing water to split the body or supply pipe. Disconnect outdoor accessories before freezing conditions, even when the faucet is labeled frost-free.
Why is water coming from the anti-siphon cap?
A small discharge during sudden pressure changes may be normal for some vacuum breakers, but continuous leakage indicates debris, a worn check assembly, freezing damage, or an improperly fitted replacement. Clean or replace the vacuum-breaker component according to the faucet manufacturer’s instructions.
Should the outdoor faucet point straight down?
The spout should point downward for hose drainage and practical use. A freeze-proof sillcock also commonly needs a slight downward pitch from the indoor connection toward the exterior, although the manufacturer’s installation instructions control the exact angle.
How long should a replacement outdoor faucet last?
A quality brass hose bibb can last 10-20 years or longer when protected from freezing, impact, and aggressive water conditions. Frequent leaks, repeated freeze exposure, mineral buildup, and poor support shorten service life, while replaceable washers and stems extend it.
The Bottom Line
To replace outdoor faucets reliably, match the inlet connection and stem length first, shut off and drain the branch, support the indoor pipe with a backup wrench, and test the joint under pressure before sealing the wall. Choose an anti-siphon freeze-proof sillcock for freezing climates, remove the hose each winter, and repair the existing valve when only its washer or packing has failed.