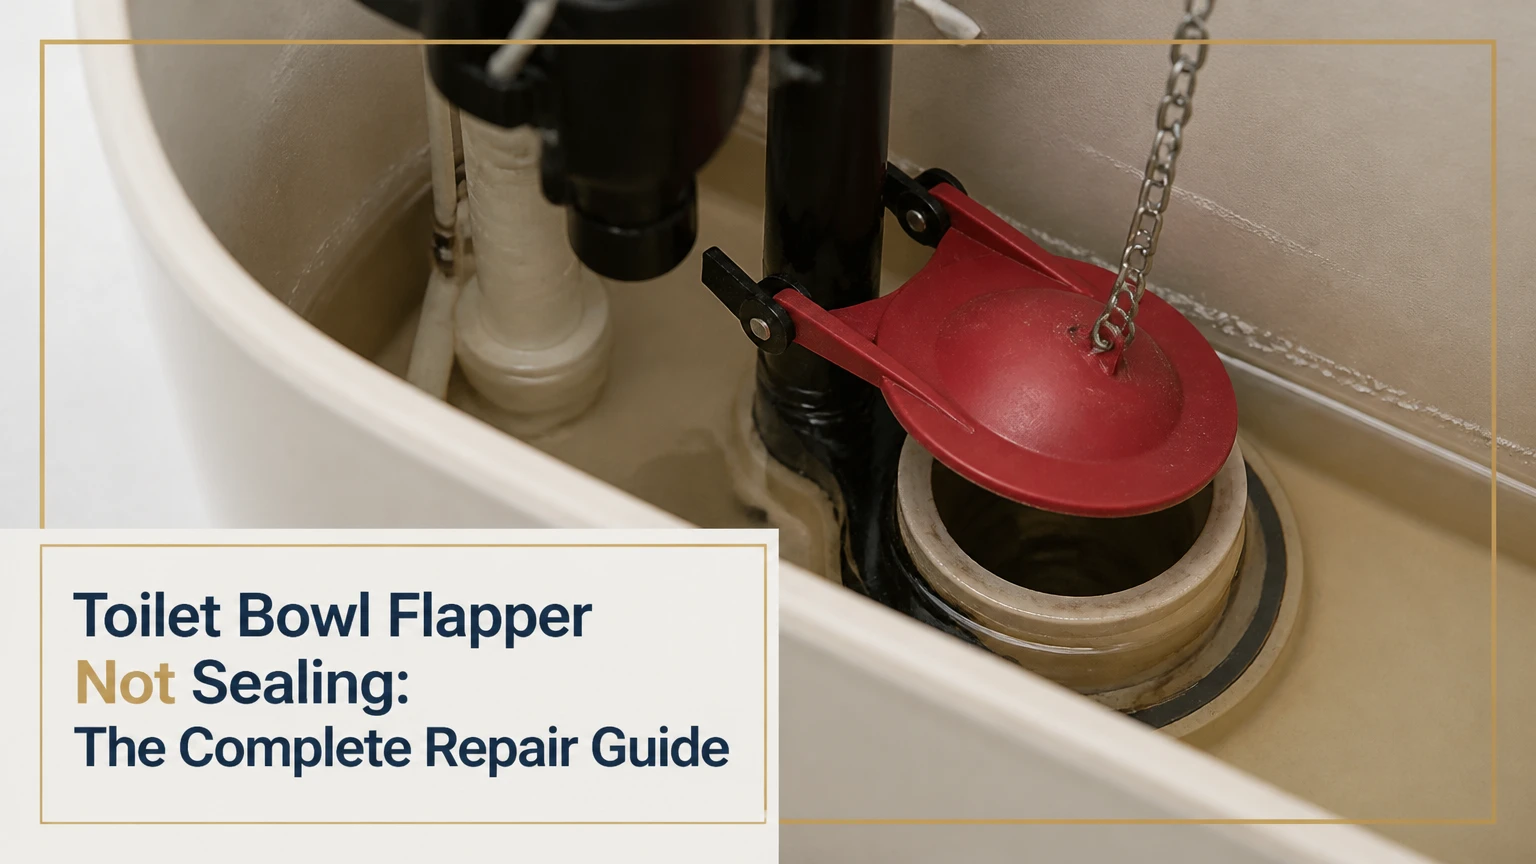
A toilet bowl flapper not sealing allows water to continuously leak from the tank into the bowl, creating a constant running sound or intermittent phantom flushes. You can resolve this failure by adjusting the lift chain tension, scrubbing the flush valve seat, or replacing the chemically degraded rubber seal entirely.
Key Facts / At a Glance
- Water Waste: A severely leaking flapper wastes up to 200 gallons of water per day.
- Financial Impact: This continuous leak adds $30 to $100 to an average monthly water bill.
- Component Cost: Standard replacement parts cost $5 to $15 at local hardware stores.
- Repair Time: A complete DIY replacement requires 5 to 15 minutes and zero specialized plumbing tools.
- Typical Lifespan: High-quality, chemical-resistant silicone flappers last 3 to 5 years under normal municipal water conditions.
What is a Toilet Flapper and How Does It Work?
A toilet flapper is a hinged rubber or plastic mechanism located at the very bottom of the toilet tank that controls the volume of water entering the bowl during a flush. Understanding how this component operates makes diagnosing a toilet bowl flapper not sealing significantly easier.
The mechanism relies entirely on a balance of mechanical leverage and hydrostatic pressure. In its sealed state, the weight of the standing water in the tank presses the flexible flapper down against the rigid flush valve seat. This physical weight creates a watertight barrier. When you press the exterior toilet handle, the attached trip lever pulls a metal or plastic lift chain upward.
This lifting action forces the flapper into its open state, breaking the hydrostatic seal and allowing gravity to pull the tank water down into the bowl. Because flappers contain a hollow cavity or a calibrated float, they remain buoyant while the water drains. As the tank empties and the water level drops, the flapper loses its buoyancy and falls back down onto the valve seat. The fill valve then introduces new water into the tank, and the rising weight of this new water locks the flapper back into a completely sealed state.
Why is Your Toilet Bowl Flapper Not Sealing?
A toilet bowl flapper fails to seal when physical obstructions, chemical degradation, or mechanical misalignments prevent the rubber gasket from sitting completely flat against the flush valve opening. Identifying the exact root cause prevents you from buying unnecessary replacement parts.
Before taking the tank apart, perform the standard plumber dye test. Remove the toilet tank lid and place ten drops of liquid food coloring directly into the tank water. Do not flush the toilet. Wait 15 minutes and look into the toilet bowl. If colored water appears in the bowl, you have a confirmed flapper leak. If the water remains clear, your flapper is sealing properly, and your running toilet is caused by a defective fill valve instead.
Table 1: Troubleshooting Symptoms and Root Causes
| Observed Symptom | Root Cause | Specific Fix Required | Typical Repair Time |
| Toilet runs immediately and constantly after flushing | Chain is too short, physically suspending the flapper above the seat | Move the metal clip down the chain to add 1/4-inch of slack | 1 minute |
| Flushes normally but starts running minutes later | Debris or hard water mineral scale built up on the flush valve seat | Scrub the plastic seat rim with a non-scratch scouring pad | 3 minutes |
| Handle must be held down forcefully to get a full flush | Chain is too long, or adjustable flapper dial is closing too quickly | Shorten chain or rotate the adjustable flapper dial to stay open longer | 2 minutes |
| Flapper feels slimy, warped, or leaves black soot on hands | Chlorine-based in-tank bleach tablets have dissolved the rubber | Replace flapper entirely and remove all drop-in chemical tablets | 5 minutes |
| Water drains down into the overflow tube | Fill valve is set too high, bypassing the flapper entirely | Lower the fill valve float to stop water 1 inch below the overflow pipe | 2 minutes |
What Are the Main Types of Toilet Flappers?
The three main types of toilet flappers are flexible rubber, hard plastic frame, and adjustable volume models. Selecting the correct replacement type ensures a watertight seal and maintains the intended flush volume of your specific toilet model.
Flexible Rubber Flappers
The most common and traditional design consists entirely of flexible rubber, silicone, or proprietary chemical-resistant materials like Chlorazone. These models mount by sliding two flexible side ears over the horizontal pegs located on the sides of the vertical overflow tube.
Flexible rubber units are highly universal and inexpensive. They conform well to older flush valves that might have slight imperfections. However, because they lack a rigid skeleton, they are prone to twisting during the flush cycle if the chain pulls them at an odd angle. They are the best choice for standard, pre-2001 toilets with conventional 2-inch flush valves, making them ideal for beginner DIY repairs.
Hard Plastic Frame Flappers
Hard plastic frame flappers feature a rigid thermoplastic skeleton with a separate silicone or rubber sealing gasket attached underneath. Instead of flexible rubber ears, they utilize hard plastic hinges that snap precisely onto the overflow tube pegs.
The primary advantage of a solid frame is perfect alignment. The rigid structure prevents the flapper from twisting, warping, or landing off-center as it drops back down through the water. This design is slightly less forgiving if your overflow tube pegs are physically crooked. These flappers excel in high-use household toilets where repeated flushing often knocks all-rubber models out of alignment.
Adjustable Flappers
Adjustable flappers include a manual dial on the top of the bulb, a rotating ring on the base, or a sliding plastic float attached directly to the lift chain. These mechanisms control how quickly trapped air escapes from the bulb, regulating the exact speed at which the flapper closes.
These models allow homeowners to fine-tune their water savings and customize the flush power. By closing the flapper faster, you use less water per flush. They require a higher initial setup complexity, as you must repeatedly test the flush to dial in the correct timing. Adjustable flappers are mandatory for modern high-efficiency toilets (1.6 or 1.28 gallons per flush) to maintain precise factory water usage ratings.
Table 2: Direct Comparison of Flapper Materials
| Flapper Material | Resistance to Chlorine | Flexibility | Best Application | Typical Lifespan |
| Standard Red Rubber | Low | Very High | Older toilets, perfectly smooth seats | 1 to 2 years |
| Chemical-Resistant Rubber | Medium | High | Homes with municipal treated water | 3 to 4 years |
| Premium Silicone | Very High | Medium | Homes using hard water or in-tank cleaners | 5+ years |
| Plastic Frame with Gasket | High | Low | High-traffic bathrooms requiring perfect alignment | 4 to 5 years |
How to Identify the Correct Flapper Size
Buying the wrong size is the primary reason a new replacement flapper fails to stop a leak. You must measure the diameter of the flush valve drain opening at the bottom of the tank, not the flapper itself.
Toilets manufactured before 2001 almost exclusively use standard 2-inch flush valves. Toilets manufactured between 2001 and the present day largely transitioned to 3-inch flush valves to provide a faster, more powerful water drop for low-flow compliance. Certain specialty brands (specifically Kohler Class Five systems) utilize massive 4-inch flush valves. Measure the width of the plastic opening under the flapper with a standard tape measure. A 2-inch flapper will literally fall into a 3-inch hole, while a 3-inch flapper will sit awkwardly on top of a 2-inch hole without ever forming a seal.
Before You Start the Replacement Process
Replacing a flapper is a beginner-level maintenance task that requires no specialized plumbing knowledge. You only need a few basic household items and a clear understanding of the steps involved.
- Total Time Required: 5 to 15 minutes.
- Difficulty Level: Beginner.
- Total Cost: $5 to $15.
- Required Tools and Materials:
- 1 exact-size replacement flapper
- 1 standard kitchen sponge
- 1 non-scratch scouring pad or old toothbrush
- 1 pair of scissors (optional, for cutting excess chain)
- 1 pair of needle-nose pliers (optional, for stubborn chain clips)
- Prerequisites: You must know the location of the water shut-off valve located on the wall behind the toilet base.
How to Replace a Toilet Bowl Flapper Not Sealing
This step-by-step procedure walks you through removing the degraded component, preparing the sealing surface, and installing the new unit for a perfect, long-lasting fix.
Step 1: Shut Off the Water Supply
Locate the oval-shaped or round metal valve on the wall or floor just behind the toilet. Turn this valve clockwise until it stops completely.
- Success Checkpoint: You will know the water is off when you hear the faint hissing sound of water stop.
- Common Mistake: Forcing a stuck valve with a wrench. If the valve will not turn by hand, do not force it, as you risk snapping the pipe. Turn off the main house water supply instead.
Step 2: Drain the Toilet Tank Completely
Press the toilet handle down and hold it there. Watch the water drain out of the tank and into the bowl. Keep holding the handle until the tank is completely empty. Use your sponge to soak up the remaining half-inch of standing water at the bottom of the tank and wring it out into the bowl.
- Success Checkpoint: The tank floor and the flush valve area should be entirely exposed and dry enough to work on comfortably.
Step 3: Disconnect the Lift Chain
Follow the metal chain attached to the flapper up to the horizontal metal or plastic trip lever arm. Unhook the small metal clip connecting the chain to the lever arm.
- Success Checkpoint: The flapper should now rest entirely free of the handle mechanism.
Step 4: Remove the Old Flapper
Look at the base of the vertical plastic overflow tube. You will see two small pegs sticking out horizontally. Slide the two rubber ears of the old flapper off these pegs. If you have a hard plastic frame flapper, gently pull the plastic arms outward to snap them off the pegs.
- Expert Insight: If your fingers are covered in a sticky black residue after touching the old rubber, the flapper was destroyed by chlorine. This confirms you must upgrade to a chemical-resistant silicone replacement to prevent the issue from returning next year.
Step 5: Clean the Flush Valve Seat
Take your non-scratch scouring pad or toothbrush and rigorously scrub the beveled rim of the flush valve hole. Wipe it clean with a damp sponge.
- Success Checkpoint: Run your bare finger around the rim of the hole. It must feel completely smooth, like clean glass.
- Common Mistake: Skipping this step guarantees a leak. Even microscopic layers of bacterial slime or hard water calcium will break the seal of a brand-new flapper.
Step 6: Install the New Flapper
Take your new flapper and slide its two side ears onto the pegs at the base of the overflow tube. Ensure the bulb portion of the flapper sits squarely inside the flush valve opening.
- Success Checkpoint: Lift the flapper with your hand and let it drop. It should fall perfectly straight and cover the hole evenly without catching on the edges.
Step 7: Attach and Adjust the Lift Chain
Thread the metal clip onto the new chain and hook it into the hole on the trip lever arm that sits directly above the flapper. You must leave exactly 1/4-inch to 1/2-inch of slack in the chain (usually one or two loose chain links).
- Success Checkpoint: When the handle is at rest, the chain should have a slight “U” shape droop, but not enough length to dangle underneath the flapper.
Step 8: Turn on Water and Test the Seal
Turn the wall shut-off valve counterclockwise to restore the water supply. Allow the tank to fill completely until the fill valve shuts off automatically. Listen closely for any trickling sounds.
- Success Checkpoint: Place a single piece of dry toilet paper against the dry porcelain inside the bowl, just above the waterline. If it stays dry for five minutes, your seal is perfect.
What Are the Most Common Replacement Mistakes?
Even with a brand-new flapper, specific installation errors will cause the toilet to continue running. Avoiding these mechanical missteps ensures you only have to do the job once.
Leaving No Chain Slack
A taut chain pulls upward on the flapper continuously. While the naked eye might not see the gap, this tension physically lifts the rubber off the seat by a fraction of a millimeter, resulting in a slow, silent leak.
Leaving Excessive Chain Slack
Leaving more than an inch of slack creates a dangerous trap. When the heavy water rushes down the drain during a flush, the strong current sucks the excessively long, dangling chain down into the hole. As the flapper closes, it traps the chain underneath itself, propping the rubber open and causing a massive continuous leak.
Ignoring the Flush Valve Seat
Installing a pristine new rubber gasket on top of a dirty, scale-covered valve seat is a waste of money. The rubber cannot conform to jagged calcium deposits. The seat must be aggressively scrubbed smooth before installation.
Using Drop-In Bleach Tablets
Placing concentrated sodium hypochlorite (bleach) tablets directly into the toilet tank water violently attacks the elastomer chains in rubber components. The Environmental Protection Agency (2023) guidelines on plumbing maintenance explicitly warn that these tablets can warp and dissolve brand-new rubber flappers within three months of installation.
Which Flapper Should You Choose for Your Toilet?
Selecting the right product depends entirely on your plumbing setup and budget. Matching your specific user profile to the correct hardware guarantees optimal performance.
The Budget-Conscious Renter
Renters looking for a quick, reliable fix should purchase a universal 2-inch flexible rubber model like the Korky Ultra 2-Inch Flapper. It adapts to almost any older toilet, requires zero complex adjustments, and costs less than a cup of coffee.
The Eco-Minded Homeowner
Homeowners with modern, low-flow toilets must prioritize water conservation. An adjustable unit like the Fluidmaster PerforMAX Adjustable Flapper allows you to dictate exactly how much water escapes per flush, maximizing efficiency while still clearing the bowl.
The Set-and-Forget Investor
Homeowners with hard well water or high-traffic bathrooms should invest in a rigid frame silicone flapper like the Korky Plus Chemical Resistant model. The rigid frame eliminates twisting misalignment, while the silicone resists harsh minerals for years longer than standard rubber.
Table 3: Sizing and Compatibility Matrix
| Flush Valve Size | Manufacturing Era | Common Brands Utilizing Size | Water Usage (GPF) |
| 2-Inch | Pre-2001 | Older American Standard, Crane, Eljer | 3.5 to 5.0 GPF |
| 3-Inch | 2001 to Present | Modern Toto, American Standard, Gerber | 1.28 to 1.6 GPF |
| 4-Inch | Specialty | Kohler Class Five Systems | 1.28 GPF |
When Should You Replace the Entire Flush Valve Instead?
Sometimes a toilet bowl flapper not sealing has nothing to do with the flapper itself. If you have cleaned the flush valve seat and installed a new flapper with the correct chain tension, but the leak persists, the flush valve seat itself is permanently damaged.
Over decades of use, highly acidic water or severe chlorine exposure can literally eat pits and grooves into the hard plastic rim of the flush valve. Rubber cannot seal against craters. In this situation, you must bypass standalone flappers entirely. You will need to purchase a complete flush valve repair kit (such as the Fluidmaster Flush Valve Repair Kit), which requires removing the toilet tank from the bowl to install an entirely new drain assembly. Alternatively, peel-and-stick repair kits exist that glue a brand-new plastic seat directly on top of the pitted one, providing a smooth surface for the new flapper to rest against.
Frequently Asked Questions (FAQ)
Can you fix or clean a warped flapper?
No. Once a rubber flapper has warped, curled at the edges, or become stiff due to chemical degradation, the material has physically changed at a molecular level. Cleaning it will not restore its original shape or flexibility, and replacement is mandatory.
Why does my new flapper still leak?
A new flapper will leak if the chain is adjusted incorrectly (too tight or too loose), if you installed a 2-inch flapper on a 3-inch valve, or if you failed to scrub the mineral scale off the plastic flush valve seat prior to installation.
Are universal flappers actually universal?
Universal flappers only fit standard 2-inch flush valves. They are entirely incompatible with modern 3-inch or specialty 4-inch valves. Furthermore, using a universal flapper on a 1.28 GPF high-efficiency toilet will ruin its calibration and waste water.
How tight should a flapper chain be?
The chain should never be tight. It must have exactly 1/4-inch to 1/2-inch of slack, which typically equates to one or two loose chain links resting at the top when the toilet handle is in the resting, horizontal position.
Will Vaseline help a toilet flapper seal?
Applying a petroleum jelly like Vaseline to a toilet flapper is a temporary hack that plumbers strongly discourage. Petroleum degrades standard rubber rapidly. While it might stop a leak for a week by filling in gaps, it ultimately destroys the flapper material entirely. Replace the part instead.