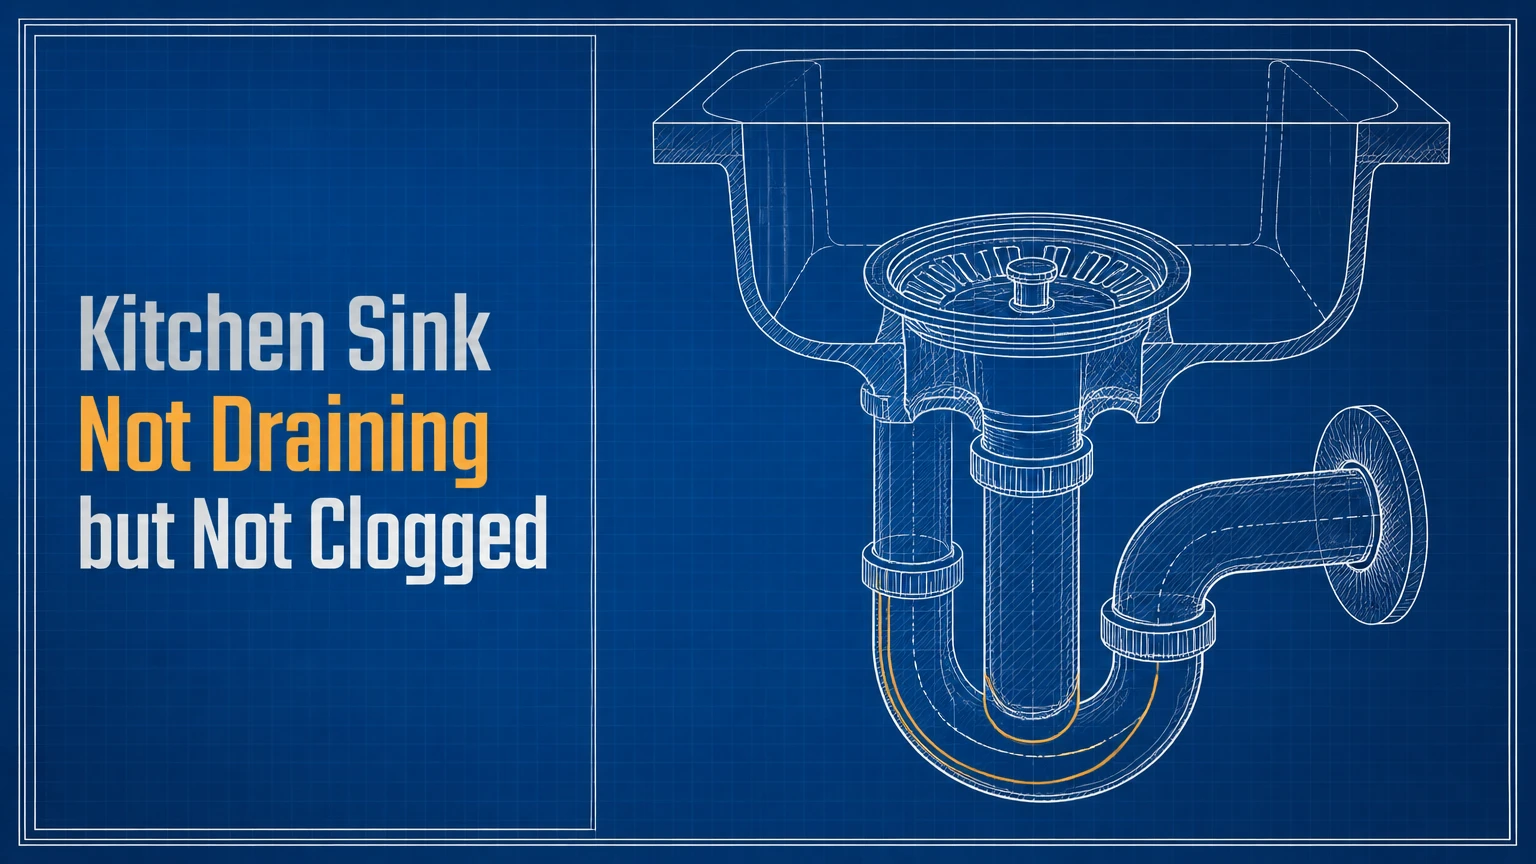
A kitchen sink not draining but not clogged usually has a hidden flow restriction, failed vent, disposal problem, incorrect pipe slope, or damaged drain line. Begin at the sink and work outward because a clear strainer or P-trap does not prove that the branch drain, vent system, or disposal discharge is clear.
Key Facts: At a Glance
- A clear P-trap does not rule out grease or debris farther inside the branch drain.
- A failed air admittance valve can cause slow drainage, but a blocked roof vent is less common than a downstream restriction.
- A jammed disposal and a blocked disposal outlet produce different symptoms and require different repairs.
- Common small horizontal drains generally require at least 1/4 inch of fall per foot under widely adopted plumbing codes.
- Gurgling indicates air movement or pressure disturbance, not automatically a blocked vent.
- Chemical drain cleaner can remain trapped in standing water and expose anyone who later opens the piping.
Why Is the Kitchen Sink Not Draining but Not Clogged?
A kitchen sink can hold standing water even when the visible drain and P-trap appear clean because drainage depends on the entire pathway. Water must pass through the strainer, disposal or tailpiece, trap, trap arm, branch drain, and larger sanitary system while replacement air enters through an approved vent.
The phrase “not clogged” often means that no solid obstruction was found near the sink. It does not exclude a thin grease layer, restricted disposal elbow, corroded pipe, sagging section, or blockage several feet downstream.
| Symptom | Most likely area | First useful test | Typical inspection time |
|---|---|---|---|
| One basin holds water | Strainer, disposal, tailpiece | Inspect the affected basin outlet | 10-20 minutes |
| Both basins back up | Shared trap or branch drain | Remove and inspect the P-trap | 20-40 minutes |
| Sink drains after several minutes | Partial branch restriction | Cable the branch drain | 30-90 minutes |
| Gurgling with water flow | Restriction or venting fault | Compare nearby fixture behavior | 10-30 minutes |
| Disposal hums without spinning | Jammed disposal flywheel | Reset and manually rotate it | 10-20 minutes |
| Sink stopped after remodeling | Pitch or configuration error | Measure trap-arm fall | 20-45 minutes |
| Several fixtures drain slowly | Main drain or sewer | Check lower fixtures and cleanout | 15-30 minutes |
How Does a Kitchen Sink Drain Work?
A kitchen sink drains when gravity moves wastewater through a continuously sloped pipe and the vent system limits harmful pressure changes. The P-trap retains water to block sewer gas, while the vent supplies or relieves air so fixture discharge does not siphon trap seals or pressurize the drainage system.
An air admittance valve, or AAV, is a mechanical alternative used in some installations. Oatey describes an AAV as a one-way valve that opens under negative pressure and closes to resist sewer-gas escape. AAV acceptance and installation still depend on local plumbing rules.
Drainage can fail in four broad ways:
- The flow path narrows. Grease, scale, food particles, or a foreign object reduce capacity.
- A mechanical component obstructs flow. A disposal, baffle, dishwasher plug, or misaligned washer blocks the outlet.
- The pipe lacks continuous fall. A flat, back-pitched, or sagging pipe retains water and grease.
- Air cannot enter correctly. A vent restriction or failed AAV contributes to pressure imbalance.
A venting defect can slow a sink, but it should not be assumed merely because the trap is clear. In residential service calls, a branch-line restriction is often the more direct explanation when the sink previously drained normally and deteriorated gradually.
Before You Start
Plan for 30-120 minutes of diagnosis. Basic inspection is a moderate DIY task, but roof work, concealed-pipe repair, powered drain equipment, and sewer investigation require additional training and protective equipment.
| Item | Recommended specification | Typical quantity or cost |
|---|---|---|
| Bucket | 2-5 gallon capacity | 1 |
| Towels or absorbent pads | Washable or disposable | 3-6 |
| Tongue-and-groove pliers | 10-12 inches | 1 |
| Flashlight | Focused LED beam | 1 |
| Bubble level | 9-24 inches | 1 |
| Hand drain cable | 1/4 inch by 15-25 feet | $20-$50 |
| Replacement AAV | Correct pipe size and DFU rating | $15-$45 |
| Disposal wrench | Manufacturer tool or specified hex key | $5-$15 |
| Safety glasses and gloves | Chemical-resistant if cleaner was used | 1 set |
Turn off disposal power at the switch and circuit breaker before touching the grinding chamber or removing disposal piping. Never place a hand inside the disposal, even when the wall switch is off.
Do not dismantle the drain when corrosive cleaner is present unless you have appropriate chemical protection. Poison Control warns that many non-enzymatic drain cleaners contain concentrated corrosive compounds capable of causing serious burns and permanent tissue injury.
Step 1: Identify Which Fixtures Are Affected
Run a small, controlled amount of water in the kitchen sink, nearby bathroom sink, dishwasher, and other lower fixtures. The number and location of affected fixtures reveal whether the failure is inside the sink assembly, the kitchen branch, or the building drain.
Use only enough water to observe movement. Stop immediately if wastewater rises in a shower, floor drain, or lower sink.
What Do the Results Mean?
| Test result | Likely fault location | Recommended next action |
|---|---|---|
| Only one kitchen basin fails | Basin outlet or disposal | Inspect that basin assembly |
| Both kitchen basins fail | Shared trap or kitchen branch | Inspect trap, then cable branch |
| Kitchen sink and dishwasher fail | Shared kitchen drain or disposal connection | Inspect disposal inlet and branch |
| Kitchen plus nearby fixtures fail | Shared branch or stack | Call for branch diagnosis |
| Lower fixtures back up | Building drain or sewer | Stop using water and call a plumber |
| Problem occurs only in freezing weather | Frozen waste line or vent terminal | Inspect accessible warm-to-cold transitions |
Success checkpoint: You can name the smallest group of fixtures sharing the problem.
Common mistake: Repeatedly filling the sink to “push” water through can convert a partial restriction into an overflow.
Step 2: Check the Garbage Disposal Safely
A garbage disposal can prevent drainage when its flywheel is jammed, its discharge elbow is blocked, or the internal chamber contains compacted food. A disposal that spins normally can still have a restricted outlet, so motor operation alone does not prove that water can leave the unit.
Pressing the reset button is appropriate only after power has been isolated and the cause of the overload has been checked.
If the Disposal Hums
- Switch off the disposal.
- Turn off its breaker or unplug the cord.
- Remove visible objects with tongs, never fingers.
- Insert the manufacturer’s wrench into the lower turning socket.
- Move the wrench back and forth until the flywheel rotates freely.
- Remove the wrench, restore power, and test with cold water.
InSinkErator notes that certain models can be rotated from below with the supplied wrench or a 1/4-inch Allen wrench. Confirm the required tool in the model manual before applying force.
If the Disposal Spins but Water Remains
Disconnect and inspect the discharge elbow after placing a bucket underneath. Sludge frequently collects where the elbow leaves the disposal, especially when insufficient water is used during grinding.
Also inspect the rubber splash baffle. A deformed or greasy baffle can make water appear trapped near the opening even when the downstream pipe is functional.
Success checkpoint: Water passes through the disposal outlet at a rate comparable to the faucet flow.
Common mistake: Running the disposal without water can leave ground material in the elbow and trap. InSinkErator recommends establishing a steady stream of cold water before operating the unit.
Step 3: Inspect the Strainer, Tailpiece, and P-Trap
The P-trap can look clear from above while a thin grease plug remains inside its bend, tailpiece, slip-joint washer, or wall-side adapter. Remove the assembly and inspect every component rather than judging it by water seen through the drain opening.
Place a bucket below the trap. Loosen the slip nuts slowly, support the trap with one hand, and keep your face away from the joint.
Look for:
- Grease with a waxy or clay-like texture
- Coffee grounds, rice, flour, or fibrous vegetables
- A slip-joint washer projecting into the flow path
- A telescoping tailpiece inserted too deeply
- A disposal elbow misaligned with the trap
- Flexible accordion tubing holding sludge
- A double-trap configuration from an incorrect remodel
Clean removable parts with dish detergent and a nylon brush. Replace split washers and distorted tubular fittings rather than overtightening them.
Success checkpoint: Water poured directly through the disconnected trap assembly flows without pooling.
Common mistake: A clear trap does not clear the wall pipe. Continue to the branch-drain test if the sink still fails after reassembly.
Step 4: Test the Branch Drain
A partially restricted branch drain is the most practical explanation when the trap is clean, both basins back up, and the sink became slower over weeks or months. Kitchen grease can coat several feet of pipe without forming one removable object, which is why the drain may appear “not clogged.”
With the trap removed, inspect the wall pipe using a flashlight. Standing water immediately inside the trap arm suggests a downstream restriction, insufficient slope, or both.
Feed a 1/4-inch hand cable into the branch line. Advance gradually while rotating the drum, retrieve the cable periodically, and remove grease or debris from the tip. Do not force the cable through a hard stop because thin fittings and old galvanized pipe can be damaged.
After cabling, flush the branch with controlled hot tap water and dish detergent. Do not use boiling water on PVC piping or pour large volumes into an untested line.
Why Can a Cable Pass Through but the Sink Stay Slow?
A small cable can punch a narrow passage through soft grease while leaving most deposits attached to the pipe wall. The sink may improve for days and then slow again because the usable internal diameter remains restricted.
Professional drain cleaning may use a larger cable, appropriate cutting head, or controlled water jetting after the pipe material and condition are confirmed. Water jetting is not automatically suitable for weak, separated, or severely corroded piping.
Success checkpoint: The open branch accepts several gallons at faucet flow without rising into the sink.
Common mistake: Assuming that cable movement proves the pipe is clean. A cable can travel through water, sludge, or a pipe belly without restoring full capacity.
Step 5: Evaluate the Plumbing Vent
A venting problem becomes more likely when drainage changes with airflow, the sink gurgles, trap water levels fluctuate, or nearby fixtures disturb one another. However, gurgling alone cannot distinguish a blocked vent from a restricted drain because wastewater squeezing past a partial blockage also displaces air.
Never climb onto a roof solely to perform an untrained vent inspection. Roof pitch, wet surfaces, overhead utilities, and unsuitable ladders create risks far greater than the value of a DIY test.
Is Loosening the P-Trap a Reliable Vent Test?
Loosening the P-trap is not a conclusive blocked-vent test. Opening the trap changes both airflow and the wastewater pathway, and the basin may drain directly into the bucket even when the real obstruction remains inside the wall pipe.
A more useful diagnosis combines multiple signs:
| Observation | Vent fault more likely | Drain restriction more likely |
|---|---|---|
| Sink drains normally with AAV temporarily removed | Yes | Possible |
| Several traps gurgle during discharge | Yes | Possible |
| Water stands in wall-side trap arm | No | Yes |
| Drain worsened gradually over months | Possible | Yes |
| Roof vent recently iced or obstructed | Yes | No |
| Cable retrieves grease | No | Yes |
| Sewer odor appears near an AAV | Failed-open AAV possible | No |
| Sink drains slowly without gurgling | Possible | Yes |
A professional can inspect an accessible vent, test pressure behavior, or use a camera where appropriate. A camera may identify a branch obstruction or structural defect, but it does not directly prove that a vent can move the required air.
Step 6: Inspect the Air Admittance Valve
An air admittance valve can cause slow drainage if it fails closed and cannot admit air during discharge. A valve that fails open creates a different problem, usually sewer odor rather than standing water.
An AAV normally appears as a capped vertical fitting above the branch drain inside the cabinet or an accessible wall space. It must remain vertical, accessible, correctly sized, and installed according to local code and manufacturer instructions.
Oatey specifies that its AAV should be installed at least 4 inches above the horizontal branch drain and kept accessible for inspection or replacement. The manufacturer also states that its valves comply with ASSE 1050 and 1051, although local acceptance must still be verified.
How Do You Test an AAV?
Turn off the water, note the existing valve position, and remove the AAV only when it is threaded and safely accessible. Briefly test drainage with the vent opening unobstructed, then stop and reinstall or replace the valve immediately.
Do not leave the pipe open. An uncapped vent can release sewer gas into the building.
Replace the AAV when drainage improves substantially with the valve removed, the valve is physically stuck, or its seal allows persistent odor. Match the pipe size and fixture-unit rating rather than buying by appearance alone.
Success checkpoint: The sink drains normally with a correctly installed replacement and no sewer odor escapes.
Common mistake: Hiding an AAV inside a sealed wall prevents required inspection and future replacement.
Step 7: Measure the Drain-Pipe Slope
A kitchen trap arm or branch line must fall continuously toward the downstream connection. A flat section slows solids, a back-pitched section returns water toward the sink, and a belly forms a permanent pool that collects grease.
The 2024 International Plumbing Code requires horizontal drainage piping to maintain uniform alignment and prescribed minimum slopes. For common drain piping 2 1/2 inches or smaller, the widely used minimum is 1/4 inch per foot, equal to a 2 percent slope. Larger piping may have different minimums, and local amendments control.
The code’s useful practitioner rule is concise: horizontal drainage piping should have “uniform alignment at uniform slopes.”
How Do You Measure the Fall?
- Place a level along the accessible horizontal pipe.
- Confirm that the pipe descends toward the wall or downstream fitting.
- Measure the pipe length.
- Multiply the length in feet by 1/4 inch for the common minimum fall.
- Inspect hangers for separation, bending, or uneven spacing.
A 4-foot run commonly needs at least 1 inch of total fall. A 6-foot run commonly needs at least 1 1/2 inches.
Too much fall can also create poor transport conditions in some systems because water may outrun suspended solids. Do not arbitrarily steepen concealed piping without considering fitting layout and applicable code.
Success checkpoint: The pipe has continuous downstream fall with no low spot.
Common mistake: Measuring only the cabinet pipe and ignoring a sag beyond the wall.
Step 8: Check for Installation and Remodeling Errors
A sink that stopped draining after a new countertop, deeper basin, disposal, dishwasher, or cabinet installation often has a geometry problem rather than a naturally developed blockage. A deeper sink lowers the outlet, while a disposal lowers it further, sometimes leaving too little height for the trap to fall toward the wall connection.
Common installation errors include:
- Disposal outlet below the wall drain
- Trap arm rising toward the wall
- Two traps installed in series
- Corrugated flexible drain tubing
- Excessively long or unsupported horizontal piping
- Incorrect sanitary-tee orientation
- Dishwasher hose connected without a required air gap or high loop
- Disposal dishwasher inlet plug left intact
- AAV installed too low, sideways, or inside a sealed cavity
The disposal inlet plug deserves special attention after dishwasher installation. A dishwasher cannot discharge through a new disposal until the manufacturer-designated knockout plug has been removed.
Do not solve a height conflict by creating a deep, improvised trap. The reliable repair is usually to raise the wall connection where feasible, select an appropriate sink or disposal configuration, or have the branch piping redesigned.
Step 9: Consider Corrosion, Sagging, or Pipe Damage
Structural pipe conditions become likely when cleaning provides only brief relief, the home contains galvanized drainage piping, or the line repeatedly holds water despite correct fixture components. Corrosion and pipe bellies are continuous capacity problems rather than isolated removable clogs.
Galvanized steel corrodes and accumulates scale internally. A pipe that appears full-sized from the outside may have only a narrow irregular channel remaining inside.
A belly develops when pipe supports fail, framing moves, or underground soil settles. Wastewater remains inside the low section after each use, allowing grease and solids to separate and accumulate.
| Structural condition | Typical evidence | Best diagnostic method | Typical repair |
|---|---|---|---|
| Internal galvanized corrosion | Rust, recurring restriction, old metal pipe | Camera plus material inspection | Replace affected section |
| Pipe belly | Standing water returns after cleaning | Camera with location measurement | Regrade or replace pipe |
| Back-pitched trap arm | Recent remodel, immediate poor drainage | Level and elevation measurement | Reconfigure connection |
| Separated fitting | Leakage, soil entry, abrupt camera stop | Camera and leak inspection | Open and replace fitting |
| Crushed underground line | Multiple fixtures affected | Camera and locating equipment | Excavation or trenchless repair |
| Failed pipe hanger | Visible sag in crawlspace or basement | Physical inspection | Re-support and correct pitch |
A drain camera has limitations. Cloudy water, grease, tight fittings, and small-diameter trap arms can obstruct the view, so a camera result must be interpreted alongside slope measurements and fixture symptoms.
What Should You Do With a Double Kitchen Sink?
When both sides of a double sink back up, the restriction is usually after the two bowls join. When only the disposal side holds water, inspect the disposal chamber, baffle, and outlet before treating the shared branch.
Seal the opposite basin before using a plunger. Without a seal, pressure simply moves air and water from one bowl to the other.
For a disposal-equipped double sink:
- Isolate electrical power.
- Inspect the disposal basin.
- Check the crossover or continuous-waste arm.
- Remove and clean the shared trap.
- Cable the wall branch if both bowls still fail.
Water rising in the opposite bowl when the disposal runs indicates restricted flow downstream of the basin connection. It does not prove that the disposal motor is defective.
Can the Dishwasher Cause the Sink to Stop Draining?
A dishwasher can reveal or worsen a kitchen-drain problem because it discharges several gallons into the same branch over a short period. The dishwasher rarely blocks the sink by itself, but its hose, air gap, disposal inlet, or shared drain connection may be incorrectly configured.
Inspect the countertop air gap, when present, for debris. Confirm that the discharge hose rises to the required high point beneath the countertop when the installation uses a high-loop arrangement permitted by the appliance instructions and local rules.
If the sink fills only when the dishwasher pumps out, suspect:
- A partially restricted disposal outlet
- An intact disposal dishwasher knockout plug
- A blocked air gap
- A kinked discharge hose
- A kitchen branch drain with insufficient capacity
Stop the dishwasher if dirty water returns to the sink. Continued cycling can overflow the basin or send contaminated water back toward the appliance.
Which Repair Can You Do Yourself?
DIY work is reasonable for accessible, low-risk components. Concealed piping, roof vents, main drains, chemical exposure, and repeated structural problems belong with a licensed plumber.
| Task | DIY suitability | Typical time | Typical planning cost |
|---|---|---|---|
| Clean strainer and P-trap | Suitable for many homeowners | 20-45 minutes | $0-$20 |
| Free a jammed disposal | Suitable with power isolated | 10-30 minutes | $0-$15 |
| Replace accessible threaded AAV | Moderate, code must be checked | 20-60 minutes | $15-$45 |
| Use a 15-25 foot hand cable | Moderate | 30-90 minutes | $20-$50 |
| Professional branch cleaning | Professional | 1-2 hours | $150-$400 |
| Drain camera inspection | Professional | 1-2 hours | $250-$600 |
| Correct accessible pipe pitch | Skilled DIY or professional | 1-4 hours | $150-$800 |
| Replace corroded branch piping | Professional | 4 hours to 2 days | $500-$3,000+ |
| Repair buried belly or sewer | Professional | 1-5 days | $2,000-$15,000+ |
These figures are broad United States planning ranges, not fixed national prices. Access, pipe material, labor market, wall removal, excavation, permits, and after-hours service can change the final quote substantially.
The BDT figures in Google’s AI Overview should not be treated as universal benchmarks. They are location-specific, lack a stated market and date, and cannot reliably guide homeowners in the United States, United Kingdom, Canada, Australia, or other regions.
Common Mistakes and How to Fix Them
Pouring More Chemical Cleaner
Chemical cleaner is poorly suited to a sink that already contains standing water because the product may remain concentrated in the trap. The trapped chemical creates splash, burn, compatibility, and worker-exposure hazards.
Do not mix drain cleaner with bleach, ammonia, acid, vinegar, or another drain product. Poison Control warns that mixing household chemicals can release dangerous gases.
Tell the plumber exactly what was poured into the drain and when.
Plunging Without Sealing the Second Basin
An open second basin prevents useful pressure from reaching the shared drain. Seal the second opening with a stopper or wet cloth, verify that slip joints are secure, and use controlled strokes.
Stop if a joint leaks. Tighten or replace the washer rather than applying greater plunging force.
Assuming Gurgling Proves a Blocked Roof Vent
Gurgling proves that air is moving through water or a restricted passage. Both a vent fault and a partial drain blockage can produce that sound.
Compare other fixtures, inspect the branch for standing water, and test an accessible AAV before concluding that the roof vent is blocked.
Replacing an AAV Without Checking the Branch
A new AAV cannot overcome a pipe filled with grease. Replace the valve only when symptoms and controlled testing support an airflow failure.
A branch that remains full with the trap removed needs drain or structural investigation.
Repeatedly Snaking a Damaged Pipe
Frequent short-term improvement suggests corrosion, a belly, poor pitch, or incomplete grease removal. Continuing to cable a weakened line can damage it while postponing the necessary repair.
Request a camera inspection and physical pipe assessment when the same restriction returns repeatedly.
When Should You Call a Plumber Immediately?
Call a plumber promptly when multiple fixtures back up, sewage appears in a lower drain, corrosive chemicals are present, a pipe leaks inside a wall, or the kitchen branch repeatedly fails after cleaning. These signs indicate risks beyond a routine sink adjustment.
Professional diagnosis is also appropriate when:
- The home has old galvanized or cast-iron piping
- The sink stopped draining after a major remodel
- The wall pipe remains full after trap removal
- A sewer odor persists after AAV replacement
- The problem returns within days or weeks
- The drain cable reaches a hard obstruction
- Roof or crawlspace access would be unsafe
- A septic system may be full or malfunctioning
Stop using connected fixtures during an active backup. Additional water can increase contamination and building damage.
FAQ
Can a Sink Be Blocked Even When the P-Trap Is Clear?
Yes. A clear P-trap rules out only one short section of the drainage path. Grease, scale, food waste, a misaligned fitting, or standing water may remain in the trap arm or kitchen branch several feet beyond the cabinet, where visual inspection cannot reach.
Will Baking Soda and Vinegar Fix the Problem?
Baking soda and vinegar may loosen light residue near an accessible drain, but their reaction does not remove pipe corrosion, a failed AAV, incorrect slope, a disposal obstruction, or a substantial grease layer. Mechanical cleaning and diagnosis are more dependable when water already stands in the basin.
Why Does the Sink Drain After I Turn Off the Faucet?
A sink that drains only after inflow stops usually has reduced downstream capacity. The faucet supplies water faster than the restricted branch can carry it, so the basin temporarily stores the difference. Grease, scale, poor pitch, or a partially obstructed disposal outlet are common causes.
Can Hot Water Clear Grease From a Kitchen Drain?
Hot tap water can soften minor fresh grease, but it may move the grease farther downstream where it cools and attaches again. Hot water cannot correct a belly, corroded pipe, failed vent, or dense grease accumulation. Avoid uncontrolled boiling water, particularly with plastic piping and vulnerable joints.
Why Does My Kitchen Sink Drain Better With the Disposal Running?
The disposal impeller can temporarily push water through a partially restricted outlet or shared drain. That improvement does not mean the line is clear. Inspect the disposal elbow, P-trap, crossover pipe, and wall branch because the restriction will usually continue accumulating.
Can a Main Sewer Problem Affect Only the Kitchen First?
Yes, especially when the kitchen connects near the developing restriction or discharges large volumes rapidly. However, an isolated kitchen symptom more often begins in the kitchen branch. Check lower fixtures, toilets, floor drains, and exterior cleanouts before concluding that the main sewer is involved.
The Bottom Line
A kitchen sink not draining but not clogged should be diagnosed from the fixture outward: identify affected fixtures, isolate the disposal, clean the trap, test the branch drain, evaluate the AAV or vent, and measure pipe slope. Most cases involve a hidden partial restriction, but recurring failure, multiple affected fixtures, corrosion, or standing water inside the branch requires professional inspection.