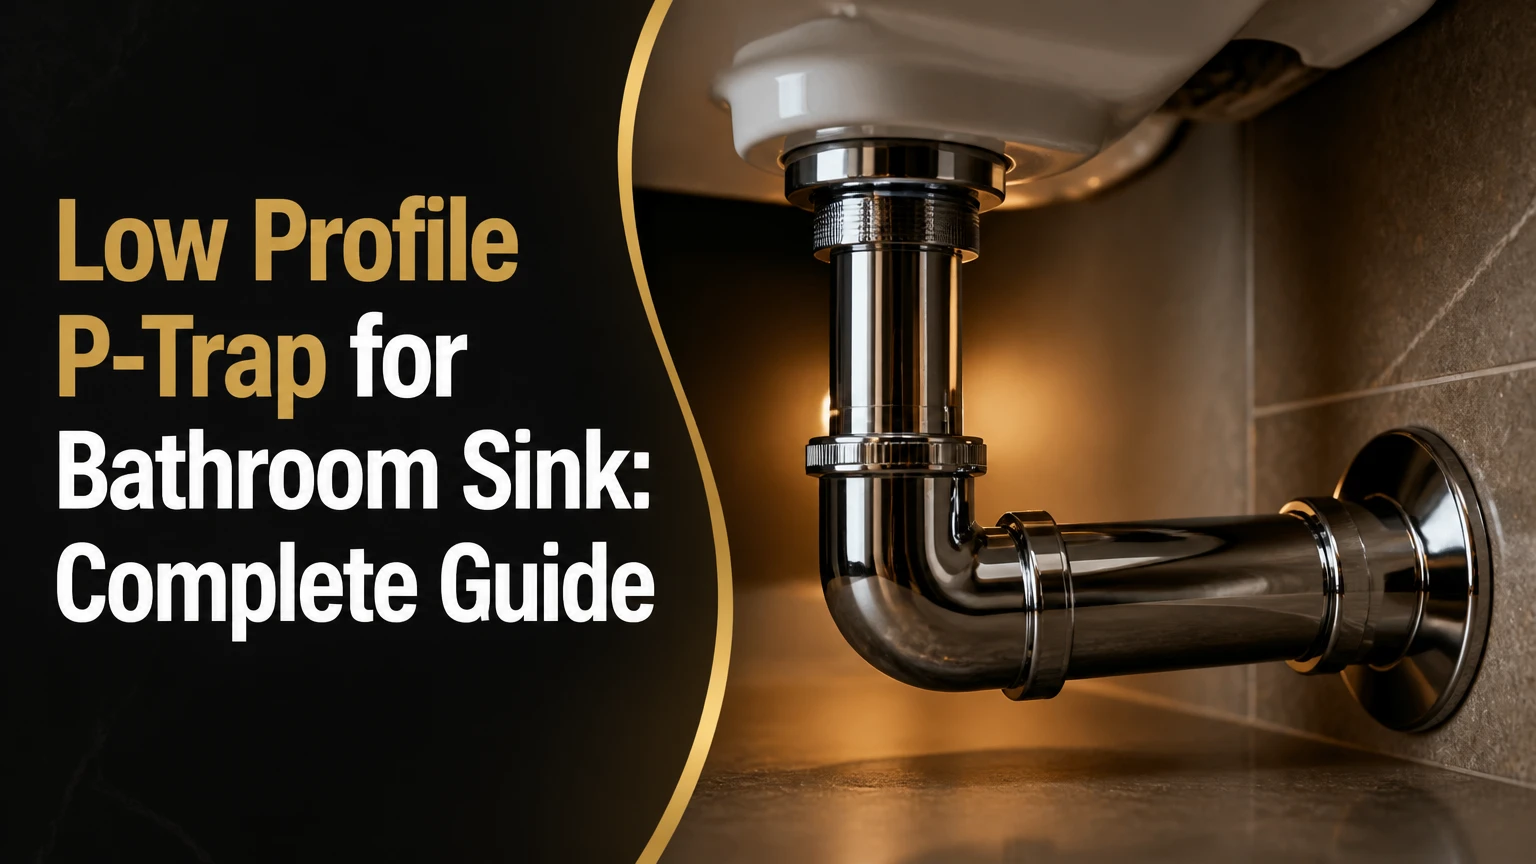
A low profile P-trap for bathroom sink plumbing is a compact drain assembly that preserves the sewer-gas barrier while reducing the space occupied beneath the basin. The safest option is usually an approved smooth-wall liquid-seal trap or rear-offset kit that fits the measured rough-in without corrugated tubing, excessive elbows, or an unapproved mechanical seal.
Key Facts: At a Glance
- A compact trap must still protect the room from sewer gas and drain the basin without retaining debris.
- The 2024 International Residential Code specifies a 2-4 inch liquid trap seal for conventional fixture traps.
- Most bathroom lavatories use a 1 1/4-inch tubular tailpiece, although the wall drain may be 1 1/2 inches.
- A low-profile trap cannot correct every high or poorly positioned wall connection.
- Corrugated accordion tubing collects hair and soap residue more readily than smooth-wall tubing.
- Local approval matters because mechanical, bottle-style, and specialty traps are treated differently across jurisdictions.
What Is a Low-Profile P-Trap?
A low-profile P-trap is a space-saving lavatory drain configuration designed to fit beneath a shallow basin, floating vanity, wheelchair-accessible sink, shelf, or drawer system. It performs the same sanitary function as a conventional P-trap but changes the trap body, direction of travel, or connection layout to reduce interference below the sink.
The term does not describe one standardized product. Retailers may apply it to shallow liquid-seal traps, oval trap bodies, rear-offset kits, telescoping assemblies, bottle traps, or waterless membrane valves. These products are not interchangeable from a code, maintenance, or performance perspective.
A legitimate compact drain solution should have:
- A smooth internal waterway
- An accessible connection
- A suitable seal against sewer gases
- Correct pipe sizing
- Adequate slope after the trap
- Approval for the applicable jurisdiction
- Removable parts for cleaning and inspection
The safest buying decision starts with the plumbing design, not the product’s marketing name.
How Does a Compact Sink Trap Work?
A conventional compact P-trap retains water in its curved body after the bathroom sink drains. That water creates a physical barrier between the room and the sanitary drainage system, while the downstream venting system stabilizes pressure so the seal is not siphoned away.
The International Plumbing Code states that each fixture must generally be separately trapped and limits the vertical distance from the fixture outlet to the trap weir to 24 inches. It also requires a conventional fixture trap to have a liquid seal measuring at least 2 inches and no more than 4 inches.
The trap’s essential components are:
- Tailpiece: The vertical tube connected to the sink drain.
- Trap inlet: The connection receiving water from the tailpiece.
- Trap bend: The section retaining the water seal.
- Trap weir: The level at which water exits the bend.
- Trap arm: The pipe traveling from the trap toward the wall drain.
- Vent connection: The drainage-system feature that prevents destructive pressure changes.
A compact trap saves space only when these functions remain intact. Flattening, shortening, or offsetting pipes without preserving the required seal and drainage geometry can create odor, siphonage, clogging, or inspection problems.
Types of Space-Saving Sink Traps
The best design depends on how much vertical clearance is available, where the wall drain enters, whether drawers must clear the plumbing, and what the local authority permits.
| Trap design | Typical space advantage | Sewer-gas seal | Maintenance profile | Approval concern |
| Compact smooth-wall P-trap | Saves about 1-3 inches, product dependent | Conventional water seal | Similar to a standard trap | Low when listed and correctly sized |
| Rear-offset trap kit | Moves plumbing toward the back wall | Conventional water seal | More joints to inspect | Low to moderate |
| Oval or flattened trap | Reduces vertical depth | Conventional water seal | Narrow sections may collect residue | Verify listing and seal depth |
| Bottle trap | Creates a compact vertical cylinder | Internal water seal | Bottom cup may be removable | Restricted in some jurisdictions |
| Waterless membrane trap | Requires little trap-bend space | Elastomeric membrane | Membrane needs inspection | Approval varies significantly |
| Flexible accordion tube | Fits irregular offsets easily | Configuration dependent | High debris-retention risk | Frequently rejected as permanent work |
Compact Smooth-Wall P-Traps
A compact smooth-wall P-trap is usually the most conservative choice because it retains familiar drainage geometry and has no moving sealing component. The body may be molded more tightly than a standard tubular trap, but it must still provide the required seal and a serviceable internal passage.
Choose this design when vertical clearance is limited by only a few inches. It is less suitable when a full drawer crosses directly beneath the drain outlet.
Rear-Offset and Telescoping Kits
A rear-offset kit redirects the sink discharge toward the back of the cabinet before completing the trap connection. This can free the central cabinet area for drawers, shelves, waste bins, or wheelchair knee space.
The design must not create an S-trap. An S-trap occurs when the discharge continues vertically after the trap in a way that can siphon the water seal. The trap arm should proceed toward the properly vented wall connection using an approved configuration.
More fittings also mean more possible leak points. Dry-fit every component without tension before tightening any slip nut.
Flattened or Oval Traps
A flattened trap compresses a round waterway into an oval or rectangular profile. The trap can fit beneath a shallow vessel or low drawer while retaining a liquid seal.
The limitation is internal geometry. A narrower passage may respond less favorably to hair, toothpaste, shaving residue, and soap solids than a full round trap. Select a product with a removable cleanout or separable trap body.
Waterless Membrane Traps
A waterless trap uses a flexible membrane that opens under wastewater flow and closes afterward. It can eliminate the conventional water-filled bend, making it attractive for accessible vanities, mobile applications, seasonal rooms, and confined cabinetry.
However, a membrane trap should not be treated as universally interchangeable with a P-trap. Some plumbing codes prohibit traps that depend on moving parts to maintain the seal, and specific jurisdictions may require a listed product, an engineered approval, or authorization from the local plumbing official. For example, the 2024 Ohio Plumbing Code lists traps depending on moving parts among prohibited designs.
A membrane may also be affected by:
- Hair caught at the sealing surface
- Incorrect installation direction
- Chemical drain cleaners
- Deformation from incompatible solvents
- Age-related loss of elasticity
- Improper pipe support
Use a waterless trap only when its listing, installation instructions, and local acceptance are confirmed.
Bottle Traps
Bottle traps are compact and visually suited to exposed plumbing beneath wall-mounted sinks. Their cylindrical body often aligns neatly with a chrome, brass, or matte-black tailpiece.
Code acceptance varies. Some jurisdictions restrict bottle traps because of internal partitions, cleanability, or self-scouring concerns. New York City’s 2022 plumbing code, for example, expressly lists bottle traps among prohibited trap types.
A decorative finish does not establish compliance. Verify the actual model before purchase.
What Size Low-Profile Trap Do You Need?
Most residential bathroom sinks connect to a 1 1/4-inch tubular drain assembly, while many wall drain adapters and sanitary branches are 1 1/2 inches. Measure the existing parts instead of assuming that every visible pipe uses the same dimension.
| Component | Common bathroom-sink size | What to verify | Common mismatch |
| Sink drain tailpiece | 1 1/4-inch tubular OD | Outside diameter and thread style | 1 1/2-inch vessel-sink tailpiece |
| Trap inlet | 1 1/4 inches | Washer and slip-nut compatibility | Metric 32 mm product |
| Trap outlet | 1 1/4 or 1 1/2 inches | Product specification | Outlet larger than wall adapter |
| Wall trap adapter | Often 1 1/2-inch nominal | Tubular washer reduction | Missing 1 1/2-to-1 1/4 washer |
| Drain branch | Commonly 1 1/2 inches | Local requirement and existing rough-in | Concealed pipe cannot be judged visually |
Do not confuse nominal plumbing size with a measurement taken across a threaded nut. Tubular components, solvent-weld pipe, and threaded fittings use different sizing conventions.
The International Plumbing Code requires fixture traps to be large enough to drain the fixture rapidly and prevents a trap from being larger than the drainage pipe into which it discharges.
How Do You Measure the Available Space?
Measure the vanity before ordering a low-profile trap because the sink outlet and wall stub-out determine whether a compact product can physically connect. Product height alone is not enough.
Record these six dimensions:
- Tailpiece centerline to back wall
- Tailpiece bottom to wall-drain centerline
- Wall-drain centerline to cabinet floor
- Maximum plumbing width allowed by drawers
- Distance from the basin bottom to the first obstruction
- Usable insertion depth inside the wall trap adapter
Also photograph the existing layout from the front and side. Include a ruler or tape measure in the frame.
The Most Important Measurement
The critical dimension is the vertical relationship between the bottom of the tailpiece and the centerline of the wall drain. The trap must fit below the fixture outlet and still discharge into the wall connection without an uphill trap arm.
A wall opening that is too high may leave insufficient space for any conventional trap beneath a deep sink. A low-profile product can recover limited clearance, but it cannot always overcome an incorrectly located sanitary tee.
Drawer Clearance
For a vanity with drawers, mark the full drawer box rather than the visible drawer front. Soft-close slides, rear panels, and structural rails may occupy another 1/2-2 inches.
A rear-offset assembly often works better than merely purchasing a shallower bend. The objective is to relocate the drain path behind the drawer, not only raise the bottom of the trap.
Are Low-Profile P-Traps Code-Compliant?
A low-profile P-trap can be code-compliant when it is an approved fixture trap, retains the required seal, remains accessible, uses permitted materials, and connects to a properly vented drainage system. The phrase “low profile” does not itself establish approval.
The 2024 International Residential Code permits traps made from materials such as copper alloy or approved plastic and requires conventional trap seals between 2 and 4 inches. It also states that slip-joint connections must comply with the applicable connection requirements.
The 2021 International Plumbing Code adds that traps must be set level with respect to the trap seal. It also restricts the distance between the fixture outlet and trap weir and prohibits double trapping.
Check five items before installation:
- The product is listed or approved for lavatory drainage.
- The trap size matches the fixture and branch.
- The required seal depth is documented.
- The trap arm reaches a properly vented wall connection.
- The assembly remains accessible for cleaning.
Local amendments control the final decision. A product accepted in one state or municipality may be rejected in another.
Low-Profile P-Trap vs Standard P-Trap
A standard P-trap is preferable when it fits because it is inexpensive, familiar to inspectors, easy to clean, and widely available. A low-profile trap earns its added complexity only when cabinet geometry, accessibility, or architectural design makes a standard trap impractical.
| Decision factor | Standard P-trap | Low-profile liquid-seal trap | Waterless membrane trap |
| Typical material price | $5-$20 | $20-$80 | $35-$90 |
| Vertical space needed | Usually greatest | Reduced by product design | Usually smallest |
| Moving seal component | None | None | Flexible membrane |
| Cleaning access | Simple disassembly | Product dependent | Membrane removal may be required |
| Clog tolerance | Generally strong | Moderate to strong | Sensitive to membrane contamination |
| Approval uncertainty | Lowest | Moderate for specialty models | Highest |
| Best application | Conventional vanity | Drawers or shallow cabinetry | Extreme clearance or special use |
| Expected DIY difficulty | Easy | Moderate | Moderate, plus approval checks |
These prices are typical retail ranges rather than fixed market quotations. Finish, metal gauge, brand, adapters, and country can materially change the cost.
Which Design Is Best for Each Bathroom?
Best for a Vanity With Drawers
Choose a smooth-wall rear-offset system that moves the drain close to the back panel. Confirm the drawer’s rear clearance before cutting any tube.
A shallow trap alone may still collide with the center of the drawer. The offset path is usually the more important feature.
Best for an Accessible Lavatory
Choose an approved rear-positioned assembly or specialty accessible-fixture trap that keeps plumbing outside required knee and toe space. Do not assume that installing any compact trap automatically makes a sink ADA-compliant.
The U.S. Access Board requires a forward approach at most accessible lavatories and knee and toe clearance beneath them. Its guidance describes a clearance at least 30 inches wide and generally 17-25 inches deep, with plumbing and other objects kept outside the required space.
Supply and drain pipes also require protection where contact could cause burns or abrasions.
Best for a Floating Vanity
Choose a finished metal compact trap or a concealed rear-offset system, depending on whether the plumbing is visible. Match appearance only after verifying trap design and approval.
Decorative bottle traps may look cleaner, but local restrictions can outweigh the aesthetic benefit.
Best for a Rarely Used Sink
A listed waterless trap may prevent odor caused by evaporation, provided the authority having jurisdiction permits it. The membrane still requires periodic inspection.
For a conventional trap, running water periodically may be simpler and easier to approve.
Which Designs Should You Avoid?
Avoid corrugated accordion drain tubing as a permanent bathroom-sink trap unless the exact product is specifically approved for that application. The internal ridges create collection points for hair, toothpaste, soap film, and biological residue.
Other risky configurations include:
- Two traps connected in series
- An S-shaped discharge dropping vertically after the trap
- A trap arm sloping back toward the fixture
- Unsupported flexible tubing
- Multiple elbows forced into alignment
- A mechanical valve installed backward
- An inaccessible trap hidden behind a fixed drawer
- A trap body with an undocumented seal depth
The counterintuitive rule is simple: the assembly with the smallest outside dimensions is not always the best space-saving solution. A slightly larger rear-offset trap may preserve more usable cabinet volume because it occupies the back of the vanity rather than the center.
How Do You Install a Low-Profile P-Trap?
Installing a low-profile bathroom sink trap usually takes 30-90 minutes when the wall connection is correctly positioned. The job becomes a plumbing modification rather than a trap replacement when the sanitary tee must be moved.
Before You Start
| Item | Typical requirement |
| Difficulty | Beginner to intermediate |
| Working time | 30-90 minutes |
| Typical parts cost | $20-$100 |
| Tools | Bucket, tape measure, marker, fine-tooth saw, deburring tool, adjustable pliers |
| Materials | Trap kit, correct washers, wall adapter if needed, extension tube |
| Main prerequisite | Compatible sink and wall-drain geometry |
Step 1: Remove the Existing Trap
Place a bucket beneath the trap, loosen the slip-joint nuts, and lower the trap carefully. Water and residue will remain inside the bend.
Clean the tailpiece and wall adapter. Replace cracked nuts, hardened washers, and corroded metal tubing.
Step 2: Dry-Fit the New Layout
Assemble the parts without fully tightening them. Position the compact bend or offset tubes so every joint meets squarely and no component is under sideways tension.
You will know the layout is viable when the wall connection, trap outlet, and tailpiece align without bending or forcing the tubing.
Step 3: Mark and Cut the Tubes
Mark insertion depth before cutting. A tube that appears correct externally may become too short once seated inside a slip-joint fitting.
Cut squarely with a fine-tooth saw or tubing cutter. Remove burrs from both the inside and outside edges because a rough edge can damage a washer or catch debris.
Step 4: Install Nuts and Washers Correctly
Slide the slip nut onto the tube first, then install the beveled washer with its narrow or tapered side facing the fitting socket. Follow the manufacturer’s instructions when its washer differs from a conventional tubular washer.
Do not apply thread-seal tape to ordinary slip-joint threads. The washer creates the seal, while the nut compresses it.
Step 5: Connect the Trap and Trap Arm
Attach the inlet to the tailpiece and the outlet to the wall adapter. Set a liquid-seal trap level according to its design and maintain the required drainage direction after the trap.
Hand-tighten every nut first. Use pliers only for a small additional turn when necessary.
Step 6: Test Under Several Conditions
Fill the basin partially, release the stopper, and inspect every connection during the high-flow discharge. Then run a thin stream to expose slow seepage that may not appear during a quick dump test.
Dry the joints with tissue and check again after 10-15 minutes. A darkened spot on dry tissue reveals a small leak more reliably than touching the pipe with a wet hand.
Common Problems and How to Fix Them
| Symptom | Likely cause | Corrective action |
| Leak at slip nut | Washer reversed, damaged, or misaligned | Disassemble, replace or orient washer, realign tube |
| Sewer odor | Lost water seal, open membrane, or poor venting | Refill trap, inspect valve, investigate vent system |
| Slow drainage | Pop-up blockage or narrow trap passage | Clean stopper and trap before using chemicals |
| Gurgling | Pressure imbalance or partial downstream blockage | Check venting and clear branch line |
| Trap pulls apart | Tubes cut too short or unsupported | Install longer tube and secure alignment |
| Repeated clogging | Corrugated or undersized pathway | Replace with approved smooth-wall assembly |
| Drawer collision | Plumbing routed through central cabinet area | Use rear offset or modify drawer |
| Trap will not reach wall | Rough-in geometry incompatible | Add approved extension or relocate wall connection |
Do not solve persistent misalignment by overtightening the nuts. Compression fittings seal properly only when the tubes meet at the correct angle.
How Much Does Installation Cost?
A DIY low-profile trap replacement commonly costs $20-$100 in parts. Professional installation may range from roughly $150-$450 for a straightforward replacement, while moving a concealed wall drain can cost several hundred dollars more because drywall, framing access, pipe alteration, and finishing work are involved.
| Cost item | Typical range |
| Plastic compact trap | $15-$45 |
| Metal or decorative compact trap | $45-$150 |
| Rear-offset kit | $25-$100 |
| Waterless specialty trap | $35-$90 |
| Adapters and extension tubes | $5-$30 |
| Straightforward plumber labor | $150-$450 |
| Wall-drain relocation | $400-$1,500+ |
These are planning ranges, not quotations. Labor market, wall construction, permit requirements, finish repairs, and access conditions produce substantial variation.
Call a plumber when:
- The wall drain is above the usable trap outlet
- The new configuration resembles an S-trap
- Sewer odor persists after restoring the seal
- The wall adapter moves inside the wall
- The branch line drains slowly after the trap is cleaned
- Local approval for a specialty trap is unclear
Expert Rules of Thumb
First, preserve geometry before chasing compactness. A correctly aligned smooth-wall assembly occupying one extra inch will usually outperform a tighter arrangement made from several strained fittings.
Second, design around maintenance access. Bathroom traps collect hair, cosmetics, toothpaste, and soap residue. A drawer that prevents trap removal turns a routine cleaning task into cabinet disassembly.
Third, treat a high wall drain as a rough-in problem. A low-profile trap can recover limited space, but it cannot make water flow uphill or legalize an S-trap. Moving the sanitary connection may be the only durable correction.
FAQ
Can a P-Trap Be Installed Sideways?
A conventional P-trap should not be rotated into a position that prevents it from maintaining its designed water seal. Some offset assemblies route the inlet horizontally before reaching a correctly oriented trap, but the product must be installed in the manufacturer-approved position and connected to a properly vented trap arm.
Can You Shorten a P-Trap?
You may trim straight tubular sections within the product’s permitted insertion limits, but you should not cut or reshape the trap bend itself. Shortening the wrong section can reduce engagement at a washer, eliminate adjustment, damage the water-seal geometry, or create a joint that separates under movement.
Is a Low-Profile Trap More Likely to Clog?
A smooth-wall low-profile trap is not automatically clog-prone, but flattened passages and extra offset fittings can collect residue faster than a simple full-bore P-trap. The pop-up stopper remains the first place to check because hair commonly accumulates around its linkage before the trap itself becomes blocked.
Can You Use a 1 1/2-Inch Trap on a Bathroom Sink?
A 1 1/2-inch trap may be used only when it matches the fixture connection, branch size, product instructions, and local requirements. Many lavatories have a 1 1/4-inch tubular tailpiece connected through a reducing washer to a 1 1/2-inch wall adapter, which does not necessarily require a full 1 1/2-inch trap assembly.
Does a Waterless Trap Need Venting?
A waterless trap may resist siphonage differently from a conventional water-seal trap, but that does not automatically remove drainage-system venting requirements. The complete installation must follow the product listing, manufacturer instructions, and locally adopted plumbing code rather than relying only on the valve’s sewer-gas seal.
Can a Low-Profile Trap Fix a Wall Drain That Is Too High?
A low-profile trap can solve a small clearance conflict, but it cannot fix every high wall connection. If the trap outlet must rise to enter the wall or the trap cannot fit beneath the sink outlet while maintaining its required seal, the sanitary tee or sink geometry must be changed.
Conclusion
The best low profile P-trap for bathroom sink plumbing is an approved, smooth-wall assembly that preserves the required sewer-gas seal while moving the drain away from drawers, shelves, or accessible knee space. Measure the sink outlet and wall rough-in first, prioritize code acceptance and cleaning access, and avoid solving a permanent plumbing problem with corrugated tubing or forced fittings.