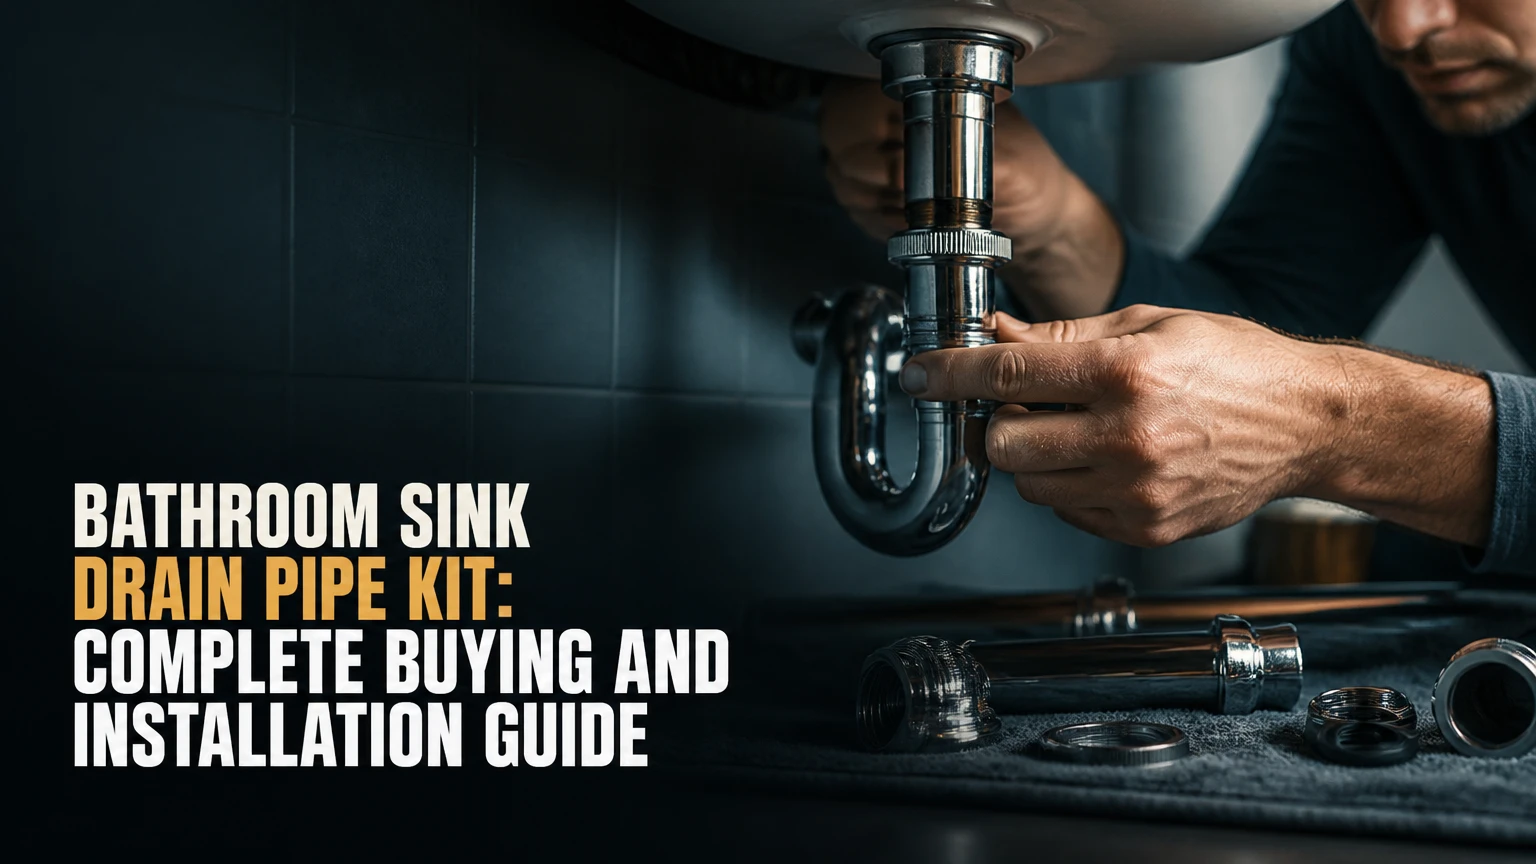
A bathroom sink drain pipe kit normally includes a 1-1/4-inch P-trap bend, trap arm, slip-joint nuts, and tapered washers that connect the sink tailpiece to the drain opening in the wall. The correct kit must match the tailpiece diameter, wall connection, available space, and whether the plumbing will remain visible.
Key Facts at a Glance
- Most residential bathroom lavatories use a 1-1/4-inch tubular P-trap.
- A P-trap retains water that blocks sewer gas from entering the room.
- Polypropylene slip-joint kits are the easiest option for concealed plumbing.
- Decorative brass kits are better for exposed pedestal or floating sinks.
- Corrugated flexible pipes collect debris and should not be treated as a permanent solution.
- Slip-joint washers create the seal, so thread tape is normally unnecessary.
What Is a Bathroom Sink Drain Pipe Kit?
A bathroom sink drain pipe kit is the removable tubular plumbing between the sink drain outlet and the permanent drainage pipe in the wall. Its primary component is the P-trap, but a complete installation may also require a tailpiece extension, trap arm, wall adapter, escutcheon, reducing washer, or pop-up drain assembly.
Retailers use several overlapping product names. A “P-trap kit” may contain only the trap bend, wall tube, nuts, and washers. An “under-sink drain kit” may include extensions or adapters. A “sink drain assembly” often refers to the flange, stopper, and tailpiece attached directly to the basin rather than the pipes beneath it.
Knowing this distinction prevents incomplete purchases. Replacing a corroded pop-up drain does not automatically replace the P-trap, while buying a P-trap kit does not normally provide the stopper or drain flange.
Which Parts Are Included in the Kit?
A standard kit contains the components needed to create a removable, watertight route from the sink tailpiece to the wall drain. Product contents vary, so compare the package against the existing installation before removing anything.
| Component | Typical specification | Function |
| J-bend or trap bend | 1-1/4-inch tubular | Holds the water seal |
| Trap arm or wall tube | 7-12 inches, cuttable | Carries water horizontally into the wall |
| Slip-joint nuts | 1-1/4-inch | Compress washers at removable joints |
| Tapered washers | Plastic or elastomeric | Seal around inserted tubing |
| Wall adapter | 1-1/2-inch hub to 1-1/4-inch tube | Connects tubular pipe to permanent drain |
| Tailpiece extension | Commonly 6 or 12 inches | Lowers the connection when the tailpiece is short |
| Escutcheon | Sized for trap arm | Covers the opening around exposed wall plumbing |
| Reducing washer | 1-1/2 by 1-1/4 inches | Joins different tubular diameters |
The sink’s drain flange, stopper, pivot rod, and vertical tailpiece may be sold as a separate pop-up assembly. Inspect those components for corrosion or leakage before deciding that the P-trap alone needs replacement.
How Does a P-Trap Work?
A P-trap holds a permanent pool of water in its curved section. That water allows wastewater to pass while forming a barrier between the bathroom and gases inside the drainage system.
Water leaves the basin through the drain body and tailpiece. It enters the low side of the trap bend, rises over the trap weir, and exits through the horizontal trap arm. The plumbing vent limits pressure changes that could otherwise siphon the trap dry or push sewer gas through the water seal.
The 2024 International Residential Code requires fixture traps to have smooth internal waterways and a liquid seal between 2 and 4 inches. It also identifies 1-1/4 inches as the minimum trap size for a lavatory.
A P-trap is therefore more than a curved connector. Its geometry, level position, vented trap arm, and retained water all contribute to safe drainage.
What Size Bathroom Sink Drain Pipe Kit Do You Need?
Most bathroom sinks require a 1-1/4-inch tubular P-trap, measured by the outside diameter of the tailpiece and tubular drain pipe. Kitchen sinks commonly use 1-1/2-inch tubing, so a kitchen kit should not be assumed to fit a bathroom lavatory.
Measure rather than relying only on the fixture type. Imported sinks, vessel-sink drains, commercial fixtures, and previous repairs may use different dimensions.
| Measurement point | Common bathroom value | What to verify |
| Drain tailpiece outside diameter | 1-1/4 inches | Match the P-trap inlet |
| Trap arm outside diameter | 1-1/4 inches | Match the trap outlet and wall adapter |
| Permanent wall drain | Often 1-1/2 inches | Use the correct trap adapter |
| Tailpiece-to-wall vertical drop | Installation-specific | Trap must fit without a deep or distorted bend |
| Wall-to-tailpiece horizontal distance | Commonly 4-10 inches | Trap arm must reach the adapter |
| Trap seal | 2-4 inches | Confirm local code requirements |
How to Measure the Existing Plumbing
Measure the outside diameter of the straight pipe below the sink rather than the threaded nut. A 1-1/4-inch tubular pipe measures approximately 1.25 inches across its exterior.
Next, measure from the centerline of the tailpiece to the wall opening. Measure the vertical difference between the tailpiece outlet and wall connection. These two dimensions reveal whether a standard swivel P-trap can align naturally or whether an extension, offset tailpiece, or plumbing modification is necessary.
Photograph the existing washer positions and wall connection before disassembly. This small step is useful when several nuts and adapters appear similar.
Which Material Is Best?
White polypropylene is the best general-purpose material for plumbing concealed inside a vanity. Brass is preferable when the pipes are exposed and appearance matters. Corrugated flexible tubing is easy to position, but its ridged interior makes it a poor permanent drainage path.
| Kit material | Typical price | Best application | Main limitation |
| White polypropylene | $7-$18 | Closed vanity cabinet | Can crack when overtightened |
| Black ABS tubular plastic | $10-$25 | Matching black drainage systems | Availability varies by region |
| Chrome-plated brass | $30-$90 | Pedestal sinks and exposed plumbing | Finish can pit or corrode |
| Decorative brass finish | $50-$180 | Premium floating vanities | High cost and finish-specific parts |
| Corrugated flexible plastic | $8-$25 | Temporary emergency alignment | Ridges retain hair and sludge |
Plastic Slip-Joint Kits
Polypropylene kits resist rust, cut easily, and can usually be assembled by hand. Their removable slip-joint connections also make trap cleaning straightforward.
Plastic is forgiving, but not indestructible. Pliers can distort a nut, split a threaded collar, or compress a washer unevenly. A properly aligned plastic joint needs modest compression, not heavy force.
Brass and Decorative Kits
Brass P-traps provide a cleaner appearance beneath pedestal sinks, wall-mounted basins, and open consoles. Available finishes may include polished chrome, brushed nickel, matte black, brass, bronze, or gold-tone coatings.
Purchase the trap, extension tube, escutcheon, and drain assembly from compatible product lines when possible. Similar finish names from separate manufacturers can differ visibly under bathroom lighting.
Why Flexible Accordion Pipes Are a Weak Choice
Corrugated pipes solve alignment problems by bending, but each ridge slows flow and gives toothpaste, hair, soap residue, and biofilm a place to accumulate. The pipe can also sag, creating an unintended second water pocket.
The 2024 International Residential Code calls for traps with smooth, uniform internal waterways. Local enforcement and product approval vary, but that smooth-waterway requirement is one reason corrugated assemblies may be rejected.
Use rigid tubular components for a permanent repair. If rigid parts cannot align, correct the geometry rather than hiding it with an accordion connector.
How Do You Choose the Correct Kit?
Select a kit by answering four practical questions: What diameter is the tailpiece, where does the drain enter the wall, how visible will the plumbing be, and how far apart are the connections?
Bathroom Sink Drain Pipe Kit Buying Checklist
- Confirm whether the wall connection requires a 1-1/4-inch or reducing adapter.
- Measure the sink tailpiece outside diameter.
- Check whether the tailpiece is long enough to enter the trap bend.
- Measure the horizontal reach to the wall drain.
- Inspect the wall adapter threads for cracks or corrosion.
- Decide whether the plumbing will be visible.
- Confirm that replacement washers and nuts are included.
- Avoid creating an S-trap, double trap, or corrugated permanent connection.
- Check local plumbing requirements before changing venting or fixed pipework.
Best Kit by Installation Type
| Installation | Recommended configuration | Important accessory |
| Standard vanity cabinet | White 1-1/4-inch polypropylene P-trap | Tailpiece extension if needed |
| Pedestal sink | Chrome or finish-matched brass P-trap | Decorative escutcheon |
| Floating vanity | Decorative rigid trap kit | Matching wall flange |
| Vessel sink | 1-1/4-inch kit with longer tailpiece | Extension or compatible drain body |
| Slight horizontal misalignment | Swivel P-trap with cuttable arm | Offset tailpiece when necessary |
| 1-1/2-inch wall adapter | 1-1/4-inch bathroom P-trap | Reducing slip-joint washer |
How Much Does a Bathroom Sink Drain Kit Cost?
A basic plastic bathroom sink drain pipe kit typically costs about $7-$18, while decorative brass assemblies commonly cost $30-$180 depending on construction and finish. Total DIY cost increases when the installation requires a new pop-up drain, extensions, adapters, or cutting tools.
| Expense | Typical range | Notes |
| Plastic P-trap kit | $7-$18 | Suitable for most enclosed vanities |
| Brass or chrome P-trap | $30-$90 | Standard exposed installation |
| Premium decorative trap | $50-$180 | Designer finish or heavy brass |
| Tailpiece extension | $4-$15 | Available in plastic or metal |
| Pop-up drain assembly | $15-$80 | Usually sold separately |
| Small hand tools | $15-$45 | Pliers, saw, file, and tape measure |
| Plumber replacement | $150-$350 | Varies by access and local labor rates |
| Wall-pipe modification | $250-$800+ | May require opening the wall |
Product prices change by brand, finish, and location. The largest cost increase occurs when the wall outlet is too high, severely offset, damaged, or connected to improper fixed plumbing.
How to Install a Bathroom Sink Drain Pipe Kit
A straightforward P-trap replacement normally takes 30-60 minutes. The main success factor is natural alignment: every pipe should enter its adjoining fitting straight, without being pulled sideways by the nut.
Before You Start
| Requirement | Typical need |
| Difficulty | Beginner to intermediate |
| Working time | 30-60 minutes |
| Water shutdown | Usually unnecessary for trap-only work |
| Main tools | Bucket, pliers, tape measure, saw, file |
| Materials | P-trap kit, washers, extension if required |
| Safety | Gloves and eye protection |
Step 1: Place a Bucket Under the Trap
Place a wide bucket or shallow pan beneath the P-trap. The bend contains wastewater even when the sink appears empty.
Clear stored items from the cabinet and provide enough lighting to see each washer. You will know the area is ready when both trap nuts can be reached without moving the bucket.
Step 2: Remove the Existing Trap
Loosen the slip-joint nuts by hand. Use tongue-and-groove pliers gently when mineral buildup or corrosion prevents movement.
Support the trap while loosening the second nut because retained water will spill as the assembly drops. If metal parts are badly corroded, cut the replaceable tubular section rather than twisting the permanent wall plumbing.
Step 3: Clean and Inspect the Connections
Clean the tailpiece and wall adapter with a cloth. Remove old washer fragments, sludge, corrosion flakes, and hardened sealant.
Check for split nuts, crushed tubing, damaged threads, and cracks around the wall adapter. Reusing a cracked adapter almost guarantees another leak.
Step 4: Dry-Fit the New Components
Assemble the trap bend and arm loosely before adding final compression. Swing the bend beneath the tailpiece and slide the arm toward the wall adapter.
The pipes should overlap far enough to remain secure after tightening. Do not stretch the trap outward or force the tailpiece sideways. Successful dry fitting means the joints remain aligned even when you briefly release your hands.
Step 5: Cut the Trap Arm or Extension
Mark excess length while the pipe is inserted into its receiving fitting. Remove the pipe and make a square cut with a fine-tooth hacksaw or tubular pipe cutter.
Deburr the inside and outside edges. A rough or angled end can damage the washer and prevent the pipe from seating evenly.
Step 6: Position the Nuts and Washers
Slide the slip-joint nut onto the pipe first, with its threads facing the receiving fitting. Install the tapered washer next.
The washer’s narrow tapered edge generally faces the fitting that receives the pipe, while the flat side faces the nut. Follow the kit manufacturer’s diagram because washer profiles can differ.
Step 7: Assemble and Tighten the Joints
Insert each pipe straight into its mating fitting. Thread the nuts by hand until snug while holding the trap level and aligned.
Oatey’s 2026 installation guidance states, “Do not overtighten.” Excessive force can crack plastic fittings or strip threads. Use pliers only for a small additional adjustment when hand tightening does not stop minor seepage.
Step 8: Test for Leaks
Run the faucet for 30-60 seconds while watching every joint. Fill the basin partially, then release the stopper to create a higher-volume test.
Wipe each connection with dry tissue or paper towel. Even a small weeping leak becomes obvious on dry paper. Retest after several hours because a slightly twisted washer may begin leaking after the assembly settles.
Does a P-Trap Need Plumber’s Tape?
Slip-joint P-traps normally do not need PTFE plumber’s tape because their washers create the watertight seal. The threads pull the joint together but are not themselves the sealing surface.
Adding tape to plastic slip-joint threads can increase resistance, create a false sense of tightness, and make future disassembly harder. Pipe thread sealant belongs on compatible tapered threaded connections, not automatically on every visible thread.
Oatey likewise advises that slip-joint connections seal with washers rather than thread tape. If a slip joint leaks, correct the alignment, washer orientation, pipe condition, or nut tension instead of wrapping the threads.
What If the Pipes Do Not Line Up?
A small horizontal offset can usually be corrected by rotating the P-trap bend and adjusting the trap arm. A large vertical or sideways mismatch requires a proper extension, offset tailpiece, or relocation of the fixed drain connection.
Never pull the trap into position using the nuts. Side pressure produces distorted washers and delayed leaks.
Practical Alignment Solutions
| Alignment problem | Correct solution | Avoid |
| Tailpiece slightly too short | Add a straight extension | Raising the trap with tension |
| Tailpiece too long | Cut it square | Creating an unnecessarily deep trap |
| Wall opening slightly sideways | Swing the trap bend | Corrugated hose |
| Large sideways offset | Install an approved offset tailpiece | Multiple improvised elbows |
| Wall outlet too high | Modify fixed drainage | Reversing or flattening the trap |
| Drain exits through floor | Have configuration reviewed | Converting directly to an S-trap |
An S-trap drops vertically after the trap rather than continuing through a properly vented horizontal arm. Current model codes generally prohibit S-traps because flowing water can siphon away the protective seal.
Common Installation Mistakes
Installing the Washer Backward
A reversed tapered washer may appear tight while leaving a narrow leak path. Remove the nut, replace damaged washers, and orient the taper toward the receiving fitting.
Overtightening Plastic Nuts
Heavy tightening deforms washers and can split plastic threads. Begin with hand pressure, test the joint, and add only a slight turn when needed.
Gluing Slip-Joint Components
Tubular slip-joint fittings are designed to be removed for cleaning. PVC or ABS solvent cement should only be used on compatible solvent-weld fixed drainage components, not on compression washers or removable trap tubing.
Creating a Double Trap
Connecting a new P-trap to an existing concealed trap can slow drainage and interfere with venting. Each fixture generally requires one effective trap, not two traps in series.
Leaving the Trap Arm Sloped Backward
The trap arm should drain toward the wall connection rather than back toward the trap. A backward slope leaves residue in the arm and contributes to odors or slow flow.
Bathroom Sink Drain Troubleshooting
| Symptom | Likely cause | Corrective action |
| Drip at a slip nut | Twisted washer or misalignment | Disassemble, realign, and replace washer |
| Leak at wall adapter | Damaged reducing washer or adapter | Replace the washer or adapter |
| Slow drain after installation | Trap arm obstruction or poor geometry | Clean and correct alignment |
| Repeated clogging | Corrugated pipe or excessive buildup | Install smooth rigid tubing |
| Sewer odor | Dry trap, siphonage, leak, or vent issue | Refill trap and investigate seal loss |
| Gurgling | Venting problem or downstream restriction | Inspect vent and drain line |
| Trap separates | Insufficient pipe insertion | Recut or replace with correct-length tubing |
| Metal pipe corrosion | Age, chemicals, or coating failure | Replace affected brass components |
Why Does a New Trap Still Leak?
A new P-trap usually leaks because of assembly geometry rather than product failure. Check that every tube enters straight, each washer sits flat, and no pipe is cut too short.
Dry the connection completely before retesting. Water traveling along the outside of a tailpiece may make a lower joint appear defective even when the actual leak begins at the sink drain flange.
Why Does the Bathroom Sink Smell?
A bathroom sink may smell when the P-trap loses water, contains decaying residue, or receives gas through a damaged or improperly vented connection. Run water for 20-30 seconds in infrequently used sinks to restore an evaporated seal.
Persistent odor after refilling the trap requires inspection. A leaking trap, failed drain-body seal, blocked vent, biofilm-filled overflow passage, or improper trap arrangement may be responsible.
When Should You Call a Plumber?
Call a plumber when the fixed wall drain is damaged, the wall opening is too high, the installation forms an S-trap, or repeated gurgling suggests a venting or downstream drainage problem. These conditions cannot be corrected reliably by changing only the removable kit.
Professional help is also appropriate when:
- The wall adapter rotates inside the wall.
- Wastewater backs up from another fixture.
- The cabinet floor has water damage or mold.
- Old metal piping breaks during removal.
- The drain line requires relocation.
- Local rules require a permit or licensed installer.
Replacing a standard accessible P-trap is a reasonable DIY task. Altering concealed drainage and vent piping is a different level of work.
Expert Rules of Thumb
First, alignment matters more than tightening force. A correctly aligned slip joint usually seals with moderate hand pressure, while a forced joint may leak regardless of how tightly the nut is turned.
Second, buy rigid extensions before flexible connectors. Straight extensions and swivel adjustments preserve a smooth waterway and remain easy to clean.
Third, replace inexpensive sealing parts during reassembly. Old tapered washers may look intact but remain permanently compressed. New washers cost little compared with repairing cabinet water damage.
Frequently Asked Questions
Is a sink drain assembly the same as a P-trap kit?
No. A sink drain assembly normally includes the flange, stopper mechanism, drain body, and tailpiece connected directly to the basin. A P-trap kit connects that tailpiece to the wall drain. Some packages combine components, but most installations require checking both product groups separately.
Can I use a 1-1/2-inch trap on a bathroom sink?
A 1-1/2-inch trap may be connected in some approved configurations, but a standard bathroom lavatory commonly uses a 1-1/4-inch tailpiece and trap. Using unnecessary reducers and oversized components can complicate alignment. Match the fixture outlet, approved wall connection, and local code.
How long does a plastic bathroom P-trap last?
A protected polypropylene P-trap can remain usable for many years when it is aligned correctly and not exposed to impact, excessive heat, or aggressive chemicals. Replacement becomes necessary when threads crack, tubing deforms, washers no longer seal, or repeated disassembly has damaged the joint surfaces.
Can I replace only the leaking washer?
Yes, when the pipe, nut, threads, and fitting remain undamaged. Match the washer to the tubing diameter and joint design. Replace the nut as well when it is split, cross-threaded, or distorted. Persistent leakage after a washer replacement usually indicates misalignment or damaged tubing.
Should the P-trap be full of water?
The curved bottom of the P-trap should retain enough water to create its designed seal, but the entire trap assembly should not remain completely full. Standing water above the normal trap level may indicate a clog, poor slope, improper configuration, or restricted drain farther downstream.
Can a bathroom P-trap drain through the floor?
Floor-drain configurations require careful attention to venting because a direct downward arrangement can create a prohibited S-trap. Do not assume that an S-shaped retail kit makes the installation compliant. A plumber should evaluate the existing vent and determine the approved local configuration.
Conclusion
The correct bathroom sink drain pipe kit is usually a rigid 1-1/4-inch P-trap assembly matched to the sink tailpiece, wall adapter, available space, and visibility of the plumbing. Choose polypropylene for a concealed vanity, decorative brass for exposed installations, and proper rigid extensions for alignment.
Measure before purchasing, keep the trap level, orient each washer correctly, and test every connection with both running water and a partially filled basin. A properly fitted kit drains freely, remains serviceable for cleaning, and preserves the water seal that separates the bathroom from the drainage system.