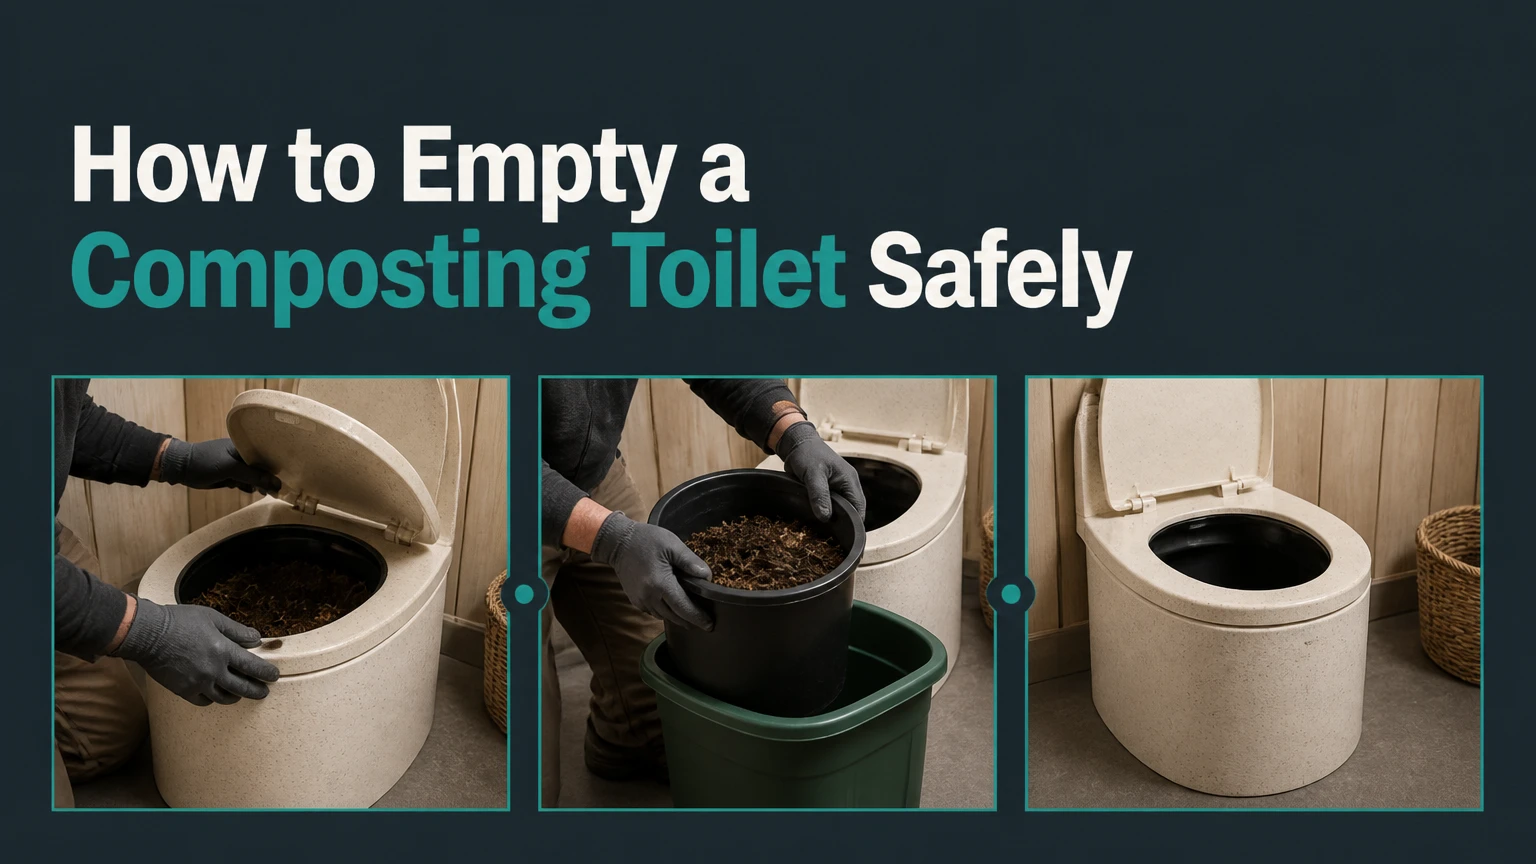
To empty a composting toilet, separate and remove the urine container first, then remove the solids chamber according to the toilet design, contain unfinished waste in a sealed bag or approved curing bin, clean compatible surfaces, add moist bulking material, and restore ventilation. Most self-contained units take 15-30 minutes, but local disposal rules and the manufacturer’s manual determine the safe final step.
Key facts at a glance
Urine-diverting toilets commonly need liquid removal every 2-5 days and solids removal every 2-6 weeks.
A composting toilet fan should normally remain operational unless the manufacturer specifically instructs you to disconnect it.
Human waste that looks composted is not automatically safe for edible gardens, lawns, or unrestricted handling.
Standard plastic bags do not compost, while certified compostable bags may require a commercial composting facility.
Liquid disposal rules vary by jurisdiction, especially for RVs, boats, and installations without an approved wastewater connection.
The owner’s manual controls the correct emptying sequence, starter-layer requirement, cleaning chemicals, and replacement parts.
Before You Start: Confirm the Toilet Design
Identify the toilet type before opening the housing, because a self-contained urine-diverting unit is emptied differently from a batch toilet or a central composting reactor. Look for a removable urine bottle, a solids drawer, a mixing crank, a heating element, or a chute leading to a chamber below the floor.
Identify your toilet type
| Toilet design | What you will see | Typical emptying method | Typical interval |
|---|---|---|---|
| Self-contained urine-diverting | Front liquid bottle and rear solids chamber | Remove bottle, then bag or withdraw solids | Liquid every 2-5 days, solids every 2-6 weeks |
| Self-contained batch or crank | Single chamber, crank, possible heater | Open service hatch or remove chamber contents | Every 2-4 weeks |
| Central or split system | Bowl connected to remote reactor | Open lower access door and remove aged material | Every 6-12 months |
| Portable separating dry toilet | Removable urine bottle and solids container | Remove each container independently | Liquid every 1-4 days, solids every several days |
These intervals are typical operating ranges, not universal schedules. Occupancy, chamber volume, ambient temperature, toilet paper use, ventilation, and whether the unit receives urine all change the fill rate. A two-person RV may empty a solids chamber weekly, while a part-time cabin may go several weeks between service visits.
What does a composting toilet actually contain?
A composting toilet may contain fresh fecal material, partially decomposed material, toilet paper, carbon bulking agent, urine, or finished compost-like material. The appearance alone cannot confirm pathogen destruction, because safe treatment depends on time, temperature, moisture, aeration, and system design.
Many compact RV toilets are better described as dry or separating toilets with a composting stage. Their small chambers often require secondary curing after removal rather than direct garden use. The 2024 World Health Organization sanitation guidance emphasizes that treated excreta require validated treatment barriers before unrestricted reuse, so handle every removed solids batch as potentially infectious.
How to Empty a Composting Toilet
Empty a composting toilet in six controlled stages: prepare the area, isolate the power safely, remove liquid, remove solids, clean the components, and reassemble with fresh bulking material. Work outdoors or in a well-ventilated service area, keep the container upright, and avoid creating dust or splashes.
Before You Start
| Requirement | Typical amount or time | Practical specification |
|---|---|---|
| Work time | 15-30 minutes | Add 15 minutes for a first-time service |
| Gloves | 1 pair | Disposable nitrile, long cuff, 6-8 mil preferred |
| Eye protection | 1 set | Safety glasses or sealed splash goggles |
| Mask | 1 | Use a well-fitting respirator if dust or aerosols are possible |
| Waste bags | 1-2 | Heavy-duty, leak-resistant; compostable only if the receiving facility accepts them |
| Bulking agent | 2-8 liters | Moist coco coir, sawdust, or approved manufacturer material |
| Cleaning solution | 250-500 milliliters | Mild soap solution or the product named in the manual |
| Absorbent material | 0.5-1 kilogram | Sawdust, paper towels, or absorbent pads for spills |
Do not service a full chamber immediately after use if waiting is practical. Allowing the fan to run for several hours reduces moisture and odor, but it does not sterilize the contents. Keep children, pets, and food-preparation equipment away from the service area.
Step 1: Prepare the service area
Place a heavy-duty bag, lidded container, absorbent pads, fresh liner, bulking material, water, and cleaning supplies within reach. Use a stable surface with enough clearance to set the toilet upper section down without touching contaminated surfaces.
Inspect the manufacturer’s access points before moving anything. Some models have a front drawer, others require the seat housing to lift, and central systems may have a lower access hatch that should never be opened from the bathroom bowl.
You will know the area is ready when the replacement liner, cap, and receiving container are open and positioned before the waste chamber is exposed. A common mistake is opening the toilet first and then searching for a bag, which increases spill and odor time.
Step 2: Secure power without disabling required ventilation
Follow the manual for fans, heaters, mixers, and electrical controls. Many urine-diverting toilets can remain connected to power while the liquid bottle is removed, and keeping the exhaust fan running helps control odor; disconnect power only where the manufacturer requires it for safe access to moving or heated parts.
If the unit has a crank, agitator, heating element, or powered lid, switch that component off and unplug it before reaching into the service area. Do not handle a 12-volt or 120-volt connection with wet gloves. For hard-wired systems, use the designated isolator rather than pulling wires.
You will know power is safely isolated when the crank, heater, or service indicator is inactive and the manual’s shutdown condition is met. A common mistake is unplugging the ventilation fan by default, allowing odor and moisture to move back into the room.
Step 3: Remove and manage the urine container
Close the toilet lid, release the latches or retaining clips, and lift the upper section only as far as the design requires. Cap the urine bottle before carrying it, keep it vertical, and inspect the gasket, hose, and bottle neck for cracks or mineral buildup.
Empty urine only at a location permitted by local rules and the installation’s sanitation plan. A connected sewer, approved RV dump station, designated boat pump-out facility, or municipal wastewater point is generally more defensible than an improvised outdoor discharge. Do not assume that a 1:10 water dilution makes urine legal for disposal on plants.
Rinse the bottle with clean water. For urine scale, use the manufacturer-approved acid cleaner or a small amount of white vinegar if the manual permits it, and never mix vinegar with bleach or chlorine products.
You will know the liquid stage is complete when the bottle is capped, empty, rinsed, and seated without rocking. A common mistake is forcing a bottle into place while the seal is folded, which causes urine to leak into the solids chamber.
Step 4: Remove the solids chamber or waste liner
Open the service hatch, unlatch the upper housing, or withdraw the solids drawer according to the manual. Keep the chamber level and move slowly, because partially decomposed material can shift toward the opening.
For a lined chamber, gather the liner’s upper edges without squeezing the contents, twist the neck several times, and secure it with a tight knot or cable tie. Place the first bag inside a second leak-resistant bag if the material is wet, the trip is long, or the receiving facility requires double containment.
For an unlined crank toilet, rotate the mixing mechanism only as directed, position a large bag around the discharge opening, and use the designed removal route. Do not automatically turn a fixed toilet upside down. Inverting a unit can damage the fan, heater, seals, or wiring and can spread material through the vent system.
Some manufacturers recommend leaving a thin starter layer, while others specify complete removal and a defined cleaning process. Follow the manual rather than assuming old material is needed for biological “seeding.” The main biological controls are adequate carbon, oxygen, moisture, and time.
You will know the chamber is empty when no material obstructs the outlet, the liner is intact, and no liquid is pooling below the solids area. A common mistake is scraping aggressively around the urine separator, which can dislodge its seal and create the leak that caused the wet chamber.
Step 5: Dispose of or cure the removed solids
Use the disposal route required by local health, wastewater, solid-waste, and campground rules. A sealed bag may be accepted as ordinary refuse in some locations, while other jurisdictions require a permitted composting, sewage, or sanitation facility.
Do not place untreated or partially treated human waste into a food-garden compost pile. A dedicated, covered curing system can be appropriate where local rules allow it, but the container must exclude children, pets, rodents, and stormwater. Label the container with the date and contents.
Finished material from a large, engineered composting toilet may have a specified curing period and approved end use. Small portable units often cannot maintain validated thermophilic conditions, so their removed solids should remain restricted rather than spread around ornamental or edible plants.
Step 6: Clean, re-line, and prime the toilet
Wipe the solids chamber, urine separator, bottle seat, lid, and accessible seals with the approved cleaner. Use a damp cloth rather than a dry brush when removing residue, because dry brushing can generate contaminated dust. Avoid bleach, quaternary disinfectants, solvents, and fragranced chemicals unless the manufacturer explicitly approves them.
Install a new liner when the toilet design uses one. Add bulking agent until the chamber has the manufacturer’s required starting depth, commonly 2-8 liters for compact self-contained units. Coco coir should feel damp like a wrung-out sponge, not drip when squeezed.
Reconnect the ventilation fan, restore the heater or mixer if applicable, and check every latch. Run the fan for 10-15 minutes while checking for leaks, abnormal noise, or air escaping into the room.
You will know the restart worked when the fan draws air toward the vent, the urine bottle remains dry externally, and the solids chamber contains a loose, evenly distributed carbon layer. A common mistake is adding a large volume of wet coir, which creates a dense, oxygen-poor mass.
How Often Should You Empty Each Part?
Empty the liquid container when it reaches its marked capacity or before travel, and empty solids according to fill level and safe handling rather than a calendar alone. Typical liquid intervals are 1-5 days, while compact solids chambers commonly require service every 2-6 weeks.
| Use case | Liquid service | Solids service | Main limiting factor |
|---|---|---|---|
| One person in an RV | Every 3-5 days | Every 3-6 weeks | Bottle volume and road movement |
| Two people in an RV | Every 1-3 days | Every 1-3 weeks | Urine capacity and toilet paper volume |
| Two people in a part-time cabin | Every 3-7 days during occupancy | Every 3-8 weeks | Chamber moisture and seasonal temperature |
| Four-person full-time home | Depends on plumbing or reactor | Every 6-12 months for large systems | Reactor capacity and access design |
| Portable separating toilet | Every 1-2 days | Every 2-7 days | Small container volume |
Empty the toilet earlier when odors increase, the solids surface reaches the outlet, the crank becomes difficult, the urine bottle is more than three-quarters full, or liquid appears in the solids chamber. Travel adds another reason to service early because vibration can loosen caps and move material into seals.
Which Disposal Method Fits Your Situation?
The correct disposal method depends on whether the material is urine, partially treated solids, or validated finished compost, and on the rules at the location. No single disposal method is legal or safe everywhere.
| Material | Common receiving location | Do not assume | Practical check |
|---|---|---|---|
| Separated urine | Sewer, RV dump, boat pump-out, approved wastewater point | Outdoor plant application is universally permitted | Ask the local authority or facility operator |
| Bagged fresh solids | Approved solid-waste or sanitation facility | A compostable label guarantees acceptance | Confirm bag and human-waste rules |
| Partially composted solids | Dedicated permitted curing container | A normal backyard compost bin is suitable | Check local health and environmental regulations |
| Finished material from engineered system | Approved soil-amendment use | Dark appearance proves pathogen safety | Follow the system certification and curing instructions |
Compostable bags need special care. ASTM D6400 or EN 13432 certification addresses performance in defined commercial composting conditions, not necessarily a backyard pile, landfill, septic system, or marine toilet. A bag that remains intact may be preferable to a leak, but it still requires the correct receiving stream.
Never flush solids or a bag into a conventional toilet. Do not pour solids into a septic tank, storm drain, dry well, surface water, or public bin unless that disposal route expressly accepts the material.
What Changes for RVs, Cabins, and Central Systems?
Installation context changes the emptying procedure because transport, freezing, access, and occupancy alter the risk. RV users need secure containment, cabin owners need seasonal protection, and central-system owners must use the reactor’s access procedure rather than lifting the bathroom bowl.
RV or van installation
Empty the liquid bottle before driving, cap it tightly, and store it upright if the design permits temporary removal. Secure the solids chamber and inspect the vent cap after travel, especially if gravel roads or strong crosswinds may have affected the installation.
Keep spare caps, two waste bags, absorbent pads, nitrile gloves, and a compatible bottle in the service kit. A portable unit that sits unused for several weeks should be emptied and rinsed before storage, because stagnant residue and warm interiors encourage odor and insect activity.
Seasonal cabin
Before freezing weather, remove liquid from bottles, hoses, and low points that can hold water. Follow the manual for antifreeze protection, since automotive antifreeze can damage seals and introduce hazardous chemicals.
For a cabin that sits unused, leave the solids chamber in the condition specified by the manufacturer. Some systems need a dry, empty chamber; others need a carbon layer. Keep the vent open as designed, prevent rain entry, and inspect for insects before the next use.
Central or split system
Central systems usually empty through an exterior or basement access door. Do not lift the bathroom bowl or pour water into the reactor unless the system documentation permits it, because the reactor depends on controlled airflow, drainage, and composting volume.
Remove only the aged material identified by the maintenance schedule. Wear respiratory and splash protection, keep the access area isolated, and record the removal date. Large systems may require a service contractor, especially when access is below a floor or the reactor contains years of material.
Common Mistakes and How to Fix Them
The solids chamber is wet or soupy
A wet solids chamber usually indicates urine entering the solids area, excessive rinse water, insufficient carbon, or a blocked drain. Remove free liquid with absorbent material, add dry approved bulking agent, inspect the urine separator seal, and confirm that users sit correctly.
Do not solve a persistent leak by adding more and more sawdust. Excessive carbon can reduce usable chamber volume while leaving the source problem untouched.
The bathroom smells after emptying
Strong indoor odor usually means the fan is off, the vent is blocked, the housing seal is open, or air is bypassing the intended route. Check fan operation, fuse or power supply, vent tubing, exterior insect screen, and lid seals.
A functioning fan should pull air from the toilet toward the outside. Hold a small tissue near the intended airflow point only if the manual permits access, and never place fingers near a powered mixer or fan blade.
Flies or fungus gnats appear
Insects usually indicate exposed moist material, a contaminated bulking supply, or an overly wet chamber. Seal the chamber, remove visible residue, replace damp bulking material, and inspect the vent for gaps.
Avoid spraying insecticide into the waste chamber unless the manufacturer approves it. Pesticides can damage seals and interfere with the biological process.
The crank becomes difficult to turn
A heavy crank commonly results from overfilling, compacted paper, excess moisture, or a foreign object. Stop forcing the handle, isolate power if the unit has a motor, remove material to the designed level, and inspect for blockage.
Never use a metal rod through the bowl unless the manual provides that procedure. Damage to a mixing blade can create a more expensive service failure.
Urine scale blocks the separator
White or tan mineral scale forms when urine dries on the bottle neck, hose, or separator. Remove the bottle, rinse the affected part, and use the approved descaling solution for the model.
Acid cleaners and chlorine cleaners must never be mixed. Rinse thoroughly before returning the component to service.
How Much Time and Money Does Emptying Take?
Routine emptying usually costs $2-$15 in consumables and takes 15-30 minutes, while a leak, blocked vent, damaged seal, or permitted secondary-curing setup can increase the cost substantially.
| Service item | Typical cost | Typical time | When it applies |
|---|---|---|---|
| Nitrile gloves and absorbent pads | $2-$5 | 2 minutes | Every service |
| Approved liner or heavy-duty bag | $1-$5 | 3-5 minutes | Lined or wet systems |
| Coco coir or sawdust | $2-$8 | 3-5 minutes | Priming and moisture control |
| Vinegar or approved descaler | $1-$10 | 5-15 minutes | Bottle and separator scale |
| Replacement seal or hose | $10-$50 | 20-60 minutes | Leakage or deterioration |
| Commercial disposal or dump fee | $0-$25 | 10-30 minutes | Location-dependent |
Treat these as typical North American retail ranges, not fixed prices. Central systems, remote reactors, and regulated waste services can cost more because access, transport, and local permits affect labor.
FAQ
Can you dump composting toilet waste in a regular trash bin?
Only where the local waste authority and collection provider allow bagged human waste. Confirm the rule before disposal, use leak-resistant double containment when required, and never place loose material in a public bin. A compostable bag may still be rejected if the facility sends waste to a landfill or lacks a compatible composting process.
Can toilet paper go into a composting toilet?
Usually, but only in the quantity and type supported by the toilet manual. Rapidly degradable, single-ply paper adds less volume than thick or quilted paper, while wet wipes, sanitary products, and paper towels can retain moisture or block mechanisms. Some small separating toilets work better when paper is collected separately.
Is composting toilet material safe for a vegetable garden?
Do not use removed material on edible crops unless the system has a validated treatment process and local rules specifically permit that use. Compact self-contained toilets often produce partially treated waste, not verified pathogen-free compost. Keep curing material covered and isolated from food production, children, pets, and groundwater.
What should you do if the urine bottle leaks?
Stop using the toilet, place an absorbent pad under the bottle, cap and remove it, then inspect the gasket, bottle neck, hose, and retaining clips. Clean the spill with the approved product, replace damaged seals, and test the empty system with a small amount of clean water before resuming use.
Can you empty a composting toilet while it is still warm?
Yes, if the unit is safe to access and the manual permits service at that time, but allow powered heaters and moving parts to cool and isolate them first. Heat does not prove that pathogens have been destroyed. Use gloves and eye protection even when the material looks dry or finished.
How do you prevent odor after emptying?
Keep the ventilation path working, maintain the correct carbon-to-moisture balance, prevent urine from entering the solids chamber, and close every service seal. Add damp rather than saturated bulking agent, remove wet material promptly, and inspect the exterior vent for insects, snow, leaves, or other obstructions.
The Bottom Line
Emptying a composting toilet safely means controlling three separate risks: liquid leakage, contact with incompletely treated solids, and airflow failure. Remove the urine container first, contain the solids without squeezing or dusting them, follow the manufacturer’s cleaning and starter-layer instructions, and use a disposal or curing route approved for human waste.
The safest answer to “how to empty a composting toilet” is therefore design-specific. A small urine-diverting RV toilet may take 15 minutes every few weeks, while a central reactor may need scheduled service only twice a year. Local sanitation rules, validated treatment, and the toilet manual determine what happens after removal.