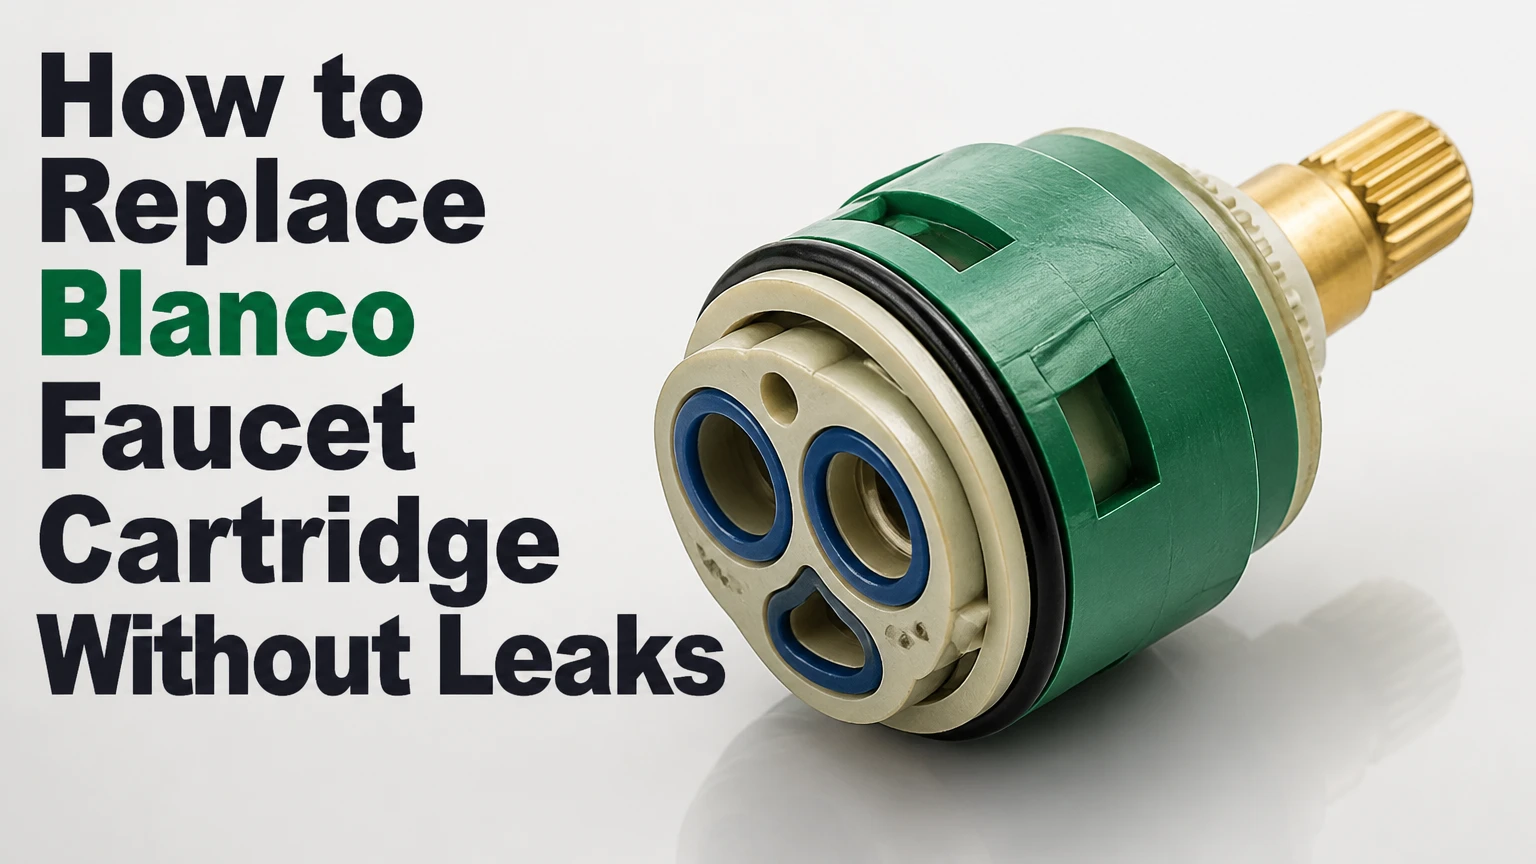
To replace a Blanco faucet cartridge, shut off both water supplies, remove the handle and retaining nut, extract the old ceramic cartridge, clean the valve seat, install the correctly matched replacement, and test the faucet. Most single-lever Blanco kitchen faucets take 20-40 minutes, but exact cartridge fit and locating-pin alignment determine success.
Key Facts at a Glance
A Blanco single-lever faucet usually uses a ceramic-disc cartridge that controls both flow and temperature.
Cartridge diameter alone does not prove compatibility; model, stem shape, pin layout, body depth, and orientation also matter.
Shut off hot and cold supplies before loosening the retaining nut, then open the faucet to release pressure.
A new cartridge will still leak if an old bottom seal remains trapped inside the valve body.
Typical DIY replacement cost is $20-$75 for the cartridge, plus basic hand tools if required.
A stiff handle after installation usually indicates excessive retaining-nut pressure, incorrect seating, or debris.
What a Blanco Cartridge Does
A Blanco faucet cartridge is the internal control valve that mixes hot and cold water and regulates flow from a single lever. Most modern single-handle Blanco kitchen faucets use two polished ceramic discs inside a cartridge housing; the discs rotate or slide so their openings admit water when aligned and block water when misaligned.
The cartridge is not the same component as the flexible pull-down hose, spray head, aerator, supply line, or faucet-body seal. A cartridge replacement addresses internal valve problems, especially a spout drip when the handle is fully closed. It will not repair a cracked faucet body or a leaking connection under the sink.
Ceramic discs resist wear, but grit and mineral scale can damage their sealing surfaces. A faucet may therefore begin dripping after years of use, after plumbing work introduces debris, or after a cartridge is disturbed without cleaning the valve seat.
Which symptoms indicate cartridge failure?
A worn or contaminated Blanco cartridge commonly causes a drip from the spout, water that continues flowing after shutoff, a rough or stiff lever, reduced flow through one temperature direction, or poor temperature control. A leak around the faucet base points more often to a body O-ring or deck seal, while a leak at a braided hose connection usually requires a connection repair rather than a cartridge.
| Symptom | Likely location | Cartridge replacement verdict |
|---|---|---|
| Spout drips with handle closed | Internal ceramic valve | Usually appropriate |
| Water leaks around handle stem | Cartridge stem or upper seal | Often appropriate |
| Water leaks at hose nut | Supply or pull-down hose connection | Not appropriate |
| Water leaks at deck plate | Base O-ring or mounting seal | Usually not appropriate |
| Low flow only at spray head | Aerator, screen, or diverter | Clean those parts first |
| Lever binds after repair | Nut pressure or cartridge alignment | Reinstall and adjust |
Before You Start
A first-time DIYer should budget 45-60 minutes, although the physical replacement often takes 20-40 minutes. The repair is suitable for a person comfortable working under a sink, provided the isolation valves operate and the faucet is not corroded beyond disassembly.
Time: 20-40 minutes for a straightforward replacement; 60-90 minutes if the handle or cartridge is seized.
Difficulty: Moderate, because small fasteners and exact alignment matter.
Typical part cost: $20-$75 for a genuine replacement; $15-$35 for a compatible cartridge. Prices vary by country, model, and availability.
Water shutoff: Two under-sink isolation valves, or the home’s main shutoff if local valves do not work.
Tools and materials: One replacement cartridge, 2.5 mm Allen key if it fits the set screw, small flat screwdriver, adjustable wrench, six-inch adjustable pliers, cloth, flashlight, mild cleaner, and a small amount of silicone faucet grease.
Do not use petroleum jelly on rubber seals. Petroleum products can swell some elastomers; silicone-based faucet grease is the safer choice when the cartridge manufacturer permits lubrication.
Place a towel in the cabinet and cover the drain opening before removing the handle. A dropped grub screw can disappear into the drain trap, and residual water will otherwise soak the cabinet base.
Which Blanco Cartridge Do You Need?
The correct Blanco cartridge is identified by the faucet model and the removed cartridge, not by diameter alone. Measure the old part only after removal, and compare its overall height, stem profile, locating pins, bottom seal arrangement, and orientation with the replacement listing or Blanco parts documentation.
Blanco has sold faucets with different cartridge designs across markets and product generations. Names such as Culina, Solenta, Linus, Linee, Alta, Torino, and 109 can have model variations, so a visually similar replacement may still have the wrong stem or body depth.
| Identification feature | What to record | Why it matters |
|---|---|---|
| Cartridge diameter | 25, 35, or 40 mm, measured across housing | Controls valve-body fit |
| Overall height | Millimetres from base to stem shoulder | Prevents handle and cap misalignment |
| Stem profile | Flat, square, splined, or proprietary shape | Determines handle engagement |
| Bottom locating pins | Count, position, and centre spacing | Determines rotational and vertical seating |
| Top retaining feature | Nut shoulder, clip, or threaded collar | Must match faucet construction |
| Faucet model | Name, product code, market, and purchase year | Narrows the correct spare part |
The frequently cited 25 mm, 35 mm, and 40 mm categories are useful starting points, not universal Blanco specifications. A 35 mm cartridge from another manufacturer can have a different stem height or pin arrangement and still fail to fit.
How do you identify the faucet model?
Look for a model label on the original sales paperwork, beneath the sink, on the installation manual, or inside the faucet’s packaging. Photograph the faucet from the front and side, then photograph the removed cartridge beside a ruler. A distributor or Blanco service department can use those details more reliably than a generic online search.
Commonly listed Blanco replacement references include numbers such as 121895, 121896, and 122604, but part numbers are market- and model-dependent. Treat a seller’s compatibility list as a claim to verify, not as proof that every cartridge with the same diameter will work.
How to Replace Blanco Faucet Cartridge
The replacement consists of eight practical stages: isolate the water, remove the handle assembly, remove the retaining nut, extract the old cartridge, clean the cavity, install the new part, reassemble the handle, and test every connection. The most important factor is complete removal of the old seals before the new cartridge enters the valve body.
Step 1: Shut off water and release pressure
Turn the hot and cold isolation valves clockwise until they stop without forcing them. Open the Blanco faucet in the centre position and operate the spray head if fitted, allowing residual water to drain before placing a cloth around the valve body.
Success checkpoint: The faucet produces no continuing flow when the handle is moved through hot and cold positions.
Common mistake: Closing only one valve leaves pressure on the cartridge and can release a spray when the retaining nut is loosened.
If an isolation valve spins without stopping, leaks from its stem, or cannot close, stop and use the main water shutoff. Do not break a brittle valve by applying a long wrench.
Step 2: Protect the drain and remove the handle button
Cover the drain with a stopper or sink strainer. Locate the small decorative button or plug on the lever, then lift its edge with a fingernail or a thin flat screwdriver protected by tape.
Some Blanco handles use a logo or temperature marker as the removable cover. Work around the edge rather than levering against the visible finish.
Success checkpoint: The button comes off without a deep scratch, and the set-screw opening is visible.
Common mistake: Prying from the centre can deform a thin cap or leave a screwdriver mark.
Step 3: Loosen the set screw and lift off the handle
Insert the Allen key that fits the screw precisely. A 2.5 mm key is common on some Blanco designs, but the size is not universal, so do not force a loose key into the hex recess. Turn counterclockwise several revolutions, then pull the lever straight upward.
If the handle does not lift, rock it gently from side to side while pulling vertically. Do not twist hard against the cartridge stem because a bent stem can make the new cartridge unusable.
Success checkpoint: The handle separates and the cartridge stem remains centred in the faucet body.
Common mistake: Removing the set screw completely allows the tiny fastener to fall into the cabinet or drain.
Step 4: Remove the decorative cap
Unscrew the cap or shroud beneath the handle by hand, turning counterclockwise. Wrap the cap with a thick cloth if it is tight; use padded pliers only on a protected surface and only after confirming that the part is metal rather than thin plastic.
Mineral deposits can lock the cap to the retaining nut. Apply a small amount of warm water around the joint and wait several minutes before trying again. Avoid penetrating oil near drinking-water passages and visible faucet finishes.
Success checkpoint: The brass retaining nut is fully exposed and its flats are accessible.
Common mistake: Gripping the finished cap directly with channel-lock pliers causes permanent coating damage.
Step 5: Remove the retaining nut
Place an adjustable wrench on the brass retaining nut and turn counterclockwise. Hold the faucet body with your free hand so the faucet does not rotate in the countertop or strain the supply connections below.
Use controlled force. If the nut is heavily scaled, a short wrench extension may loosen it, but excessive force can damage the cartridge housing or rotate the entire faucet.
Success checkpoint: The nut is removed without turning the faucet body or twisting a supply hose.
Common mistake: Treating the nut as a compression fitting and tightening it aggressively during reassembly can make the new lever stiff.
Step 6: Extract the old cartridge and seals
Pull the cartridge straight up by its stem or upper body. If mineral scale has seized it, grip the stem gently with padded pliers and alternate small upward movements with rotational movement that follows the cartridge’s existing travel.
Inspect the valve cavity after removal. Old rubber seals may remain stuck to the bottom, and a second seal under the new cartridge creates excess height, uneven compression, or a leak.
Success checkpoint: The cavity is empty, and the old cartridge, bottom seals, and locating components are accounted for.
Common mistake: Levering against the faucet body with a screwdriver can gouge the sealing surface and create a permanent leak path.
Step 7: Clean and inspect the valve seat
Wipe the cavity with a lint-free cloth or cotton swab. Remove loose grit and scale without dropping debris into the water passages. Inspect the seat for cracks, deep corrosion, or a broken locating notch.
A cartridge that looks worn can sometimes improve after cleaning, but soaking the entire cartridge in vinegar is not a guaranteed repair. Acid may remove scale while leaving scratched ceramic discs, hardened seals, or a damaged stem. Replace the cartridge when the discs, housing, or seals show physical damage.
Success checkpoint: The cartridge cavity is clean, dry enough to inspect, and free of a second gasket.
Common mistake: Installing the new part over scale transfers grit directly onto the ceramic sealing surfaces.
Step 8: Install, tighten, and test the new cartridge
Apply a thin film of silicone faucet grease to approved external rubber seals. Align the cartridge’s bottom pins or tabs with the matching notches, then press it straight down without rotating or forcing it.
Replace the retaining nut and tighten it until snug, then add only a small additional movement if needed to eliminate leakage. Reinstall the cap, place the handle in its original orientation, tighten the set screw, and replace the decorative button.
Open both isolation valves slowly. Test cold, hot, mixed, full-flow, low-flow, closed, and spray modes, then inspect the base and connections with a dry tissue.
Success checkpoint: The lever moves smoothly, the spout stops completely, temperatures correspond to handle direction, and no tissue becomes wet.
Common mistake: Tightening the nut until the handle becomes stiff usually indicates excess compression, not a better seal.
Genuine or Compatible Cartridge?
A genuine Blanco cartridge is the lower-risk choice when the model is known, the faucet is under warranty, or the replacement is difficult to return. A compatible cartridge can reduce the purchase price, but only when its dimensional drawing and compatibility list match the removed part.
| Criterion | Genuine Blanco part | Compatible ceramic part | Practical consequence |
|---|---|---|---|
| Typical cartridge price | $20-$75 | $15-$35 | Compatible parts may save $5-$40 |
| Fit confidence | High when model is verified | Medium unless dimensions match | Wrong stem or pins can stop reassembly |
| Availability | Model-dependent, sometimes backordered | Often stocked online | Faster shipping may favor compatible stock |
| Warranty position | Usually best for faucet warranty | May complicate warranty claims | Keep receipt and part packaging |
| Handle feel | Calibrated to original design | Can vary by friction and seal fit | Test before discarding old part |
| Return risk | Lower with official part number | Higher with generic listings | Buy from a seller accepting returns |
The best budget strategy is not buying the cheapest cartridge. It is removing the old cartridge first, recording every dimension, and selecting a compatible part with a published drawing and return policy.
Should You Clean the Cartridge or Replace It?
Clean a removable cartridge only when the symptom began after plumbing work and the ceramic surfaces and seals remain undamaged. Replace the cartridge when it drips continuously, has scratched discs, split seals, a bent stem, a cracked housing, or a rough action that remains after the valve seat is cleaned.
A faucet aerator or spray screen is a better first cleaning target when flow is weak but the faucet shuts off normally. A diverter is more likely than the cartridge when water will not switch correctly between the main spout and pull-down spray head.
| Condition found | First action | Expected result |
|---|---|---|
| Loose grit in valve cavity | Clean cavity and install cartridge | Flow and shutoff may recover |
| White scale on external seals | Replace cartridge seals or cartridge | Better seating and handle feel |
| Scratched ceramic discs | Replace cartridge | Drip should stop if body is sound |
| Blocked aerator screen | Remove and rinse screen | Flow improves without valve work |
| Cracked valve body | Replace complete faucet | Cartridge cannot restore structural integrity |
| Damaged supply hose | Replace hose and seal | Under-sink leak is addressed |
How Much Time and Money Does Replacement Take?
A typical Blanco cartridge replacement costs $20-$75 for a genuine part and $15-$35 for a compatible part, with a DIY duration of 20-40 minutes when the handle, cap, and cartridge are not seized. Professional service commonly adds a local call-out and labor charge, often producing a total of roughly $100-$250 in the United States before unusual access or replacement-faucet costs.
Regional pricing differs substantially. A plumber may charge more when the isolation valves fail, the faucet must be removed from a crowded cabinet, or the replacement cartridge is not available locally.
| Repair scenario | Typical time | Typical parts cost | Likely total DIY spend |
|---|---|---|---|
| Standard single-lever replacement | 20-40 minutes | $20-$75 | $20-$90 |
| Compatible cartridge replacement | 25-50 minutes | $15-$35 | $15-$60 |
| Seized cap or cartridge | 60-90 minutes | $20-$75 | $20-$100 |
| New isolation valve required | 1-2 hours | $15-$50 per valve | $35-$150 |
| Professional cartridge service | Under 60 minutes onsite | $20-$75 | $100-$250 typical |
These are typical planning ranges, not a quote. A complete faucet replacement may be financially wiser when the faucet body, hoses, finish, and mounting hardware are also deteriorated.
Special Cases and Stopping Points
Pull-down and pull-out Blanco faucets need extra care because the hose, spray head, counterweight, and swivel body can obstruct access under the sink. Remove the spray head only if it improves access, and support the hose so its weight does not pull on the faucet during repair.
Dual-handle Blanco faucets may use separate hot and cold valve cartridges rather than one mixing cartridge. The left and right valves can differ, so record which side was removed and do not assume a single-lever 35 mm cartridge will fit either handle.
Stop the repair and call a plumber when the faucet body rotates with the retaining nut, the main shutoff will not close, a supply line begins twisting, the countertop mounting hardware is inaccessible, or the valve cavity is cracked. Water damage under a sink can cost more than the original repair if a fitting is forced and left leaking.
Why Is the Faucet Still Leaking or Stiff?
A Blanco faucet that still leaks after cartridge replacement usually has a trapped old seal, dirty valve seat, incorrect cartridge orientation, damaged faucet body, or improperly adjusted retaining nut. A stiff lever usually results from over-tightening, a cartridge that is not fully seated, or a replacement part with incompatible dimensions.
| Problem after repair | Most likely cause | Corrective action |
|---|---|---|
| Spout still drips | Debris, wrong part, damaged seat | Remove, clean, verify model and seals |
| Leak at cartridge nut | Nut loose or seal damaged | Reseat cartridge and tighten moderately |
| Handle is very stiff | Nut overtightened | Loosen slightly and retest |
| Handle sits too high | Cartridge too tall or not seated | Compare height and inspect pins |
| Hot and cold reversed | Cartridge rotated 180 degrees | Shut off water and reinstall correctly |
| Faucet leaks at base | Base O-ring or body seal | Repair base seal, not cartridge |
| Low flow after repair | Blocked aerator or inlet debris | Clean screen and inspect supply |
Do not compensate for a wrong cartridge by tightening the retaining nut harder. That approach can crack the plastic housing, distort seals, and make diagnosis more difficult.
Expert rules that prevent repeat failures
- Photograph orientation before removal. A single image showing the cartridge pins, stem flat, and handle direction prevents the common 180-degree installation error.
- Use the old cartridge as a dimensional template. Diameter is only one measurement; body height and stem geometry often determine whether the handle can be reinstalled.
- Test with tissue, not sight alone. A slow leak under the cap or base may not form a visible drop during a short test, while dry tissue reveals moisture immediately.
- Do not discard the old part until testing is complete. The old cartridge provides the return-reference evidence if the new part proves incompatible.
- Tightness is not a substitute for seating. A cartridge must drop into its locating notches before the nut is tightened; the nut should retain the part, not force it into alignment.
When Should You Replace the Whole Faucet?
Replace the complete Blanco faucet when the body is cracked, the finish is failing around structural joints, the swivel base is loose because of damaged casting, or multiple hoses and seals are leaking. A cartridge repair is sensible when the faucet body remains sound and the defect is confined to shutoff or handle control.
A faucet replacement also becomes reasonable when the correct cartridge is discontinued and the cost of parts, shipping, and labor approaches the price of a new fixture. Preserve the old faucet until the replacement is installed and tested because countertop hole spacing and supply connections may not match.
FAQ
Can I replace a Blanco cartridge without removing the faucet?
Yes, most single-lever Blanco cartridges can be replaced with the faucet still mounted in the countertop. The handle, decorative cap, retaining nut, and cartridge are accessed from above, while the under-sink area is needed mainly for water shutoff and leak inspection.
What Allen key size does a Blanco faucet use?
A 2.5 mm Allen key is common on some Blanco faucet handle set screws, but it is not universal across every model or production year. Use the key that fits the recess fully and does not wobble; forcing the wrong size can round the grub screw.
Can a universal 35 mm cartridge fit a Blanco faucet?
A universal 35 mm cartridge can fit only when its height, stem, bottom pins, seal arrangement, and rotational orientation match the Blanco valve body. Diameter alone is insufficient, so compare the removed part with the manufacturer’s dimensions before ordering.
Why does a new cartridge make the handle hard to move?
A new cartridge can make the handle hard to move when the retaining nut is over-tightened, the cartridge is misaligned, the valve seat contains grit, or the replacement has incompatible dimensions. Shut off water, verify seating, and reduce nut pressure slightly before replacing another part.
How long should a Blanco faucet cartridge last?
Service life varies with water quality, debris, usage, and cartridge construction. A ceramic cartridge may operate for many years in clean water, but limescale and grit can shorten its life significantly. Persistent dripping or damaged seals justify replacement regardless of age.
Is a Blanco faucet cartridge covered by warranty?
Warranty coverage depends on the faucet model, purchase date, country, and whether the failure is treated as a manufacturing defect or normal wear. Check the model-specific Blanco warranty before installing an aftermarket part, and retain proof of purchase and photographs of the failed component.
The Bottom Line
Replacing a Blanco faucet cartridge is a practical 20-40 minute repair when the faucet body is sound and the correct cartridge is matched by model and dimensions. The reliable sequence is to shut off both supplies, release pressure, remove the handle and retaining nut, clear every old seal, align the new ceramic cartridge, tighten moderately, and test all functions. For how to replace Blanco faucet cartridge searches, correct identification and clean seating matter more than wrench force or cartridge price.