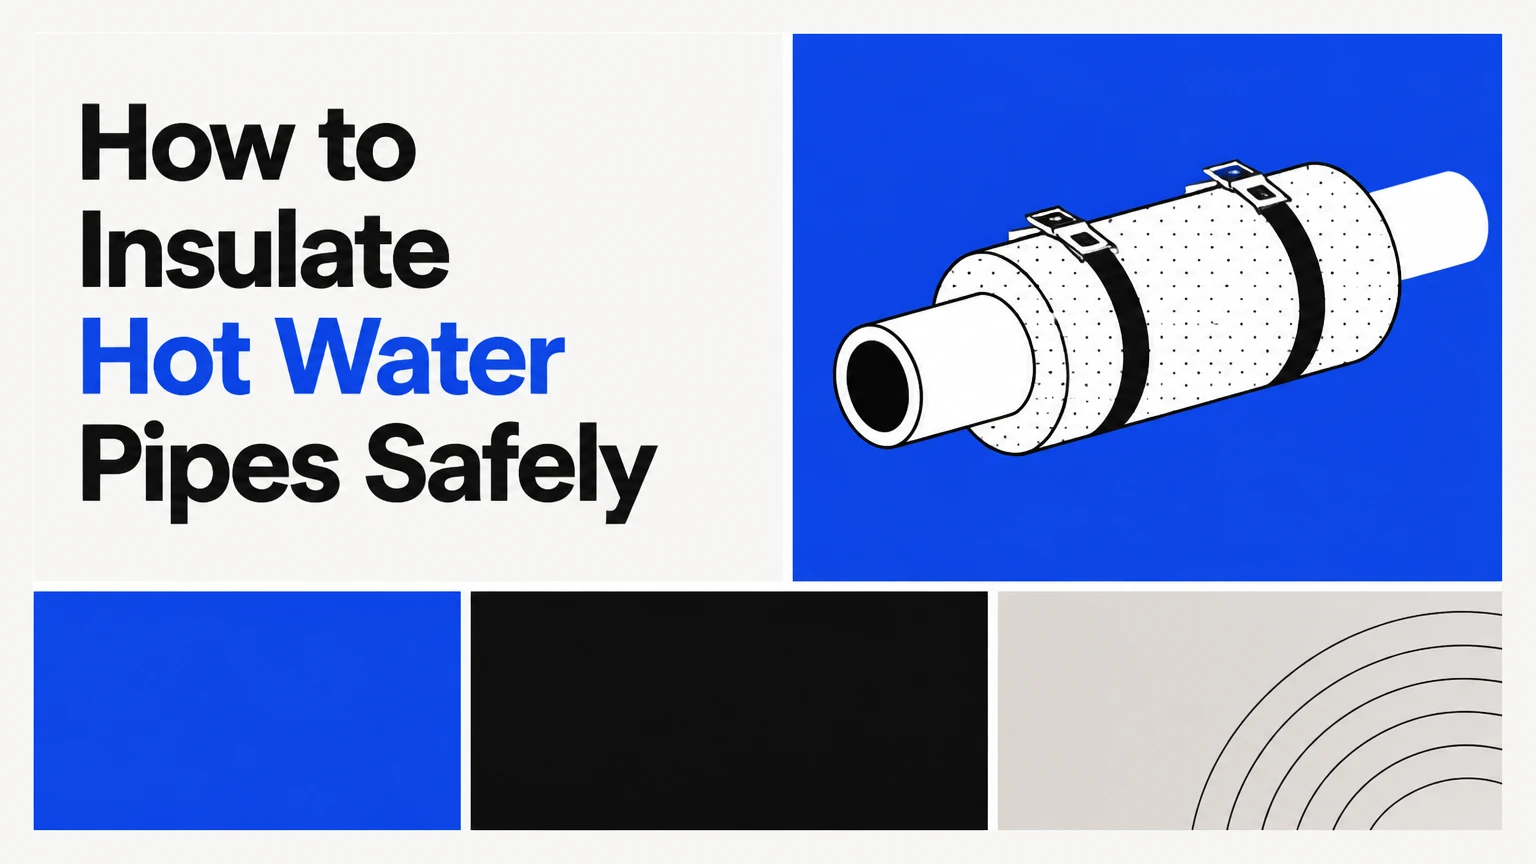
To insulate hot water pipes, measure the pipe’s outside diameter, select heat-rated insulation with approximately R-3 or higher, cut sleeves around fittings, and seal every seam without covering valves, controls, or flue clearances. Most accessible residential runs take 2-4 hours, and the first 5-6 feet leaving the water heater usually deserves priority.
Key Facts at a Glance
R-3 to R-5 insulation is a practical target for many residential hot-water supply pipes.
Half-inch wall sleeves suit conditioned interiors; 1-inch walls are more useful in crawlspaces and outdoor exposures.
Typical savings are approximately 4%-7% of water-heating energy, but results depend on pipe length, temperature, and ambient conditions.
Insulation can keep delivered water roughly 2-4°F warmer after a long idle period.
Never cover a gas appliance flue, draft hood, temperature-and-pressure relief valve, burner controls, or required service access.
Insulation delays freezing; it does not replace heat, heat trace, or winterization.
Why Insulate Hot Water Pipes?
Hot-water pipe insulation slows heat transfer from the water to the surrounding air, so less heat escapes before water reaches a fixture. The insulation works mainly by trapping low-conductivity air within foam, rubber, or fiber, reducing conduction and convection around the pipe.
The U.S. Department of Energy recommends insulating accessible hot-water pipes, particularly near the water heater, because shorter wait times and lower standby losses can reduce water-heating demand. A practical expectation is modest rather than dramatic: 2-4°F warmer water at a distant tap after storage, with typical annual savings around 4%-7% when substantial uninsulated pipe is exposed.
The result improves when pipes run through a cold basement, ventilated crawlspace, garage, or exterior wall. A short, already enclosed pipe inside a warm cabinet has less recoverable loss.
Which pipes deserve priority?
Insulate the first 5-6 feet of hot-water pipe leaving a storage water heater, then continue along exposed runs toward frequently used fixtures. Prioritize long, cool routes to kitchens, bathrooms, laundry rooms, and detached facilities.
Cold-water pipes can also benefit from insulation where condensation forms or where freezing is a concern. Cold-pipe insulation does not save hot-water energy, however, so hot supply lines usually provide the better first project.
Before You Start
The project requires a pipe-size check, heat-rated insulation, a sharp knife, and safe access around the plumbing. A typical utility-room installation costs $25-$100 in materials and takes 2-4 hours, excluding repairs or difficult crawlspace work.
| Item | Typical requirement | Practical specification |
|---|---|---|
| Time | 2-4 hours | 20-40 linear feet, accessible basement |
| DIY difficulty | Low to moderate | Moderate around tees, valves, and elbows |
| Sleeve quantity | 6-foot sections | Buy 10% extra for offcuts |
| Insulation target | R-3 or higher | Verify the package label |
| Cutting tool | 1 utility knife | Use a fresh blade and cutting board |
| Sealing supplies | 1-2 rolls | Acrylic, foil, or manufacturer-approved tape |
Tools and materials
Gather the following before cutting:
- Tape measure and outside-diameter caliper, or a pipe-size gauge
- Pre-slit polyethylene or elastomeric sleeves
- Sharp utility knife and spare blades
- Manufacturer-approved acrylic, foil, or vapor-barrier tape
- Plastic zip ties for outdoor or mechanically vulnerable sections
- Cloth, mild cleaner, and gloves
- Eye protection when cutting fiberglass
- Weather-resistant cladding for exposed outdoor foam
Turn off nearby equipment only when the work requires access. Do not disconnect water lines merely to install split sleeves.
Which Insulation Material Should You Buy?
Polyethylene foam is the best general-purpose choice for straight, accessible indoor residential pipes, while elastomeric rubber is better for bends, moisture, UV exposure, and higher-temperature service. Fiberglass fits very hot commercial or boiler piping, and wrap tape is mainly a fitting solution rather than a long-run insulation system.
| Material | Typical wall and rating | Strength | Limitation | Best location |
|---|---|---|---|---|
| Polyethylene foam | 0.5-1 inch; commonly R-3 to R-4 | Low cost, pre-slit, simple installation | UV and high heat can damage it | Indoor copper, CPVC, and PEX |
| Elastomeric rubber | 0.5-1 inch; product-specific R-value | Flexible, moisture-resistant, bend-friendly | Higher material price | Crawlspaces, outdoors, elbows |
| Fiberglass with jacket | 1-2 inches; high-temperature service | Fire resistance and high-temperature tolerance | Fibers irritate skin and lungs | Boiler rooms and commercial mains |
| Insulation wrap tape | 0.125-0.5 inch equivalent; variable R-value | Fits valves, tees, and tight gaps | Slow installation and lower R-value | Fittings and short repairs |
When is polyethylene foam appropriate?
Polyethylene foam works well on clean, dry, straight runs in a basement or utility room. Its factory slit reduces cutting, and self-sealing versions make continuous seams easier to close.
Polyethylene foam is not the default for every location. Unprotected foam deteriorates in direct sunlight, can deform near excessive heat, and may not meet local flame-spread requirements in exposed building areas. Check the product temperature range and installation instructions.
When is elastomeric rubber worth the extra cost?
Elastomeric rubber is worth considering when the pipe passes through a damp crawlspace, follows several tight bends, or faces sunlight and temperature cycling. Closed-cell rubber resists water absorption better than many open fiber products, but outdoor insulation still needs UV protection and sealed joints.
Use the manufacturer’s adhesive or approved contact cement for longitudinal seams. Ordinary household glue can soften, fail to bond, or damage the insulation.
Where does fiberglass fit?
Fiberglass is appropriate for high-temperature boiler loops and commercial mechanical rooms when the product includes a suitable jacket, such as an all-service jacket. Fiberglass handling requires long sleeves, gloves, eye protection, and a properly fitted mask according to the product safety data sheet.
Fiberglass is a poor casual choice for a damp crawlspace because wet fibers lose thermal performance and the jacket can trap moisture against defective plumbing.
How Thick Should Pipe Insulation Be?
Use a 0.5-inch wall sleeve for many indoor residential hot-water runs and consider a 1-inch wall for unheated crawlspaces, garages, or outdoor sections. The correct product is the one that fits the pipe, reaches the desired R-value, tolerates the operating temperature, and complies with local code.
| Location | Typical wall thickness | Minimum planning target | Additional protection |
|---|---|---|---|
| Heated basement | 0.5 inch | R-3 | Sealed longitudinal seam |
| Unheated basement | 0.5-1 inch | R-3 to R-4 | Seal butt joints |
| Ventilated crawlspace | 1 inch | R-3 to R-5 | Moisture-resistant jacket |
| Outdoor exposed run | 1 inch | R-4 or product-specific | UV and impact cladding |
| Boiler room | 1-2 inches | Manufacturer and code | High-temperature jacket |
Nominal plumbing size is not always the insulation size. A “1/2-inch” copper pipe, for example, has a different outside diameter from some nominal plastic systems, so measure the actual pipe or follow the sleeve manufacturer’s sizing chart.
How much insulation do you need?
Measure each straight section, add the lengths, and purchase at least 10% extra. A 42-foot project therefore needs about 46 feet of sleeve, or eight 6-foot sections after rounding up.
Plan fittings separately. A tee, valve, or elbow can consume more material than its straight-line length suggests.
How to Insulate Hot Water Pipes, Step by Step
Step 1: Inspect the plumbing and mark unsafe areas
Inspect every target pipe for active leaks, pinhole corrosion, mineral deposits, damaged supports, and loose fittings. Mark sections near a gas flue, draft hood, burner, relief valve, control, union, or access panel before bringing insulation into the area.
Do not insulate a leaking or severely corroded pipe. Repair and dry it first, because insulation can conceal a developing failure and hold moisture against the surface.
Success checkpoint: The pipe is sound, accessible, dry, and all required clearances are visible.
Common mistake: Treating insulation as a repair for a sweating joint or pinhole leak.
Step 2: Measure the pipe outside diameter and route
Measure outside diameter with calipers or compare the pipe against the packaging gauge. Record each straight run, elbow, tee, valve, and removable connection.
Leave unions and serviceable connections accessible where future maintenance requires disassembly. Do not create a sealed sleeve that forces a plumber to destroy insulation for routine servicing.
Success checkpoint: Every section has a recorded length and a matching sleeve size.
Common mistake: Buying insulation from nominal pipe size alone.
Step 3: Clean and dry the pipe
Wipe dust, grease, flux residue, and condensation from the pipe using a cloth and suitable mild cleaner. Let the surface dry completely before closing adhesive seams.
Cleaning matters most at joints and on elastomeric products that rely on adhesive contact. Do not install over wet copper or active condensation.
Success checkpoint: The pipe feels dry, and tape or adhesive can contact a clean surface.
Common mistake: Closing wet insulation around a cold or damp pipe.
Step 4: Cut straight sleeves for the runs
Cut the sleeve with a sharp utility knife against a stable surface. Make square 90-degree cuts where two straight pieces meet, and keep offcuts for short sections near valves.
For a long run, cut and fit one section at a time. A small gap at each joint can create a warm-air chimney that bypasses much of the insulation.
Success checkpoint: Sleeve ends meet tightly without compression or visible gaps.
Common mistake: Stretching the foam to gain length, which thins the wall and opens seams.
Step 5: Install around elbows, tees, and valves
Use 45-degree miter cuts to join sleeves around a 90-degree elbow. For a tight bend, cut a wedge from the inside radius or use short mitered segments rather than forcing one sleeve around the corner.
Wrap complex fittings with approved insulation tape, but preserve valve handles, labels, drain points, and access. A removable insulating cover is preferable around a serviceable valve.
Success checkpoint: The fitting has continuous coverage without crushing the insulation or restricting operation.
Common mistake: Pulling a straight sleeve around a sharp elbow until the outside seam splits.
Step 6: Close and seal every longitudinal seam
Position the slit away from likely impact and close the seam firmly. Remove the backing from self-sealing strips only after the sleeve is correctly aligned, then press along the joint in short sections.
Use acrylic or foil tape compatible with the insulation at butt joints and difficult seams. Cloth duct tape commonly dries out or loses adhesion under heat and humidity.
Success checkpoint: No light passes through the seam, and the joint remains closed when lightly squeezed.
Common mistake: Taping over dust, moisture, or a misaligned seam instead of refitting it.
Step 7: Secure exposed sections and verify safety
Use plastic zip ties or approved mechanical fasteners at approximately 12-18-inch intervals where vibration, animals, or outdoor wind could move the insulation. Add UV-resistant cladding outdoors, because foam exposed to sunlight can crack and shrink.
Step back and verify that water-heater controls, combustion air openings, the flue, draft hood, temperature-and-pressure relief valve, discharge pipe, and service clearances remain unobstructed.
Success checkpoint: Insulation stays in place, seams are sealed, and every safety component remains visible and accessible.
Common mistake: Covering the top of a gas water heater or touching a hot flue with foam.
What Must Stay Uninsulated?
Water-heater safety components must remain clear, including the flue and draft hood on gas units, burner and control access, the temperature-and-pressure relief valve, and the relief discharge pipe. Insulation belongs on the water pipe, not on combustion or pressure-control equipment.
Keep a product’s specified clearance from hot surfaces. Clearance requirements vary by appliance, fuel, insulation material, and jurisdiction, so the water-heater manual and local plumbing code control when they differ from generic advice.
Do not cover:
- Gas flues, draft hoods, combustion-air openings, or burner compartments
- Temperature-and-pressure relief valves and their discharge piping
- Thermostats, electrical controls, access covers, and inspection points
- Leaking joints, corroded pipe, or removable unions that need service
- Plastic pipe sections beyond the manufacturer’s temperature rating
Does the Pipe Material Matter?
Copper, CPVC, and PEX can all be insulated when the sleeve temperature range and installation method are compatible. PEX has lower thermal conductivity than copper, but insulation still reduces heat loss through long runs in cold or unconditioned spaces.
| Pipe material | Insulation compatibility | Main caution | Suitable approach |
|---|---|---|---|
| Copper | Polyethylene, rubber, fiberglass | Condensation and corrosion under wet insulation | Dry pipe, seal seams |
| CPVC | Foam or rubber within rating | Excessive heat can soften plastic | Check temperature label |
| PEX | Foam or rubber | Avoid crushing or tight ties | Use loose, evenly spaced supports |
| Flexible connector | Rubber or wrap product | Preserve bend and service access | Use short removable sections |
PEX insulation should not be cinched tightly with wire or over-tight zip ties. Excess pressure can deform the tubing or stress fittings, especially where the line moves during thermal expansion.
How Does the Method Change Outdoors or in a Crawlspace?
Outdoor and crawlspace pipes need a moisture strategy as well as thermal resistance. Install closed-cell elastomeric insulation or another approved product, seal longitudinal and butt joints, and protect the finished surface from sunlight, animals, abrasion, and standing water.
Insulation alone cannot guarantee freeze protection. A pipe with no heat source eventually approaches the surrounding temperature, although thicker insulation slows that transition and can provide valuable extra time during a short cold event.
For freezing climates, combine insulation with one or more of the following:
- Air sealing around pipe penetrations
- Enclosure within the home’s thermal boundary
- Approved heat cable with ground-fault protection
- Safe, code-compliant supplemental heat
- Draining and winterizing seasonal exterior plumbing
Never wrap an electric heat cable beneath insulation unless the cable manufacturer specifically permits that arrangement and gives the required installation method.
How Much Does Pipe Insulation Cost?
Typical DIY material cost is $2-$7 per 6-foot foam section, while a professional residential basement retrofit commonly falls near $200-$600. Actual pricing changes with insulation thickness, elastomeric rubber, fiberglass jackets, access difficulty, regional labor rates, and required outdoor cladding.
| Project scope | Typical material cost | Typical labor or time | Planning note |
|---|---|---|---|
| First 6 feet at heater | $4-$14 | 20-40 minutes DIY | Highest-priority short project |
| 30-foot indoor run | $20-$70 | 2-3 hours DIY | Polyethylene usually cheapest |
| 50-foot crawlspace run | $60-$180 | 3-6 hours DIY | Add sealing and protective jacket |
| Whole basement retrofit | $100-$300 materials | $200-$600 professional | Access drives labor cost |
| Outdoor exposed run | $75-$250 | 2-5 hours DIY | Cladding can exceed sleeve cost |
A simple payback calculation divides installed cost by estimated annual energy savings. The calculation is most favorable where long hot-water pipes stay exposed for many hours, and least favorable where the pipe is short, already insulated, or enclosed in conditioned space.
Common Mistakes and How to Fix Them
Gaps at joints
Unsealed butt joints allow air movement and create thermal bridges. Cut a replacement piece square, butt it tightly against the adjacent sleeve, and seal the circumference with compatible tape.
Wet insulation or condensation
Condensation usually indicates a cold surface, humid air, an unsealed vapor barrier, or water entering from above. Remove the wet section, locate the moisture source, dry the pipe completely, and reinstall insulation with sealed seams and appropriate vapor control.
Slipping sleeves
Sleeves slip when the slit faces impact, the pipe is greasy, or the diameter is oversized. Clean the pipe, select the correct size, close the seam, and add spaced plastic ties without crushing the wall.
Adhesive that will not hold
Cold surfaces and dusty backing reduce adhesive performance. Warm the product only as the manufacturer permits, clean the seam, and use compatible mechanical fastening if the location remains cold.
Insulating a damaged pipe
Insulation can hide a slow leak and accelerate corrosion when moisture remains trapped. Remove it during inspection, repair the plumbing, and reinstall only after the surface is dry.
Blocking access or heat-producing equipment
A complete-looking installation can still be unsafe if it covers a valve or touches a flue. Cut back the insulation, restore the required clearance, and follow the appliance manual rather than a generic sleeve diagram.
What Are the Alternatives?
Pipe insulation is the lowest-cost first measure, but it does not solve every hot-water complaint. A recirculation system can reduce wait time on long distribution loops, while a point-of-use heater can address one remote fixture without heating an entire run.
| Alternative | Typical use | Benefit | Limitation |
|---|---|---|---|
| Pipe insulation | Exposed supply lines | Low cost, passive heat retention | Does not create heat |
| Demand recirculation | Long whole-house runs | Faster delivery at multiple fixtures | Pump, controls, installation cost |
| Timer recirculation | Predictable occupancy | Scheduled hot-water availability | Can waste energy off schedule |
| Point-of-use heater | Remote sink or bathroom | Shortens local delivery distance | Adds electrical and plumbing work |
| Lower flow fixture | Long waits caused by low demand | Reduces water waste | Does not retain pipe heat |
Do not raise the water-heater temperature simply to compensate for uninsulated pipes. Higher storage temperatures increase scald risk and standby loss; anti-scald mixing valves and local code requirements govern any temperature adjustment.
How Can You Verify the Installation Worked?
Measure delivery temperature and wait time before and after insulation using the same fixture, starting water temperature, and idle period. Insulation is working when exposed seams remain closed, the pipe surface feels less hot relative to the water, and the fixture reaches a usable temperature with less discarded water.
A simple test uses a thermometer and stopwatch:
- Let the pipe sit unused for at least two hours.
- Run the same hot-water fixture at the same flow rate.
- Record the temperature at 15, 30, and 60 seconds.
- Install and seal the insulation.
- Repeat under similar indoor conditions.
The test will not isolate every variable, because incoming water temperature, flow rate, heater cycling, and mixing valves affect results. It can still reveal an obvious installation gap or a major improvement on a long exposed run.
FAQ
Should I insulate hot-water pipes or cold-water pipes first?
Insulate hot-water pipes first when the goal is lower water-heating loss and faster delivery. Insulate cold-water pipes first when condensation damages cabinets, when pipes pass through freezing spaces, or when cold water warms excessively before reaching a tap. Many homes eventually need both, but the priority depends on the problem.
Does insulating water pipes prevent freezing?
Insulation delays freezing by slowing heat transfer, but it cannot keep a pipe warm indefinitely without an internal or external heat source. In freezing climates, combine insulation with air sealing, safe heat cable where approved, or winterization. Never assume a thick sleeve alone protects an exposed stagnant line during prolonged subfreezing weather.
Can pipe insulation touch copper or PEX?
Compatible foam or rubber insulation can touch copper, PEX, and CPVC directly when the product is rated for the pipe temperature. The insulation must not touch a flue, burner, draft hood, or other high-temperature appliance surface. Keep PEX ties loose enough to avoid crushing the tubing.
Is pipe wrap tape enough for a long run?
Pipe wrap tape is usually insufficient as the primary insulation for a long run because its thickness and R-value are inconsistent, and installation takes longer. Use sleeves for straight sections, then use compatible wrap material to close elbows, valves, tees, and small gaps that sleeves cannot cover neatly.
Should insulation cover the water-heater connection?
Insulate the accessible hot-water pipe leaving the tank, commonly for the first 5-6 feet, but stop at the appliance’s required clearances and keep the temperature-and-pressure relief valve, controls, flue, draft hood, and service access unobstructed. The appliance manual and local code determine the final boundary.
How often should insulated pipes be inspected?
Inspect pipe insulation at least annually and after plumbing work, flooding, pest activity, or severe weather. Look for wet sections, mold, split seams, UV damage, compression, corrosion, and concealed leaks. Outdoor cladding and crawlspace insulation deserve additional checks because moisture and physical damage are common there.
The Bottom Line
The most reliable way to insulate hot water pipes is to fit correctly sized, heat-rated sleeves tightly around clean, sound pipe, seal every seam, protect exposed insulation, and preserve water-heater safety clearances. Start with the first 5-6 feet leaving the heater, then cover long runs through unheated spaces. For a typical residential project, how to insulate hot water pipes comes down to accurate measurement, continuous coverage, and safe placement rather than maximum thickness alone.