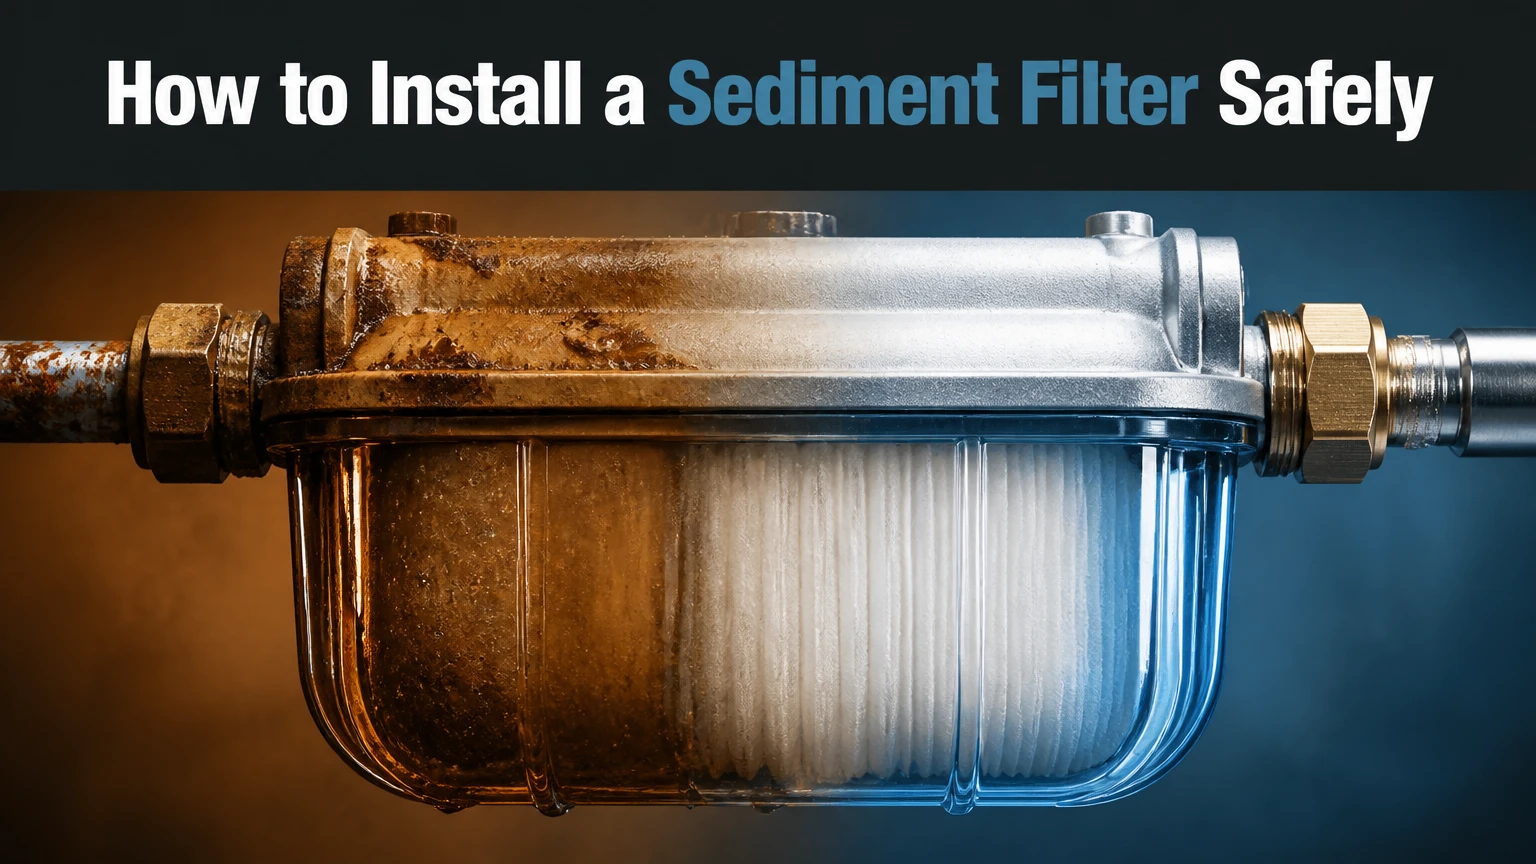
To install a sediment filter, place the correctly sized housing after the main shutoff, mount it securely, connect the inlet and outlet in the marked direction, install a cartridge and lubricated O-ring, then open the system slowly and check for leaks. A typical whole-house installation takes 2-4 hours, and correct filter sizing determines pressure loss and service life.
Key Facts
A sediment filter removes suspended dirt, sand, rust, silt, and scale by mechanical filtration.
A sediment filter does not remove dissolved chemicals, heavy metals, bacteria, viruses, odors, or hardness.
Install a whole-house sediment filter after the main shutoff and before water heaters, softeners, carbon filters, UV systems, or RO pretreatment.
A 5-20 micron cartridge suits many homes, while well systems with visible sand often need a 50-100 micron spin-down stage first.
Replace a disposable cartridge when pressure loss reaches about 10-15 PSI, water flow becomes inadequate, or the cartridge visibly loads with sediment.
A three-valve bypass lets you service the filter without shutting off water to the entire house.
What Does a Sediment Filter Do?
A sediment filter physically strains suspended particles from water. The filter captures material such as rust flakes, sand, clay, silt, pipe scale, and loose debris before those particles reach faucets, valves, water heaters, washing machines, softeners, carbon media, ultraviolet lamps, or reverse-osmosis membranes.
Sediment filtration does not purify water in the broad sense. Dissolved iron, lead, arsenic, nitrate, chlorine, volatile organic compounds, bacteria, viruses, and unpleasant tastes require different treatment technologies. The U.S. Environmental Protection Agency distinguishes particulate filtration from treatment processes designed for microbial or chemical contaminants, so a sediment cartridge should never replace a certified treatment system or laboratory water test.
A sediment filter is most useful when the problem is visible or measurable suspended material. Orange flakes from aging municipal pipes, gritty well water, and cloudy water after a main break are typical examples. If water remains cloudy after filtration, the cloudiness may come from dissolved minerals, microorganisms, fine colloids, or air rather than ordinary sediment.
How Does Sediment Filtration Work?
Sediment filtration works through size exclusion: water passes through pores or channels, and particles larger than the effective opening become trapped. Surface filters collect particles mainly on the outside, while depth filters hold particles throughout a thicker media structure.
A spin-down unit uses a washable screen and often a clear bowl, making it suitable for coarse sand and large debris. Melt-blown polypropylene cartridges use layered depth media, so they hold more fine sediment than a thin screen but gradually restrict flow as the media fills. Pleated polyester cartridges provide extensive surface area and may be washable, although cleaning does not restore every cartridge to its original performance.
Micron ratings need careful interpretation. A nominal 5-micron rating generally indicates substantial removal near that size under stated test conditions; an absolute rating is a tighter claim that limits the largest particle passing through. Ratings are not interchangeable between manufacturers, and cartridge flow capacity depends on pressure, water temperature, media design, and contaminant load.
Which Sediment Filter Type Should You Install?
The best sediment filter depends on particle size, peak household flow, maintenance preference, and the equipment installed downstream. A spin-down screen is usually the first choice for heavy sand, while a high-capacity cartridge housing is better for fine silt, rust, or pretreatment before UV and RO equipment.
| Filter type | Typical rating | Typical service pattern | Best application |
|---|---|---|---|
| Spin-down screen | 50-500 microns | Flush every days to months; screen lasts 6-12 months or longer | Well sand, shale, visible debris |
| Melt-blown polypropylene | 1-50 microns | Disposable; often 1-6 months | Fine silt, rust, progressive dirt |
| String-wound cartridge | 1-100 microns | Disposable; often 1-6 months | Broad sediment sizes at moderate flow |
| Pleated polyester | 1-50 microns | Washable; often 4-12 months | High flow and reusable surface filtration |
Spin-Down Versus Cartridge Filters
A spin-down filter handles larger particles with low maintenance cost because the screen can be flushed rather than discarded. The trade-off is limited fine-particle removal, especially when the screen rating is 50 microns or larger.
Cartridge filters provide finer filtration and greater flexibility. A 20-micron pleated cartridge may maintain flow better than a restrictive 1-micron depth cartridge, while a 5-micron polypropylene cartridge provides finer pretreatment for sensitive equipment. Cartridge systems require enough housing capacity, because a small 10-inch housing can create substantial pressure loss at high household flow.
A practical well-water arrangement is a 50-100 micron spin-down filter followed by a 5-20 micron cartridge. The first stage removes sand before the disposable cartridge fills rapidly. Installing a 1-micron cartridge first often creates unnecessary maintenance and can starve showers or appliances of pressure.
How Do You Choose a Micron Rating?
Choose the coarsest micron rating that removes the problem particles and protects the next treatment stage. Typical starting points are 50-100 microns for coarse well debris, 10-20 microns for general whole-house sediment, and 1-5 microns before equipment that requires very clear water.
| Water condition or downstream equipment | Starting rating | Reason |
|---|---|---|
| Visible well sand and grit | 50-100 microns | Reduces rapid loading and protects finer stages |
| Municipal rust flakes | 10-20 microns | Captures common suspended pipe debris |
| Fine silt or gray mud | 5-10 microns | Provides finer depth filtration |
| Ultraviolet purifier | 1-5 microns | Improves clarity before UV exposure |
| Reverse-osmosis membrane | 1-5 microns | Reduces particulate fouling of the prefilter and membrane |
Test the water and inspect the cartridge after the first service interval. A filter that clogs within days may be too fine, undersized, or installed downstream of an uncontrolled sediment source. A cartridge that remains clean while particles reach the fixtures may be too coarse or incorrectly sealed.
Before You Start
Prepare the installation before cutting any pipe. The project normally requires 2-4 hours, intermediate plumbing skill, a dry working area, and enough room below the housing to remove the sump without hitting the floor or nearby equipment.
| Requirement | Typical specification |
|---|---|
| Filter assembly | Housing, head, bracket, sump, cartridge, O-ring, wrench |
| Isolation valves | 2 full-port ball valves, sized to the main pipe |
| Bypass | 1 valve and pipe section, or a manufacturer bypass manifold |
| Monitoring | 1 inlet gauge and 1 outlet gauge, commonly 0-160 PSI |
| Pipe connections | PEX, copper, CPVC, PVC, or threaded adapters matched to existing pipe |
| Seal materials | PTFE tape or approved thread sealant, food-grade silicone grease |
| Tools | Pipe cutter, adjustable wrench, drill, level, bucket, towels, deburring tool |
Check the filter manual before buying fittings. Port size, flow direction, maximum pressure, cartridge dimensions, and approved temperature limits vary by model. A housing designed for a 10-inch cartridge cannot accept a 20-inch cartridge, and a 10-inch standard housing is not the same as a 10-inch Big Blue housing, whose wider body supports higher flow with less pressure loss.
Do not cut a pressurized line. If the main shutoff does not close completely, stop the project and repair or replace that valve first. Local plumbing codes may require an accessible shutoff, approved support, backflow protection, or a licensed plumber.
Step 1: Choose the Filter Location
Install the sediment filter after the main water shutoff and before the equipment or fixtures it must protect. On a private well, place the filter after the pressure tank and pressure switch assembly unless the filter manufacturer specifies another arrangement.
The location should provide protection from freezing, direct sunlight, impact, and excessive heat. Leave at least 4-6 inches below the sump, although the exact clearance must accommodate the full housing length and wrench movement. Mount the head to wall framing or a firmly secured backing board, not to unsupported drywall.
For whole-house treatment, the usual sequence is:
Service entry or well pressure tank → main shutoff → sediment filter → softener or carbon filter → water heater and fixtures
A pressure regulator belongs upstream when incoming pressure exceeds the plumbing or filter rating. Many residential systems operate near 40-80 PSI, but the filter manual controls the permitted maximum. A pressure regulator does not fix a clogged cartridge, and a filter does not regulate excessive supply pressure.
Success checkpoint: You can reach both shutoff valves, remove the sump vertically, read the gauges, and drain spilled water safely.
Common mistake: Installing the housing where the sump rests against the floor. The cartridge cannot be changed without disconnecting plumbing.
Step 2: Shut Off Water and Depressurize
Close the main water shutoff, then open the lowest faucet or an outdoor hose bib to release pressure. Turn off electrical power to a well pump before working on the plumbing, and turn off the water heater heat source if the supply may remain off long enough to expose the heater to overheating or dry operation.
Open the filter head’s pressure-relief button if the model has one. Keep a bucket under the cut point because trapped water can remain in horizontal pipes even after the gauge reads zero. Never loosen the housing while the system is pressurized.
Success checkpoint: The open faucet stops flowing, the filter pressure gauge reads zero or near zero, and no pump starts during the work.
Common mistake: Relying only on the main shutoff. A leaking shutoff can leave enough pressure to eject water when the pipe is cut.
Step 3: Assemble and Mark the Filter Head
Identify the molded inlet and outlet arrows before attaching adapters. The inlet must receive untreated water, and the outlet must send filtered water toward the house or downstream equipment.
Dry-fit the head, valves, unions, and adapters in the intended orientation. Include enough straight pipe to remove fittings later, and avoid placing the housing where the pipe must support its full water-filled weight. Install inlet and outlet pressure gauges if the head provides gauge ports. The pressure difference between those gauges is more useful than either pressure reading alone for deciding when a cartridge is loaded.
Wrap male NPT threads with PTFE tape in the direction of tightening, commonly 4-6 wraps, while leaving the first thread clear. Do not apply tape to compression threads, flare threads, or push-to-connect tubing ends. Use a sealant approved for potable water when the fitting manufacturer permits it.
Success checkpoint: The flow arrow points toward the house, the gauges are readable, and every fitting matches the pipe material and port thread.
Common mistake: Applying PTFE tape to a fitting that seals with an O-ring. Tape can interfere with proper seating and introduce debris.
Step 4: Cut and Prepare the Pipe
Hold the assembled filter head and valve arrangement beside the main line. Mark the pipe only after accounting for insertion depth, threaded adapter length, unions, and the space occupied by the bypass.
Cut the pipe squarely with a tubing cutter for copper or the approved cutter for PEX and plastic. Remove burrs from copper and plastic, clean copper before soldering, and keep shavings away from the filter housing. Push-to-connect fittings require smooth, round pipe inserted to the marked depth; PEX often needs the manufacturer’s stiffening insert.
Do not solder close to a connected plastic filter head or cartridge housing. Complete hot work before attaching heat-sensitive components, and follow the fitting manufacturer’s instructions for cooling and pressure testing.
Success checkpoint: The pipe ends are square, clean, deburred, and fully supported without forcing the filter head out of alignment.
Common mistake: Cutting too much pipe. Dry-fit every component and measure insertion depth before making the final cut.
Step 5: Build the Three-Valve Bypass
Install one isolation valve before the filter and one after it. Connect a third valve across a parallel bypass line between the upstream and downstream sides.
Main shutoff
     |
Inlet valve ---- Sediment filter ---- Outlet valve
     |                                  |
     ----------- Bypass valve -----------
During normal operation, open both filter valves and close the bypass valve. During cartridge service, close both filter valves and open the bypass valve. A bypass supplies untreated water, so label it clearly and close it again after maintenance.
Use unions or quick-disconnect fittings where the filter head may need replacement. Keep the bypass pipe supported independently, because valve weight and thermal movement can transfer stress to the filter housing. Follow local backflow requirements, particularly when the line supplies irrigation, boilers, or chemical-treatment equipment.
Success checkpoint: You can isolate the housing without shutting off the main supply, and the normal and bypass positions are labeled.
Common mistake: Leaving the bypass partially open. Unfiltered water then mixes with filtered water and can defeat downstream protection.
Step 6: Mount the Housing and Install the Cartridge
Secure the filter head to its bracket before connecting rigid pipe. The bracket carries the head, but the plumbing should not pull sideways on the housing. Confirm that the cartridge sits on the sump’s center standpipe and that the cartridge’s open end matches the head design.
Remove the O-ring and inspect its groove for grit, cuts, flattening, or stretching. Clean the groove, apply a thin film of food-grade silicone grease, and place the O-ring evenly without twisting. Do not use petroleum jelly because petroleum products can damage some rubber compounds.
Thread the sump into the head by hand. Tighten until the O-ring seals, then use the supplied wrench only as directed by the manual, commonly for removal or a small final turn. Excessive force can distort the housing, pinch the seal, or make the next cartridge change difficult.
Success checkpoint: The cartridge is centered, the O-ring lies flat, the sump threads smoothly, and the wrench is not needed to force the seal closed.
Common mistake: Installing the cartridge upside down or omitting the center post. Water can bypass the media or deform the cartridge.
Step 7: Start the System Slowly and Flush It
Close the bypass, if normal operation is intended, and open the inlet valve slowly. Open the outlet valve gradually while a nearby faucet remains open to purge air. Sudden pressure can damage a cartridge, disturb fittings, or create water hammer.
Inspect every threaded joint, push fitting, valve stem, gauge port, and housing seam. Wipe each connection dry, wait several minutes, and check again for a growing wet ring. A slow leak may not appear immediately.
Flush the filter according to the cartridge instructions. A common manufacturer instruction is 5 minutes or several gallons, but some cartridges require longer flushing to remove carbon fines, manufacturing dust, or preservative solution. A pure sediment cartridge usually needs less flushing than a carbon-containing cartridge.
Success checkpoint: The faucet runs without sputtering, the housing remains dry, and the outlet pressure is close to the inlet pressure with no unusual restriction.
Common mistake: Treating a pressure drop during startup as normal without checking the cartridge rating, flow direction, and valve positions.
How Should You Maintain and Replace the Filter?
Maintain a sediment filter by inspecting the cartridge, flushing a spin-down screen, and comparing inlet with outlet pressure. Replace or clean the filter when differential pressure reaches about 10-15 PSI, flow becomes unacceptable, or visible loading confirms that the media is full.
| Maintenance task | Typical interval | Replace or service when |
|---|---|---|
| Inspect clear spin-down bowl | Weekly to monthly | Sand layer blocks screen area |
| Flush spin-down screen | Every days to several weeks | Flush water remains heavily loaded |
| Inspect cartridge | Monthly | Media turns dark or visibly packs with sediment |
| Replace disposable cartridge | 1-6 months typical | Differential pressure reaches 10-15 PSI |
| Check housing O-ring | At every change | Cut, flattened, stretched, or persistently leaking |
Service intervals vary widely. A municipal home may use a 10-20 micron cartridge for 3-6 months, while a sandy well may load the same cartridge in days. Calendar replacement alone is inferior to pressure-drop monitoring because water quality can change after construction, flooding, pump work, or a water-main break.
Use clean hands and potable-water-safe lubricant during replacement. If a cartridge develops slime, odor, or unexpected biological growth, investigate the source and sanitation condition rather than simply installing a finer cartridge.
What Does Installation Typically Cost?
A DIY whole-house sediment filter installation typically costs about $100-$400 for a basic housing, valves, fittings, cartridge, and gauges, while professional labor can add roughly $200-$800 depending on access, pipe material, bypass complexity, and regional rates.
| Installation component | Typical DIY cost | Typical replacement cost |
|---|---|---|
| Spin-down filter | $50-$200 | $0-$30 screen or gasket |
| Standard cartridge housing | $40-$150 | $5-$30 cartridge |
| Big Blue housing | $100-$300 | $15-$60 cartridge |
| Valves, adapters, unions | $50-$200 | $10-$80 service parts |
| Professional installation labor | Not applicable | $200-$800 typical |
These are planning ranges, not quotations. A difficult copper cut, corroded shutoff, confined crawlspace, or required pressure regulator can move the project beyond the normal range. Cartridge cost also depends on micron rating, dimensions, certification, and whether the filter is nominal or absolute.
Which Installation Variations Need Different Decisions?
Different water sources require different filter sequences. A municipal supply often needs protection from rust and scale, while a private well may require coarse sand removal before fine filtration and laboratory testing for contaminants unrelated to sediment.
Private Well With Sand
Use a 50-100 micron spin-down filter with a flush valve before a 5-20 micron cartridge when visible sand is frequent. Place the system after the pressure tank unless the equipment manufacturer specifies a different order, and provide a drain that can handle flushing discharge.
If sand continues after filtration, inspect the well screen, pump setting, pressure-tank behavior, and plumbing. A filter cannot correct a damaged well component that continuously introduces sediment.
Municipal Water With Rust
Use a 10-20 micron pleated or depth cartridge when the main problem is intermittent rust flakes. Install the filter after the house shutoff and before water-heating or treatment equipment, then inspect the first cartridge after a local water-main repair.
Do not assume every orange stain is sediment. Dissolved iron can pass through a sediment cartridge and may require oxidation, catalytic media, or another iron-treatment method determined by testing.
Before UV or Reverse Osmosis
Use the rating required by the UV or RO manufacturer, commonly 1-5 microns. UV systems need low turbidity so particles do not shield microorganisms, while RO membranes need particulate protection to limit fouling.
A sediment filter does not disinfect water before UV. It improves clarity and reduces particulate load, but the UV unit still requires correct dose, lamp maintenance, flow control, and power.
Common Mistakes and How to Fix Them
| Failure mode | Likely cause | Corrective action |
|---|---|---|
| Housing leaks at seam | Dirty, dry, twisted, or stretched O-ring | Depressurize, clean groove, lubricate, reseat, replace if damaged |
| Water pressure falls sharply | Loaded cartridge or rating too fine | Compare gauges, replace cartridge, or select a coarser rating |
| No water after installation | Closed outlet valve, blocked cartridge, or reversed flow | Check valves, arrow, cartridge seating, and pressure |
| Bypass water remains untreated | Bypass valve partly open | Close bypass and label valve positions |
| Filter head cracks | Unsupported pipe or overtightened sump | Replace damaged parts and add independent pipe support |
| Faucet sputters | Trapped air or incomplete line purge | Open a faucet slowly and bleed air at the relief button |
A pressure difference greater than 10-15 PSI is a practical service warning for many residential cartridges, but the manufacturer’s pressure-drop specification takes priority. If both gauges read low, the problem may be the municipal supply, well pump, pressure regulator, or a closed upstream valve rather than the filter.
Persistent leaks deserve a full depressurization, not repeated tightening. Housing threads do not create the primary seal on many systems; the O-ring does. More wrench force can make the leak worse.
Can You Install a Sediment Filter on PEX, Copper, or PVC?
A sediment filter can be installed on PEX, copper, CPVC, or PVC when the adapters, joining method, temperature rating, and local code requirements match the pipe. The filter housing itself should remain supported independently, because flexible tubing and rigid threaded ports respond differently to movement and weight.
Use crimp, clamp, or approved push-to-connect fittings for PEX. Use compression, sweat, press, or threaded adapters for copper according to the fitting instructions. Use solvent-weld fittings rated for potable water on PVC or CPVC, and keep plastic components away from soldering heat.
A licensed plumber is the safer choice when the main shutoff cannot isolate the building, the installation involves a water meter seal, the pipe is heavily corroded, the filter will be installed near electrical equipment, or local law requires a permit.
FAQ
Can a sediment filter make well water safe to drink?
A sediment filter alone cannot make well water microbiologically or chemically safe. Private well owners should test for bacteria, nitrate, arsenic, lead, iron, manganese, and other locally relevant contaminants, then choose certified treatment based on the results. Sediment filtration can protect the treatment equipment and improve appearance, but it does not disinfect water.
Should the sediment filter go before or after a water softener?
Install the sediment filter before a water softener. Removing sand, rust, and silt upstream protects the softener resin bed, control valve, and injector from fouling or abrasion. On a well, coarse spin-down filtration may precede the fine cartridge, while the softener follows both sediment stages.
How often should a whole-house sediment filter be changed?
A whole-house sediment cartridge commonly lasts 1-6 months, but the correct interval depends on sediment concentration, cartridge capacity, flow, and micron rating. Replace the cartridge when outlet pressure falls about 10-15 PSI below inlet pressure, flow becomes inadequate, or visible loading indicates the media is full.
Is a 5-micron filter too fine for a whole house?
A 5-micron filter is not automatically too fine, but it can restrict flow faster than a 10-20 micron cartridge when sediment loads are high. Use a larger high-capacity housing, check the cartridge flow specification, and install a coarse prefilter first when well water contains visible sand or grit.
Can a sediment filter remove chlorine or bad taste?
A sediment filter cannot remove chlorine, dissolved minerals, most odors, or bad taste because those contaminants pass through mechanical pores in dissolved form. Activated carbon is the usual technology for chlorine and many taste compounds, although carbon does not replace disinfection or treatment for every chemical contaminant.
Do sediment filters reduce water pressure?
A clean, correctly sized sediment filter causes a small pressure drop, while a loaded cartridge or undersized housing can reduce flow substantially. Compare inlet and outlet gauges under active flow. Increasing housing size, selecting a higher-capacity cartridge, or adding coarse pretreatment can reduce unnecessary restriction.
The Bottom Line
To install a sediment filter successfully, choose the filter type and micron rating from the actual sediment problem, install the housing after the main shutoff, support the head independently, and use inlet and outlet isolation valves with a bypass when possible. Open the system slowly, flush the cartridge, and monitor differential pressure instead of relying only on a calendar. A sediment filter protects plumbing and treatment equipment, but it does not replace testing, disinfection, or chemical treatment. Use these steps to install a sediment filter safely and maintain reliable household flow.