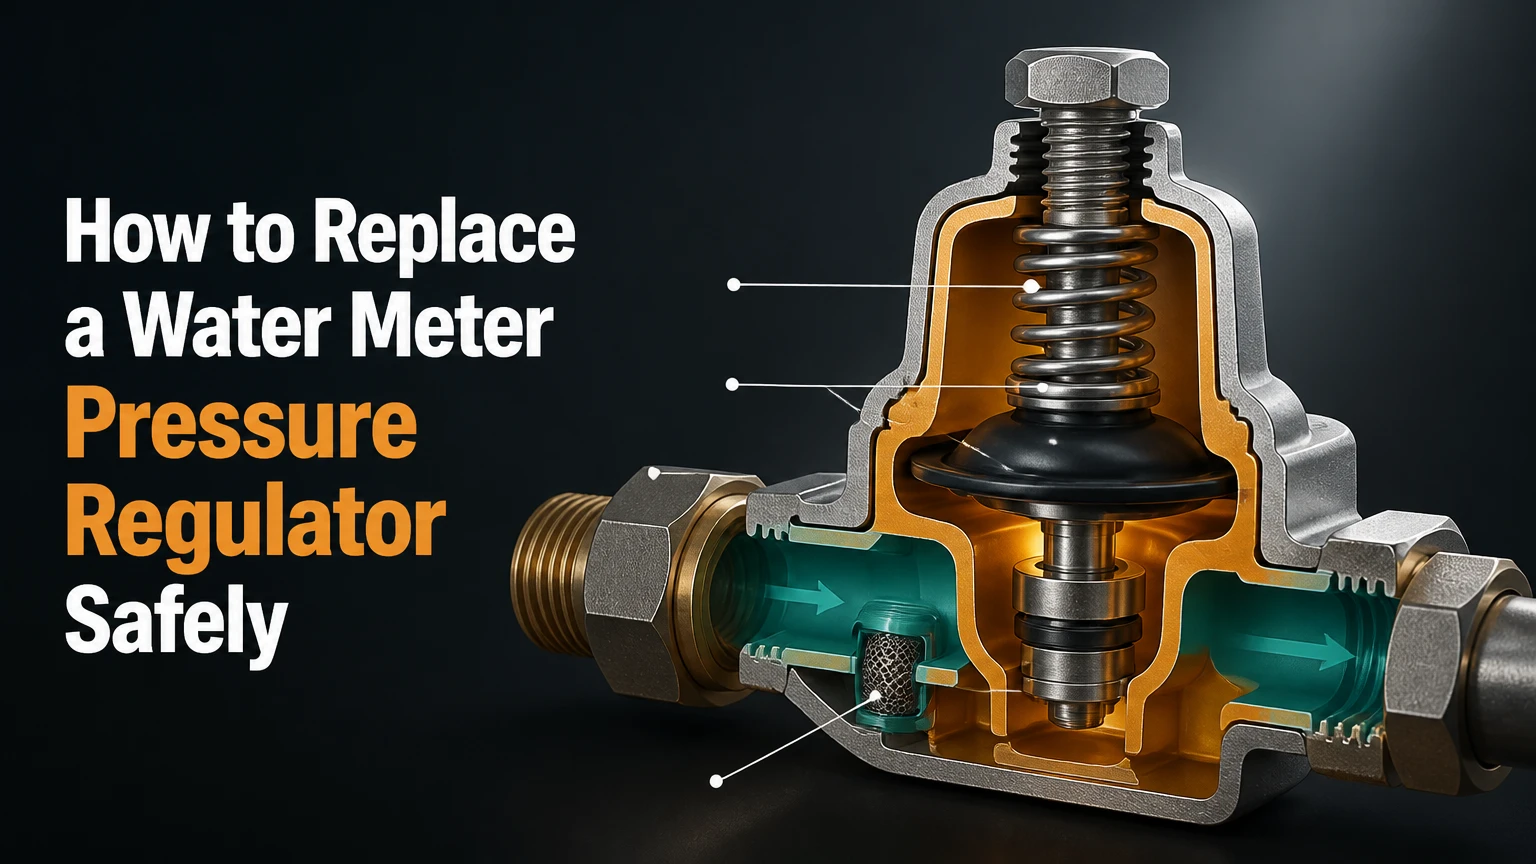
To replace a water meter pressure regulator, shut off the home’s main water supply, drain the plumbing, remove the old pressure-reducing valve, install a correctly sized replacement with its flow arrow pointing toward the house, then restore water slowly and verify 50-60 PSI with a gauge. The job typically takes 1-3 hours when unions already exist.
Key facts at a glance
A residential pressure-reducing valve, or PRV, normally reduces municipal pressure to approximately 40-60 PSI.
The valve’s cast arrow must point from the water meter toward the house.
A pressure reading above 80 PSI is a recognized plumbing design concern, but the exact legal requirement depends on the adopted local code.
Union connections allow a future PRV replacement without cutting the supply pipe.
A new PRV can create a closed plumbing system, making a working thermal expansion tank important.
Never loosen a utility-owned water meter, curb stop, meter seal, or utility-side fitting without permission.
What Is a Water Meter Pressure Regulator?
A water meter pressure regulator is a spring-loaded valve installed on the building side of a water meter or main shutoff. The meter records consumption; the regulator controls downstream pressure. They are separate devices, although installers often place them close together in the same service assembly.
Municipal water pressure can vary with elevation, demand, pump operation, and time of day. A PRV uses a diaphragm, spring, and valve seat to reduce that incoming pressure. The adjusting screw compresses or relaxes the spring, changing the downstream pressure setting.
The valve does not increase available water volume. A clogged inlet screen, undersized service pipe, partially closed shutoff, failed well pump, or blocked whole-house filter can still produce low flow after a new PRV is installed.
Is the pressure regulator part of the water meter?
Usually, no. The water meter is commonly owned and sealed by the water utility, while the pressure regulator belongs to the property owner and sits downstream of the meter. Local arrangements differ, so identify the ownership boundary before turning any fitting.
A typical sequence from the street toward the building is curb stop, utility or customer shutoff, water meter, customer-side PRV, house shutoff, and interior distribution piping. Some homes place the PRV before the meter, and that arrangement requires utility or licensed-plumber guidance.
Is the Regulator Actually Defective?
A PRV should be replaced when measured pressure remains too high, pressure fluctuates substantially, the valve leaks through its body, or the valve cannot maintain a stable setting after adjustment. A single weak shower does not prove PRV failure.
Attach a hose-bib pressure gauge to an outdoor faucet or laundry connection. Record pressure with no fixtures running, then record it while a toilet fills or a faucet flows. A failed PRV may show normal static pressure but excessive pressure creep after the house sits unused.
Check these alternative causes first:
- Confirm the main shutoff is fully open.
- Remove and inspect a whole-house filter cartridge.
- Compare hot and cold pressure at several fixtures.
- Check whether low pressure affects the entire house or only one branch.
- Test pressure at two hose connections if the plumbing layout permits.
- Inspect the meter screen only through the transparent dial, without opening the meter assembly.
Pressure above 80 PSI is not automatically proof that pipes will fail immediately. The International Plumbing Code uses 80 PSI as a threshold requiring pressure reduction in many installations, but jurisdictions adopt different code editions and enforcement rules.
How Do You Choose the Replacement Valve?
Choose a PRV by nominal pipe size, flow direction, connection type, pressure range, temperature rating, and service capacity. Match the existing valve’s size markings and end connections rather than measuring only the outside diameter of the pipe.
| Replacement characteristic | Typical residential value | How to verify it | Consequence of mismatch |
|---|---|---|---|
| Nominal pipe size | 3/4 inch or 1 inch | Read valve body or measure fitting | Restricted flow or incompatible fittings |
| Outlet pressure range | 25-75 PSI | Read manufacturer specification | Inability to reach the desired setting |
| Normal setting | 50-60 PSI | Test with a pressure gauge | Excessive pressure or weak fixture flow |
| Maximum inlet pressure | 150-300 PSI | Check product data sheet | Premature failure or unsafe operation |
| Connection style | Union, NPT, sweat, push-fit | Inspect both valve ends | Cutting, soldering, or adapters required |
| Flow capacity | Approximately 7-25 GPM | Compare fixture demand and valve rating | Pressure droop during simultaneous use |
A standard direct-acting PRV is adequate for many single-family homes. A high-capacity model is more appropriate for a large residence, multiple bathrooms, irrigation demand, or a service line where a small valve causes noticeable pressure loss.
Which connection type is easiest to replace?
A double-union PRV is usually the easiest long-term replacement because the valve lifts out after two union nuts are loosened. A push-to-connect model can simplify copper, PEX, or CPVC work, but it requires clean, round, fully inserted pipe and adequate pipe support.
| Connection type | Typical installation method | DIY time | Main limitation |
|---|---|---|---|
| Double union | Replace valve and new gaskets | 30-90 minutes | Requires matching union ends and spacing |
| NPT threaded | Apply approved thread sealant and tighten | 60-150 minutes | Existing threads may be corroded or damaged |
| Copper sweat | Cut, clean, flux, solder, and cool | 90-180 minutes | Requires torch skill and fire protection |
| Push-to-connect | Deburr, mark insertion depth, push fitting | 45-120 minutes | Poor pipe preparation can cause leaks |
| Galvanized threaded | Remove nipples or use transition fittings | 120-240 minutes | Old steel may seize or break during removal |
Do not assume two valves with the same pipe size will have the same face-to-face length. Measure the installed body length between connection points, and confirm whether replacement unions include gaskets.
What Tools and Materials Are Needed?
Prepare the replacement PRV, two wrenches, a pressure gauge, replacement union gaskets, towels, a bucket, thread sealant, and a pipe-cutting method before shutting off the water. Add a tubing cutter, deburring tool, soldering equipment, or push-fit depth gauge only when the connection method requires it.
Before-you-start checklist
| Item | Typical requirement | Practical note |
|---|---|---|
| Work time | 1-3 hours | Add time for soldering or seized fittings |
| DIY difficulty | Moderate | Existing unions reduce difficulty substantially |
| PRV cost | $50-$250 | Standard valves cost less than dial models |
| Professional total | $300-$850 typical | Region, access, and pipe repairs change price |
| Pressure gauge | 0-160 PSI | Use a hose-bib model with a readable scale |
| Union gaskets | 2 new pieces | Match the union face and material |
| Wrenches | 2 adjustable or pipe wrenches | Counterhold the stationary fitting |
| Leak supplies | Bucket, towels, flashlight | Keep water away from electrical equipment |
Wear eye protection when cutting pipe or loosening corroded fittings. If the main shutoff does not close fully, stop the project because active flow can prevent a dry connection and flood the work area.
How to Replace a Water Meter Pressure Regulator
The replacement consists of eight controlled stages: measure, isolate, drain, remove, prepare, install, repressurize, and commission. The factor that most determines success is the existing connection arrangement, because double unions permit a direct swap while soldered or corroded piping may require pipe alterations.
Step 1: Measure pressure and document the assembly
Attach the pressure gauge to an outdoor hose bib. Open the faucet fully, record static pressure, then record pressure while another fixture flows. Photograph the existing PRV, arrow direction, pipe size, union spacing, and nearby shutoff before disassembly.
Write down the old valve’s brand, model, size, and adjustment range. Buy a replacement rated for potable water and compatible with the building’s maximum inlet pressure.
You will know this step worked when the replacement valve matches the pipe size and fits the available length without forcing the piping. A common mistake is buying a 1-inch valve because the outside pipe appears close to 1 inch, even though the installed valve is nominally 3/4 inch.
Step 2: Shut off the building water supply
Close the customer-side main shutoff downstream of the meter. If no customer shutoff exists, contact the water utility or a licensed plumber rather than breaking a meter seal or turning a buried utility valve.
Open a nearby faucet briefly to confirm that the building supply has stopped. Keep the meter and utility-side fittings untouched.
You will know this step worked when the faucet flow falls to residual drainage and the pressure gauge reads zero or near zero. A common mistake is relying on a stiff, partially closed stop valve that still allows enough flow to make the replacement impossible.
Step 3: Drain and depressurize the plumbing
Open the lowest practical faucet, then open a higher faucet to admit air. Drain water into a bucket until the flow stops, leaving towels below the PRV and unions.
Do not expect every drop to drain. Water trapped between the shutoff, meter, and PRV can remain under pressure, especially when the PRV is below the incoming pipe.
You will know this step worked when loosening a union produces only a small release of residual water. A common mistake is removing a union nut while the line still has full municipal pressure.
Step 4: Remove the old regulator
For a union-connected valve, hold the valve body or stationary union with one wrench and loosen the union nut with the second wrench. Repeat on the opposite side, then remove the valve and both old gaskets.
For a threaded valve without unions, disconnect the closest serviceable threaded joint. If no joint can be separated, cut the pipe only after confirming that enough straight length remains for new fittings.
You will know this step worked when the pipe remains stable and the connection faces are not distorted. A common mistake is twisting the meter, soldered joint, or service pipe while using the valve body as a lever.
Step 5: Prepare the pipe and fittings
Clean pipe ends, union faces, and threads. Remove old gasket fragments, corrosion, burrs, and solder beads that could prevent a flat seal or obstruct the new valve seat.
Apply four to five clockwise wraps of PTFE tape to clean male NPT threads, keeping the first thread clear, or use a potable-water-rated pipe joint compound according to the product instructions. Never apply thread sealant to a union gasket face.
You will know this step worked when each pipe end is round, smooth, and aligned with the replacement valve. A common mistake is using tape to compensate for damaged threads or placing tape on a compression or union sealing surface.
Step 6: Install the new PRV in the correct direction
Position the new pressure-reducing valve so its cast flow arrow points from the meter toward the house. Install new union gaskets flat and centered, then start every nut by hand before tightening.
Hold the valve body with one wrench and tighten each union nut with another. Tighten firmly, but stop when the gasket is compressed and the connection is secure. Excessive force can deform the gasket or crack a brass fitting.
For NPT connections, keep the valve body aligned without reversing it to achieve a final orientation. For push-fit connections, deburr the pipe, mark the manufacturer’s insertion depth, and verify that the pipe reaches the internal stop.
You will know this step worked when the valve is supported, the arrow faces downstream, and the unions are square. A common mistake is installing the PRV backward, which can produce very low flow or prevent regulation.
Step 7: Restore water slowly and inspect for leaks
Close the faucets used for draining, then open the main shutoff gradually. Pause several seconds while the line fills, and leave one cold-water faucet slightly open until air stops sputtering.
Inspect both unions, threaded joints, soldered fittings, and the valve body with a dry tissue. A tissue reveals a slow seep more reliably than a quick visual glance.
You will know this step worked when the system reaches pressure without a spray, hammer, or continuous drip. A common mistake is tightening a leaking union repeatedly without first checking whether its gasket is flat, damaged, or missing.
Step 8: Set and verify outlet pressure
Attach the pressure gauge again and read the static pressure after all fixtures stop. Loosen the PRV locknut, turn the adjustment screw clockwise to increase pressure or counterclockwise to decrease pressure, and make changes in quarter-turn or half-turn increments.
After each adjustment, open a faucet briefly to relieve downstream pressure, close it, and wait for the gauge to stabilize. Set most homes near 50-60 PSI unless the valve manufacturer, plumbing design, or local professional specifies another value.
Tighten the locknut without moving the adjustment screw. Recheck pressure with a flowing fixture because direct-acting valves can show droop, meaning outlet pressure falls as flow increases.
You will know this step worked when static pressure remains near the chosen setting, flowing pressure remains usable, and the gauge does not climb steadily after several minutes. A common mistake is adjusting from a pressurized, stagnant line without relieving trapped downstream pressure.
Does a New PRV Require a Thermal Expansion Tank?
A new PRV can make a home’s water system closed because the valve prevents heated water from flowing backward toward the municipal main. When water heats and expands, pressure may rise unless an expansion tank or another approved control method absorbs that increase.
The International Code Council’s plumbing guidance treats thermal expansion protection as a system-design issue, not as an automatic requirement for every PRV replacement. Local code, water-heater type, backflow protection, and existing check valves determine the required arrangement.
Check the expansion tank’s air charge with the water pressure removed, using the manufacturer’s procedure. A leaking tank, waterlogged tank, or incorrect precharge can cause the temperature-and-pressure relief valve to discharge overnight.
Do not cap, plug, or obstruct the water heater’s T&P relief valve. If it releases water after the PRV replacement, investigate thermal expansion and pressure settings promptly.
What If the Pipes Are Copper, PEX, or Galvanized?
Pipe material changes the safest replacement method. Copper often requires soldering when no unions exist, PEX needs correct insert fittings and pipe support, and galvanized steel may require replacement of corroded nipples instead of forcefully turning the old regulator.
Copper pipe
Use a tubing cutter, clean the tube and fitting, protect nearby combustibles, and remove pressure and water before heating. A small amount of trapped water can prevent solder from bonding, so dry the line thoroughly.
PEX pipe
Use a PRV approved for PEX and the selected connection system. Prevent the flexible pipe from pulling sideways on the valve by adding manufacturer-approved clamps, brackets, or a rigid transition section.
Galvanized pipe
Expect seized threads and internal corrosion. Penetrating oil may help, but heating unknown old plumbing can create hazards, and excessive torque can fracture a concealed fitting inside a wall.
When should a plumber take over?
Hire a licensed plumber when the meter-side shutoff will not close, the meter assembly must be disturbed, the valve is inside a confined or finished wall, the pipe is badly corroded, or soldering would occur near combustible materials. A professional is also appropriate when pressure remains high after the PRV is correctly installed.
How Much Does Replacement Cost?
A direct double-union replacement commonly costs $50-$250 for the valve and takes 1-3 hours for a capable DIYer. Professional replacement commonly totals $300-$850, with higher prices when the plumber must replace shutoffs, cut concrete, repair galvanized piping, or coordinate utility access.
| Job condition | Parts range | Typical time | Typical total cost |
|---|---|---|---|
| Existing double unions | $50-$150 | 45-90 minutes | $300-$500 professionally |
| Threaded replacement | $70-$200 | 1-2 hours | $350-$650 professionally |
| Copper solder alteration | $60-$220 | 1.5-3 hours | $450-$850 professionally |
| Corroded galvanized service | $100-$300 | 2-4 hours | $600-$1,200 professionally |
These are typical planning ranges, not a universal price schedule. Access, regional labor rates, permits, emergency timing, and the need to replace a failed main shutoff can change the estimate.
Common Mistakes and How to Fix Them
The regulator is installed backward
A backward PRV can restrict flow severely or fail to regulate. Shut off the customer-side supply, drain the line, and confirm that the arrow points downstream toward the house.
The union leaks after tightening
A union leak usually indicates a misaligned, reused, damaged, or missing gasket rather than insufficient force. Shut off water, separate the joint, center a new gasket, inspect both faces, and retighten with two wrenches.
Pressure stays low after installation
Verify the main shutoff is fully open, confirm the arrow direction, inspect inlet screens if the model has one, and compare pressure at another hose bib. A blocked filter or supply-side restriction requires a different repair.
Pressure rises overnight
Pressure creep can result from debris on the valve seat, a damaged cartridge, thermal expansion, or an incorrectly adjusted PRV. Record pressure before bed and after several hours without water use; a steady increase points to a system or valve problem.
Water hammer begins after the work
Air in the lines, rapid valve opening, loose pipe supports, and a failing PRV can cause hammer. Purge air by opening fixtures gradually, secure accessible piping, and verify that the PRV is not chattering under flow.
The valve cannot be removed safely
Stop when a meter, soldered joint, concealed fitting, or corroded pipe begins to twist. Cutting more pipe is not automatically safer because the replacement may then lack enough straight pipe for a secure coupling.
Can You Repair the Old Regulator Instead?
Some PRVs have replaceable cartridges, diaphragms, springs, or strainers, but repair is practical only when the manufacturer supplies parts and the valve body remains sound. A complete replacement is usually more predictable when the body is corroded, the adjustment screw is seized, or the model is obsolete.
Cleaning a removable cartridge may correct pressure creep caused by installation debris. Follow the specific manufacturer’s service instructions because cartridge orientation, spring arrangement, and torque requirements differ between brands.
Do not rebuild a potable-water PRV with generic rubber parts whose material, temperature rating, or chemical compatibility is unknown. A small part-cost saving can create a persistent leak or unstable pressure.
Frequently Asked Questions
Can I replace a pressure regulator without shutting off the water meter?
No. The building supply must be isolated before removing the PRV, but you normally do not need to shut off or remove the meter itself. Close the customer-side shutoff downstream of the meter; if that shutoff is absent or defective, ask the utility or a licensed plumber to isolate the service.
What is the difference between a water pressure regulator and a backflow preventer?
A PRV reduces downstream pressure, while a backflow preventer stops contaminated water from reversing into the potable supply. A PRV does not replace a backflow preventer, and a backflow device does not provide normal household pressure regulation.
Can a pressure regulator cause low water pressure?
Yes. A failed diaphragm, clogged screen, incorrect installation direction, undersized valve, or excessive flow demand can cause low pressure downstream. Confirm the pressure with a gauge before replacing the valve, because a clogged filter or partially closed shutoff can create the same symptom.
How long does a residential pressure regulator last?
A residential PRV often lasts approximately 7-12 years, but water quality, inlet pressure, sediment, cycling, and valve construction change the service life. Replacement becomes more likely when adjustment no longer changes pressure, pressure creeps upward, or the body develops corrosion.
Should the PRV be before or after the water meter?
The PRV is commonly installed after the water meter on the customer side, allowing the meter to record all delivered water while the valve protects the building plumbing. Some systems use another arrangement, so the utility ownership boundary and local plumbing rules control the acceptable location.
Why is the pressure different at different faucets?
Pressure can vary because of pipe length, elevation, fixture restrictors, partially closed stops, clogged aerators, filters, and flow-dependent PRV droop. A properly adjusted PRV controls the main downstream pressure, but it cannot eliminate pressure loss in undersized or obstructed branch piping.
The Bottom Line
Replacing a water meter pressure regulator is a manageable plumbing task when the valve is customer-owned, the main shutoff works, and existing unions provide a direct fit. Measure pressure first, match size and connections, install the arrow toward the house, use new gaskets, restore water slowly, and verify both static and flowing pressure. The safest how to replace a water meter pressure regulator decision is to stop and call a professional whenever meter-side fittings, concealed corrosion, failed shutoffs, or combustible-area soldering enter the job.