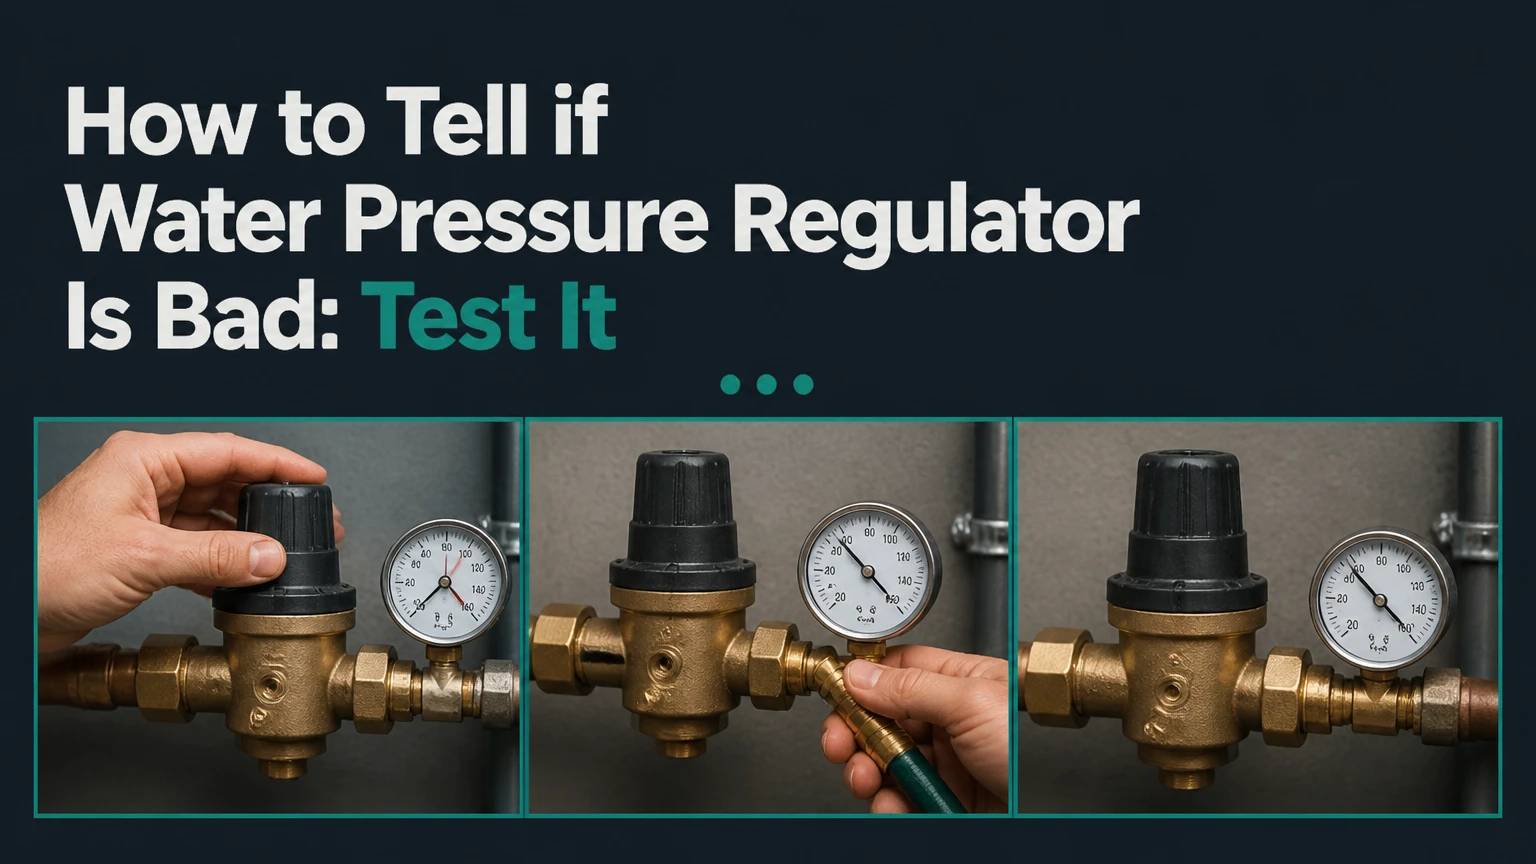
A bad water pressure regulator, also called a pressure-reducing valve or PRV, usually produces abnormal static pressure, pressure creep, severe fluctuations, or a leak from the valve assembly. The reliable diagnosis is a gauge test at a hose bib, followed by checks under flowing water and after several hours of no use.
Key Facts at a Glance
A residential PRV commonly maintains approximately 40-60 PSI, although the correct setting depends on the valve, plumbing design, and local code.
Static pressure above 80 PSI can damage fixtures, appliances, and water heaters and requires prompt investigation.
Pressure that rises while every fixture is closed indicates pressure creep, thermal expansion, a failed check mechanism, or a supply-side problem.
Low pressure at every fixture does not prove PRV failure because clogged filters, a partly closed shutoff valve, corroded pipe, and utility restrictions cause similar symptoms.
A regulator that cannot change outlet pressure during a controlled adjustment may have a blocked or damaged internal mechanism.
A leaking valve body, diaphragm cover, or adjustment area generally calls for replacement rather than sealant applied to the outside.
What Does a Water Pressure Regulator Do?
A water pressure regulator reduces the higher pressure entering from a public water main to a controlled pressure suitable for household plumbing. The brass valve normally sits on the incoming service pipe, downstream of the main shutoff and before the branch lines supplying faucets, toilets, appliances, and the water heater.
A PRV is different from a shutoff valve. A shutoff valve stops flow; a pressure regulator modulates flow to control downstream pressure. A backflow preventer protects the public supply from reverse flow, while a PRV limits the pressure delivered to the building.
Municipal pressure varies widely. A home on a hillside, a property near a pumping station, and a building supplied during overnight low demand can receive very different inlet pressures. The regulator must absorb that variation without allowing excessive outlet pressure into the home.
How does a PRV work?
A pressure-reducing valve uses inlet pressure, a spring, and a diaphragm or piston to control an outlet opening. When downstream pressure falls because a faucet opens, the internal mechanism opens farther; when downstream pressure reaches the set point, the mechanism restricts incoming flow.
The adjustment screw changes spring force. Turning the screw clockwise commonly increases the set pressure, while turning it counterclockwise decreases pressure, but the direction and adjustment range must follow the manufacturer’s instructions. A clogged strainer, mineral deposits, a torn diaphragm, a weakened spring, or a worn seat can prevent accurate regulation.
A normally closed fixture can expose another failure mode. If the PRV allows pressure to rise gradually with no water use, the valve may be experiencing pressure creep. Thermal expansion from a water heater can also raise pressure in a closed plumbing system, so a rising gauge does not automatically prove the regulator is defective.
What Are the Signs of a Bad Water Pressure Regulator?
The strongest signs are a measured pressure above 80 PSI, pressure that rises with all fixtures closed, large unexplained pressure swings, or a regulator that leaks from its body. Low pressure alone is weaker evidence because restrictions elsewhere in the plumbing can create the same complaint.
| Symptom | Likely PRV condition | Other common causes | Best confirmation |
|---|---|---|---|
| 90-120 PSI with no fixtures open | Failed open, misadjusted, or bypassed PRV | Utility pressure, incorrect gauge | Test at two locations and inspect valve arrow |
| 20-35 PSI at all fixtures | Restricted or misadjusted PRV | Clogged filter, shutoff restriction, corroded pipe | Compare static and flowing pressure |
| Pressure rises from 55 to 85 PSI overnight | Pressure creep or closed-system expansion | Water-heater heating cycle, check valve | Record gauge pressure before and after heating |
| Humming or whistling during flow | Internal vibration or excessive velocity | Partly closed valve, pipe resonance | Compare sound at regulator and fixtures |
| Water leaking from valve body | Corroded casting, failed diaphragm seal, loose connection | Nearby joint or relief-valve leak | Dry valve, observe exact leak source |
| Pressure alternates between weak and strong | Sticking mechanism or unstable supply | Well pump cycling, utility work | Gauge test during flow and at different times |
Does low water pressure prove the regulator is bad?
Low pressure does not prove PRV failure. A faucet aerator, showerhead screen, whole-house filter, water softener, partially closed main valve, clogged cartridge, undersized service pipe, or galvanized-pipe corrosion can reduce flow while the regulator remains functional.
Test the pressure at a hose bib close to the regulator before removing fixtures. If the gauge reads 55 PSI with no flow but falls to 15 PSI when one faucet opens, the system has a flow restriction or inadequate supply capacity. A regulator stuck partially closed is one possibility, not the only diagnosis.
What does high pressure from a PRV failure look like?
High pressure often appears as forceful faucet discharge, toilet fill valves that hiss or fail prematurely, dripping relief valves, leaking appliance hoses, and water hammer when solenoid valves close. A pressure gauge is more reliable than any symptom because people perceive flow rate as pressure, although flow and pressure are different measurements.
Pressure above 80 PSI is the widely used residential danger threshold in plumbing codes such as the International Plumbing Code and International Residential Code. Local amendments and the valve manufacturer’s specification control the enforceable requirement.
How to Test a Water Pressure Regulator
A hose-thread pressure gauge can screen a residential PRV in about 10 minutes, provided every fixture is closed and the gauge is accurate. Test static pressure first, then flowing pressure and pressure creep, because one reading cannot distinguish a failed valve from a restricted pipe or expanding hot-water system.
Before you start
| Item | Typical requirement | Purpose |
|---|---|---|
| Hose-thread pressure gauge | 1 gauge, 0-160 PSI scale | Measures static and flowing pressure |
| Test location | 1 exterior hose bib or heater drain | Provides access to house-side pressure |
| Test time | 10-20 minutes, plus overnight check | Captures immediate and delayed changes |
| Adjustable wrench | 1, typically 8-10 inches | Connects or removes the gauge |
| Thread seal | Existing rubber washer, no tape on gauge gasket | Prevents a connection leak |
Use a gauge with a female garden-hose connection and an integral maximum-pressure indicator if available. A gauge attached to the water-heater drain can work, but the heater drain must be in good condition and the connection must not disturb the temperature-and-pressure relief system.
Step 1: Choose the correct test point
Attach the gauge to an outside hose bib supplied downstream of the PRV. A hose bib before the regulator, if one exists, will show street pressure rather than household pressure and cannot diagnose the outlet setting.
Open and close the hose bib briefly before attaching the gauge to clear loose debris. Do not force a corroded faucet stem. If the bib leaks around its stem, repair that leak after testing because it can make a pressure reading unstable.
Step 2: Close every source of water use
Turn off faucets, toilets that are refilling, irrigation, washing machines, dishwashers, refrigerator ice makers, and water-treatment equipment. Wait until the water heater finishes any active recovery cycle if you are testing pressure creep.
Screw the gauge onto the hose bib with its rubber washer seated. Hand-tighten it, then use only a small wrench movement if needed. Excessive force can damage the bib or deform the gauge gasket.
Step 3: Record static pressure
Open the hose bib fully and record the gauge reading after the needle settles. A typical residential target is 40-60 PSI, while readings from 60-80 PSI may be acceptable in some installations if fixtures and local requirements allow them.
Use these readings as diagnostic indicators:
| Gauge reading | Initial interpretation | Recommended next action |
|---|---|---|
| 0-20 PSI | Severe supply interruption or closed valve | Check main shutoff and utility service |
| 20-39 PSI | Low static pressure or restriction | Test flow, filters, and regulator setting |
| 40-60 PSI | Typical regulated range | Check fluctuation and creep if symptoms persist |
| 61-79 PSI | High but not automatically a failure | Verify local limit and monitor creep |
| 80-99 PSI | Excessive residential pressure | Reduce pressure and arrange prompt inspection |
| 100+ PSI | Potentially damaging pressure | Shut off water if uncontrolled and call a plumber |
The 40-60 PSI range is a practical residential target, not a universal factory setting. Many PRVs leave the manufacturer preset near 50 PSI, but the correct outlet pressure can differ by model and building requirements.
Step 4: Measure flowing pressure
Leave the gauge connected and open a nearby faucet until the reading stabilizes. Compare the flowing reading with the static reading. A small drop is normal because pipes and the regulator must supply moving water, but a sharp fall suggests a restriction, insufficient service capacity, or a PRV that cannot open correctly.
For example, 55 PSI static pressure that falls to 12 PSI while one shower runs points toward a flow problem. Check the regulator strainer, whole-house filter, shutoff valves, and pipe condition before replacing the PRV solely from that result.
Step 5: Check for pressure creep
Close the hose bib and note the pressure. Leave all fixtures unused for 30-60 minutes, then record the gauge again. For a stronger test, record the pressure before bed and after at least six hours without water use.
Pressure that remains close to the original reading supports normal regulation. A rise from 55 PSI to 85 PSI with no use indicates pressure creep or thermal expansion. Turn on a cold faucet briefly; if pressure drops and then climbs again, the system needs further diagnosis.
Step 6: Adjust only with the manufacturer’s procedure
If the regulator has an adjustment screw and locknut, mark the original position, loosen the locknut, and make a small adjustment, commonly one-quarter turn. Watch the gauge while a fixture is closed, then retighten the locknut and recheck both static and flowing pressure.
An adjustment that produces no pressure change can indicate a frozen spring, blocked passage, damaged diaphragm, or a regulator that has reached its mechanical limit. Do not repeatedly tighten the screw to overcome low pressure. Excessive spring compression can damage the diaphragm and create a dangerously high setting.
How Can You Tell Whether the PRV or Another Component Failed?
A pressure diagnosis becomes more reliable when the gauge is moved through the system. Compare the street side, regulator outlet, water-heater connection, and a distant fixture when those test points are safely accessible.
Compare pressure at multiple locations
If pressure is high before and after the regulator, the valve may be missing, installed backward, bypassed, or unable to regulate. If pressure is normal at the regulator outlet but weak at one faucet, the fault is downstream and may involve a cartridge, aerator, branch shutoff, or local corrosion.
If pressure is low before the regulator, replacing the PRV will not create municipal supply pressure. Contact the water utility or a plumber to investigate the service line, meter, neighborhood demand, or an upstream shutoff.
Inspect the regulator physically
Look for the flow arrow cast into the body. The arrow should point from the street or supply source toward the building. An incorrectly oriented PRV can restrict flow and may not control pressure.
Check the strainer, if the model has one, for sediment. Inspect threaded connections, union joints, the spring housing, and the adjustment area with a dry tissue. A leak that begins at a union may require a new gasket or tightened connection; water emerging through the casting or diaphragm cover usually means valve replacement.
Can Thermal Expansion Mimic a Bad Regulator?
Thermal expansion can mimic PRV failure when a water heater raises pressure inside a closed plumbing system. A working PRV may prevent city-side pressure from flowing backward, while an expansion tank absorbs the increased volume created as heated water expands.
A pressure reading that rises mainly during a heating cycle does not identify the regulator as the sole fault. Test the gauge while the heater is cold and again while it operates. Inspect the expansion tank’s air charge only after isolating and depressurizing it according to the tank manufacturer’s instructions.
A failed or waterlogged expansion tank can cause pressure spikes, dripping fixtures, and discharge from the water-heater relief valve. Do not cap, plug, or obstruct that relief valve. If it discharges repeatedly, arrange prompt professional service because it is a safety device.
What If the House Has a Well or Booster Pump?
A well-water pressure problem is usually controlled by the pressure tank, pump, pressure switch, or sediment filter rather than a city-water PRV. Typical well systems cycle around a pressure-switch range such as 30-50 or 40-60 PSI, but the exact settings belong to the pump system.
A gauge that rapidly falls to the cut-in pressure and rises to cut-out pressure may indicate normal cycling. Rapid cycling, low air charge, a blocked filter, or a failing pump can resemble regulator trouble. Test pressure near the tank and compare it with pressure inside the house.
Booster-pump systems add another possible cause. A malfunctioning pump controller or clogged inlet strainer can produce low flow even when the PRV holds a normal static reading.
Should You Adjust or Replace the Regulator?
Adjust a PRV only when the valve is dry, mechanically intact, within its rated range, and responsive to small screw movements. Replace the regulator when pressure remains uncontrolled, the body leaks, the mechanism sticks, the valve is badly corroded, or the valve repeatedly loses its setting.
Most residential PRVs have a typical service life of roughly 5-15 years, but water chemistry, sediment, inlet pressure, flow demand, and maintenance matter more than a fixed age limit. A 12-year-old valve that holds 55 PSI may be healthier than a three-year-old valve exposed to heavy sediment.
| Condition | Adjustment appropriate? | Replacement or service decision |
|---|---|---|
| 52 PSI, dry body, stable reading | Yes, if a different setting is required | No replacement indicated |
| 45 PSI static, 10 PSI flowing | Usually no | Check strainer and restrictions, then replace if internal |
| 55 PSI rising to 90 PSI closed | No repeated adjustment | Diagnose creep, expansion tank, and PRV seat |
| Water through valve casting | No | Replace valve and inspect surrounding pipe |
| Spring housing heavily corroded | No | Replace before leakage worsens |
| Pressure changes correctly but one faucet is weak | No | Repair the fixture or branch restriction |
Which Replacement Regulator Should You Choose?
A direct replacement with matching pipe size, flow capacity, pressure range, and connection style is usually the best choice. A double-union PRV costs more initially but can reduce future labor because the valve body can be removed without cutting and rebuilding both sides of the pipe.
| Connection style | Typical material or tool need | Typical valve cost | Replacement difficulty |
|---|---|---|---|
| Threaded NPT | Pipe wrenches and approved thread sealant | $50-$120 | Moderate |
| Single union | One union gasket and wrenches | $70-$150 | Moderate |
| Double union | Two union connections and replacement gaskets | $90-$200 | Low for future swaps |
| Sweat copper | Torch, solder, flux, heat protection | $60-$140 | High |
| Push-to-connect | Deburring tool and disconnect clip | $80-$180 | Low, with strict installation limits |
Select a valve rated for potable water and the expected inlet pressure. Match 3/4-inch or 1-inch pipe size rather than assuming a larger body always improves pressure. A regulator with insufficient flow capacity can create a large pressure drop even when it is new.
Push-to-connect valves can simplify accessible repairs, but pipe ends must be clean, round, fully inserted, and deburred. Avoid burying any connection that the manufacturer or local code does not permit for concealed locations. Soldered connections can be durable, but torch work near framing requires appropriate fire protection and skill.
How Much Does PRV Replacement Cost?
A typical DIY replacement costs about $60-$200 for the regulator, fittings, gaskets, and sealant, while professional installation commonly ranges from $300-$800 depending on access, pipe material, local labor, and whether an expansion tank or shutoff valve also needs work.
| Replacement situation | Typical material cost | Typical labor time | Typical total professional cost |
|---|---|---|---|
| Accessible double-union replacement | $90-$200 | 45-90 minutes | $300-$600 |
| Threaded valve with fitting changes | $60-$150 | 1-2 hours | $350-$750 |
| Copper sweat replacement | $60-$180 | 1-3 hours | $400-$900 |
| Concealed or corroded service line | $150-$400 | 2-5 hours | $700-$1,500+ |
Prices vary substantially by region and emergency timing. A replacement that requires shutting down a shared building, excavating a service line, or relocating the regulator does not fit ordinary single-family estimates.
Common Mistakes and How to Fix Them
- Testing while water is running: A washing machine fill or ice maker can make static pressure appear low. Close every fixture and repeat the test after the needle settles.
- Using a faulty gauge: A damaged gauge can falsely show excessive pressure. Compare it with a second gauge or test at another known-good connection before ordering a valve.
- Confusing flow with pressure: A weak shower can result from a clogged cartridge even when the house pressure is 55 PSI. Test the main pressure before replacing the regulator.
- Over-adjusting the screw: Large turns can move pressure beyond the safe range. Mark the original setting and adjust in quarter-turn increments while watching the gauge.
- Ignoring thermal expansion: A new PRV can create or reveal a closed system. Check whether pressure rises when the water heater heats, and ensure the expansion tank is correctly sized and charged.
- Replacing the valve backward: The body arrow must follow water flow toward the house. Shut off the main, drain pressure, and verify orientation before tightening any connection.
When Should You Shut Off the Water?
Shut off the main supply or call an emergency plumber when the gauge shows uncontrolled pressure above 100 PSI, a pipe or regulator is actively spraying, the water-heater relief valve is discharging continuously, or a fixture cannot be closed.
Do not remove a regulator under pressure. Turn off the main valve, open a faucet to drain pressure, confirm the gauge reaches zero, and protect nearby electrical equipment. If the main shutoff does not close completely, stop the work and contact the water utility or a licensed plumber.
FAQ
Can a water pressure regulator fail intermittently?
Yes. Sediment, a worn seat, and a sticking diaphragm can make a PRV alternate between normal and abnormal pressure. Record readings when the problem occurs, including static pressure, flowing pressure, time of day, and whether the water heater is operating. Intermittent municipal pressure and well-pump cycling can produce the same pattern.
Is 70 PSI too high for a house?
70 PSI is below the commonly used 80 PSI residential limit, but it may still exceed a fixture manufacturer’s preferred setting and leave little room for pressure creep. A stable 70 PSI reading is different from a system that rises from 70 to 95 PSI with no water use. Monitor delayed pressure, not only the initial reading.
Can a bad regulator cause no water pressure?
A PRV stuck closed or severely blocked can reduce pressure to nearly zero, but a closed main valve, frozen pipe, failed well pump, clogged filter, or utility outage can also cause no pressure. Verify supply pressure before condemning the regulator, especially if neighboring properties have the same problem.
Where is a water pressure regulator located?
A residential PRV is usually installed on the main incoming water line near the meter, main shutoff, basement entry, crawl-space entry, or exterior service box. The valve is commonly brass, has a spring-shaped housing or adjustment screw, and includes a directional arrow cast into its body.
Does a pressure regulator need an expansion tank?
A PRV can create a closed plumbing system when it prevents water from flowing backward toward the supply. If the home has a storage water heater, an appropriately sized and charged thermal expansion tank may be required by local code or the plumbing design. A plumber should verify the system rather than adding a tank blindly.
How long can I use a house with a bad PRV?
A leaking or uncontrolled PRV should not be treated as a routine maintenance issue. Pressure above 80 PSI can shorten the life of water heaters, washing-machine hoses, faucet cartridges, and toilet valves; pressure above 100 PSI or an active leak warrants immediate action.
The Bottom Line
To determine how to tell if water pressure regulator is bad, attach a hose-thread gauge downstream of the valve, measure static pressure with every fixture closed, compare it with flowing pressure, and check whether pressure rises over time. Readings above 80 PSI, uncontrolled pressure creep, severe pressure collapse, abnormal regulator noise, or leakage from the valve body justify professional diagnosis or replacement.