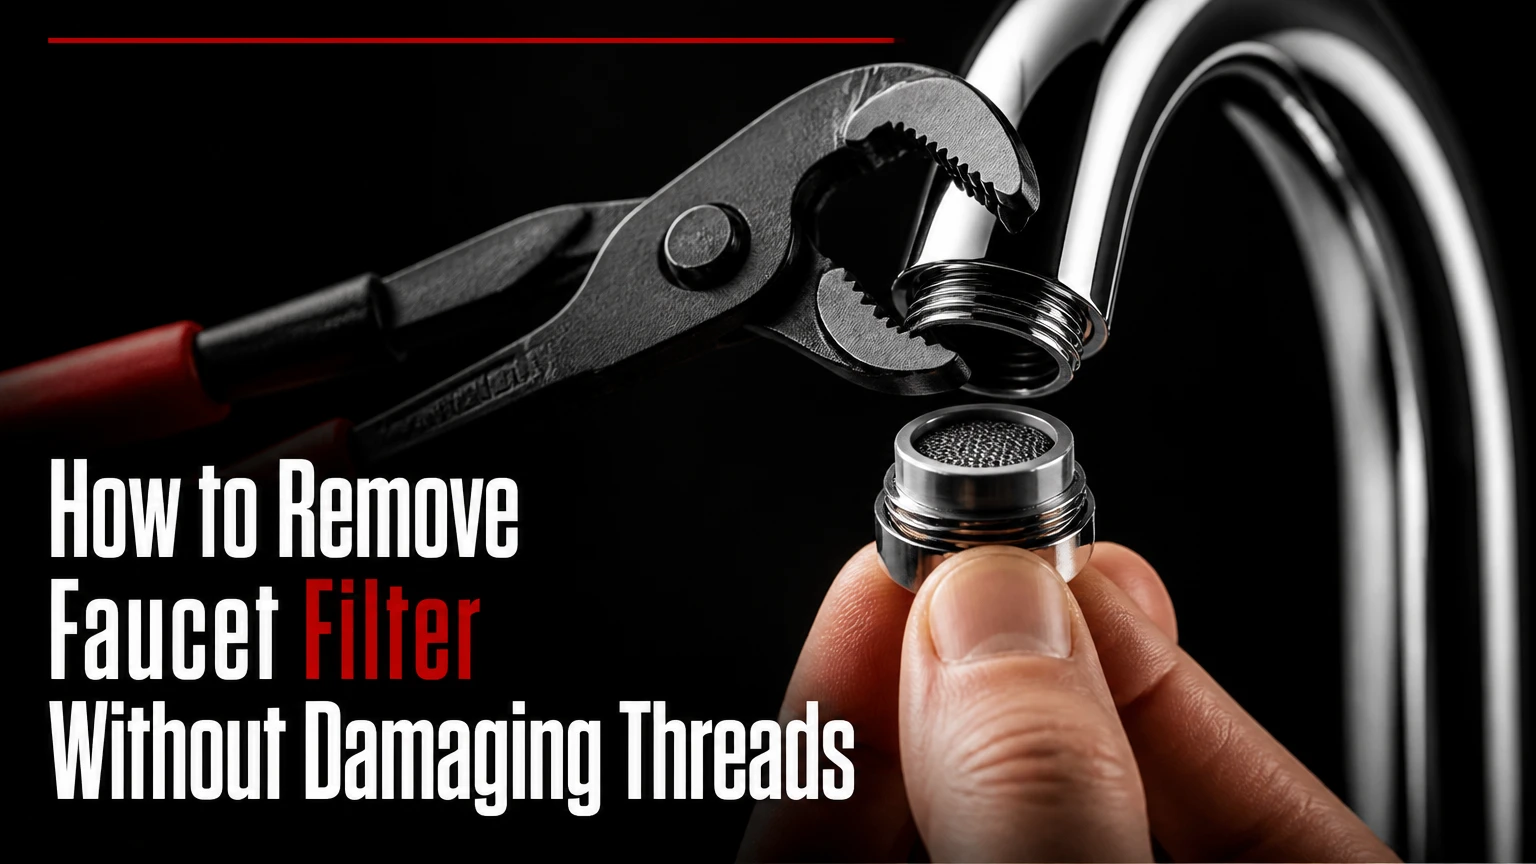
To remove a faucet filter, first identify whether the part is an internal faucet aerator or an external filter attachment such as PUR or Brita. Remove a visible aerator by turning its housing counterclockwise when viewed directly from below, use a matching cache-aerator key for recessed models, and release external filter mounts with their buttons or threaded collar.
Key Facts
A faucet aerator is the small screen at the spout tip; an external faucet filter is a separate cartridge housing attached outside the spout.
Most visible aerators loosen counterclockwise when you look directly at the aerator from below the faucet.
A hidden aerator requires a compatible plastic or metal removal key, not a screwdriver pried into the spout.
A towel over the drain prevents washers, screens, and retaining rings from disappearing into the plumbing.
White vinegar can loosen mineral scale on removable metal screens, but acidic soaking is unsuitable for every finish and rubber component.
A typical removal takes 5-10 minutes when the threads are clean and 20-60 minutes when scale has seized the part.
What faucet part are you removing?
A faucet filter usually refers to one of two different components: an aerator installed inside the spout tip, or an external water-filtration unit attached to the faucet. The distinction determines the tool, turning direction, and reinstallation method.
An aerator shapes the water stream by mixing air into water and catching sediment. It does not usually remove dissolved chlorine, lead, fluoride, or other contaminants. An external faucet filter uses a replaceable cartridge and has a visibly larger housing, often with a selector switch or filter-life indicator.
Look at the last 1-2 inches of the spout. A small threaded ring, screen, or smooth recessed opening indicates an aerator. A bulky plastic device with a cartridge body indicates an external filter mount. Some attachments include a faucet adapter between the original spout threads and the filter housing, so removal may require taking off both pieces.
How can you identify the filter type?
| Appearance at spout | Component | Usual removal method | Typical time |
|---|---|---|---|
| Metal ring with flats | Standard aerator | Hand or padded pliers | 2-10 minutes |
| Smooth recessed opening | Cache aerator | Correct aerator key | 5-15 minutes |
| Large PUR or Brita housing | External filter mount | Release buttons or collar | 2-5 minutes |
| Small adapter left after filter removal | Threaded faucet adapter | Hand or adjustable pliers | 2-10 minutes |
| Pull-down spray head with screen | Spray-head aerator | Manufacturer-specific disassembly | 10-30 minutes |
Do not confuse a faucet aerator with an under-sink filter, a refrigerator filter, or a cartridge inside a countertop dispenser. Those systems have separate shutoff valves and housings that do not unscrew from the faucet tip.
How to remove faucet filter parts safely
The safest process is to protect the drain, remove the component from the correct viewing angle, preserve every gasket, and test the faucet before tightening anything further. Water usually does not need to be shut off for an aerator, but turn off the faucet and close any filter bypass or isolation valve before removing an external cartridge system.
Before You Start
| Requirement | Typical specification | Why it matters |
|---|---|---|
| Time | 5-10 minutes clean, 20-60 minutes scaled | Allows time for soaking if threads bind |
| Difficulty | Easy for visible aerator, moderate for cache type | Hidden keys require exact engagement |
| Cost | $0-$15 for basic tools; $5-$8 for key set | Replacement aerators commonly cost $2-$8 |
| Protection | 1 towel, 1 drain stopper, 1 parts dish | Prevents lost washers and scratched finishes |
| Tools | Adjustable pliers, rubber band or tape, flashlight | Provides grip without crushing the housing |
| Cleaning solution | 1:1 white vinegar and water | Dissolves many calcium deposits on removable parts |
Remove jewelry from your hands and dry the faucet before gripping it. Place the drain stopper in position, then cover the basin with a folded towel. Keep the removed screen, washer, housing, and any adapter in a shallow dish rather than on the counter.
A replacement gasket is inexpensive insurance. A flattened washer can appear serviceable but still cause a side leak after reassembly.
Step 1: Inspect the faucet tip
Identify the gripping surface before applying force. A visible aerator usually has knurled edges or two opposing flat sections, while a cache aerator has no external grip and sits inside a smooth spout opening.
Use a flashlight and look directly into the underside of the spout. Remove visible sediment with a soft toothbrush, but do not insert a knife or screwdriver into a recessed opening. A metal tool can deform the sealing seat or strip plastic cache-aerator slots.
Success checkpoint: You can name the part as visible aerator, hidden aerator, external filter mount, or adapter.
Common mistake: Treating every faucet-end screen as an external water filter. An aerator may improve flow appearance but does not provide certified contaminant reduction.
Step 2: Stabilize the faucet and protect the finish
Hold the faucet body with one hand while turning the removable part with the other. For pliers, wrap the aerator with a thick rubber band, masking tape, or a folded cloth before placing the jaws over it.
A strap wrench is preferable on polished chrome, brushed nickel, or matte-black finishes because it distributes force around the housing. Tongue-and-groove pliers provide strong grip but can leave permanent jaw marks when used directly on metal.
Success checkpoint: The faucet body does not twist in its mounting hole, and the tool contacts only the removable ring.
Common mistake: Gripping the entire spout with pliers. That can loosen the faucet mounting hardware below the sink or damage the spout’s swivel joint.
Step 3: Turn the aerator in the correct direction
Turn a standard aerator counterclockwise when looking directly at the aerator face from below the spout. If you are looking down at the top of the faucet or viewing the part in a mirror, the apparent direction can seem reversed, so use the actual thread viewpoint rather than relying on the phrase “left” or “right.”
Start with firm hand pressure. If the ring will not move, apply padded pliers with small movements instead of one violent twist. A typical aerator needs less than a quarter-turn before the threads begin to release.
Success checkpoint: The ring moves smoothly without the faucet body rotating.
Common mistake: Turning clockwise because the faucet points downward. Thread direction depends on your viewing position. Looking directly at the exposed underside, counterclockwise normally loosens a standard right-hand thread.
Step 4: Remove a hidden aerator with a matching key
Insert the aerator key straight into the recessed screen until all key tabs engage the internal slots. Turn counterclockwise while looking directly at the underside of the spout, using steady hand pressure rather than a diagonal force that can strip the insert.
Common cache-aerator dimensions include M16.5, M18.5, M21.5, and M24. The numbers refer to nominal aerator sizes, not a universal guarantee across brands. A multi-key set is practical when the faucet brand and model are unknown.
| Common cache size | Typical key label | Common application | Correct tool |
|---|---|---|---|
| M16.5 | Tom Thumb | Compact bathroom faucet | M16.5 key |
| M18.5 | Junior | Mid-size modern faucet | M18.5 key |
| M21.5 | Tiny Junior | Less-common compact spout | M21.5 key |
| M24 | Standard | Larger bathroom or kitchen spout | M24 key |
Success checkpoint: The key remains fully seated while the aerator rotates as one piece.
Common mistake: Using a screwdriver as a substitute key. Plastic recessed aerators can strip quickly, and the damaged insert may then require extraction with a specialized tool.
Step 5: Separate the screen and gasket
Place the removed aerator over the towel and note the order of its parts before separating them. A common assembly contains a threaded housing, flow screen, internal restrictor, and rubber washer, although the exact stack differs by manufacturer.
Photograph the component with your phone before cleaning it. If the faucet sprays from the sides after reassembly, the washer is usually missing, upside down, pinched, or installed outside the housing rather than against its sealing shoulder.
Success checkpoint: Every removed part is accounted for, and the gasket has no tears, flattening, or mineral distortion.
Common mistake: Pushing the screen out with a sharp object. A punctured mesh screen changes the stream pattern and can release fragments into the water.
Step 6: Clean or replace the faucet aerator
Soak a removable metal screen in a 1:1 mixture of white vinegar and water for 30-60 minutes, then brush away loosened scale with a soft toothbrush and rinse thoroughly. Denver Water recommends cleaning faucet aerators because screens collect sediment and can restrict flow, but cleaning does not restore a screen with torn mesh or badly corroded threads.
Do not soak rubber washers, plated decorative parts, or unknown plastic components for hours without checking the faucet manufacturer’s instructions. For those pieces, use warm water, mild dish soap, and a short brush cleaning instead.
Replace the aerator when the mesh is damaged, the housing is cracked, the threads are visibly flattened, or repeated cleaning fails to restore a uniform stream. Typical replacement cost is $2-$8 for a basic aerator and $5-$15 for a specialized low-flow or brand-specific model.
Success checkpoint: Water passes through a clean, intact screen without visible flakes or side spray.
Common mistake: Assuming vinegar fixes every blockage. Mineral scale may not be the cause when the faucet supply hose, shutoff valve, cartridge, or spray-head diverter is restricted.
Step 7: Reinstall the component and test for leaks
Place the washer and screen in their original order, then start the threads by hand. Turn the aerator clockwise while looking directly at the underside until it is hand-tight, open the faucet slowly, and inspect the joint for 30 seconds.
Do not use thread-sealing tape on the aerator threads unless the manufacturer specifically calls for it. The washer normally creates the seal, while tape can prevent the housing from seating at the intended depth and may shed material into the stream.
Success checkpoint: The stream is even, the connection remains dry, and the faucet body does not wobble.
Common mistake: Tightening with pliers immediately. Over-tightening can crush the gasket, crack a plastic housing, or make the next removal harder.
How do you remove an external PUR or Brita faucet filter?
Remove an external PUR or Brita faucet filter by pressing its release buttons while pulling the housing straight away from the faucet, or by turning the threaded collar counterclockwise if the model uses a screw-on mount. After the main unit comes off, remove any faucet adapter separately and restore the original aerator if one was supplied.
External systems vary by model, so identify the release mechanism before pulling. A button-style mount commonly has two buttons on opposite sides or near the rear. Press both at the same time and keep the housing level to avoid stressing the faucet adapter.
For a collar-style mount, hold the filter housing steady and rotate only the collar. If the cartridge is due for replacement, remove it according to the manufacturer’s instructions rather than opening a sealed housing at the faucet connection.
Remove the adapter and inspect the threads
An adapter may remain screwed onto the faucet after the filter housing is removed. Wrap the adapter with cloth or tape, turn it counterclockwise when viewed from the exposed end, and avoid rotating the faucet spout itself.
Clean residue from the faucet threads with a soft toothbrush and warm water. Vinegar on a cloth can loosen mineral deposits, but rinse the area afterward, especially on finishes that may discolor or lose protective coating.
| External filter part | Typical material | Removal method | Replacement or maintenance interval |
|---|---|---|---|
| Filter housing | ABS or polypropylene plastic | Release buttons or collar | Cartridge commonly 2-3 months |
| Faucet adapter | Chrome-plated brass or plastic | Hand or padded pliers | Replace if threads deform |
| Cartridge | Activated carbon block or carbon media | Twist or pull per model | Follow rated gallons and time |
| Battery module | Small lithium or alkaline cell | Open model-specific cover | Commonly 6-12 months |
| Diverter valve | Plastic or brass | Remove with housing or adapter | Inspect when flow switches poorly |
Filter replacement intervals are not interchangeable. A faucet-mounted cartridge may be rated for a specific gallon capacity, and heavy sediment or high daily consumption can shorten practical service life. PUR and Brita instructions should take precedence over a generic two- or three-month estimate.
Why is a faucet aerator stuck?
A faucet aerator usually sticks because calcium carbonate, rust, or sediment has filled the fine thread gap. Scale is more likely in hard-water areas, on infrequently used bathroom faucets, and where the aerator has remained installed for several years.
Begin with a dry cloth and padded hand grip. If the ring does not move, place a cloth soaked in 1:1 vinegar and water around the joint for 30-60 minutes, keeping the solution away from vulnerable finishes and the faucet base. Reapply moderate force after rinsing and drying.
A hair dryer on low heat can warm a metal aerator for 1-2 minutes, allowing the housing to expand slightly. Do not heat a faucet with exposed plastic parts, a plastic cache insert, or nearby sealants that could soften.
Avoid routine use of WD-40 or other petroleum-based penetrating oils on components that contact drinking water. If such a product has already reached the faucet opening, remove the part, wash it with detergent, rinse repeatedly, and replace the aerator if an oily odor remains.
When should you stop forcing the aerator?
Stop when the faucet body begins rotating, the aerator deforms, the finish starts flaking, or the tool slips repeatedly. Excessive force can turn a simple cleaning task into a damaged faucet-spout repair.
A plumber or faucet manufacturer’s service department is appropriate when the aerator is cross-threaded, the cache insert is stripped, the spout is soldered or unusually specialized, or the faucet is still under warranty. Extraction tools can remove a destroyed insert, but they require controlled alignment to avoid damaging the internal seat.
Which faucet aerator should replace the old one?
Choose a replacement aerator by thread size, faucet application, flow rate, and washer design. A bathroom handwashing faucet commonly works well with 0.5-1.5 gallons per minute, while a kitchen sink often needs 1.5-2.2 GPM for practical pot filling and rinsing.
The flow-rate label may appear on the aerator, packaging, or faucet documentation. A lower-flow model saves water but can make a kitchen sink frustratingly slow, particularly when the faucet has low household pressure.
| Aerator type | Typical flow rate | Best use | Typical price |
|---|---|---|---|
| Water-saving bathroom | 0.5 GPM | Handwashing basin | $2-$6 |
| Standard bathroom | 1.0-1.5 GPM | General lavatory use | $2-$8 |
| Kitchen standard | 1.5-2.2 GPM | Filling pots and washing | $3-$10 |
| Laminar stream | 1.0-1.5 GPM | Low-splash bathroom use | $5-$15 |
| Spray or dual-function | 1.5-2.2 GPM | Kitchen rinsing | $8-$20 |
Match the replacement’s thread type and external diameter, not merely its appearance. Take the old aerator to a hardware store or compare it with the faucet manufacturer’s parts diagram when the size is uncertain.
Expert rule: the aerator is not a water purifier
An aerator’s mesh screen catches particulate debris and changes stream behavior, but it is not equivalent to a certified drinking-water filter. For chlorine taste, lead reduction, or other contaminant claims, select a system certified for the specific contaminant by an appropriate standards organization, such as NSF.
This distinction matters after cleaning. A clear stream only proves that the screen is less obstructed; it does not prove that the tap water is chemically filtered.
Expert rule: low flow may come from upstream
A clean aerator cannot correct a closed shutoff valve, kinked supply tube, clogged inlet screen, failing cartridge, or pressure problem. If both hot and cold flow are weak, inspect the aerator first; if only one side is weak, the affected supply or faucet cartridge deserves attention.
Expert rule: test before final tightening
Run the faucet with the aerator loose enough to observe the stream, then shut it off and check the joint. This catches a missing gasket before the housing becomes difficult to remove again.
What should you do in special faucet situations?
The removal method changes for pull-down faucets, removable spray heads, damaged cache aerators, and faucets with proprietary parts. These situations require identification before force because the visible screen may be part of a diverter or spray-head assembly rather than a conventional threaded aerator.
Pull-down or pull-out faucet
Extend the spray head and hold the hose so it does not retract beneath the sink. Some spray heads unscrew from the hose connection, while others contain a non-removable screen accessed from the face or rear.
Do not twist the hose to remove the screen. Look for a retaining ring, manufacturer-specific key, or service instructions. A pull-down spray head may also have a diverter that changes flow between stream and spray modes, so a blockage there can resemble a dirty aerator.
Faucet with no visible threads
A smooth spout may contain a cache aerator, a snap-in screen, or no removable aerator at all. Try a flashlight and a matching cache key first; do not pry against the polished rim.
If no key engages and the faucet documentation does not identify a removable part, contact the manufacturer with the model number. The model number is often printed on the installation guide, receipt, or a tag under the sink.
Aerator breaks during removal
Stop and remove loose fragments with needle-nose pliers only if the fragments are accessible without scraping the spout seat. A broken plastic insert may require an internal aerator extractor, while a damaged metal housing may be easier and safer to replace.
Rinse the faucet for 30-60 seconds after extraction. This clears loosened scale and small plastic particles before normal use.
How much time and money does removal require?
A visible aerator removal normally costs nothing if hand force is sufficient and takes 2-10 minutes. A hidden aerator commonly requires a $5-$8 multi-key set, while a replacement aerator costs about $2-$20 depending on flow control, finish, and brand compatibility.
| Situation | Typical time | Typical cost | Likely requirement |
|---|---|---|---|
| Clean visible aerator | 5-15 minutes | $0-$8 | Towel, pliers, vinegar |
| Clean hidden aerator | 10-30 minutes | $5-$15 | Correct cache key |
| Replace damaged aerator | 10-20 minutes | $2-$20 | Matched replacement |
| Remove external filter mount | 2-10 minutes | $0-$10 | Hand removal or padded pliers |
| Free a heavily scaled part | 30-90 minutes | $0-$20 | Vinegar, replacement gasket |
| Extract stripped insert | 30-120 minutes | $25-$150 professional service | Specialized extractor or plumber |
These are typical consumer ranges, not fixed prices. Regional labor rates, faucet brand, finish, access beneath the sink, and corrosion determine the final cost.
Common mistakes and how to fix them
| Mistake | Result | Recovery |
|---|---|---|
| Turning from the wrong viewpoint | Aerator tightens further | Look directly at the underside and turn counterclockwise to loosen |
| Using bare pliers on chrome | Scratched or crushed housing | Use tape, cloth, rubber, or a strap wrench |
| Losing the black washer | Side spray or leak | Replace with the correct diameter gasket |
| Using a screwdriver on cache slots | Stripped plastic insert | Use the exact cache key or extractor |
| Over-soaking the complete assembly | Damaged finish or rubber | Soak only compatible removable metal parts |
| Over-tightening on reassembly | Cracked housing or flattened seal | Hand-tighten, then add only a small padded turn |
A faucet that drips from the spout after aerator removal has a different problem. The aerator controls the outlet stream, but it normally does not stop water passing through a worn faucet cartridge or valve seat.
FAQ
Can I remove a faucet aerator without turning off the water?
Yes, an aerator can normally be removed without shutting off the home’s water supply because the faucet valve controls flow upstream. Turn the faucet off, place a stopper over the drain, and open the handle briefly to release residual pressure. Shut off the local supply valves if the external filter mount leaks or the faucet valve does not close fully.
Which way do you turn a faucet filter to loosen it?
Turn a standard threaded aerator counterclockwise when looking directly at the exposed underside of the faucet spout. The viewing angle causes confusion because the faucet points downward. For an external filter, turn the threaded mounting collar counterclockwise when looking at the collar face, unless the manufacturer specifies a proprietary locking mechanism.
How often should a faucet aerator be cleaned?
Clean a faucet aerator about every six months in ordinary use, and sooner when flow weakens, the stream sprays sideways, or visible sediment appears. Homes with hard water, old galvanized plumbing, or construction-related sediment may need cleaning every 1-3 months. Replace the screen when mesh damage or corrosion remains after cleaning.
Can vinegar damage a faucet aerator?
A short 30-60 minute soak of a removable metal screen in a 1:1 vinegar-and-water solution is generally suitable for mineral scale, but vinegar can affect some coatings, rubber parts, and vulnerable metals. Avoid soaking the whole faucet assembly. Rinse every cleaned part thoroughly and follow the faucet manufacturer’s material guidance.
Why does my faucet spray after I reinstall the filter?
A faucet sprays from the sides after reinstallation when the rubber gasket is missing, pinched, installed in the wrong position, or contaminated with scale. Remove the aerator, clean the sealing surfaces, verify the washer’s orientation, and reinstall it hand-tight. Replace a flattened or cracked washer rather than compensating with excessive torque.
Do faucet filters remove lead and chlorine?
An aerator does not normally remove dissolved lead or chlorine; its screen mainly catches particles and shapes the stream. An external faucet filter may reduce specified contaminants only when its cartridge is certified and used within its rated capacity. Check the product’s certification, contaminant claims, replacement schedule, and gallon limit before relying on it for drinking water.
The Bottom Line
To remove a faucet filter, first determine whether you have an internal aerator, hidden cache aerator, external PUR or Brita mount, or threaded adapter. Use a towel over the drain, turn a standard aerator counterclockwise from the underside, use the correct cache key for recessed models, and release external filter buttons or collars without twisting the faucet body.
Clean compatible metal screens in diluted vinegar for 30-60 minutes, replace damaged washers, and reinstall every part hand-tight. If an aerator resists after soaking, the faucet starts rotating, or the insert strips, stop forcing it and use a manufacturer-specific extractor or professional service. Knowing how to remove faucet filter components safely protects the finish, threads, water seal, and faucet itself.