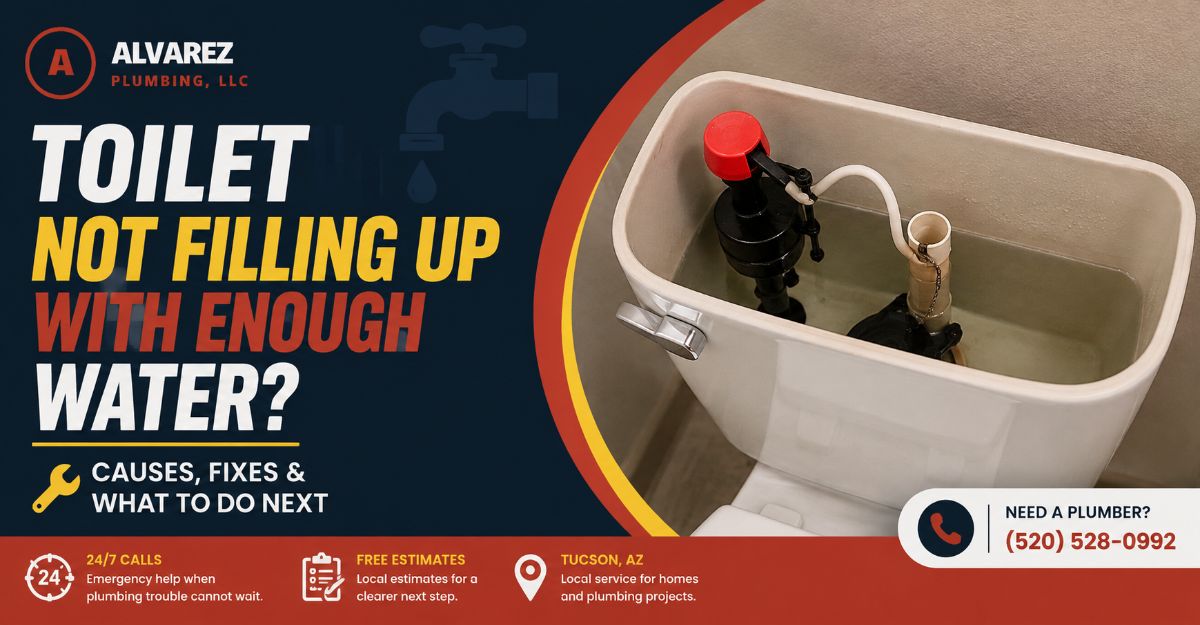
A toilet not filling up with enough water is typically caused by a misadjusted float, a disconnected refill tube, or a partially closed supply valve. Identifying whether the low water is in the tank or the bowl determines the exact fix. Most filling failures take under 15 minutes to resolve without plumbing tools.
Key Facts / At a Glance
- Standard tank water levels must sit exactly 0.5 to 1 inch below the top of the open overflow pipe.
- Modern toilet fill valves require a home water pressure of 20 to 80 PSI to function properly.
- Low water in the ceramic bowl usually stems from a misdirected or damaged rubber refill tube.
- Low water in the upper tank usually indicates an improperly set float or a blocked fill valve.
- Modern toilets require 1.28 to 1.6 gallons per flush (GPF) to clear waste, while older models require 3.5 to 5.0 GPF.
Before You Start
- Total Time: 10 to 15 minutes.
- Difficulty: Beginner.
- Cost: $0 for adjustments; $10–$25 if replacing the fill valve.
- Tools Needed: Screwdriver (Phillips or flathead, depending on your valve), adjustable pliers, a small plastic cup.
- Prerequisite: Locate the chrome water supply valve behind the toilet base to shut off water during step 4.
Where Is the Water Level Low?
Determining where the water deficiency exists dictates your troubleshooting path.
Low water in the lower ceramic bowl causes poor flushes, trapped waste, and sewer gas odors entering the bathroom. This bowl deficiency is almost always caused by an issue with the refill tube directing water into the overflow pipe.
Low water in the upper plastic or ceramic tank causes weak, incomplete flushes because the toilet lacks the gravity-fed volume required to initiate a strong siphon. This tank deficiency points directly to a misadjusted float, a clogged fill valve, or a restricted main water supply.
How Does a Toilet Fill Cycle Work?
A toilet fill cycle relies on mechanical gravity and a simple float mechanism to regulate water. When you press the trip lever, a chain lifts the rubber flapper at the bottom of the tank. Gravity pulls the stored tank water down into the bowl through the flush valve.
As the tank empties, the float (either a modern cylinder or an older balloon-style ballcock) drops. This downward movement opens the fill valve, drawing fresh water from your home’s plumbing. The fill valve splits this incoming water: roughly 80% dumps straight into the tank to raise the float, while 20% travels through a small rubber refill tube directly into the overflow pipe to replenish the bowl’s standing water. Once the float rises to its preset height, it shuts the valve.
How Do You Fix a Toilet That Won’t Fill?
Follow this sequential diagnostic process to isolate and resolve filling issues. Work from the most common and easiest fixes down to the more involved component cleanouts.
Step 1: Reconnect the Refill Tube
Ensure the small rubber tube sends water into the hollow overflow pipe. Remove the toilet tank lid and flush the toilet. Watch the small rubber tube connected to the top of the fill valve.
Attach the metal or plastic clip on the end of the refill tube directly to the top edge of the vertical overflow pipe. The tube must squirt water completely down the center of the pipe during the entire fill cycle. If the tube is spraying wildly into the tank, the bowl will never receive its necessary water volume.
- Success Checkpoint: You will know it worked when the bowl’s standing water level rises simultaneously with the tank water and stops only when the fill cycle completes.
- Common Mistake: Pushing the flexible tube too deep into the overflow pipe. If the tip of the tube sits below the tank’s final water line, it creates a continuous siphon that drains the tank and causes “ghost flushing.”
Step 2: Adjust the Fill Valve Float
Raise the float mechanism to increase the volume of water stored in the tank. For modern cylinder-style valves (like Fluidmaster), squeeze the metal spring clip on the side of the float and slide the float upward along the rigid plastic shaft. Alternatively, use a screwdriver to turn the long plastic adjustment screw clockwise, which raises the float’s resting position. For older ballcock valves, physically bend the brass rod holding the rubber ball slightly upward.
- Success Checkpoint: You will know it worked when the tank water stops filling exactly 0.5 to 1 inch below the top rim of the overflow pipe.
- Common Mistake: Setting the float too high. If the water level crests over the top of the overflow pipe, the toilet will leak constantly into the bowl, wasting hundreds of gallons of water a day.
Step 3: Open the Water Supply Valve
Clear restrictions in the primary plumbing line feeding the toilet. Look behind the base of the toilet near the floor to find the chrome stop valve. Grasp the oval handle and turn it completely counter-clockwise until it physically stops.
A partially closed valve slows the incoming water flow to a crawl. If your fill valve requires 20 to 80 PSI to close its internal diaphragm properly, a restricted supply valve can cause the toilet to hiss continuously without ever reaching the proper water height.
- Success Checkpoint: You will know it worked when a standard 1.28 GPF toilet tank fully refills from empty in 45 to 60 seconds.
- Common Mistake: Forcing a stuck valve. If the valve is corroded and resists turning, do not force it with pliers, as breaking the valve will cause an immediate, catastrophic bathroom flood.
Step 4: Flush Debris From the Fill Valve
Remove rust, pipe scale, or sediment blocking the fill valve’s internal diaphragm. Shut off the wall water supply valve and flush the toilet to empty the tank. Reach into the tank, press down slightly on the fill valve’s top cap, and twist it a quarter-turn counter-clockwise to lift it off. Hold an inverted plastic cup completely over the open valve assembly. Briefly turn the wall supply valve on and off a few times.
The water pressure will blast out trapped debris into the cup and down into the tank. Reassemble the cap by pressing down and twisting clockwise until it locks.
- Success Checkpoint: You will know it worked when the water flow changes from a restricted hissing trickle to a robust, full-volume spray.
- Common Mistake: Failing to hold a cup over the valve. Uncapped fill valves will shoot a geyser of water directly into your bathroom ceiling the moment the supply valve opens.
Step 5: Inspect for Clogged Vent Pipes or Rim Jets
Address environmental plumbing issues outside of the toilet’s internal hardware. If the tank fills perfectly but the bowl remains low, check the small holes under the rim of the toilet bowl. Use an L-shaped piece of wire (like a coat hanger) and a mirror to scrape hard water mineral deposits out of these rim jets.
If the bowl water mysteriously drops overnight without flushing, you either have a hairline crack in the porcelain bowl or a blocked plumbing vent pipe on your roof. A clogged roof vent forces the plumbing system to pull air through the toilet’s P-trap, siphoning the bowl water down the drain.
- Success Checkpoint: You will know the rim jets are clear when a flush produces a vigorous, swirling vortex rather than a slow, straight drop of water.
- Common Mistake: Using harsh liquid drain cleaners in the tank or bowl to clear rim jets. These chemicals will not dissolve calcium scale and will destroy your rubber flapper.
Which Replacement Parts Should You Choose?
If troubleshooting fails to restore proper water levels, the internal seals of your fill valve have likely failed. You must replace the valve.
| Part Type | Typical Cost | Install Time | Best For | Verdict |
| Standard Cylinder Valve (Fluidmaster 400A) | $10 – $15 | 15 mins | The Budget DIYer | The universal industry standard; highly reliable and easy to adjust. |
| Premium Cylinder Valve (Fluidmaster 400H) | $18 – $25 | 15 mins | “Set It & Forget It” Homeowners | Features independent bowl-water adjustment dials for exact water conservation. |
| Brass-Shank Valve (Korky QuietFIX) | $20 – $28 | 20 mins | Landlords & Property Managers | Brass threads prevent amateur overtightening and cross-threading leaks. |
| Traditional Ballcock Valve | $15 – $30 | 30 mins | Vintage Toilet Restorations | Outdated and bulky; only use if maintaining a historically accurate antique toilet. |
The Budget DIYer
Choose a standard Fluidmaster 400A Fill Valve paired with a matching universal rubber flapper. This combination costs under $20, fixes 90% of all filling and ghost-flushing issues, and installs in 15 minutes using only adjustable pliers.
The Landlord or Property Manager
Choose a brass-shanked fill valve like the Korky QuietFIX. The brass threads protruding through the bottom of the tank prevent tenants or amateur maintenance workers from cross-threading the locknut, virtually eliminating the risk of flood damage in multi-unit buildings.
What Are the Most Common Repair Mistakes?
- Over-tightening Plastic Nuts: The plastic locknut securing the fill valve to the bottom of the tank only requires hand-tightening, followed by a quarter-turn with pliers. Applying maximum force will crack the plastic threads or split the ceramic tank entirely.
- Using In-Tank Bleach Tablets: Dropping chemical chlorine or bleach tablets into the tank corrodes rubber flappers and degrades plastic fill valve seals. This causes premature leaks and complete component failure within six to twelve months.
- Ignoring Flapper Compatibility: Purchasing a standard 2-inch flapper for a modern high-efficiency toilet that requires a 3-inch flapper will result in a massive tank leak. Always measure the flush valve drain opening before purchasing replacement rubber.
Frequently Asked Questions
Why does my toilet bowl water level drop overnight?
If your toilet bowl water disappears overnight without flushing, your plumbing vent pipe on the roof is likely clogged with debris or an animal nest. The trapped sewer gases create a vacuum that siphons the standing water out of your toilet’s P-trap and down the drain.
How do I know if my fill valve is bad?
A fill valve is definitively bad if it continues to hiss or run water into the overflow pipe even after the float has been manually lifted to its highest position. This indicates the internal rubber diaphragm seal has degraded and can no longer stop the water pressure.
Can hard water cause a toilet not to fill?
Yes. Hard water contains high levels of calcium and magnesium, which crystallize inside the narrow neck of the fill valve and the small rim jets under the toilet bowl. This severe scale buildup restricts water flow, leading to incomplete fill cycles and weak flushes.
Why is my toilet ghost flushing?
A toilet “ghost flushes” when water slowly leaks out of the tank and into the bowl, causing the float to drop and trigger the fill valve to run momentarily. This is caused by a deteriorating rubber flapper or a refill tube shoved too deeply into the overflow pipe, creating a siphon.