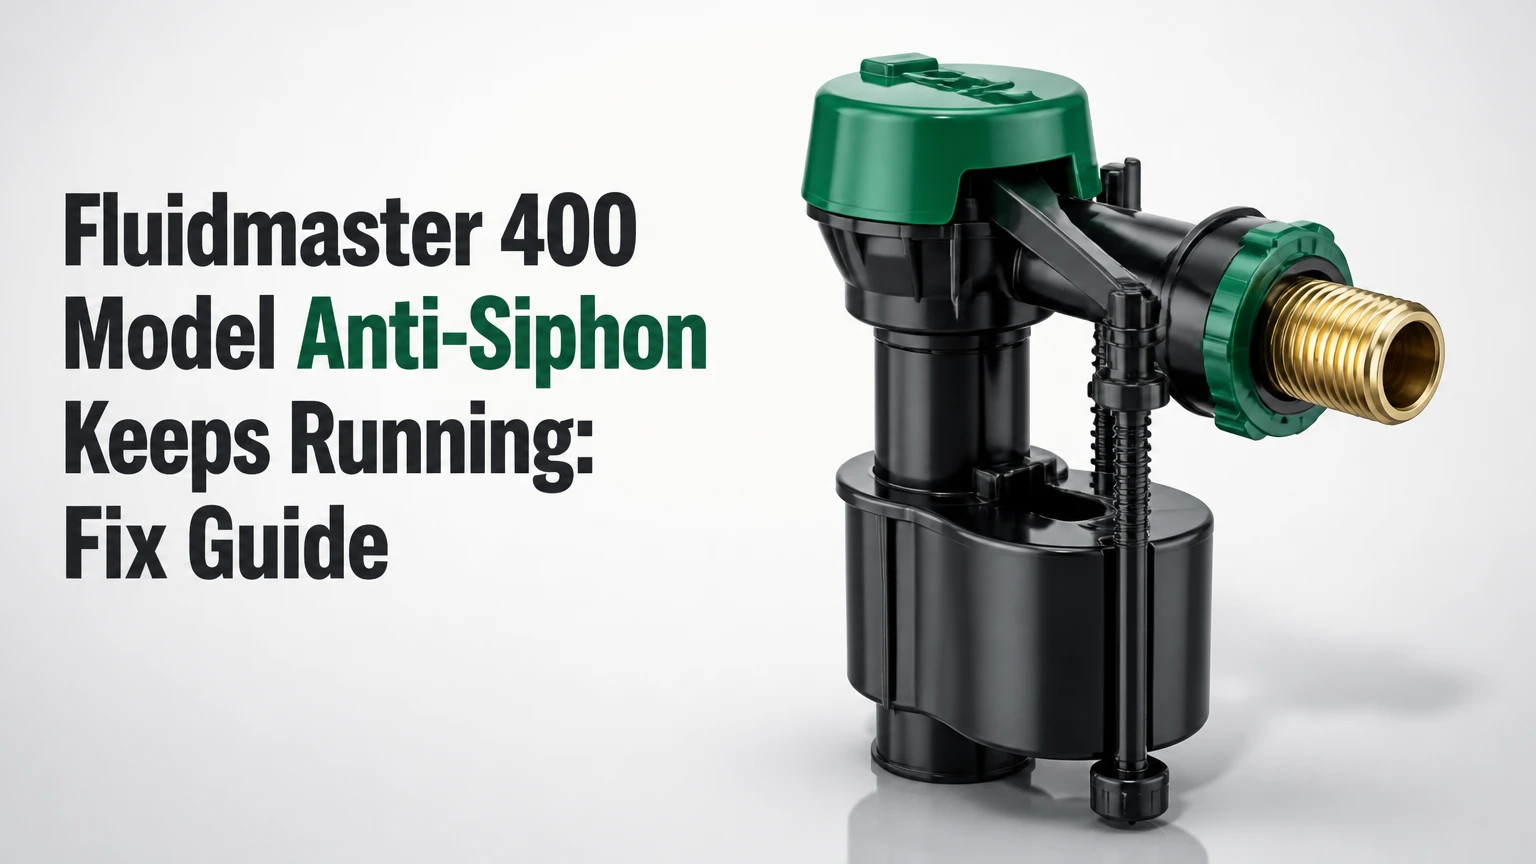
A Fluidmaster 400A anti-siphon fill valve that keeps running usually has debris under its cap seal, a worn Fluidmaster 242 seal, an incorrectly adjusted float, or water escaping through another toilet component. Check whether water reaches the overflow tube first, because a full tank with a running sound often indicates a leaking flapper rather than a failed fill valve.
Key Facts at a Glance
- The Fluidmaster 400A shuts off through a float-operated pilot valve and rubber diaphragm seal.
- Water flowing over the overflow tube indicates excessive tank filling or a fill valve that cannot close.
- A tank that stays below the overflow tube while the bowl slowly loses water usually has a flapper or flush-valve leak.
- The Fluidmaster 242 seal is a service part for compatible Fluidmaster fill-valve caps, but it cannot repair a cracked valve body.
- The normal final tank level is typically about 1 inch below the overflow-tube opening, unless the toilet manufacturer specifies another mark.
- A typical cleaning or seal replacement takes 5-15 minutes; complete valve replacement commonly takes 20-40 minutes.
Why Does a Fluidmaster 400A Keep Running?
A Fluidmaster 400A keeps running when incoming water fails to shut off completely or when tank water continually escapes. The main fill-valve causes are sediment beneath the cap diaphragm, deterioration of the 242 seal, a float set too high, a restricted float mechanism, and damage to the cap or valve body.
The 400A is an anti-siphon fill valve. Its vacuum-breaker function admits air during a negative-pressure event so tank water cannot flow backward into the potable-water line. The anti-siphon feature does not itself regulate the final tank level. The float, lever, pilot opening, and diaphragm perform that shutoff job.
A running sound alone is not enough to identify the defective part. A fill valve may run periodically because the flapper leaks, allowing tank water into the bowl. The fill valve then correctly replaces the missing water, creating a repeating refill cycle.
What does the fill valve do?
The Fluidmaster 400A connects the household supply line to the toilet tank and meters water into the tank and bowl through its refill tube. A rising float cup moves a rod and lever; the lever closes the pilot passage, pressure changes across the diaphragm, and the inlet shuts off.
The refill tube must attach to the overflow tube with the supplied clip. The tube outlet needs an air gap above the overflow opening. Inserting the tube deeply into the overflow tube can create siphoning, which drains water from the tank and makes the valve refill continuously.
Step 1: Identify Where the Water Is Going
Determine whether water is entering the overflow tube, leaking into the bowl, or siphoning through the refill tube. Remove the tank lid, observe the water path for 60 seconds, and mark the tank level with a pencil or a strip of removable tape.
Use this diagnostic sequence:
- Water spills over the overflow tube: lower the float. If the valve still runs, clean or replace the shutoff seal.
- Water stops below the overflow tube, but the valve periodically starts: test the flapper and flush-valve seat.
- Water flows through the refill tube after the tank is full: check the refill-tube clip and air gap.
- Water leaks around the bottom of the valve: replace the fill valve or its tank-to-valve seal.
- The float cup sticks against the tank wall: reposition the valve or replace a distorted component.
How can you test for a flapper leak?
Add several drops of dark food coloring to the tank without flushing, then wait 10-15 minutes. Colored water appearing in the bowl confirms that tank water is passing the flapper or flush-valve seat, even if the fill valve itself shuts off correctly.
Do not use a colored toilet-cleaning product for this test. A flapper can leak through a warped rubber surface, mineral deposits on the seat, a loose chain, or incompatibility with chlorine tablets. A fill-valve repair will not stop those leaks.
Step 2: Adjust the Float and Water Level
Lower the Fluidmaster 400A float cup until the tank water stops approximately 1 inch below the overflow-tube top. On most 400A installations, turn the adjustment screw to change the float height, then flush once and observe the final level rather than judging the setting while water is moving.
- Close the supply stop if the valve is actively overflowing.
- Locate the adjustment screw or the rod-and-clip mechanism beside the float cup.
- Turn the screw in small increments, commonly one or two turns at a time, or reposition the clip as the model design permits.
- Reopen the supply stop and allow the tank to fill completely.
- Confirm that the water surface remains below the overflow opening.
- Flush and repeat the test after the valve reaches full height.
You will know the adjustment worked when the float rises smoothly, the valve stops without hissing, and the water level remains stable for at least five minutes.
The exact adjustment direction varies by valve revision and viewing angle, so do not rely on a universal “clockwise always lowers” rule. Read the molded arrow or instruction label on the valve. A float set too low can reduce flush performance, while a float set too high sends water into the overflow.
Step 3: Flush Debris from the Valve Cap
Flush sediment from the Fluidmaster 400A cap when the float reaches its upper position but the valve continues hissing or sending a thin stream into the tank. Small particles from galvanized pipe, a replaced water heater, or municipal work can lodge beneath the rubber diaphragm.
- Turn the toilet supply stop clockwise until it closes.
- Lift the float cup to its highest position to reduce pressure on the cap.
- Press down on the black cap and rotate it counterclockwise about one-quarter turn, following the cap’s locking tabs.
- Lift the cap off while keeping the diaphragm and pin in place.
- Hold a cup or small container over the open valve to control spray.
- Open the supply stop slightly for approximately 5 seconds.
- Close the supply stop, reinstall the cap, and rotate it clockwise until locked.
- Turn the water on fully and perform two flush tests.
You will know the flush worked when the inlet stream stops cleanly after the float rises. If water sprays around the cap, the cap is not fully locked or its internal seal is misplaced.
Do not remove the cap with the supply line fully pressurized and uncovered. The brief flush should be controlled, and the tank lid should remain off until the valve has been checked for leaks.
Step 4: Replace the Fluidmaster 242 Seal
Replace the Fluidmaster 242 seal when cleaning does not stop the flow and the cap, stem, and valve body remain intact. The seal is a small rubber component inside the cap; cracks, hardening, a circular groove, swelling, or embedded grit justify replacement.
- Shut off the water and remove the cap using the procedure above.
- Inspect the underside of the cap for the rubber diaphragm and its center pin.
- Remove the old 242 seal without bending or losing the pin.
- Press the new seal evenly into its recess.
- Verify that the center pin sits straight and moves freely.
- Reinstall and lock the cap.
- Restore water pressure gradually, then test the shutoff.
The repair is successful when the valve stops within a few seconds of the float reaching its upper position and does not restart during a 10-minute observation period.
A 242 seal cannot correct a cracked cap, damaged pilot seat, broken lever, split valve stem, or distorted valve body. Match the replacement part to the valve design and packaging instructions. Universal-looking toilet parts are not automatically interchangeable across Fluidmaster generations.
Step 5: Replace the Fill Valve
Replace the complete Fluidmaster fill valve when the valve body leaks, the float cup binds, the cap is damaged, the plastic threads are cracked, or a new seal fails to stop the inlet. Full replacement is usually more reliable than repeated seal changes on an older valve with multiple worn components.
What tools and materials are needed?
Typical requirements are an adjustable wrench, a sponge or towel, a small bucket, a replacement fill valve, and a compatible supply-line washer if the existing connection is damaged. Most installations take 20-40 minutes, depending on access and whether the supply stop closes completely.
- Close the supply stop and flush the toilet.
- Sponge remaining tank water into a bucket.
- Disconnect the supply line beneath the tank.
- Remove the old valve’s locknut and lift out the valve.
- Clean the tank hole and inspect the porcelain for chips or cracks.
- Set the replacement valve height according to its marked range.
- Insert the rubber shank washer inside the tank.
- Install the locknut below the tank and tighten hand-tight plus a small additional turn.
- Reconnect the supply line without cross-threading.
- Attach the refill tube to the overflow clip, preserving the air gap.
- Open the supply stop slowly and check every connection.
- Adjust the water level and perform two flushes.
You will know the installation worked when the tank fills without spraying, the valve shuts off below the overflow, and no water appears around the shank after 10 minutes.
Porcelain tanks can crack under excessive locknut force. A wrench should hold the supply-line connection, not substitute for brute force on the plastic tank nut.
How Much Water Can a Running Toilet Waste?
A continuously running toilet can waste from several gallons per day to hundreds of gallons per day, depending on the refill rate and whether water flows into the bowl or over the overflow tube. The claim that every running valve wastes “thousands of gallons per week” is possible for a large, unrestricted flow but is not a dependable universal figure.
Measure the loss instead:
| Observed flow | Approximate daily loss | Approximate weekly loss | Typical cause |
|---|---|---|---|
| 0.01 gallons per minute | 14.4 gallons | 101 gallons | Small flapper seep |
| 0.05 gallons per minute | 72 gallons | 504 gallons | Defective fill-valve seal |
| 0.10 gallons per minute | 144 gallons | 1,008 gallons | Strong bowl or overflow leak |
| 0.25 gallons per minute | 360 gallons | 2,520 gallons | Open overflow or supply fault |
These figures use continuous flow and are arithmetic estimates, not a measurement of a particular toilet. A water meter can provide a more accurate result: turn off every fixture, record the meter, wait 15 minutes, and compare the reading.
The U.S. Environmental Protection Agency identifies household leaks as a significant source of avoidable water use, but the amount depends on fixture flow, duration, and local pressure. Repairing the cause promptly also reduces valve noise, mineral buildup, and the risk of an unnoticed supply connection leak.
Which Fluidmaster Replacement Is Appropriate?
The 400A is the practical standard replacement for many conventional residential toilets, while the 400AH PerforMAX is intended for higher refill performance and broader adjustment. The PRO45 is a heavier-duty option in product lines where its dimensions and connection style match the toilet.
| Component or valve | Typical retail range | Typical repair time | Main use |
|---|---|---|---|
| Fluidmaster 242 seal | $2-$5 | 5-15 minutes | Compatible cap with worn diaphragm |
| Fluidmaster 400A | $10-$18 | 20-40 minutes | Standard gravity toilet |
| Fluidmaster 400AH PerforMAX | $15-$30 | 20-40 minutes | Higher-performance refill adjustment |
| Fluidmaster PRO45 | $20-$40 | 25-45 minutes | Heavy-duty replacement where compatible |
Prices vary by retailer, location, kit contents, and date. Confirm the shank length, tank clearance, supply connection, refill-tube routing, and manufacturer requirements before purchasing.
Repair versus replacement
| Decision factor | Replace 242 seal | Install a new 400A | Install a 400AH or PRO45 |
|---|---|---|---|
| Part cost | $2-$5 | $10-$18 | $15-$40 |
| Best valve age | Under 5 years | 5-10 years | Any age if compatible |
| Body condition | Must be intact | New body included | New body included |
| Required tank draining | Partial or minimal | Yes | Yes |
| Main advantage | Lowest cost | Simple standard reset | Feature or durability upgrade |
The seal is the economical choice when the valve body is clean and undamaged. Complete replacement is the better decision when the valve has been installed for many years, the float sticks, or multiple components show wear.
Common Mistakes and Recovery
The refill tube is below the waterline
A refill tube pushed into the overflow tube can siphon tank water. Reattach the tube to the outside clip and keep its outlet above the overflow opening.
The float is forced upward
Holding the float up can temporarily stop the sound without repairing the cause. Release it, observe the water path, and diagnose the shutoff or downstream leak.
The tank nut is overtightened
Excessive force can crack the ceramic tank or distort the rubber washer. Replace a damaged washer, tighten the nut by hand, and add only a modest turn while checking for seepage.
The cap is installed without its diaphragm
A missing, folded, or off-center seal prevents correct pilot pressure. Remove the cap, seat the diaphragm flat, align the pin, and lock the cap fully.
Chlorine tablets remain in the tank
In-tank bleach tablets can accelerate deterioration of rubber flappers and fill-valve seals. Remove the tablet, drain and rinse the tank if appropriate, and use a manufacturer-compatible cleaning method.
The supply stop does not shut off
Do not force a corroded stop valve until it breaks. Close the home’s main shutoff and arrange replacement of the toilet stop if the local valve cannot isolate the fixture.
When the 400A Needs More Than a Seal
A Fluidmaster 400A needs complete replacement or professional diagnosis when the valve continues running after a clean, correctly installed seal and a verified float adjustment. A cracked shank, leaking tank connection, broken cap, damaged overflow tube, or inaccessible shutoff changes the repair risk.
A low water level can also originate outside the fill valve. A partially closed supply stop, clogged angle-stop screen, restricted supply line, low household pressure, or blocked inlet can cause slow filling, although those conditions usually produce weak flow rather than continuous overflow.
Call a licensed plumber if the tank or bowl is cracked, the supply connection leaks inside a wall or cabinet, sewage backs up, the main shutoff will not operate, or the toilet continues losing water after both the fill valve and flapper have passed their tests.
How Should a Renter or Homeowner Handle the Repair?
A renter should photograph the tank components, close the supply stop if it works safely, and report an active leak to the property manager. A homeowner can replace a compatible seal first when the valve is accessible and intact, then install a complete valve if the troubleshooting sequence identifies body damage or repeated failure.
| Situation | First action | Sensible next step | Avoid |
|---|---|---|---|
| Water overflows now | Close supply stop | Clean cap or replace valve | Leaving the toilet unattended |
| Periodic refill only | Food-color test | Replace flapper if bowl colors | Replacing the fill valve first |
| Valve under 5 years old | Inspect seal and float | Install 242 seal if compatible | Assuming age requires replacement |
| Valve over 10 years old | Inspect body and threads | Consider complete valve replacement | Reusing brittle washers |
| Supply stop will not close | Use main shutoff | Replace angle stop professionally | Forcing corroded hardware |
The best repair is the smallest repair that restores a stable water level and passes a timed leak test. Replacing a sound fill valve will not correct a flapper leak, and replacing only a seal will not correct a damaged valve body.
FAQ
Can a Fluidmaster 400A run intermittently without overflowing?
Yes. Intermittent running usually means tank water is escaping through the flapper, flush-valve seat, or refill tube. Add food coloring to the tank and wait 10-15 minutes without flushing. Color in the bowl confirms a downstream leak, while a stable bowl and rising tank level point toward the fill valve.
Why does the toilet run after replacing the 242 seal?
A new 242 seal may fail to stop the valve when sediment remains in the pilot passage, the seal is folded, the center pin is misaligned, or the cap is not locked. Inspect the cap, flush the valve briefly, reinstall the diaphragm evenly, and check for cracks in the cap or body.
Does anti-siphon protection cause a toilet to keep running?
Anti-siphon protection normally does not cause continuous filling. The vacuum breaker admits air during backflow-risk conditions, while the float and diaphragm control shutoff. A defective anti-siphon assembly can leak in some valve designs, but debris, seal wear, float height, and downstream toilet leaks are more common causes.
Can low water pressure make a Fluidmaster 400A keep running?
Low pressure can make filling slow and may prevent a worn valve from sealing reliably, but it is not the usual cause of a continuously running 400A. Check whether other fixtures have weak flow, open the supply stop fully, and inspect the supply line before replacing the fill valve.
Should the water level touch the top of the overflow tube?
No. The final tank level should normally remain about 1 inch below the overflow-tube top or align with the toilet manufacturer’s marked waterline. Water entering the overflow indicates excessive fill height or a valve that has failed to shut off, and it should be corrected promptly.
Is a complete valve replacement better than replacing the seal?
Complete replacement is better when the valve body, cap, float, or threads are damaged, or when the assembly is old and has repeated failures. A 242 seal is better when the valve is structurally sound and the repair needs to remain inexpensive. Test the float and inspect the cap before choosing.
The Bottom Line
A Fluidmaster 400 model anti siphon keeps running because water is either not reaching the correct shutoff condition or is escaping elsewhere in the toilet. Check the overflow tube and flapper first, adjust the float, flush debris from the cap, replace the Fluidmaster 242 seal when appropriate, and install a complete valve when the body or cap is damaged.