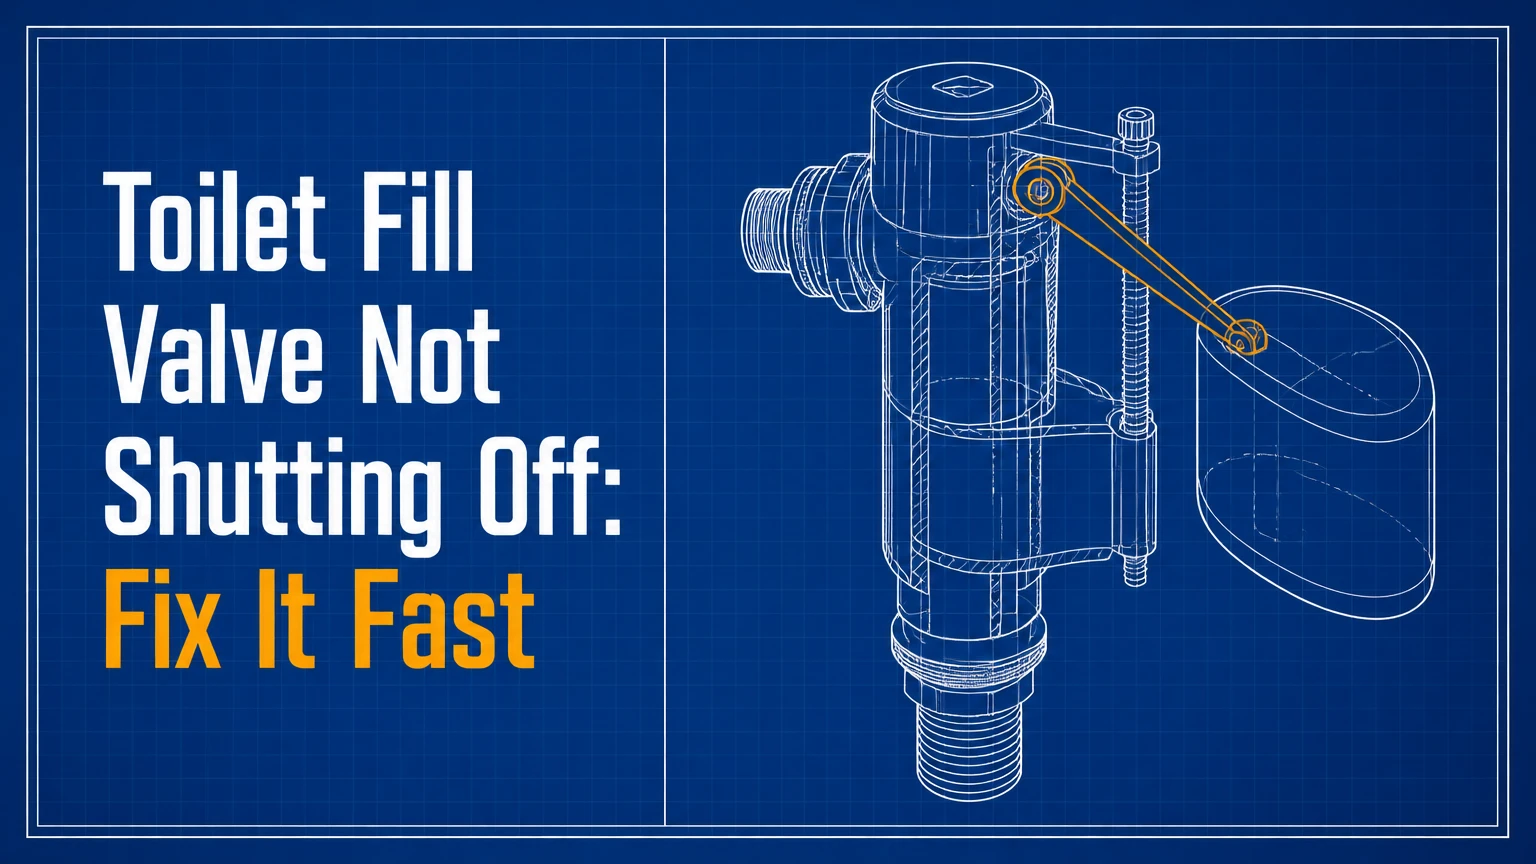
A toilet fill valve not shutting off usually has a float set too high, an obstructed float, sediment inside the valve, or a worn inlet seal. Lower the float and check the refill tube first; if the valve still hisses after cleaning, replacing the fill valve usually takes 15-30 minutes and costs about $10-$40 for parts.
Key Facts at a Glance
- A properly adjusted toilet fill valve stops filling when the tank water reaches the manufacturer’s marked fill line, commonly about 1 inch below the overflow tube.
- A toilet that runs intermittently may have a leaking flapper rather than a failed fill valve.
- A fill valve that keeps running after the float rises usually has sediment, a damaged diaphragm, excessive water pressure, or a worn valve body.
- A universal cylinder fill valve typically costs $10-$22 and fits many standard two-piece toilets, but proprietary dual-flush systems require model-specific parts.
- The refill tube must clip above the overflow tube opening, not extend below the tank waterline, because submersion can siphon water continuously.
- Chlorine bleach tablets placed inside the tank can shorten the life of rubber diaphragms, seals, and flappers.
What Does a Toilet Fill Valve Do?
A toilet fill valve admits fresh water into the tank after a flush and stops that flow when the float reaches the set level. The valve also sends a measured stream through the refill tube into the overflow tube, which restores the bowl’s water seal after the flush.
During a flush, the flapper or flush-tower seal opens and tank water leaves through the flush valve. The float drops with the tank level, opening the fill valve. As water returns, the float rises and moves a diaphragm, piston, or internal seal toward the closed position.
The tank and bowl refill are separate hydraulic paths. A toilet can have a fill valve that closes correctly while a defective flapper still lets tank water leak into the bowl. That distinction prevents an unnecessary fill-valve replacement.
How Does the Shutoff Mechanism Work?
A float provides the level signal, while an internal seal controls the incoming supply. When the float rises, the fill valve closes its inlet; when the float drops because of flushing or leakage, the inlet reopens.
The overflow tube provides a safety route if the water level rises too far. The refill tube should discharge into the overflow tube without forming a submerged connection. The critical-level mark on an anti-siphon valve must remain above the overflow tube’s top according to the valve manufacturer’s instructions.
Why Is the Fill Valve Not Shutting Off?
The most common causes are incorrect float height, mechanical interference, sediment, a failed internal diaphragm, high supply pressure, or a refill tube that creates a siphon. A quick observation of the tank often identifies the category before any parts are removed.
First remove the tank lid and watch one complete refill. Note whether the float physically rises, whether water reaches the overflow tube, and whether water continues entering after the float reaches its stop position.
| Symptom | Likely cause | First test | Typical remedy |
|---|---|---|---|
| Water reaches overflow tube | Float set too high | Lower adjustment screw | Reduce tank level |
| Float stops but water continues | Worn seal or sediment | Lift float by hand | Clean cap or replace valve |
| Float rubs tank wall | Poor positioning | Move float assembly | Reposition or replace |
| Valve runs every few minutes | Leaking flapper | Add food coloring to tank | Replace flapper |
| Thin stream enters overflow tube | Refill-tube siphon or excess refill | Lift tube above waterline | Clip tube correctly |
| Hissing occurs at shutoff | Restricted valve or high pressure | Check supply flow and valve | Clean valve or investigate pressure |
Is the Water Entering the Overflow Tube?
If water flows over the top of the overflow tube, the float is not closing the valve at the intended level. Lower the float using the valve’s adjustment screw, clip, dial, or threaded body, depending on the design.
If lowering the float does not stop the flow, the valve has an internal problem rather than a simple level-setting problem. A fill valve that cannot stop below the overflow level should be cleaned once, then replaced if the symptom remains.
How Can You Tell if the Flapper Is the Real Problem?
A leaking flapper causes the tank level to fall slowly, which repeatedly activates a correctly functioning fill valve. Add several drops of food coloring to the tank, do not flush, and wait 10-15 minutes. Colored water in the bowl confirms a tank-to-bowl leak.
This test matters because replacing the fill valve will not stop a flapper leak. A flapper may fail because of age, mineral deposits, a stretched chain, a mismatched replacement, or damage from chlorine tablets.
Should You Adjust, Clean, or Replace the Valve?
Adjust the valve when the float is simply too high or obstructed. Clean the valve when the float rises normally but sediment prevents shutoff. Replace the valve when cleaning fails, the body is cracked, the float is waterlogged, or the internal seal repeatedly sticks.
A practical repair sequence is adjustment first, cleaning second, and replacement third. Do not keep forcing the float upward because excessive force can damage the float arm or valve linkage without repairing the inlet seal.
| Repair choice | Use when | Parts cost | Typical time | Success indicator |
|---|---|---|---|---|
| Float adjustment | Water reaches overflow level | $0 | 2-5 minutes | Valve stops below overflow |
| Mechanical repositioning | Float contacts tank parts | $0 | 2-5 minutes | Float moves freely |
| Cap cleaning | Sediment causes incomplete closure | $0 | 10-15 minutes | Flow stops after reassembly |
| Fill-valve replacement | Seal or body has failed | $10-$40 | 15-30 minutes | No inlet flow at set level |
| Flapper replacement | Dye enters bowl | $5-$15 | 10-20 minutes | Tank level remains stable |
Before You Start
Prepare a towel, small bucket, sponge, adjustable pliers, a flashlight, food coloring, and the correct replacement valve if cleaning does not work. Most standard toilets require no special tools for adjustment, while replacement usually needs pliers for the supply-line coupling and mounting nut.
- Time: 15-30 minutes for replacement; 2-15 minutes for adjustment or cleaning
- Difficulty: Beginner for exposed tank valves
- Typical parts cost: $0 for adjustment, $10-$22 for a standard cylinder valve, $25-$40 for a premium or specialized valve
- Prerequisite: The toilet’s water supply must be controllable
- Safety condition: Stop if the tank, shutoff valve, supply line, or porcelain shows cracking or active leakage
Close the wall shutoff clockwise before disconnecting any fitting. If the shutoff valve does not close, use the home’s main water shutoff rather than loosening the toilet supply line under pressure.
Step 1: Observe One Full Refill
Flush the toilet, remove the tank lid, and watch the float from its lowest position to its highest position. Identify the moment the valve should stop and compare the final water level with the overflow tube and the manufacturer’s fill line.
You will know the observation is complete when the float reaches its upper stop and the incoming stream either stops, continues into the overflow, or continues through the valve without visible overflow.
The common mistake is diagnosing the valve before checking the flapper. If the valve stops, then restarts several minutes later, perform the food-coloring test before buying a fill valve.
Step 2: Remove Interference Around the Float
Move the flapper chain, refill tube, and flush-tower parts away from the float. A cylinder float must slide vertically without contacting the tank wall; a float ball must swing through its full arc without touching the lid, sidewall, or flush lever.
You will know the clearance is adequate when the float moves from low to high with one finger and does not catch at any point. The tank lid should also sit without pressing on the valve or float mechanism.
The common mistake is bending a metal float arm aggressively. Make only a small adjustment, because a bent arm can misalign the valve and create a second failure.
Step 3: Lower the Float and Set the Water Level
Turn the adjustment screw or dial in the direction marked to lower the float, then flush and observe the new level. Set the tank water at the valve’s indicated fill line, or approximately 1 inch below the overflow tube top when no manufacturer mark is visible.
You will know the setting is correct when the fill stream stops cleanly and the water remains below the overflow opening. The exact level must also provide enough water for the toilet’s designed flush volume.
The common mistake is lowering the level too far. A tank that stops filling but produces a weak flush may need a slightly higher setting, provided the water remains below the overflow and the toilet manufacturer’s line.
Step 4: Flush Sediment From the Valve Cap
Close the supply shutoff and remove the valve cap according to the valve’s design. Place a cup over the open valve, briefly reopen the supply for a few seconds to flush sediment, then close the supply and reinstall the cap.
The cup controls splash and captures grit that may otherwise enter the tank. Do not disassemble a proprietary dual-flush valve unless its instructions specifically permit service, because seals and cap retainers differ substantially between models.
You will know cleaning worked when the valve fills at normal speed and stops without hissing after the float rises. The common mistake is opening the cap while the supply remains on, which can release a high-pressure stream into the bathroom.
Step 5: Shut Off Water and Drain the Tank
Turn the shutoff clockwise until it stops, then flush while holding the handle down. Sponge the remaining water from the tank so the supply connection and valve mounting hole stay dry during removal.
You will know the tank is ready when only a shallow puddle remains and no water enters during a second flush. If the shutoff continues allowing water through, close the main house valve before proceeding.
The common mistake is relying on a stiff shutoff that appears closed. Confirm that the tank stops refilling before disconnecting the supply line.
Step 6: Remove the Old Fill Valve
Place a bucket below the tank, disconnect the flexible supply line, and remove the plastic mounting nut beneath the tank. Lift the old fill valve out through the tank opening, then clean mineral deposits from the porcelain around the hole.
You will know the valve is removed when the tank hole, rubber washer, and mounting surface are visible and free of grit. Inspect the supply line washer before reuse; a flattened or cracked washer justifies replacing the entire supply line.
The common mistake is overtightening the new plastic nut later. Porcelain can crack and plastic threads can strip when pliers apply excessive torque.
Step 7: Install and Test the New Valve
Adjust the replacement valve height before installation, position its rubber washer inside the tank, and secure the mounting nut from below. Connect the refill tube to the overflow tube with the supplied clip, reconnect the supply line, and reopen the shutoff slowly.
Keep the anti-siphon critical-level mark above the overflow tube’s top, following the product instructions. The refill tube should terminate above the overflow opening or at the specified clip position, never deep below the tank waterline.
You will know installation worked when the tank fills, the bowl receives a controlled refill, the valve stops at the selected level, and no water appears beneath the tank. Flush twice and inspect the supply and mounting connections during both cycles.
Which Fill Valve Type Is Installed?
Most exposed residential toilets use a floating-cylinder valve, while older toilets may use a float-ball ballcock. Floatless valves use pressure sensing, and dual-flush toilets frequently use proprietary assemblies that should be matched by brand and model.
Look inside the tank before purchasing a replacement. A universal valve may fit the tank opening but still conflict with a concealed flush tower, a narrow tank, a top-button mechanism, or a manufacturer-specific refill setting.
| Valve type | Identification clue | Typical setting method | Best replacement approach |
|---|---|---|---|
| Floating cylinder | Vertical plastic float sleeve | Screw, dial, or threaded body | Universal anti-siphon valve |
| Float-ball ballcock | Long arm with round ball | Screw or arm adjustment | Compatible ballcock or cylinder conversion |
| Floatless valve | No visible moving float | Internal pressure mechanism | Same-brand or listed compatible unit |
| Dual-flush integrated | Two-button flush tower | Model-specific adjustment | Manufacturer replacement assembly |
| Concealed cistern valve | Access panel, no exposed tank | Manufacturer-specific | Identify model before removal |
Which Replacement Valve Should You Buy?
A standard adjustable cylinder valve is the most practical choice for a conventional exposed tank. A quiet-fill model can reduce refill noise, while a hard-water model may provide more useful service in wells or areas with heavy sediment, but no universal valve fits every dual-flush or concealed system.
| Replacement category | Typical price | Useful feature | Main limitation |
|---|---|---|---|
| Standard universal cylinder | $10-$22 | Broad compatibility | Plastic body and basic noise control |
| Quiet-fill cylinder | $15-$30 | Adjustable bowl refill and lower sound | May need careful setting |
| Heavy-duty cylinder | $20-$40 | Larger seal and sediment tolerance | Higher cost than needed for clean city water |
| Brass-bodied valve | $25-$40 | Rigid threaded construction | More expensive and less compact |
| Proprietary dual-flush valve | $20-$60 | Exact factory compatibility | Model-specific availability |
What Changes for Special Situations?
Dual-flush toilets, wall-hung toilets, well-water systems, and high-pressure homes require different diagnosis. The visible symptom may be the same, but the correct replacement and adjustment procedure can differ.
- Dual-flush toilet: Photograph the tank mechanism and record the brand before removal. The fill valve may connect to a compact tower and use a proprietary refill rate.
- Wall-hung or concealed cistern: Use the access panel instructions rather than attempting to remove a tank that is fixed inside the wall. A plumber is appropriate when the isolation valve is inaccessible.
- Well water: Sediment can repeatedly clog the inlet screen. Clean the household sediment filter and the valve cap, not only the toilet valve.
- High water pressure: Pressure above the toilet manufacturer’s operating range can create hiss, splash, or premature seal wear. A licensed plumber should test pressure with a gauge rather than guessing.
- Cold climate: An unheated space can freeze the supply line or valve. Shut off and drain vulnerable plumbing before freezing weather.
What Will the Repair Cost?
A simple adjustment costs nothing and usually takes under 5 minutes. A standard replacement valve costs about $10-$22, a premium or quiet model commonly costs $15-$40, and professional service often totals $150-$300 depending on access, local labor, and additional faults.
| Repair scenario | Parts range | Labor range | Typical total | Typical duration |
|---|---|---|---|---|
| Float adjustment | $0 | $0 DIY | $0 | 2-5 minutes |
| Cap cleaning | $0 | $0 DIY | $0 | 10-15 minutes |
| Standard valve replacement | $10-$22 | $0 DIY | $10-$22 | 15-30 minutes |
| Valve plus supply line | $16-$32 | $0 DIY | $16-$32 | 20-35 minutes |
| Professional valve repair | $10-$40 | $100-$260 | $150-$300 | 30-90 minutes |
| Concealed or dual-flush repair | $20-$60 | $150-$350 | $170-$410 | 1-2 hours |
The U.S. Environmental Protection Agency reports that household leaks can waste more than 10,000 gallons of water per year in an average home, and toilets are a frequent source of silent loss. The actual waste from one running toilet varies widely, so a meter reading or dye test is more reliable than a fixed dollar estimate.
Common Mistakes and How to Fix Them
- Replacing the fill valve when the flapper leaks: Use the dye test first. Replace the flapper if colored water reaches the bowl.
- Setting the water level above the overflow: Lower the float until the valve shuts off below the tube opening.
- Submerging the refill tube: Reclip the tube above the overflow opening to eliminate siphoning.
- Using bleach tablets in the tank: Remove the tablet and replace degraded rubber parts; use an external bowl cleaner instead.
- Overtightening the mounting nut: Hand-tighten, then add only a small turn if needed. Repair or replace cracked porcelain rather than forcing the connection.
- Ignoring the supply shutoff: If the valve will not isolate the toilet, close the home’s main shutoff and replace the defective isolation valve.
A counterintuitive repair rule is that a slow refill and a failure to shut off can share the same cause: sediment restricts the inlet screen, while grit lodged in the diaphragm prevents complete closure. Cleaning can therefore improve both symptoms.
Another practitioner rule is to replace the supply line when its washer remains compressed after years of service. A new fill valve connected to an old, distorted washer can create a floor leak that did not exist before the repair.
When Should You Call a Plumber?
Call a plumber when the toilet shutoff will not close, the tank porcelain is cracked, water leaks from the tank-to-bowl bolts, the supply connection is corroded, or a concealed cistern cannot be safely accessed. Professional help is also appropriate when house water pressure may be damaging multiple fixtures.
A fill valve replacement is usually a reasonable beginner repair only when the tank is exposed, the isolation valve works, and the porcelain is intact. Stop immediately if water continues flowing after the main shutoff closes, because the repair area is no longer safely isolated.
FAQ
Can a Fill Valve Fail Intermittently?
Yes. A partially worn diaphragm, mineral particle, or float that sticks against the tank can cause intermittent shutoff. Observe the valve during several flushes and perform the dye test; repeated cycling with no bowl leak points toward the fill valve, while a slowly falling tank points toward the flapper.
Why Does the Toilet Hiss After the Tank Fills?
A hissing toilet usually has a restricted inlet screen, partially closed supply valve, high water pressure, or a seal that is not closing completely. Open the supply valve fully, check the float setting, and clean the valve cap. Persistent hiss after cleaning generally justifies replacement.
How Long Does a Toilet Fill Valve Last?
A toilet fill valve commonly lasts about 5-7 years, although hard water, sediment, high pressure, and chlorine tablets can shorten service life. Age alone does not require replacement, but a valve that repeatedly sticks after cleaning has reached the practical end of its service life.
Can I Replace a Float Ball With a Cylinder Valve?
Often, yes, if the replacement fits the tank opening, clears the flush mechanism, and meets the toilet’s anti-siphon requirements. Measure the tank space and verify the manufacturer’s compatibility information before converting an older ballcock, especially in a narrow or vintage tank.
Is a Running Toilet an Emergency?
A running toilet is usually not an immediate plumbing emergency if water remains inside the tank and bowl, but it can waste substantial water and eventually overflow. Close the toilet shutoff until repair. Treat floor leakage, uncontrolled supply flow, or cracked porcelain as urgent conditions.
Why Does the Tank Fill but the Bowl Stay Low?
A low bowl after filling usually indicates a kinked or misdirected refill tube, insufficient refill flow, or a partially blocked bowl passage. Confirm that the tube sends water into the overflow tube and that its end is not submerged. Adjust the bowl refill setting if the valve provides one.
The Bottom Line
A toilet fill valve not shutting off should be diagnosed in order: watch the refill, free the float, lower the water level, clean the valve, and replace it if the seal still fails. Confirm the flapper with a dye test before buying parts, keep the refill tube above the overflow opening, and close the home’s main water supply if the toilet shutoff cannot isolate the repair.