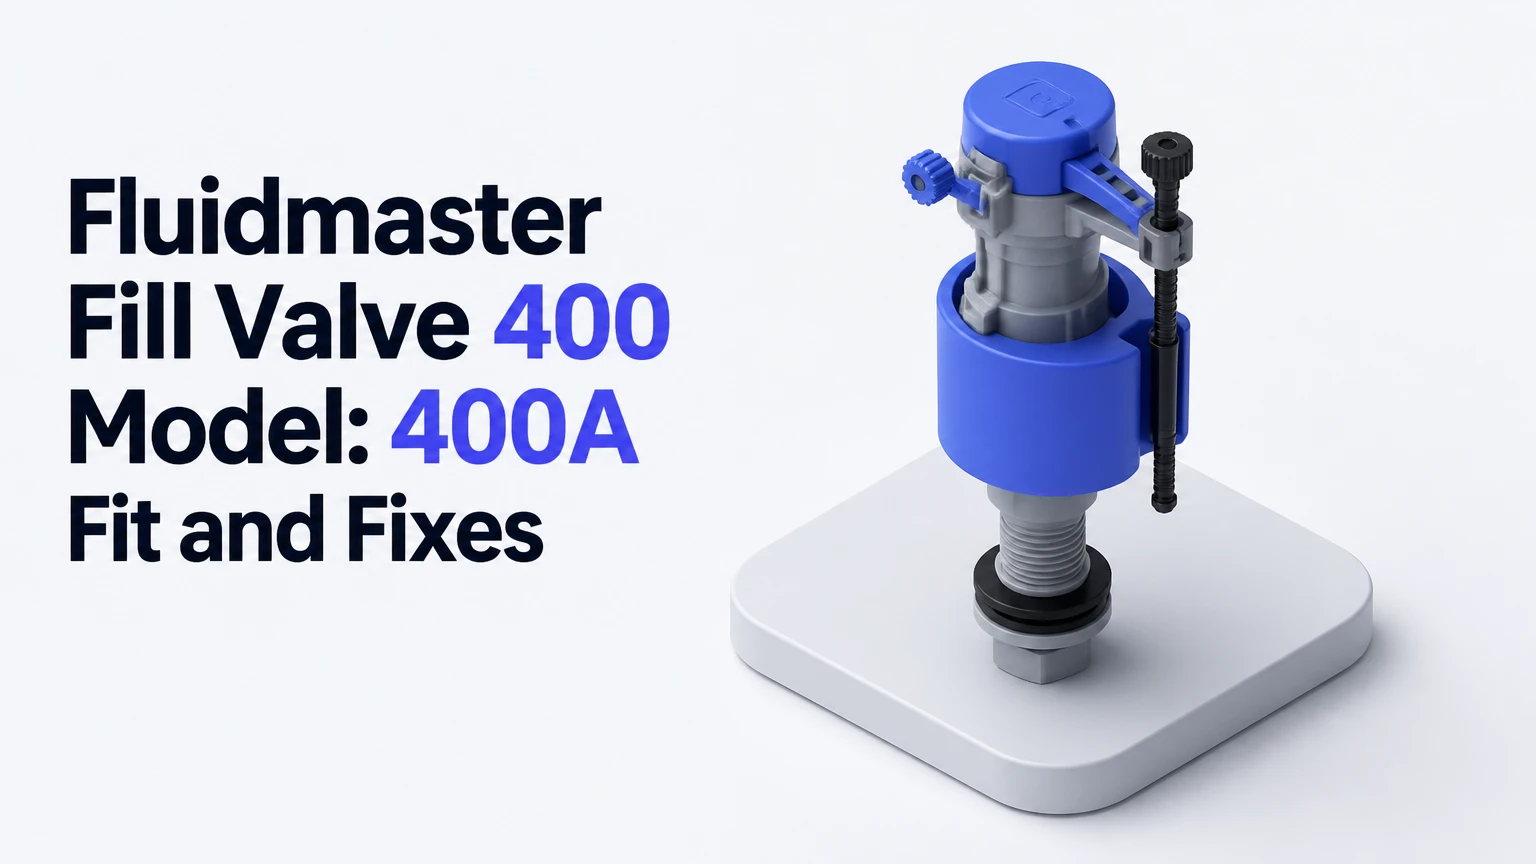
The Fluidmaster 400 model is an adjustable, anti-siphon toilet tank fill valve, with the 400A as the standard black-cap version. It replaces many older ballcock assemblies, refills both the tank and bowl, and shuts off through a float-controlled diaphragm. The correct replacement depends on tank height, toilet flush volume, refill requirements, and connection condition.
Key Facts at a Glance
- The Fluidmaster 400A adjusts from approximately 9 to 14 inches and fits many standard gravity toilets.
- The black float cup controls tank water height; the refill tube sends a metered stream into the overflow tube.
- The 400A is an anti-siphon valve, so its air-gap refill connection must remain above the overflow-water level.
- A typical DIY replacement takes 10-15 minutes and requires pliers, a sponge, and a bucket.
- The 400H PerforMAX adds refill-flow adjustment for modern low-consumption toilets.
- A toilet that keeps running may have a flush-valve flapper problem rather than a defective Fluidmaster fill valve.
What Is the Fluidmaster 400 Model?
The Fluidmaster 400 model is a family of universal toilet fill valves that controls fresh water entering a toilet tank after flushing. The commonly recognized 400A has a black cap, a sliding float cup, a plastic shank, and an adjustable body that accommodates different tank depths.
Fluidmaster describes the 400A as a universal fill valve and markets it as its most popular fill valve worldwide. That statement is a manufacturer claim, not an independent market ranking, but the 400A is widely stocked because its replacement dimensions and adjustment range suit many residential toilets.
The 400A is intended for gravity-flush toilet tanks, not pressure-assist systems. It does not replace the toilet’s flush valve, flapper, handle, overflow tube, or tank-to-bowl gasket. Those components perform different jobs.
How Do You Identify a 400A?
A black cap and black float cup usually identify a Fluidmaster 400A, although color alone does not prove the exact model. Look for the Fluidmaster name molded into the cap or body, then check the valve’s adjustment range, shank type, and any model marking on the package or replacement instructions.
| Identification feature | Typical 400A detail | Why it matters |
|---|---|---|
| Cap color | Black | Distinguishes the standard family visually |
| Float design | Sliding float cup | Controls shutoff height on the main shaft |
| Height range | Approximately 9-14 inches | Must fit the tank and overflow assembly |
| Supply connection | Usually 7/8-inch ballcock shank | Must match the toilet supply line |
| Valve type | Anti-siphon diaphragm valve | Requires a correctly positioned refill tube |
| Intended system | Residential gravity tank | Not a pressure-assist cartridge |
Older Fluidmaster valves may resemble the 400A while using different internal parts or shank materials. Confirm the model before ordering a cap, diaphragm, seal, or complete replacement.
How Does the Fluidmaster 400A Work?
The Fluidmaster 400A uses a float-operated, pilot-controlled diaphragm. After a flush, the float cup drops, the valve opens, water enters through the shank, and a smaller controlled stream travels through the refill tube into the toilet’s overflow pipe. As the tank rises, the float cup closes the diaphragm and stops flow.
The operating sequence is precise:
- The flush handle lifts the flapper, allowing tank water to leave.
- The float cup falls with the tank water level.
- The control stem opens the internal pilot passage.
- Pressure above the rubber diaphragm decreases.
- Incoming supply water opens the diaphragm.
- Water refills the tank through the valve body.
- A metered portion refills the bowl through the flexible tube.
- The rising float cup closes the pilot passage.
- Pressure equalizes across the diaphragm and shuts the valve.
The refill tube does not fill the tank. It replenishes the bowl trap seal, which is necessary for proper drainage and sewer-gas protection.
Why Does the Valve Refill the Bowl Separately?
The toilet bowl loses water during a flush, while the tank stores water for the next flush. The Fluidmaster 400A therefore divides incoming water between the tank and overflow tube. The exact ratio depends on the toilet’s refill restrictor, valve configuration, bowl design, and supply pressure.
A refill tube pushed below the overflow-tube opening can create a siphon path. The tube should attach to the overflow tube with the supplied clip, leaving an air gap above the tube’s highest possible water level. The refill connection is an anti-siphon detail, not a cosmetic installation preference.
What Are the 400-Series Models and Specifications?
The standard 400A is the economical general-purpose option, while the 400H PerforMAX provides adjustable refill flow for toilets that need tighter water control. Brass-shank and professional-series versions change connection durability or operating characteristics, but they do not automatically solve a poorly adjusted bowl, clogged supply line, or leaking flapper.
| Model or version | Cap or body identifier | Main adjustment | Typical application |
|---|---|---|---|
| 400A | Black cap | Tank height, approximately 9-14 inches | Standard gravity toilets |
| 400A brass shank | Black cap, metal shank | Tank height, approximately 9-14 inches | Installations needing metal connection threads |
| 400H PerforMAX | Blue cap or blue components | Tank height and refill-flow dial | Many 1.28-1.6 GPF toilets |
| Pro45 series | Red professional-series body | Model-dependent height and refill settings | Service work and repeated maintenance |
| Older ballcock | Metal or plastic float arm | Arm position or screw adjustment | Existing legacy systems, usually replaced |
The 400A’s 9-14-inch range is a practical specification, but the usable setting is determined by the tank and overflow tube. The valve cap must clear the tank lid, the float cup must move without rubbing, and the final waterline must remain below the overflow opening.
What Water Pressure and Supply Size Does It Need?
The 400A normally connects to a standard toilet supply line through a 7/8-inch ballcock thread. Household water pressure, supply-line condition, shutoff-valve opening, and inlet-screen cleanliness determine actual refill speed.
A typical residential tank refills in roughly 30-60 seconds with a clear supply path. A refill time near 33 seconds is possible in favorable installations, but it should not be treated as a universal specification. High pressure can increase noise, while restricted pressure can produce slow filling even when the valve is new.
How Much Does a Fluidmaster 400A Cost?
A typical retail price for a standard 400A is approximately $10-$16, while brass-shank, professional, or multi-pack versions cost more. A plumber’s installed price commonly reaches $75-$175 because the labor charge includes travel, diagnosis, shutoff-valve risk, and cleanup.
| Purchase or service scenario | Typical price range | Typical time |
|---|---|---|
| Standard 400A retail unit | $10-$16 | Same-day purchase |
| 400H PerforMAX retail unit | $15-$25 | Same-day purchase |
| Three-pack contractor purchase | $24-$36 | Stocking purchase |
| DIY replacement | $10-$25 in parts | 10-15 minutes |
| Plumber replacement | $75-$175 installed | 20-60 minutes |
| Replacement shutoff valve added | $15-$40 in parts | Adds 30-90 minutes |
Prices vary by country, retailer, supply chain, and whether the package includes a refill clip or shank washer. Do not choose a cheaper valve if the existing supply shutoff does not close reliably.
Is the 400A Compatible With Your Toilet?
The 400A fits many standard gravity toilets when the tank has adequate clearance and the supply connection uses a compatible ballcock thread. The valve is not automatically suitable for every toilet because pressure-assist tanks, unusually shallow tanks, proprietary refill systems, and restricted low-flow bowls can require different components.
Check these conditions before buying:
- Measure from the tank bottom to the lid area.
- Confirm the fill-valve body can adjust to that height.
- Verify the supply-line connection and washer condition.
- Compare the toilet’s rated flush volume, such as 1.6 GPF or 1.28 GPF.
- Confirm the float cup will not touch the tank wall, lid, flush lever, or trip chain.
- Identify whether the toilet uses a pressure-assist vessel.
- Inspect the overflow tube for cracks or a waterline set too high.
Pre-1994 toilets often used 3.5-7.0 gallons per flush, but a 400A may refill those tanks successfully without making the toilet legally or hydraulically equivalent to a modern low-flow model. Flush performance belongs to the complete toilet, not the fill valve alone.
Should You Use the 400A in a Modern Low-Flow Toilet?
The 400A can operate in many modern toilets, but the 400H PerforMAX is often easier to tune because its refill-flow dial limits water sent to the bowl. The correct choice depends on the bowl’s refill requirement, not simply the toilet’s manufacturing date.
A low-flow toilet may need a carefully controlled bowl refill. Too much water can waste water through the overflow tube, while too little can leave the bowl below its intended trap-seal level. Adjust the refill ratio while observing the bowl and tank after a complete flush.
400A vs. 400H: Which Should You Choose?
Choose the 400A for a straightforward replacement in a conventional gravity toilet, especially when purchase price and simple high-flow filling matter most. Choose the 400H PerforMAX when the toilet is a 1.28-1.6 GPF model, bowl refill needs adjustment, or refill noise and performance require more control.
| Decision factor | Fluidmaster 400A | Fluidmaster 400H PerforMAX |
|---|---|---|
| Typical body identifier | Black cap | Blue cap or blue components |
| Approximate height range | 9-14 inches | Confirm package-specific range |
| Bowl refill control | Basic built-in restriction | Adjustable refill-flow dial |
| Typical retail price | $10-$16 | $15-$25 |
| Best fit | Standard gravity replacement | Modern low-flow tuning |
| Main drawback | Less independent bowl adjustment | Higher price and potentially slower fill |
| Typical buyer | Budget DIY homeowner | Homeowner prioritizing refill calibration |
The 400H is not inherently a stronger repair for every running toilet. If the flapper leaks, either fill valve will cycle repeatedly because the tank cannot hold water. Diagnose the flush valve before upgrading the fill valve.
When Is a Brass-Shank Version Worthwhile?
A brass-shank version is worthwhile when repeated service, rigid supply-line connections, or damaged plastic threads create a practical durability concern. Brass does not improve bowl refill accuracy, eliminate hard-water deposits, or compensate for cross-threading.
Professional-series valves may make sense for landlords or facilities that perform frequent replacements, but a residential owner should compare the complete price and available replacement parts. A plastic 400A installed without excessive force can provide years of service.
How Do You Install a Fluidmaster 400A?
Installing a Fluidmaster 400A usually takes 10-15 minutes after the water shutoff, supply line, and tank hardware prove serviceable. The most important success factor is setting the valve height and final waterline without allowing the float cup or refill tube to interfere with the flush mechanism.
Before You Start
| Requirement | Typical value |
|---|---|
| Time | 10-15 minutes |
| Difficulty | Basic DIY |
| Tools | Slip-joint pliers, sponge, bucket |
| Parts | 1 fill valve, 1 refill tube, 1 clip |
| Water shutoff | Fully closes clockwise |
| Replacement supply line | Optional, 1 line if washer or hose is damaged |
Step 1: Shut Off Water and Empty the Tank
Turn the toilet’s wall shutoff clockwise until it stops, then flush while holding the handle down. Sponge the remaining water from the tank bottom and place a bucket beneath the supply connection.
You will know the step worked when the tank no longer refills and only a thin puddle remains. Do not force a frozen shutoff valve; a failing valve may leak at the stem or fail to isolate the toilet.
Step 2: Remove the Old Fill Valve
Disconnect the supply line beneath the tank, loosen the old mounting nut, and lift the fill valve out through the tank opening. Remove the old rubber washer and clean mineral deposits from the porcelain around the hole.
The common mistake is gripping the shutoff valve body while loosening the supply line. Support the valve and stop if the wall connection begins to rotate.
Step 3: Set the 400A Height
Twist the Fluidmaster 400A body to set its length before tightening the tank nut. Position the cap below the tank lid while keeping the float cup clear of the tank wall, flush lever, and overflow tube.
Follow the current instruction sheet for the required clearance between the valve top and overflow tube. Older instructions and model variants may specify different measurements, so a fixed “three-inch” rule should not override the supplied manual.
Step 4: Seat the Valve and Tighten the Locknut
Place the rubber shank washer inside the tank, insert the shank through the tank hole, and thread the plastic locknut onto the shank underneath. Hand-tighten the nut, then add only a small additional turn if the washer still moves.
The success checkpoint is a centered valve with no visible gap at the tank hole. Overtightening can crack the tank, distort the washer, or damage plastic threads.
Step 5: Connect the Refill Tube Correctly
Push the refill tube onto the valve nipple and clip the other end to the overflow tube. Keep the tube’s outlet above the overflow opening and never push the flexible tube down inside the overflow pipe.
The installation is correct when water can enter the overflow tube without the tube end becoming submerged. The air gap protects the anti-siphon function.
Step 6: Reconnect, Test, and Adjust
Reconnect the supply line, open the shutoff slowly, and inspect the shank, supply connection, and tank interior for leaks. Let the tank fill, flush twice, and adjust the valve’s water-level screw or rod until the waterline reaches the toilet manufacturer’s marked level or remains below the overflow opening.
You will know the adjustment works when the valve stops cleanly, the bowl reaches its normal standing level, and no water continues flowing into the overflow tube. A waterline that rises into the overflow indicates a separate adjustment or flush-valve problem.
Why Is the Toilet Still Running After Installation?
A toilet that runs after a new Fluidmaster 400A installation usually has a leaking flapper, an incorrectly set refill tube, debris in the fill-valve diaphragm, or a tank waterline that reaches the overflow tube. The sound location provides a useful first diagnosis.
| Symptom | Likely cause | First corrective action |
|---|---|---|
| Water enters overflow tube | Tank level too high | Lower the fill-valve setting |
| Valve cycles every few minutes | Leaking flapper | Add food coloring to tank and check bowl after 10 minutes |
| Hissing from valve cap | Debris or worn diaphragm | Flush the valve inlet and inspect seal |
| Leak below tank | Damaged washer or loose nut | Shut off water and reseat connection |
| Bowl level remains low | Tube disconnected or restricted | Reattach clip and inspect refill path |
| Float cup rubs wall | Incorrect valve position | Rotate or reposition the valve body |
Food coloring is a diagnostic tool, not a permanent treatment. If colored tank water enters the bowl without flushing, replace or service the flapper.
How Do You Fix a Slow-Filling 400A?
Fix a slow-filling Fluidmaster 400A by checking the shutoff valve, supply line, inlet screen, and household pressure in that order. A clean valve cannot fill quickly through a partly closed stop valve or a supply hose with a collapsed inner liner.
Turn off the water, remove the supply connection as directed by the manufacturer, and inspect the valve inlet for sand or scale. Fluidmaster’s service guidance commonly recommends using a cup to shield the open valve while briefly flushing the supply, preventing water from spraying across the bathroom.
Do not remove internal screens permanently. The screen protects the diaphragm from debris that can cause later shutoff failure.
Why Does the 400A Make a Screeching Noise?
A screeching or chattering Fluidmaster 400A usually results from a worn diaphragm, debris at the inlet, unstable water pressure, or a partially closed shutoff valve. Noise that occurs only at final shutoff often points toward diaphragm vibration rather than a tank-height problem.
Clean the inlet first because it costs nothing and can restore stable flow. If the diaphragm or cap is damaged, compare the price of a genuine replacement part with a complete valve, since a complete 400A often costs only $10-$16.
What Mistakes Shorten Fill-Valve Life?
The most damaging installation mistakes are overtightening the plastic locknut, submerging the refill tube, leaving mineral scale on the tank hole, and installing the valve where the float cup rubs the tank wall. Each mistake creates a different failure pattern.
- Overtightened locknut: Porcelain stress or a distorted washer causes a slow leak beneath the tank.
- Submerged refill tube: The tube can siphon tank water continuously into the drain.
- Misadjusted waterline: Water entering the overflow is wasted and can mimic a defective fill valve.
- Blocked inlet screen: Sand or pipe scale slows filling and may prevent diaphragm closure.
- Chemical tablet exposure: Chlorine tablets placed in the tank can damage rubber seals and plastic components.
- Wrong model assumption: A pressure-assist toilet may not accept a universal gravity fill valve.
A practical rule is to diagnose water movement before replacing parts. If water is leaving through the bowl, test the flapper. If water is entering through the fill valve and stopping below the overflow, the fill valve is probably functioning.
Repair or Replace: What Is the Sensible Choice?
Replace the complete Fluidmaster 400A when the body is cracked, the shank threads are damaged, the valve has severe scale, or a genuine repair cap costs close to a new assembly. Service the valve when the body is sound and the problem is limited to debris, a worn seal, or a replaceable diaphragm.
Typical service life is about 5-7 years in ordinary residential use, but hard water, well sediment, high chlorine exposure, and in-tank cleaning chemicals can shorten that period. The range is a field expectation, not a guaranteed warranty term.
Fluidmaster’s standard product warranty and the warranty printed for a specific package control the actual coverage. Retail listings and regional product pages may show different warranty durations, so confirm the current documentation rather than relying on a generic five-year or seven-year claim.
Which Alternative Should You Consider?
The 400A is the sensible default for many gravity toilets, but it is not the only viable option. A model-specific replacement can be better when the toilet manufacturer requires a proprietary refill rate or when the existing valve has an unusual mounting arrangement.
| Alternative | Typical cost | Best situation | Limitation |
|---|---|---|---|
| Fluidmaster 400H | $15-$25 | Low-flow bowl refill adjustment | Costs more than 400A |
| Korky universal fill valve | $12-$25 | Adjustable residential replacement | Settings differ by model |
| Manufacturer-specific valve | $20-$60 | Proprietary toilet design | Parts may be harder to find |
| Brass-shank 400A | $15-$30 | Repeated service or rigid connection | Does not improve refill control |
| Professional-series valve | $20-$40 | Maintenance inventory | Higher upfront cost |
Choose the 400A for a standard, inexpensive replacement. Choose the 400H for adjustable low-flow bowl refill. Choose a manufacturer-specific valve when the toilet’s installation guide identifies a required component.
FAQ
Can a Fluidmaster 400A replace a metal ballcock?
Yes, a Fluidmaster 400A can replace many conventional metal ballcocks in gravity toilets when the tank hole and supply connection are compatible. Remove the old arm-and-ball assembly, confirm the new valve fits the tank height, and set the waterline below the overflow opening.
Does a Fluidmaster 400A fit a 1.28 GPF toilet?
A Fluidmaster 400A may fit a 1.28 GPF toilet physically, but physical fit does not guarantee correct bowl refill. The 400H PerforMAX offers more refill-flow control, which can make calibration easier on low-consumption toilets.
Can I install the valve without removing the toilet tank?
Yes. A standard Fluidmaster 400A installs through the tank opening while the tank remains attached to the bowl. Tank removal is usually unnecessary unless the supply connection, tank bolts, gasket, or porcelain around the mounting hole requires separate repair.
Why does the bowl refill too high?
A bowl that refills too high may have excessive flow through the refill tube, a blocked bowl siphon jet, or a water level governed by the toilet’s internal trap design. Adjust the refill setting first, then verify that the tank itself stops below the overflow.
Can hard water damage a Fluidmaster 400A?
Hard water can deposit calcium and magnesium scale on the inlet screen, diaphragm, and adjustment components. Sediment filtration, periodic cleaning, and avoiding chlorine tablets inside the tank reduce premature failure, although severe deposits can make replacement more economical.
Is the Fluidmaster 400A suitable for commercial toilets?
The 400A can suit some commercial gravity-tank toilets, but commercial installations may require a brass-shank or professional-series valve for service durability. Pressure-assist commercial systems need their specified replacement cartridge or valve assembly instead.
Conclusion
The Fluidmaster fill valve 400 model usually refers to the black-cap 400A, an adjustable anti-siphon valve for standard gravity toilets. Confirm the 9-14-inch fit, keep the refill tube above the overflow waterline, and diagnose the flapper before blaming the valve for constant running. Choose the 400H when a modern low-flow toilet needs more precise bowl refill control.