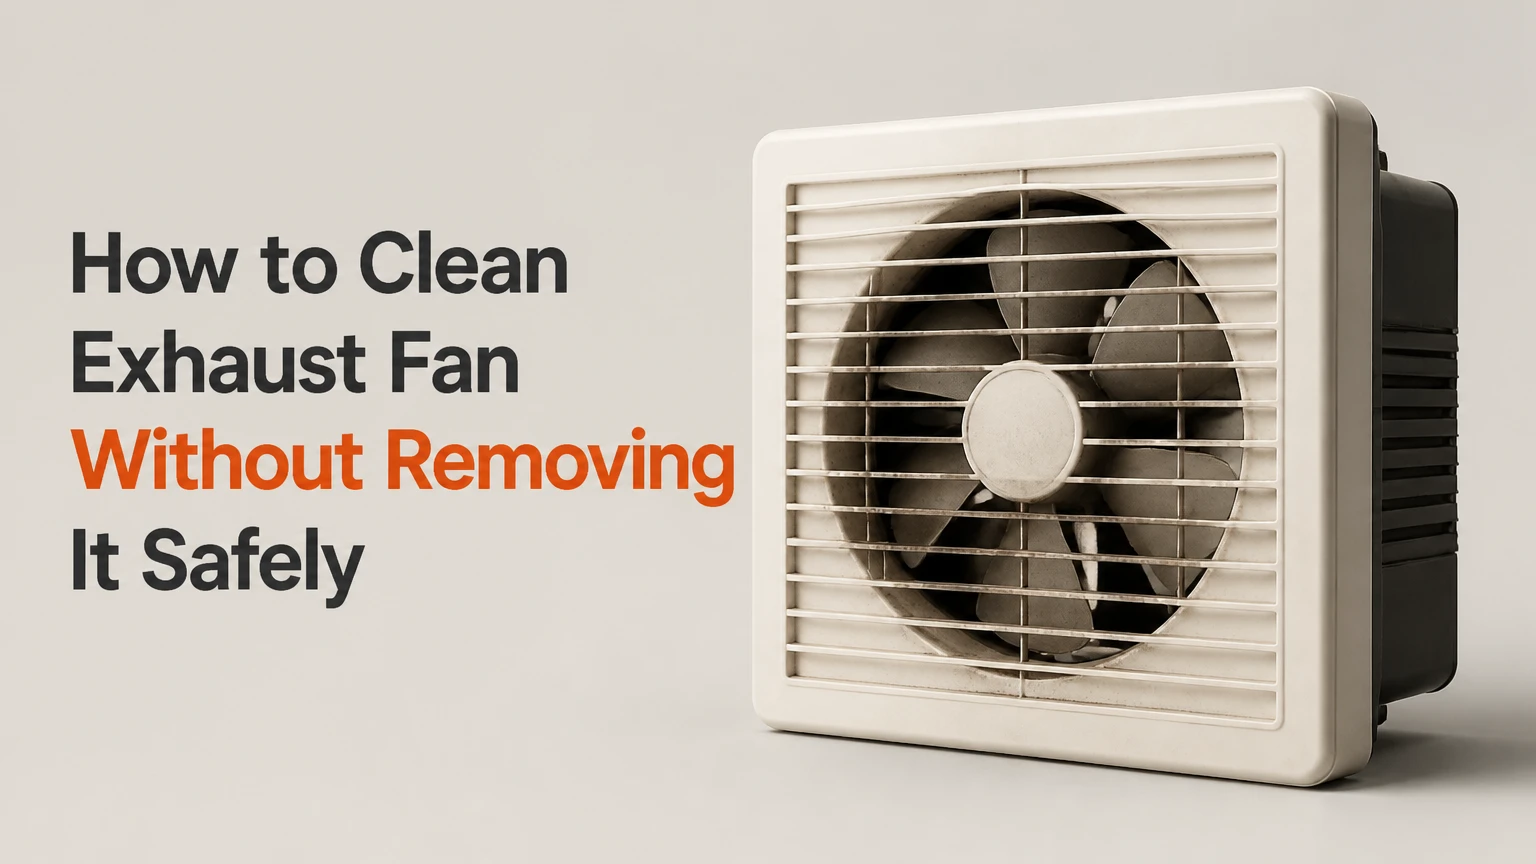
To clean an exhaust fan without removing it, switch off the circuit breaker, vacuum the grille and accessible impeller, then wipe blades and housing with a barely damp cloth. Never spray liquid into the mounted fan. Allow all accessible surfaces to dry completely before restoring power, usually after 30-60 minutes.
Key Facts at a Glance
A mounted exhaust fan can usually be surface-cleaned in 20-45 minutes without disconnecting its wiring.
Turning off the wall switch is not enough; isolate the fan at the circuit breaker and verify that power is absent.
Vacuuming before wet cleaning prevents loose dust from becoming a damp, compacted paste inside the housing.
Apply detergent to a cloth, not to the grille, motor, impeller, or electrical connections.
Bathroom fans typically need cleaning every 6-12 months; greasy kitchen fans may need attention every 1-3 months.
Cleaning the visible fan cannot clear a blocked duct, stuck backdraft damper, or clogged exterior vent.
What You Need Before Cleaning
A mounted exhaust fan needs a small set of non-invasive tools: a vacuum with a brush attachment, microfiber cloths, a soft toothbrush, a flexible duster, mild dish detergent, protective equipment, and a stable step ladder. A non-contact voltage tester adds an important verification step when the fan is ceiling-mounted or wired to a shared circuit.
Before You Start
| Item | Typical specification | Approximate cost |
|---|---|---|
| Cleaning time | 20-45 minutes | $0 labor |
| Drying time | 30-60 minutes | $0 |
| Vacuum attachment | Soft brush, crevice tool | Existing tool or $5-$15 |
| Cleaning solution | 2 cups warm water plus 1 teaspoon detergent | Under $2 |
| Protective equipment | Safety glasses, nitrile gloves, N95 or similar mask | $3-$15 |
| Access equipment | Fiberglass step ladder, level floor placement | Existing tool or $40-$100 |
Use a fiberglass ladder when possible, especially near electrical fixtures. Bathroom dust can contain mold fragments, while kitchen dust can contain oxidized grease and fine particulate matter. Wear eye protection and a suitable mask, and do not work above shoulder height if you cannot maintain a stable stance.
A mounted fan is not a good candidate for in-place cleaning when the grille is cracked, the motor wiring is exposed, the housing is loose, or the fan is coated with thick, wet grease. Those conditions require deeper disassembly by a qualified person or replacement of the unit.
How to Clean an Exhaust Fan Without Removing It
Cleaning an exhaust fan in place involves seven controlled steps: isolate power, contain debris, vacuum dry dust, access the impeller, wipe with minimal moisture, clean the grille, and verify drying before testing. The factor that most determines the result is access, because a grille with narrow slots may allow surface cleaning but leave the rear housing and duct contaminated.
Step 1: Turn Off the Circuit Breaker
Switch off the exhaust fan, then turn off the circuit breaker that supplies it. Place a note on the panel or tell others not to restore power while you work. If the fan shares a bathroom or lighting circuit, switch off the associated lights as well.
Test the fan switch. Then use a non-contact voltage tester near the switch box or accessible fan wiring if the tester is appropriate for the situation. A non-contact tester is a screening tool, not a substitute for safe electrical procedures when wiring is exposed.
You will know it worked when: the fan does not start and the tester indicates no voltage at the accessible test point.
Common mistake: relying on the wall switch alone. A switched conductor can remain energized inside the fan housing.
Step 2: Protect the Room and Set Up Access
Place a plastic sheet, towel, or disposable drop cloth beneath the fan. Cover nearby shelving, toiletries, cooking equipment, and flooring because dry dust often falls from the rear edge of the grille rather than straight down.
Use a headlamp or bright battery flashlight. Position the ladder so both feet sit level and you can work without leaning sideways. Ceiling fans require more care because debris may fall directly toward your face.
You will know it worked when: the work area is illuminated and you can reach the grille while keeping your torso between the ladder rails.
Common mistake: standing on a bathtub edge, toilet, counter, or top ladder step. Use a properly sized ladder instead.
Step 3: Vacuum the Grille and Housing
Set the vacuum to normal suction and fit a soft brush attachment. Hold the brush lightly against each grille slot, moving slowly across the entire face. Vacuum the perimeter seam, switch area, screw recesses, and any visible lip between the grille and housing.
Use the crevice tool only around rigid external edges. A hard nozzle pressed against thin plastic can scratch the grille or pull it loose. Keep the vacuum nozzle close to the surface so dust enters the vacuum instead of dispersing into the room.
You will know it worked when: the grille changes from gray or fuzzy to its original color and no visible dust plume appears when you brush across it.
Common mistake: beginning with a wet cloth. Moisture binds loose lint into a paste that is harder to remove through narrow slots.
Step 4: Reach the Impeller With a Flexible Tool
If the grille remains mounted, insert a flexible microfiber duster, foam swab, or narrow cloth-wrapped plastic tool through the openings. A cloth-wrapped putty knife can reach flat areas, but keep the blade fully covered and avoid forcing it between moving components.
Rotate the impeller only by gently nudging a blade when the power is isolated. Wipe one blade at a time, using short strokes from the hub toward the outer edge. Do not bend plastic blades or press against the motor shaft.
For dust packed around the motor vents, use a vacuum brush first. Low-pressure canned air can help in a tight corner, but it also relocates dust into the motor, ceiling cavity, or room. Vacuuming is usually the cleaner first choice.
You will know it worked when: the impeller rotates smoothly by hand, the blades have no thick deposits, and no loose lint remains around the motor vents.
Common mistake: pushing a rigid tool deep into the housing. It can damage the impeller, wiring, thermal protector, or bearing shield.
Step 5: Wipe With a Controlled Cleaning Solution
Mix 2 cups of warm water with approximately 1 teaspoon of mild liquid dish detergent. Dip a microfiber cloth into the solution, wring it until it is nearly dry, and wipe the accessible grille, blade surfaces, and rigid housing.
For bathroom mineral spots, a 1:1 mixture of white vinegar and water can loosen scale on the grille, but vinegar is not a superior grease solvent and should not contact electrical components. Never mix vinegar with chlorine bleach or other cleaning chemicals.
For kitchen grease, use a manufacturer-approved or label-directed degreaser on the cloth. Test the product on an inconspicuous plastic edge first because citrus solvents and concentrated alkaline cleaners can discolor, soften, or craze plastic.
You will know it worked when: the cloth removes residue without leaving liquid pooling in the housing, grille slots, or motor area.
Common mistake: spraying the solution upward toward the fan. Aerosolized liquid can enter motor windings, connectors, bearings, or the ceiling cavity.
Step 6: Clean the Grille and Surrounding Surface
Wipe the front and rear-facing edges of the grille as far as the mounted design permits. Use a soft toothbrush for slot corners and the grille perimeter. Clean the ceiling or wall immediately around the fan because accumulated dust can fall back onto the grille during the next operating cycle.
Do not use steel wool, abrasive powder, a stiff wire brush, or a melamine sponge on glossy plastic. Fine scratches increase surface area and give future dust a better foothold.
If the grille has heavy grease that cannot be removed in place, stop rather than saturating it. A removable grille may be detachable without removing the fan, but only follow the manufacturer’s instructions and keep the electrical assembly untouched.
You will know it worked when: the grille is visibly clean, dry to the touch, and free of detergent streaks.
Common mistake: pulling the grille down by force. Spring clips can release suddenly, and some models contain a light socket or humidity sensor attached to the grille.
Step 7: Dry, Restore Power, and Test
Inspect the fan with the flashlight. Remove any remaining dampness from the grille, blades, and housing using a dry microfiber cloth. Leave the circuit off for at least 30 minutes in a warm, ventilated room; use 2-24 hours when moisture entered the housing, the room is cold or humid, or the motor was exposed to a wet cloth.
Restore power only after the motor area is dry and no loose cloth fibers remain. Run the fan for several minutes and listen for changes in pitch, scraping, humming, or rattling.
You will know it worked when: the impeller starts promptly, airflow is stronger, and the sound is consistent with the fan’s previous normal operation.
Common mistake: using a hair dryer close to the unit. Forced heat can deform plastic, drive moisture deeper, or create an electrical hazard.
Which Cleaning Method Is Safest?
Vacuuming is the safest first method for a mounted exhaust fan because it removes dry contamination without introducing moisture. A cloth-applied detergent is better for grease, while compressed air is useful only for limited, controlled areas where dust relocation will not create another problem.
| Method | Reach and result | Main risk | Best use |
|---|---|---|---|
| Vacuum with soft brush | Grille and visible housing, 5-10 minutes | Brush can pull a loose grille | Bathroom dust and light lint |
| Flexible microfiber duster | Narrow slots and impeller edges, 5-15 minutes | Tool can bend blades | Ceiling fans with fixed grilles |
| Cloth-applied detergent | Surface grease and residue, 10-20 minutes | Excess liquid entering motor | Light to moderate kitchen film |
| Diluted vinegar cloth | Mineral deposits, 5-10 minutes | Limited grease removal, chemical incompatibility | Hard-water marks on plastic grille |
| Low-pressure canned air | Tight dry corners, 1-3 minutes | Blows dust into motor or room | Final dry clearing after vacuuming |
A practitioner rule is to remove contamination from cleanest to dirtiest: grille first, impeller second, housing third, and surrounding wall or ceiling last. Reversing that order transfers grease back onto surfaces already cleaned.
Compressed air is not a deep-cleaning substitute. It may make a fan appear cleaner while pushing lint into the motor shaft or duct connection, where the material can continue restricting airflow.
How Bathroom and Kitchen Fans Differ
Bathroom exhaust fans usually accumulate lint, hair, soap residue, and humid dust, while kitchen exhaust fans accumulate an adhesive grease film that traps airborne particles. Bathroom cleaning therefore favors dry vacuuming and mild detergent; kitchen cleaning requires shorter intervals and a compatible degreaser.
| Fan environment | Typical contaminant | Cleaning interval | Suitable solution |
|---|---|---|---|
| Bathroom, low use | Dry lint and dust | Every 9-12 months | Vacuum plus mild detergent |
| Bathroom, daily showers | Humid dust and hair | Every 6 months | Vacuum plus barely damp cloth |
| Kitchen, light cooking | Fine grease film | Every 3-6 months | Mild detergent on cloth |
| Kitchen, frequent frying | Sticky grease and soot | Every 1-3 months | Label-directed degreaser on cloth |
| Laundry or utility room | Lint and detergent dust | Every 3-6 months | Vacuum, then dry wipe |
The U.S. Environmental Protection Agency states, “The key to mold control is moisture control.” A bathroom fan cannot control moisture effectively if its impeller is dirty, its duct is blocked, or the fan exhausts into an attic rather than outdoors.
Run a bathroom fan during a shower and for about 20 minutes afterward, a duration commonly recommended by the Home Ventilating Institute. A humidity-sensing control can automate operation, but cleaning remains necessary because a sensor does not remove lint from the impeller.
What Should You Do About Mold, Thick Grease, or Damage?
Surface mildew on a grille can often be wiped after power isolation, but extensive mold growth, wet insulation, sewage contamination, or thick combustible kitchen grease exceeds ordinary in-place cleaning. Cleaning only what is visible does not resolve contamination inside the duct or ceiling cavity.
Mold and Mildew
Wear gloves, eye protection, and a suitable respirator or mask when disturbed mold is present. Clean a small nonporous grille with detergent and water, dry it fully, and avoid mixing bleach with vinegar, ammonia, or other products.
Call a qualified remediation professional when mold covers a large area, repeatedly returns because of a leak, enters porous ceiling material, or causes respiratory symptoms. Do not run the fan during aggressive mold disturbance because the airflow can distribute spores through the room.
Thick Kitchen Grease
Heavy grease should not be softened with a large volume of liquid while the fan remains wired. Apply a small amount of degreaser to a disposable cloth, work in sections, and replace the cloth as it loads with oil.
Stop when the residue is hardened inside the motor compartment or duct. A grease-coated motor can overheat, and grease in a kitchen exhaust path can increase fire risk. A professional cleaning or replacement may be safer than forcing a grille-only method beyond its design.
Electrical or Mechanical Damage
Do not continue cleaning if insulation is cracked, copper is visible, the housing vibrates, the motor smells burned, or the impeller contacts the frame. Turn off the breaker, keep the unit isolated, and arrange an electrician or appliance technician inspection.
Cleaning cannot repair a seized bearing, failing capacitor, damaged winding, broken mounting bracket, or defective speed control. A clean but mechanically failing fan still needs repair or replacement.
Why Is the Fan Still Weak After Cleaning?
Weak airflow after cleaning usually indicates a blocked damper, duct restriction, exterior vent obstruction, undersized duct, or failing motor rather than more dirt on the grille. Check the airflow path from the room to the outdoor termination before repeating the same surface-cleaning process.
Hold a single square of toilet tissue near the grille while the fan runs. The tissue should pull toward the grille and remain attached or nearly attached. This is a qualitative check, not a measured airflow test.
Inspect the exterior termination for lint, leaves, insect nests, bird nests, and a stuck flap. Confirm that the backdraft damper opens when the fan operates. Do not reach into an exterior vent if the opening is unstable or contains wildlife.
| Symptom after cleaning | Likely location | Safe first response |
|---|---|---|
| Tissue barely moves | Grille, damper, or duct | Inspect grille and exterior flap |
| Fan runs but no outdoor airflow | Duct or termination | Check exterior vent for blockage |
| Airflow drops after several minutes | Motor overheating | Switch off and arrange inspection |
| Bathroom remains humid | Fan capacity or duct route | Check outdoor discharge and runtime |
| Grease remains in duct | Kitchen exhaust path | Request professional degreasing |
A bathroom fan exhausting into an attic is a building and moisture problem, not a grille-cleaning problem. Moist air can condense on cold roof components and contribute to mold or material deterioration.
Why Does the Fan Hum, Scrape, or Rattle?
A new noise after cleaning usually comes from a displaced grille, bent impeller blade, loose mounting screw, foreign debris, or a motor bearing that was already deteriorating. Turn off power immediately if the fan hums without rotating, smells hot, or vibrates strongly.
| Sound or behavior | Probable cause | Correct response |
|---|---|---|
| Hum with no rotation | Seized bearing, capacitor, or obstruction | Turn off power; do not keep testing |
| Rhythmic rattle | Loose grille or mounting screw | Isolate power and inspect fasteners |
| Scraping each revolution | Bent blade or displaced impeller | Stop; do not force blade alignment |
| Higher-pitched whine | Dry bearing or motor wear | Arrange service or replacement |
| Short delay before starting | Motor or control fault | Stop repeated cycling and inspect |
Do not push a bent blade back aggressively through the grille. Plastic becomes brittle with age, and a cracked blade can detach at operating speed. If the impeller is visibly damaged, replacement of the motor assembly or entire fan is safer.
How Much Time and Money Does Cleaning Take?
A typical DIY in-place cleaning costs $5-$25 and takes 20-45 minutes, excluding drying time. Professional service commonly costs about $75-$150 for accessible general cleaning, while heavy kitchen degreasing, duct cleaning, electrical repair, or high-ceiling access can cost more.
| Service or task | Typical duration | Typical DIY or service cost |
|---|---|---|
| Light bathroom vacuuming | 10-20 minutes | $0-$5 |
| Bathroom wipe cleaning | 20-35 minutes | $5-$15 |
| Greasy kitchen fan cleaning | 30-60 minutes | $10-$25 |
| General professional cleaning | 30-60 minutes | $75-$150 |
| Fan replacement by a professional | 1-3 hours | $150-$500 or more |
Prices vary by region, ceiling height, fan access, wiring condition, and whether the technician cleans the duct and exterior termination. A quote that includes only grille wiping is not equivalent to a quote that includes motor housing, duct, damper, and outside hood access.
How Can Renters Clean a Mounted Exhaust Fan?
Renters can usually vacuum and wipe the accessible grille without removing the fan, provided the lease does not restrict fixture maintenance and the unit has no exposed wiring or damage. Avoid removing electrical covers, disconnecting wiring, applying liquid directly, or modifying the duct.
Photograph the fan before cleaning if the grille is damaged or heavily contaminated. Notify the landlord or property manager when the fan has weak airflow, persistent mold, a loose housing, or a duct problem, because those conditions may involve building maintenance rather than routine housekeeping.
Common Mistakes and How to Fix Them
Spraying Directly Into the Fan
Direct spray can enter the motor, connector, and bearing area. Turn off power, blot visible liquid without pushing it deeper, and allow extended drying before any test; seek electrical inspection if the breaker trips or the motor behaves abnormally.
Using Too Much Pressure on the Blades
Force can warp the impeller and create an imbalance. Stop rotating the blade, inspect it under a flashlight, and replace damaged components rather than trying to reshape brittle plastic.
Blowing Dust Into the Housing
Compressed air can move dust from the grille into the motor or duct. Vacuum the accessible area, then use a soft dry swab for remaining deposits instead of increasing air pressure.
Cleaning Around Live Wiring
A wall switch does not guarantee that every conductor is dead. Restore the breaker only after the housing is dry and intact, and use a licensed electrician when wiring is exposed or uncertain.
Ignoring the Outdoor Termination
A clean grille cannot overcome a blocked exterior hood. Inspect the flap and screen from ground level, but do not climb onto a roof or disturb a nest without appropriate equipment and authorization.
FAQ
Can I clean an exhaust fan while it is running?
No. Turn off the fan and isolate its circuit before inserting a cloth, duster, vacuum tool, or brush. A running impeller can catch loose material, and an energized motor creates an electrical hazard when moisture is present. Test the fan after cleaning, not during the cleaning process.
Can I use baking soda to clean the fan?
Use baking soda only as a mild dry abrasive on a detached, non-electrical grille, and avoid putting powder into a mounted fan. Baking soda does little against thick grease and can leave residue in narrow slots. Mild detergent on a nearly dry cloth is more controlled for an installed unit.
Should I remove the fan grille even if I do not remove the fan?
Only if the manufacturer’s design allows safe grille removal without exposing wiring or disconnecting components. Some grilles use spring clips, while others include a light, humidity sensor, or electrical connector. If the grille resists, clean through the slots instead of forcing it.
How often should a bathroom exhaust fan run?
Run a bathroom exhaust fan during showering and for approximately 20 minutes afterward, as commonly recommended by the Home Ventilating Institute. The fan should discharge outdoors, not into an attic or wall cavity. A timer or humidity control can improve consistency, but neither eliminates the need for cleaning.
When should I replace an exhaust fan instead of cleaning it?
Replace or professionally inspect an exhaust fan when it hums without spinning, overheats, smells burned, vibrates after the grille is secure, has exposed wiring, or cannot move air despite a clear duct. Cleaning addresses contamination, not failed bearings, capacitors, motors, controls, or damaged impellers.
The Bottom Line
The safest way to clean an exhaust fan without removing it is to isolate power, vacuum dry debris, wipe accessible parts with a nearly dry cloth, and keep every liquid away from the motor and wiring. Allow 30-60 minutes of drying before testing, then check airflow, sound, the backdraft damper, and the exterior termination. For renters, bathroom fans, and light dust, this method is usually sufficient; heavy grease, mold, exposed wiring, and persistent low airflow require professional attention.