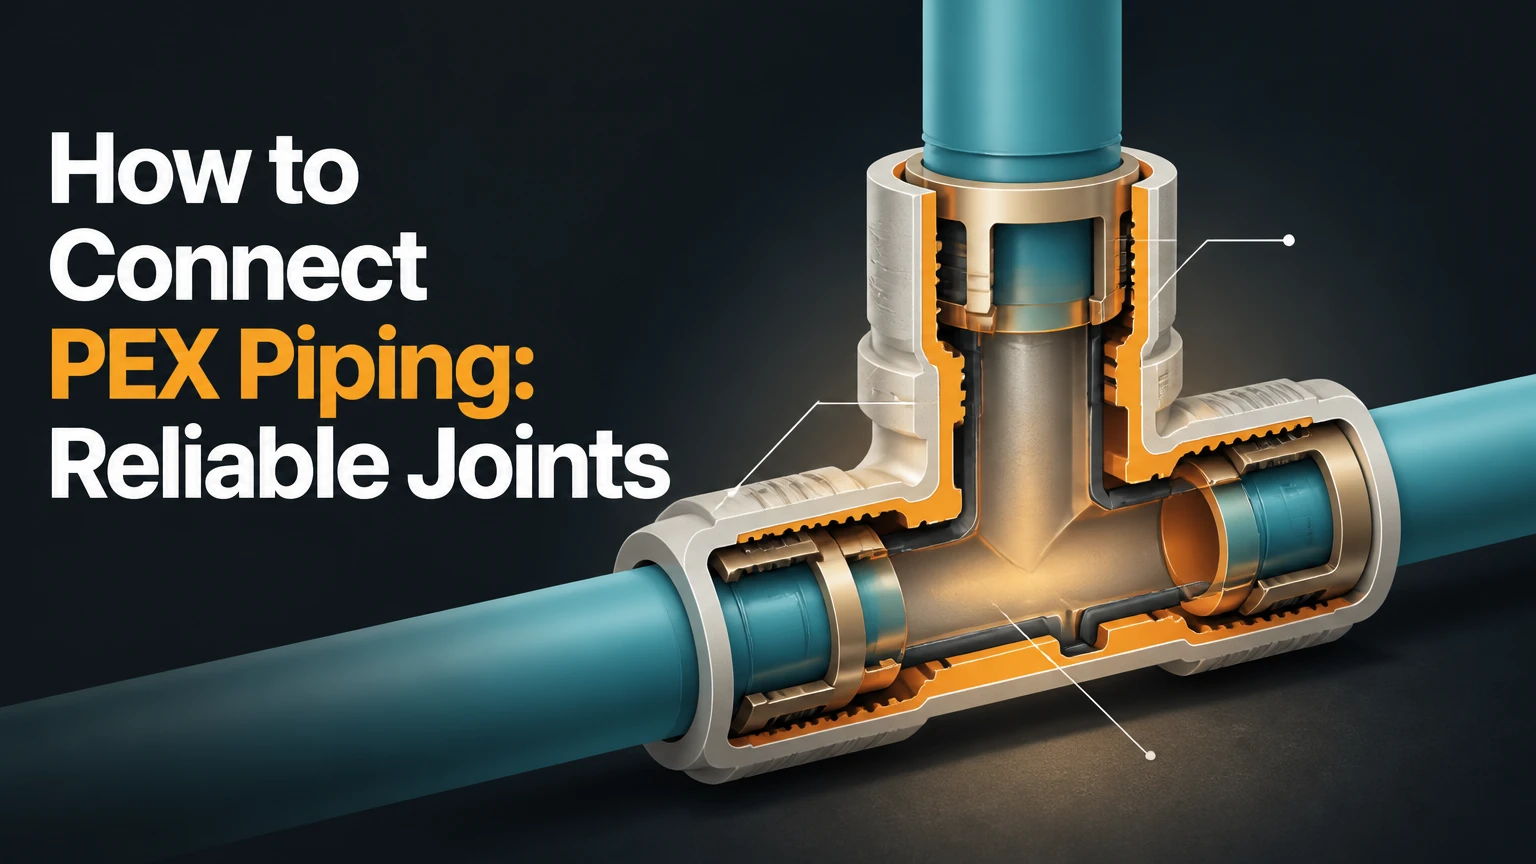
To connect PEX piping, cut the tube square, select a fitting system compatible with the pipe, insert the fitting to its stop, and secure it with a correctly installed crimp ring, cinch clamp, expansion sleeve, or push-to-connect mechanism. A clean cut, correct insertion depth, and manufacturer-approved tool determine whether the joint remains watertight.
Key Facts at a Glance
PEX crimp and cinch fittings use a barbed insert compressed around the tube by an exterior ring.
Cold-expansion fittings are designed for compatible PEX-A systems and ASTM F1960 components.
A PEX cutter must produce a square, clean cut without flattening or gouging the tube.
Copper crimp rings require a compatible crimp tool and a Go/No-Go gauge for verification.
Push-to-connect fittings seal with an internal O-ring, so scratches, dirt, and angled cuts can cause leaks.
Pressure ratings, bend radius, fitting compatibility, and concealed-joint rules depend on the product listing and local plumbing code.
How to Connect PEX Piping Safely
The safest PEX connection method is the one specified for the exact tube, fitting, and tool combination. Crimp and cinch systems work with many PEX-A, PEX-B, and PEX-C tubes, while cold expansion requires compatible PEX-A and push-to-connect fittings require the listed tube size and insertion depth.
PEX means cross-linked polyethylene. Cross-linking changes polyethylene’s molecular structure, giving PEX greater heat resistance and flexibility than ordinary polyethylene. The tube is commonly used for potable water, radiant heating, hydronic distribution, and some fire-protection applications when the complete system has the required listing.
Do not mix parts by appearance. A 1/2-inch copper crimp ring, a 1/2-inch cinch clamp, and a 1/2-inch expansion sleeve are different components with different tools. Use the fitting manufacturer’s instructions when they differ from a generic distance or technique.
Identify the PEX Pipe Before Choosing Fittings
Identify PEX type from the printing on the tube, not from color. Red and blue colors usually indicate hot and cold service, but color does not reliably identify PEX-A, PEX-B, or PEX-C.
| Pipe or connection feature | Typical identification | Compatible approach | Important limitation |
|---|---|---|---|
| PEX-A tube | Manufacturer marking, often peroxide method | ASTM F1960 expansion, crimp, cinch, listed push fitting | Expansion sleeve and fitting must belong to a compatible system |
| PEX-B tube | Manufacturer marking, often silane method | Crimp, cinch, compression-style, listed push fitting | Do not use cold-expansion fittings unless specifically listed |
| PEX-C tube | Manufacturer marking, often electron-beam method | Crimp, cinch, listed push fitting | Bend recovery and fitting options vary by manufacturer |
| PEX with oxygen barrier | “O2 barrier” or hydronic marking | Listed hydronic fittings | Do not assume potable-water approval |
| PEX-AL-PEX | Aluminum layer visible in cut section or product marking | Specialized multilayer press or compression fittings | Standard PEX crimp rings are not interchangeable |
The Plastics Pipe Institute identifies ASTM F876 and ASTM F877 as important PEX tubing standards for building plumbing applications. Those standards do not mean every fitting works with every tube. The complete connection system must be listed for the intended service.
Which PEX Connection Method Should You Use?
For a whole-house or multi-room installation, crimp or cinch usually provides the lowest material cost. For a single accessible repair, a listed push-to-connect fitting minimizes tool expense. For PEX-A production work, cold expansion offers high flow through larger-bore fittings, but the system costs more and requires careful temperature-sensitive installation.
| Method | Compatible pipe | Typical tool cost | Typical fitting cost | Best practical use |
|---|---|---|---|---|
| Copper crimp | PEX-A, B, or C when listed | $40-$100 per size range | $1-$3 | Repeated indoor plumbing joints |
| Stainless cinch | PEX-A, B, or C when listed | $30-$60 | $1-$3 | Remodeling and restricted access |
| Cold expansion | Compatible PEX-A only | $150-$400 or more | $2-$5 | New PEX-A systems and high-flow layouts |
| Push-to-connect | Listed PEX, plus some copper and CPVC | $0 for installation tools | $6-$15 or more | Accessible repairs and transitions |
| Compression fitting | Product-specific PEX or multilayer tube | $15-$60 | $4-$12 | Valves, appliance connections, and serviceable joints |
The “best” method changes with access and quantity. A cinch tool may cover several tube diameters, while some crimp tools are dedicated to one ring size. Push fittings are fast, but their higher fitting cost becomes significant across dozens of joints.
What Tools and Materials Are Required?
For a typical 1/2-inch crimp joint, prepare one compatible barbed fitting, one 1/2-inch copper crimp ring, a PEX cutter, a correctly sized crimp tool, and a Go/No-Go gauge. Add pipe supports, bend guides, clamps, shutoff valves, transition adapters, and approved tubing inserts where the fitting design requires them.
| Item | Typical quantity for one joint | Typical price | Selection rule |
|---|---|---|---|
| PEX tubing | 1-3 feet | $0.30-$1.50 per foot | Match size, pressure, temperature, and service listing |
| Barbed fitting | 1 | $1-$5 | Match tube OD and connection system |
| Copper ring or cinch clamp | 1 | $0.25-$2 | Match the fitting standard and tube size |
| PEX cutter | 1 | $10-$25 | Use a sharp blade that leaves a square cut |
| Crimp or cinch tool | 1 | $30-$100 | Use the correct jaw profile and size |
| Go/No-Go gauge | 1 | $5-$15 | Match the crimp system and ring size |
| Push fitting, if selected | 1 | $6-$15 or more | Confirm listed tube and insertion depth |
Before You Start
- Typical time: 10-20 minutes for one accessible joint, including inspection and testing.
- Difficulty: Moderate for crimp or cinch; advanced for expansion layouts and concealed piping.
- Water control: Shut off the supply, open a faucet, and drain pressure before cutting.
- Tube condition: Reject sections with deep scratches, kinks, UV damage, crushing, or heat damage.
- Compatibility: Confirm tube size, PEX type, fitting material, standard, and intended water temperature.
- Access: Keep every concealed connection permitted by local code and accessible where required.
- Testing: Plan a pressure test before insulation, drywall, cabinets, or backfill conceal the work.
How Do You Make a Crimp Connection?
A crimp connection takes about 20-40 seconds after the tube is prepared. Slide a copper ring onto clean PEX, insert the barbed fitting fully, place the ring over the fitting’s barb zone, compress it with the correctly sized tool, and verify the finished ring with a Go/No-Go gauge.
Step 1: Cut the PEX Squarely
Use a dedicated PEX cutter and make one clean cut perpendicular to the tube. Do not use a utility knife, hacksaw, side cutters, or a dull blade because each can create an angled edge, crushed wall, or longitudinal split.
You will know the cut worked when the tube remains round and the end is flat across its entire diameter. The common mistake is cutting too close to a damaged section. Remove all gouged or flattened material before making the joint.
Step 2: Slide on the Crimp Ring
Place the copper ring over the tube before inserting the fitting. Keep the ring far enough back that the fitting can enter without catching it, and use the ring size specified for the tube.
A ring that is flush with the cut edge cannot compress the barb zone correctly. A ring that sits too far back may compress plain tubing rather than the fitting’s barbs.
Step 3: Insert the Barbed Fitting
Push the fitting into the tube until the tube contacts the fitting shoulder or reaches the manufacturer’s specified insertion point. Twisting slightly can help insertion, but do not use petroleum lubricant or force a damaged tube onto the barb.
The success checkpoint is visible, complete seating against the shoulder. The failure mode is partial insertion, which leaves too few barbs inside the tube and concentrates pressure at the joint entrance.
Step 4: Position and Crimp the Ring
Position the ring over the barb area, typically about 1/8-1/4 inch, or 3-6 millimeters, from the tube end when the fitting instructions specify that range. Place the crimp tool squarely over the ring and close the handles fully in one controlled compression.
Do not crimp twice unless the manufacturer specifically permits a defined multi-step tool process. A second squeeze can distort the ring and overstress the tube.
Step 5: Gauge the Finished Joint
Use the correct Go/No-Go gauge immediately after crimping. The gauge should confirm that the ring has reached the required diameter without excessive compression.
A failed gauge result requires cutting out the entire joint and restarting with a new ring and fitting. Never slide a loose ring into position and recrimp the same connection, because the first deformation may prevent a reliable second compression.
How Do You Make a Stainless Cinch Connection?
A cinch connection uses a stainless-steel clamp with a raised ear, rather than a copper ring. The installer positions the clamp over the fitting’s barb zone and squeezes the ear with a compatible cinch tool until the tool releases or reaches the manufacturer’s required stop.
The basic sequence is shorter than crimping, but visual inspection is less exact. Some cinch tools automatically release at the correct compression, while others require a specified jaw position or manufacturer gauge.
- Cut the PEX squarely and remove the damaged section.
- Slide the cinch clamp over the tube.
- Insert the barbed fitting fully to the shoulder.
- Position the clamp approximately 1/8-1/4 inch from the tube edge, unless the fitting maker specifies another location.
- Center the tool jaws over the clamp ear.
- Squeeze until the tool releases or reaches its defined stop.
- Inspect the ear, ring, and tube for distortion or incomplete closure.
The joint is acceptable when the clamp is uniformly tight, the ear is fully compressed, and the tube has not split or folded. A clamp that closes unevenly indicates a wrong tool, a damaged ring, or misaligned jaws.
How Does a Cold-Expansion PEX-A Connection Work?
A cold-expansion connection works by expanding compatible PEX-A tubing and an expansion sleeve over an oversized fitting. The tubing’s material memory then shrinks around the fitting, creating the seal without a copper crimp ring or cinch clamp.
- Cut the PEX-A tube squarely.
- Slide the correct expansion sleeve onto the tube.
- Insert the expansion head completely into the tube.
- Expand in repeated cycles while rotating the tool head as directed.
- Stop when the tube reaches the tool shoulder or the manufacturer’s specified expansion count.
- Remove the tool and immediately insert the fitting fully.
- Hold the fitting in place for the manufacturer’s stated period, commonly several seconds.
Cold temperatures slow material recovery. Uponor’s installation guidance emphasizes rotating the expansion head and completing the fitting insertion promptly, because the tube begins shrinking as soon as the tool leaves the opening.
Do not attempt ASTM F1960 expansion on PEX-B or PEX-C. The tubing may split, and a joint that appears tight before pressure testing can fail later.
How Do You Install a Push-to-Connect PEX Fitting?
A push-to-connect fitting requires a square, undamaged tube end and full insertion past the internal O-ring. Cut the tube, clean its outside surface, mark the manufacturer’s insertion depth, push it straight into the fitting until it reaches the internal stop, and confirm the depth mark remains at the fitting mouth.
Push-to-connect fittings use stainless-steel gripping teeth and an elastomeric O-ring. The O-ring seals against the tube’s outer surface, so a scratch that would be harmless inside a barb fitting can cause a push fitting to leak.
- Shut off water and release pressure.
- Cut the tube squarely with a PEX cutter.
- Remove burrs only with the approved deburring tool, if required.
- Inspect the outside wall for scratches, gouges, and dirt.
- Mark the exact insertion depth from the fitting instructions.
- Push the tube straight through the grab ring and O-ring to the internal stop.
- Pull back gently to confirm the grab ring has engaged.
- Pressure-test the connection before concealing it.
Use disconnect tongs designed for the fitting if removal is necessary. A removed fitting may be reusable only when its manufacturer permits reuse and the O-ring, teeth, and body remain undamaged.
How Do You Connect PEX to Copper, a Valve, or a Manifold?
Connect PEX to copper with a listed PEX-to-copper transition fitting, such as a threaded adapter, sweat adapter, press adapter, or push-to-connect transition fitting. Connect PEX to a valve or manifold through the manufacturer’s matching adapter, because thread size alone does not guarantee a suitable tube connection.
For a threaded transition, secure the metal fitting with the appropriate wrench while preventing torque from twisting the PEX. For a sweat adapter, complete soldering before attaching the PEX, and allow the metal fitting to cool. Heat can damage PEX and nearby seals.
| Transition | Typical connection | Suitable situation | Main precaution |
|---|---|---|---|
| PEX-to-sweat copper adapter | PEX ring to copper solder joint | Permanent copper stub-out | Solder before attaching PEX |
| PEX-to-threaded adapter | Crimp, cinch, or expansion to NPT | Water heater, valve, equipment | Seal only tapered male threads as specified |
| PEX-to-press adapter | PEX system to copper press | Professional remodel | Use the listed press profile |
| PEX-to-push adapter | O-ring push fitting to copper or PEX | Accessible repair | Protect the tube from scratches |
| PEX manifold port | Dedicated ring, expansion, or compression inlet | Home-run plumbing | Match manifold port and tube system |
PEX should not connect directly to a fitting that lacks the required barb, sleeve, O-ring, or compression insert. Brass and poly-alloy fittings can both be suitable when listed for the application; material preference does not replace system compatibility.
What Specifications Matter After Connecting PEX?
PEX pressure and temperature ratings are product-specific, although common PEX potable-water ratings include 160 psi at 73.4°F and 100 psi at 180°F. The tube marking, fitting listing, water-heater instructions, local code, and system design control the permitted operating conditions.
A frequently cited minimum bend radius is six times the tube’s outside diameter, but manufacturers may publish different values for supported bends, cold conditions, or specific PEX grades. For 1/2-inch PEX, six outside diameters is approximately 3 inches if the stated diameter is 0.50 inch, not 4.5 inches. Always use the actual outside diameter printed or specified for the product.
| Specification | Common reference value | What controls the final value | Installation implication |
|---|---|---|---|
| Hydrostatic rating at 73.4°F | 160 psi | Tube listing and system standard | Do not exceed the lowest-rated component |
| Hydrostatic rating at 180°F | 100 psi | Tube listing and temperature class | Hot-water systems need temperature-rated materials |
| Typical bend-radius rule | 6 times OD | Manufacturer instructions | Use bend supports when the radius is tight |
| Crimp ring position | 1/8-1/4 inch from edge | Fitting manufacturer | Center compression over the barb zone |
| Push-fitting insertion | Product-specific, often 1-1/8 to 1-1/2 inches | Fitting manufacturer | Mark the tube before insertion |
| Pressure-test duration | Local code or product instructions | Authority having jurisdiction | Test before concealment |
Avoid direct sunlight exposure. The PEX industry and manufacturers warn that ultraviolet exposure can degrade tubing, and storage outdoors without approved protection can invalidate the product warranty.
How Do You Pressure-Test and Inspect a PEX System?
Pressure-test a PEX system before closing walls or covering underground piping, using the pressure, medium, duration, and acceptance criteria required by local code and the product manufacturer. Water testing is often preferred where freezing is not a risk; air testing requires extra caution because compressed air stores substantially more energy.
Inspect every joint under pressure. Look for weeping at the tube shoulder, ring movement, clamp distortion, push-fitting seepage, and adapters that rotate under load.
Expert Inspection Rules
- A joint that passes a static test can still fail if the tube is under bending stress at the fitting. Support the tube close to every connection.
- A fitting body can be sound while the tube is the failure point. Scratches, kinks, and heat damage deserve the same attention as visible fitting defects.
- Never bury a questionable joint. Cutting out one connection costs less than opening a finished wall.
What Are the Most Common PEX Connection Mistakes?
The most common PEX failures come from incompatible components, angled cuts, incomplete insertion, incorrect ring placement, damaged tubing, and concealed joints that were never tested. Most failed connections should be removed and rebuilt rather than adjusted in place.
| Failure mode | Likely cause | Corrective action | Prevention |
|---|---|---|---|
| Crimp fails gauge | Wrong tool size or incomplete compression | Cut out ring and fitting; recalibrate tool | Gauge every crimp |
| Ring shifts after crimping | Ring was behind barb zone | Remove and remake joint | Follow placement dimension |
| Barb leaks | Tube stopped before shoulder | Cut out and replace | Mark insertion or inspect shoulder |
| Push fitting drips | Scratch, dirt, or shallow insertion | Depressurize, recut, and reinsert | Mark insertion depth |
| Expansion joint leaks | Wrong tube, insufficient expansion, delayed insertion | Cut out fitting and sleeve | Use compatible PEX-A components |
| Tube splits | Overexpansion, damaged edge, freezing | Remove damaged section | Keep cutter sharp and tube warm |
| Valve connection twists | Unsupported PEX or excessive torque | Add support and remake transition | Use stub-out or bend support |
A leaking crimp joint cannot be repaired by adding sealant around the ring. Sealant does not restore the required mechanical compression and may hide a defect until the joint fails behind a wall.
How Should You Connect PEX in Difficult Situations?
Use different practices for cold weather, tight cavities, repairs, and concealed construction. The fitting method remains the same, but temperature, movement, access, and inspection requirements change the risk.
Cold Weather
Warm PEX-A before expansion work when permitted by the manufacturer. Cold tubing contracts more slowly, so insertion may require greater care and a longer recovery period. Never heat PEX with an open flame or exceed the product’s approved temperature.
Tight Wall Cavities
Cinch tools often fit more easily than full-handle crimp tools, but tool access still must allow a square compression. If a fitting cannot be inspected or tested, relocate the joint to an accessible area rather than relying on a blind connection.
Repairing a Damaged Section
Cut out the damaged section and install a listed repair coupling with two correctly made joints. Leave enough straight tube for full insertion and tool clearance. Do not place a coupling directly inside a sharp bend or where repeated movement will load the fitting.
Outdoor or Underground PEX
Use tubing specifically listed for the exposure and application. Protect PEX from sunlight, abrasion, rodents, sharp edges, and freezing. Underground work may require sleeving, burial depth, tracer provisions, or continuous runs under local code.
Concealed Connections
Concealed PEX joints are acceptable only where the plumbing code and fitting listing permit them. Many professionals prefer continuous tubing through framing and place manifolds, valves, and repair joints where they remain inspectable.
How Much Does It Cost to Connect PEX?
A single accessible PEX repair typically costs $6-$25 with a push fitting, $20-$75 with a new crimp or cinch tool, or $150-$400 or more for a cold-expansion tool. A multi-joint project lowers the per-connection cost of crimp and cinch systems because rings and barbed fittings are inexpensive.
| Project size | Push-to-connect total | Crimp or cinch total | Expansion total |
|---|---|---|---|
| One repair joint | $6-$25 | $20-$115 | $155-$425 |
| Ten joints | $60-$150 | $50-$135 | $175-$450 |
| Fifty joints | $300-$750 | $100-$250 | $250-$650 |
| Tool rental option | Often unnecessary | $20-$50 typical daily rate | $50-$100 typical daily rate |
These are typical retail ranges, not guaranteed quotes. Labor, permits, access, shutoff replacement, drywall repair, insulation, and pressure testing can exceed the fitting cost.
Which Method Should You Choose?
Choose crimp for the lowest material cost across repeated joints, cinch for economical work with limited access, expansion for compatible PEX-A installations where flow and production speed justify the tool, and push-to-connect for accessible one-off repairs.
- Single leak or appliance branch: Use a listed push-to-connect fitting when the joint will remain accessible and the tube is undamaged.
- Bathroom or basement remodel: Use cinch or crimp components throughout the project instead of mixing systems.
- Whole-house manifold installation: Use the manufacturer’s complete expansion, crimp, or cinch system and pressure-test before closing surfaces.
- High-flow PEX-A layout: Consider cold expansion because its fitting bore can be larger than many barb fittings.
- Concealed wall connection: Prefer a continuous tube run or a code-approved mechanical system that can be inspected and tested.
PEX piping is not a universal solution. It is a poor choice where continuous ultraviolet exposure, excessive heat, chemical incompatibility, rodent damage, or unprotected freezing is likely. A licensed plumber is appropriate for service upgrades, gas-related work, commercial systems, fire protection, and any installation governed by permits you cannot verify.
FAQ
Can PEX Be Connected Without a Tool?
PEX can be connected without a specialized installation tool by using a listed push-to-connect fitting. The tube still needs a PEX cutter, a square end, clean outside walls, and full insertion to the fitting stop. Push fittings cost more and should remain accessible when local code or the manufacturer requires service access.
Can You Use PEX-A Fittings on PEX-B?
You can use standard crimp or cinch fittings on compatible PEX-B and PEX-A tubing, but cold-expansion fittings are generally intended for compatible PEX-A systems. PEX-B should not be expanded for an ASTM F1960 connection unless the tube manufacturer specifically lists that exact use.
Is PEX Crimp or Cinch Better?
Neither system is universally better. Crimp offers widespread fitting availability and easy gauge verification, while cinch tools can be easier to use in restricted spaces and may cover multiple sizes. Select one complete listed system, because rings, clamps, tools, and fittings are not interchangeable merely because they fit the same tube diameter.
Why Does a New PEX Joint Leak?
A new PEX joint usually leaks because the tube was cut unevenly, inserted incompletely, damaged near the seal, fitted with the wrong ring, or compressed with an incompatible tool. Shut off water, remove pressure, cut out the failed connection, inspect the remaining tube, and rebuild it with new components.
Can PEX Connect Directly to a Water Heater?
PEX can connect to a water heater only through a listed transition arrangement that observes the heater manufacturer’s temperature and clearance requirements. Many installations use a short copper or approved flexible-metal connection near the heater, followed by a PEX adapter outside the restricted heat zone.
The Bottom Line
To connect PEX piping reliably, identify the tube, use one compatible fitting system, make a square cut, seat the fitting completely, secure the joint with the specified tool, and pressure-test before concealment. Crimp and cinch suit most repeated installations, expansion suits compatible PEX-A systems, and push-to-connect fittings suit accessible repairs. Always follow the product listing and local plumbing code.