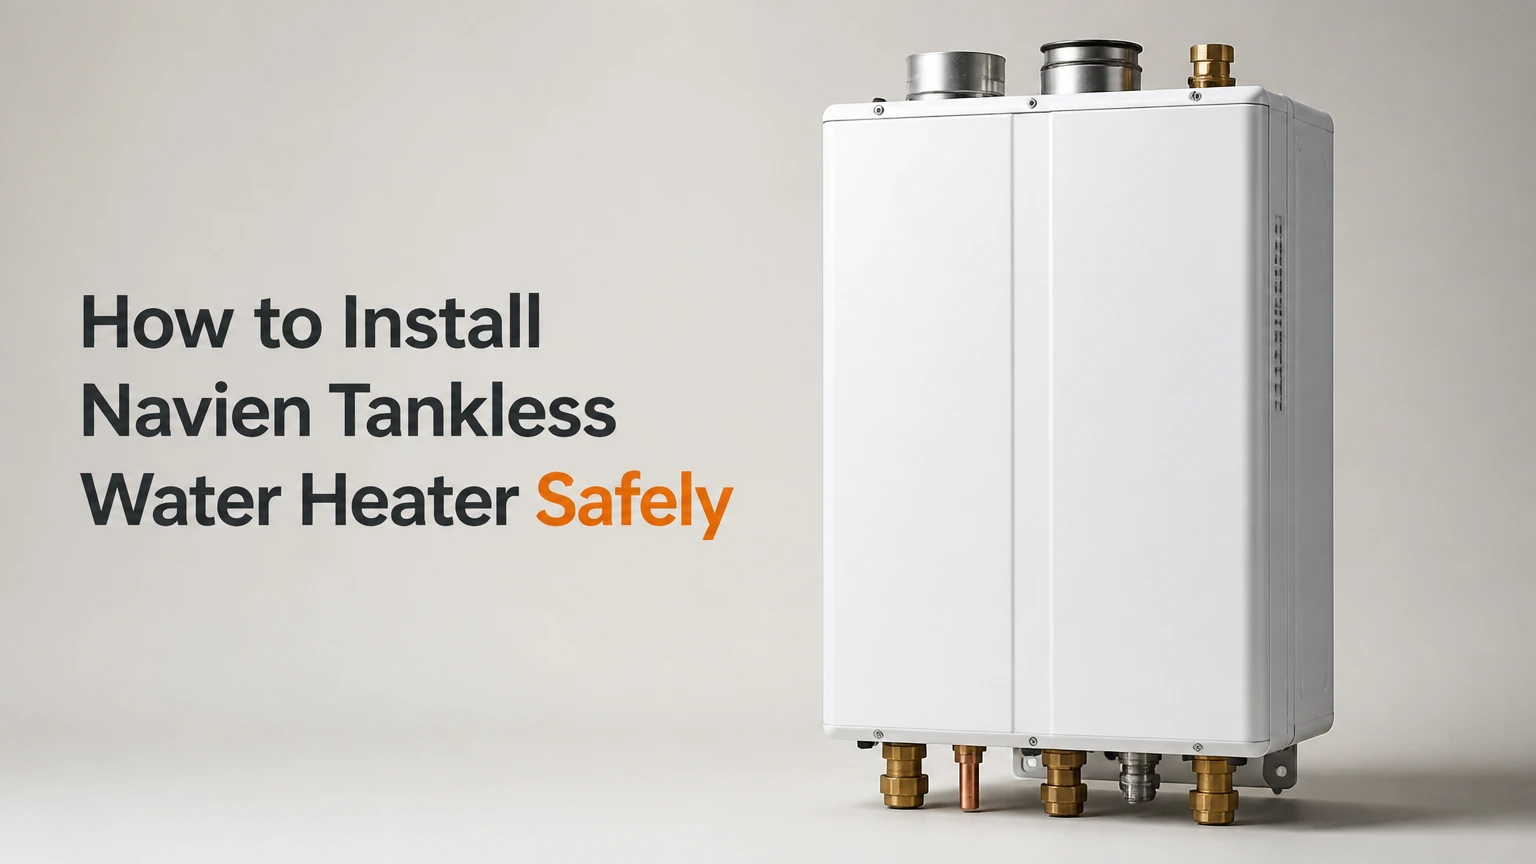
To install a Navien tankless water heater, select the correctly sized model, mount it securely, connect code-compliant water and gas piping, install approved intake and exhaust venting, route neutralized condensate, connect 120-volt power, and complete startup tests. A licensed professional should perform gas, combustion, venting, and electrical work because installation errors can cause fire, carbon-monoxide exposure, flooding, or equipment damage.
Key Facts at a Glance
- Navien NPE-2 condensing heaters require model-specific venting, gas, condensate, water, and electrical installation requirements from the current Navien manual.
- NPE-A2 models include an internal buffer tank and recirculation pump; NPE-S2 models do not include those internal components.
- A tankless heater must be sized by required flow and temperature rise, not by bathroom count alone.
- Condensing units create acidic condensate, which normally requires a suitable drain route and, where required by local code, a neutralizer.
- An existing 1/2-inch gas line may be adequate in some installations, but only a gas-input calculation and pressure test can confirm that.
- Annual flushing is a typical maintenance interval, while hard water may require more frequent scale control.
Before You Start the Installation
A typical professional installation takes 4-10 hours and costs approximately $3,000-$5,000 or more when gas, venting, electrical changes, permits, and disposal are included. A first-time homeowner should treat the project as a planning and coordination task, not as a routine appliance swap.
Pre-Installation Requirements
| Requirement | Typical value | Verification method |
|---|---|---|
| Electrical supply | 120 V AC, grounded outlet | Electrician or receptacle tester |
| Water service pressure | Commonly 40-80 psi | Pressure gauge at hose connection |
| Vent diameter | 2 or 3 inches, model-specific | Current Navien installation manual |
| Condensate pH | Commonly about 3-5 | Manufacturer documentation or test strip |
| Installation duration | 4-10 professional hours | Site inspection |
| Professional installed cost | $3,000-$5,000+ | Local written estimates |
Before purchasing, identify the gas type, available gas pressure, vent route, drain location, electrical outlet, incoming water temperature, and distance to the fixtures. Check local permit requirements and whether a licensed gas fitter, plumber, or electrician must complete or inspect the work.
Do not remove the existing water heater until the replacement location and vent termination have been approved. A tankless unit can fit on a smaller wall while still requiring service clearances around the front, sides, top, piping, and vent connections.
Tools and Materials
A normal installation may require a Navien-compatible service-valve kit, unions, isolation valves, approved vent components, pipe primer and cement, a condensate neutralizer, drain tubing, a condensate pump where gravity drainage is impossible, a sediment trap, gas-rated sealant, mounting hardware, and a grounded 120-volt receptacle.
The exact materials depend on the model and local code. Do not substitute ordinary plumbing fittings, unlisted vent pipe, yellow gas tape, or improvised adapters. Navien manuals identify approved vent materials and connection methods for each product family.
How Does a Navien Tankless Water Heater Work?
A Navien tankless water heater detects water flow, ignites a gas burner, transfers heat through stainless-steel heat exchangers, and delivers hot water without storing a full tank. A condensing NPE-2 unit also extracts heat from combustion exhaust, which lowers exhaust temperature and produces condensate that must be drained.
The flow sensor starts operation when demand reaches the unit’s activation threshold. Incoming cold water passes through the heat exchanger while the control system adjusts burner output to target the selected outlet temperature.
The NPE-A2 adds a buffer tank and internal recirculation pump. Those components reduce temperature fluctuation and can shorten waits when a properly designed return loop exists. The NPE-S2 provides condensing operation without those internal recirculation components, so a separate pump and control strategy may be needed.
Tankless operation does not mean unlimited hot water. The unit can heat only the flow permitted by its burner capacity and the temperature rise required by the home. A large shower flow in a cold climate can reduce the available gallons per minute substantially.
Which Navien Model Fits the Home?
The NPE-180, NPE-210, and NPE-240 differ mainly in maximum input and flow capacity, while the A2 and S2 suffixes identify different feature sets. The correct choice depends on simultaneous flow, groundwater temperature, gas capacity, and whether the home needs built-in recirculation.
| Model family | Maximum input | Approximate maximum flow | Main installation distinction |
|---|---|---|---|
| NPE-180A2 or S2 | About 150,000 BTU/h | About 8.4 GPM under rated conditions | Smaller demand, A2 adds buffer and pump |
| NPE-210A2 or S2 | About 180,000 BTU/h | About 10.1 GPM under rated conditions | Mid-range demand, A2 adds recirculation hardware |
| NPE-240A2 or S2 | About 199,000 BTU/h | About 11.2 GPM under rated conditions | Highest residential capacity in the NPE-2 range |
| NPN outdoor or indoor models | Model-specific | Model-specific | Non-condensing venting and installation requirements |
Published maximum flow is not the same as practical winter flow. For example, heating 5 GPM from 45°F groundwater to 120°F requires a 75°F temperature rise, while heating 5 GPM from 60°F requires only a 60°F rise.
How Do You Size the Heater?
Size a Navien tankless water heater by adding the flow rates likely to run simultaneously and checking that capacity against the required temperature rise. A useful planning formula is:
Required BTU/h = 500 × flow in GPM × temperature rise in °F
A home using two 2.0-GPM showers simultaneously needs about 4.0 GPM. At a 75°F rise, that demand equals approximately 150,000 BTU/h before accounting for other simultaneous fixtures, making the NPE-180 a narrow fit rather than an automatic recommendation.
| Household scenario | Simultaneous demand | Typical planning direction |
|---|---|---|
| One bathroom, one shower | 2.0-2.5 GPM | NPE-180 often sufficient |
| Two showers | 4.0-5.0 GPM | NPE-180 or NPE-210, based on groundwater |
| Two showers plus kitchen faucet | 4.5-5.5 GPM | NPE-210 commonly provides more margin |
| Three bathrooms with overlap | 6.0+ GPM | NPE-240 or multiple units may be needed |
| Cold groundwater, northern climate | Same fixture flow, higher temperature rise | Select by winter design temperature, not bathroom count |
Step 1: Choose and Prepare the Mounting Location
Mount the Navien heater vertically on a structurally supported wall with the required service and vent clearances. Choose a location near the gas and water connections, but prioritize a short, code-compliant vent path and safe condensate drainage over the shortest pipe run.
Install the supplied bracket into wall studs or an approved structural backing board. A 3/4-inch plywood backer can distribute load when studs do not align with the bracket, but the backer itself must be securely fastened to structural members.
Keep combustible materials, stored chemicals, electrical equipment, and freeze-prone areas away from the appliance. Indoor NPE-2 equipment is not interchangeable with an outdoor-rated model simply because a weather cover is available.
You will know it worked when: the bracket is level, fastened to structure, and the cabinet hangs without movement.
Common mistake: mounting over drywall anchors alone. A filled water heater and connected piping impose loads that ordinary hollow-wall anchors cannot safely carry.
Step 2: Install Water Piping and Service Valves
Install hot and cold isolation valves, flush ports, unions, and correctly oriented water connections before connecting the heater. A Navien service-valve kit allows future descaling and isolation without shutting down the entire building water system.
The cold-water line should include a full-flow shutoff and any required check valve, filter, pressure regulator, or expansion-control equipment. A thermal expansion tank may be required on the cold-water line when a check valve, backflow preventer, or pressure-reducing valve creates a closed system.
Do not rely on the heater’s internal components to replace an external service-valve arrangement. The installation manual and local plumbing code determine pipe size, relief protection, drain routing, and connection materials.
You will know it worked when: hot and cold lines are correctly identified, unions are accessible, valves operate freely, and no pipe strain reaches the cabinet.
Common mistake: reversing the inlet and outlet. The unit may display an error or operate incorrectly even when the fittings appear to connect normally.
Step 3: Verify the Gas Supply and Connect the Heater
Confirm the fuel type, gas pressure, pipe size, total developed length, and connected BTU load before connecting the Navien heater. The gas line must deliver the required pressure while other appliances operate, so a 1/2-inch connection size does not prove that the upstream line is adequate.
NPE-2 models may operate on an existing 1/2-inch line in some short-run configurations because of their gas-valve design, but the installer must calculate demand and test operating pressure. A longer run, low inlet pressure, propane conversion, or several high-input appliances may require a larger line.
Install an accessible manual shutoff and a sediment trap where required. Use only an approved connector and fittings rated for the appliance input and local installation method. Apply gas-rated thread sealant only where permitted, and never use ordinary plumbing materials on gas joints.
Restore gas slowly and test every accessible joint with a noncorrosive leak-detection solution. Bubbles indicate a leak that requires immediate correction. Never use a flame for testing.
You will know it worked when: the pressure test passes, the gas appliance input remains stable during firing, and every joint remains bubble-free.
Common mistake: checking for leaks without checking pressure under load. A static pressure reading can look acceptable while the heater starves when the burner fires.
Step 4: Install Approved Intake and Exhaust Venting
Install the Navien-approved vent system exactly as specified for the model, fuel, diameter, length, termination, and climate. NPE-2 condensing installations commonly use separate intake and exhaust pipes made from approved 2-inch or 3-inch plastic vent materials, but the current manual controls the permissible configuration.
Plan the wall or roof termination before mounting the heater. Measure equivalent length, count elbows, maintain required clearances from windows and doors, and account for snow accumulation in cold regions. A termination that meets a generic 12-inch rule may still violate local code or the Navien manual.
For a typical condensing arrangement, slope the exhaust toward the heater so condensate returns to the appliance drain. The manual may specify a slope such as 1/4 inch per foot, but installers must verify the exact requirement for the selected vent material and configuration. Intake and exhaust terminations must not allow exhaust recirculation.
| Venting decision | Typical value or rule | Failure if ignored |
|---|---|---|
| Pipe diameter | 2 or 3 inches, model-specific | Excessive restriction or unsafe operation |
| Exhaust slope | Often 1/4 inch per foot toward heater | Condensate accumulation or leakage |
| Vent length | Manual-specific, reduced by elbows | Combustion or pressure errors |
| Termination location | Code clearances plus snow allowance | Exhaust exposure or recirculation |
| Intake arrangement | Separate pipe commonly preferred | Contaminated or insufficient combustion air |
You will know it worked when: every joint uses approved components, the exhaust drains toward the heater, terminations meet clearance rules, and intake air cannot draw exhaust.
Common mistake: using ABS, thin-wall pipe, dryer duct, or unlisted fittings because the diameter appears correct. Vent material approval is as important as pipe size.
Step 5: Route and Neutralize Condensate
Route condensate from the Navien heater to an approved drain through a suitable neutralizer when required by local code or the installation instructions. Condensing combustion creates acidic water, often around pH 3-5, and the drain path must tolerate continuous discharge.
Use gravity drainage when the drain is below the appliance and the route remains protected from freezing. Install a condensate pump when gravity flow is impossible, and select a pump with sufficient head, temperature rating, and continuous-duty capacity.
Secure tubing, maintain the required slope, and prevent kinks or air traps. In freezing climates, protect the entire exposed route because a frozen condensate line can shut down the heater or force water into the cabinet.
Replace or replenish neutralizer media according to the product instructions. A neutralizer is not a substitute for a drain that can handle the volume.
You will know it worked when: condensate flows freely during operation, the pump starts and stops correctly, and no water backs up into the appliance.
Common mistake: terminating condensate over a floor drain without checking local code. Some jurisdictions require an indirect connection, air gap, neutralizer, or dedicated drain receptor.
Step 6: Connect Power and Complete Startup
Connect the Navien heater to a properly grounded 120-volt supply that matches the manual and local electrical code. Keep the receptacle accessible, protect it from water, and avoid extension cords or shared circuits that can introduce voltage drop or nuisance shutdowns.
Before firing, open the water supply, purge air, inspect all water connections, and confirm that the gas valve is closed until the plumbing and venting checks are complete. Then restore gas, energize the unit, and follow the model’s control setup for fuel type, altitude, temperature, and recirculation mode.
Do not change circuit-board settings by guesswork. Older Navien units may use DIP switches, while newer controls may provide guided configuration, and the correct settings vary by series and installation.
Run hot-water fixtures one at a time, then test expected simultaneous demand. Confirm ignition, stable temperature, condensate drainage, vent integrity, and absence of gas or water leaks.
You will know it worked when: the heater fires without an error, outlet temperature remains stable, hot water reaches fixtures, and condensate drains during operation.
Common mistake: commissioning with an unopened isolation valve or an air-filled water circuit. The burner may ignite while flow protection or temperature control behaves abnormally.
Can a Homeowner Install a Navien Tankless Water Heater?
A homeowner can often measure the location, prepare the wall, identify fixture demand, and coordinate permits, but gas, venting, combustion, and electrical connections usually require licensed trades or inspection. The legal boundary depends on the jurisdiction, fuel type, permit rules, and whether the work affects a building’s combustion system.
A direct tank replacement is rarely a direct connection. The project may require a larger gas line, new PVC venting, condensate drainage, a 120-volt receptacle, water-line changes, and removal of the old flue. Manufacturer warranty requirements may also depend on installation by a qualified professional.
A practical division of work is simple: the homeowner can clear the work area, select fixtures and controls, and arrange access; the licensed installer should calculate gas demand, install venting, test combustion, verify electrical grounding, and complete startup documentation.
What Does Installation Cost?
A typical Navien tankless water heater installation costs about $3,000-$5,000 or more when the unit, labor, permits, venting, gas modifications, condensate work, and disposal are included. A straightforward replacement costs less than a conversion that needs a new gas run, long vent route, electrical circuit, or masonry penetration.
| Project condition | Typical added cost range | Main cost driver |
|---|---|---|
| Basic same-location replacement | $500-$1,500 labor and materials | Existing compliant utilities |
| New vent penetration | $300-$1,200 | Wall or roof access and finishing |
| Gas-line upgrade | $500-$2,000+ | Length, access, pipe size, permits |
| Condensate pump and neutralizer | $100-$400 | Drain distance and pump head |
| Electrical circuit or outlet | $250-$1,000 | Panel capacity and wire routing |
| Full turnkey conversion | $3,000-$5,000+ total | Multiple utility modifications |
Obtain a written estimate that lists the model, vent material, gas-line work, condensate equipment, permits, startup testing, warranty registration, and disposal. The lowest quote often omits one of those items.
Common Mistakes and How to Fix Them
| Symptom or mistake | Likely cause | Safe corrective action |
|---|---|---|
| E003 ignition failure | Gas off, incorrect fuel setting, ignition problem | Verify gas availability and settings, then call service |
| E012 flame loss | Gas pressure, venting, flame-sensing, or combustion issue | Stop repeated resets and obtain professional diagnosis |
| E110 air or exhaust fault | Blocked intake, exhaust, snow, or incorrect vent length | Inspect exterior terminations, then follow the manual |
| Water dripping from vent | Wrong slope, unsealed joint, or condensate problem | Shut down if unsafe and have venting corrected |
| Temperature swings | Low flow, crossover, scaling, or incorrect setup | Check fixture flow and isolation, then service the unit |
| No drain during firing | Kinked tube, blocked neutralizer, frozen line, or failed pump | Stop operation and clear or replace the drainage system |
Repeatedly resetting an error does not repair the underlying cause. Carbon-monoxide alarms, gas odor, scorch marks, water inside the cabinet, or a vent separation require immediate shutdown and professional attention.
Variations for Common Installation Situations
Replacing a Storage-Tank Heater
A tank replacement usually requires removal of the old draft-vent system and installation of a new direct-vent or concentric system approved for the Navien model. The existing water lines may be reusable, but the gas line, electrical outlet, condensate drain, and wall support still require separate verification.
Installing in a Cold Climate
Cold groundwater reduces output at the same fixture flow because the heater must create a larger temperature rise. Protect exterior vent terminations and condensate piping from snow and freezing, and consider pipe insulation and freeze-protection provisions where the manual permits them.
Adding Recirculation
An NPE-A2 can use its internal pump for supported recirculation arrangements, while an NPE-S2 generally needs an external pump and controls. Recirculation reduces wait time but can increase energy use, heat loss, installation complexity, and scale exposure if the loop runs continuously.
Maintenance After Installation
Flush the heat exchanger with a manufacturer-compatible descaling solution, commonly white vinegar where Navien permits it, for approximately 45-60 minutes during scheduled service. The service valves installed during construction make this procedure possible without removing the heater.
Annual flushing is a reasonable starting interval for many homes, but hard water, high usage, and elevated mineral content can shorten the interval. A water test and scale inspection provide better guidance than a calendar alone.
Clean the inlet-water filter, inspect the condensate neutralizer, verify the drain, check vent terminations for blockage, and inspect for leaks. Do not remove combustion components or alter gas pressure without the training and instruments required for combustion service.
FAQ
How long does a Navien tankless water heater last?
A properly installed Navien tankless water heater commonly provides about 15-20 years of service, although water quality, usage, maintenance, venting, and gas pressure affect actual life. Heat exchangers exposed to untreated hard water can fail earlier, while annual flushing and filtration can reduce scale-related damage.
Does a Navien tankless heater need a dedicated gas line?
A dedicated gas line is not automatically required, but the supply must deliver the heater’s input while every connected appliance operates. A qualified installer calculates total BTU demand, pipe length, and pressure drop. A shared line can be acceptable when its capacity and code compliance are proven.
Can the heater vent through an existing chimney?
An existing chimney is generally not a direct substitute for the approved Navien vent system. Tankless condensing appliances use sealed combustion and model-specific vent materials, termination clearances, and condensate handling. A chimney may need to be abandoned, relined, or replaced with a new direct-vent route.
Why does hot water take time to arrive?
The delay usually comes from cooled water sitting in the pipe between the heater and fixture, not from the burner’s heating speed. An NPE-A2 recirculation arrangement can reduce that delay when the return loop, controls, insulation, and schedule are designed correctly.
Should a water filter be installed before the heater?
A filter or water-treatment system can help protect the heat exchanger when incoming water contains sediment or scale-forming minerals. The filter must maintain adequate flow and be serviced regularly. Water treatment does not eliminate the need for heat-exchanger flushing or inspection.
The Bottom Line
To install a Navien tankless water heater successfully, start with temperature-rise sizing and a site plan, then verify gas capacity, approved venting, service valves, condensate drainage, electrical supply, and local permits before ordering equipment. The safest installation is one that completes every Navien manual checkpoint and passes gas, water, vent, electrical, and startup inspections. For most homes, professional installation is the correct choice because the highest-risk work involves combustion and exhaust, not wall mounting.