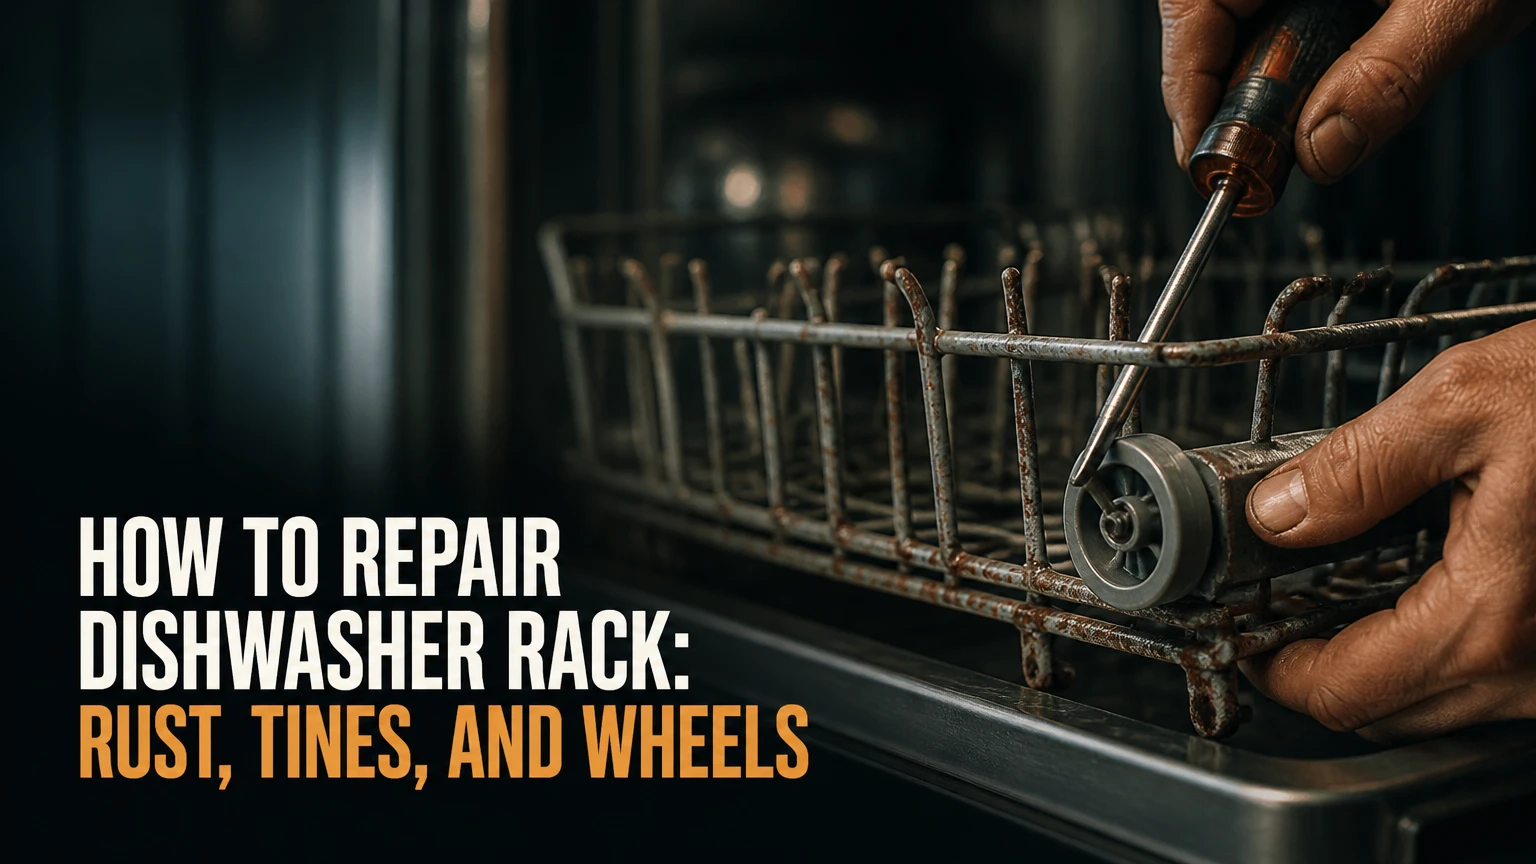
To repair a dishwasher rack, remove the rack, sand away all loose coating and rust, clean and dry the exposed steel, then apply a dishwasher-rack vinyl repair coating according to its label. Replace missing tine tips with compatible caps and replace damaged wheels separately. Minor repairs usually take 30-60 minutes, plus the product’s curing time.
Key Facts at a Glance
- Dishwasher rack coating protects steel wire from water, detergent, heat, and contact corrosion.
- Liquid rack-repair vinyl is suitable for small exposed areas, peeled intersections, and sharp wire ends.
- Sanding must remove active rust and loose coating before any repair compound is applied.
- Product labels control cure time; 24 hours is a common minimum, not a universal rule for every coating.
- A broken wheel assembly needs a wheel or carrier repair kit, not liquid vinyl.
- Replace the rack when corrosion has weakened the frame, caused sagging, or affected many connected wires.
Why Dishwasher Racks Rust
Dishwasher racks rust when water reaches the steel wire beneath a damaged vinyl or nylon coating. Heat, alkaline detergent, trapped moisture at wire intersections, and repeated contact with plates or utensils gradually expose the metal, allowing reddish-brown corrosion to form.
Rack coating commonly fails first at tine tips, wire intersections, corners, and areas where heavy cookware rubs against the surface. The underside of a cross-wire joint can hold a small droplet after a cycle, so a repair that covers only the visible top may leave the active corrosion intact.
Rust is more than a cosmetic stain. A sharp exposed wire can scratch glassware, while corrosion that reduces the wire diameter can eventually cause a tine or support grid to snap. A dishwasher rack does not normally carry electrical current, but loose metal and deteriorated coating can interfere with smooth movement and damage dishes.
What Does the Rack Coating Do?
Rack coating creates a waterproof barrier around the steel wire and provides a softer contact surface for dishes. The coating is typically a flexible plastic material designed for repeated exposure to hot water, detergent, and thermal cycling.
The coating does not restore metal that rust has already consumed. It seals sound metal after preparation. That distinction determines whether a repair lasts or merely hides corrosion for several weeks.
Which Damage Is Repairable?
| Damage condition | Typical repair | Expected difficulty | Safety outlook |
|---|---|---|---|
| 5-20 mm coating chip, no rust | Rack coating touch-up | 10-20 minutes | Usually safe after curing |
| Rusted tine tip, wire still solid | Sand, coat, add tine cap | 20-35 minutes | Safe if the wire remains firm |
| One missing tine | Tine cap or replacement rack section | 15-30 minutes | Functional, with reduced capacity |
| Broken wheel bracket | Wheel or carrier kit | 15-45 minutes | Safe after smooth rolling is restored |
| Rust across several intersections | Multiple coating patches | 45-90 minutes | Inspect closely before reuse |
| Sagging frame or brittle wire grid | Full rack replacement | 10-30 minutes to install | Repair coating is insufficient |
Choose the Repair Method Before Starting
The correct dishwasher rack repair method depends on the damaged component, not on the color of the rack. Use liquid vinyl for exposed but structurally sound wire, tine caps for sharp or shortened tips, wheel kits for rolling hardware, and a replacement rack for weakened structure.
Do not use ordinary interior paint, automotive touch-up paint, or household epoxy unless the product specifically states that it is suitable for dishwasher-rack temperatures, immersion, and food-contact-adjacent use. A rack is not a food surface, but coating fragments can contact dishes and circulate through the wash system.
Repair Options Compared
| Method | Best damage size | Typical cost | Typical time | Main limitation |
|---|---|---|---|---|
| Liquid vinyl coating | 1-20 small exposed areas | $10-$25 | 30-60 minutes plus cure | Cannot rebuild missing steel |
| Push-on tine caps | 1-10 sharp or shortened tips | $5-$15 | 10-25 minutes | Caps cannot replace a missing support |
| Wheel or carrier kit | 1-4 damaged wheels | $10-$35 | 15-45 minutes | Part must match the rail design |
| Silicone rack organizer | One localized missing-tine area | $15-$40 | 5-15 minutes | Reduces usable space |
| OEM replacement rack | Broad corrosion or broken grid | $60-$250 or more | 10-30 minutes | Exact model compatibility required |
A practical rule is to repair isolated coating damage when the wire remains rigid and round. Replace the rack when pushing a tine sideways produces visible flex at its base, when the frame sags, or when corrosion affects several adjacent supports.
Before You Start
Set aside 30-60 minutes of hands-on work for a moderately damaged rack, then add the curing period specified by the coating manufacturer. The work is low-to-moderate difficulty, but careful rust removal matters more than painting speed.
Tools and Materials
- Dishwasher-rack repair coating, 1 bottle of approximately 1-2 fluid ounces
- Matching tine caps, sized for the rack wire
- Fine sandpaper, approximately 120-220 grit
- Small wire brush or nylon abrasive pad
- Utility knife or side cutters for loose coating only
- Isopropyl alcohol, clean cloths, and disposable gloves
- Safety glasses and a dust mask or respirator suitable for the product
- Cardboard or a plastic sheet for the work surface
- Replacement wheel or carrier kit if rolling hardware is damaged
Work outdoors or in a well-ventilated space. Follow the product safety data sheet for ventilation, gloves, eye protection, flammability, and solvent handling. Keep children, pets, and open flames away from the repair area.
How to Repair Dishwasher Rack Damage
A complete repair has eight phases: identify the damage, remove the rack, strip corrosion, clean the steel, apply compatible coating, fit caps if necessary, cure the material, and test the rack without dishes. The success checkpoint is a fully sealed repair that does not snag a cloth, flex under light pressure, or interfere with the rails.
Step 1: Identify the Damaged Parts
Inspect every rack surface before removing anything. Look at tine tips, wire intersections, the underside of the frame, rack corners, wheel brackets, and the points where the rack meets its tracks.
Photograph the wheel arrangement and track position before disassembly. Dishwasher racks from Bosch, GE, Maytag, Miele, Samsung, Whirlpool, and other brands can use different stops, carriers, and wheel geometries.
You will know the inspection is complete when: every exposed metal area is marked, and you can distinguish coating damage from wheel or structural damage.
Common mistake: treating a missing wheel as a rust problem. Liquid coating cannot repair a cracked plastic carrier or a wheel axle.
Step 2: Remove the Rack Safely
Pull the lower rack straight out and lift it clear of the door or tub lip. For an upper rack, inspect the rail stops before pulling; some stops release by pressing a tab, rotating a plastic end piece, or removing a retaining clip.
Never force an upper rack past a fixed stop. A broken rail stop can release ball bearings or small carrier parts into the dishwasher. Place removed hardware in a container and keep the left and right assemblies separate.
You will know it worked when: the rack is fully free, the rails remain intact, and no wheel or stop is missing.
Common mistake: lifting a loaded rack. Unload dishes first because the rack can twist and place excessive force on the rail carriers.
Step 3: Remove Loose Coating and Rust
Use a utility knife to cut away only loose, bubbling, or peeling coating. Sand the exposed wire with 120-220 grit paper, then use a small wire brush for rust inside intersections and around tine bases.
Remove the corrosion until the remaining steel feels hard and stable. Light discoloration in a narrow pit may remain after sanding, but flaky scale, red powder, and hollow-feeling wire must not remain beneath the patch.
Treat the underside of each damaged intersection. Rust often survives there because it is hidden from a quick visual inspection.
You will know it worked when: a dry cloth no longer catches on loose edges, and the exposed wire has a firm metallic surface rather than flaky scale.
Common mistake: sanding only the orange surface while leaving a rust pocket under intact-looking coating. Cut back farther until the coating edge is firmly bonded.
Step 4: Clean and Dry the Repair Area
Vacuum or brush away sanding dust. Wipe the prepared area with isopropyl alcohol and a lint-free cloth, then allow it to dry completely.
Avoid acetone unless the coating manufacturer specifically permits it. Acetone can soften or remove surrounding plastic coating and may spread damage beyond the original repair area. Do not apply coating over detergent residue, grease, wet steel, or sanding dust.
A clean surface is more important than a thick first coat. The coating must overlap sound original material by approximately 3-6 mm where the product instructions permit that overlap.
You will know it worked when: the metal feels dry, the cloth picks up no visible residue, and the surrounding coating has a firm edge.
Common mistake: touching the cleaned area with bare fingers. Skin oil can reduce adhesion at the exact boundary where peeling begins.
Step 5: Apply the Rack Repair Coating
Stir the liquid vinyl gently if the label instructs you to do so. Use the supplied brush to cover the exposed metal and overlap the intact coating without creating a large ridge that can catch dishes.
Build thickness with multiple compatible coats rather than one heavy puddle. A typical working interval is 20-30 minutes between coats, but the bottle label takes priority because formulations differ in solvent content and cure behavior.
Coat the top, sides, underside, and wire intersections. Keep liquid away from wheel axles, rail channels, and moving joints.
You will know it worked when: all steel is hidden, the coating boundary is continuous, and no liquid has pooled around moving hardware.
Common mistake: applying a thin cosmetic smear that leaves sharp steel visible after drying. A repair should seal the wire, not merely change its color.
Step 6: Repair a Sharp Tine Tip
Choose a flexible tine cap that fits tightly over the prepared wire. Sand away rust and loose coating at the tip, clean the wire, and test-fit the cap before applying any adhesive or coating.
If the product instructions allow it, place a small amount of rack-repair coating inside the cap and push the cap fully onto the tine. Do not fill the cap with so much liquid that it slides upward or contaminates nearby dishes.
A cap is a protective sleeve, not a structural repair. If the tine is missing, loose at its base, or broken below the cap’s gripping area, use an organizer or replace the rack.
You will know it worked when: the cap cannot be lifted by hand and the repaired tine no longer presents a sharp edge.
Common mistake: installing a cap over rust. Corrosion can continue underneath and push the cap off during later cycles.
Step 7: Repair or Replace Rack Wheels
Remove a damaged wheel only after photographing its orientation. Many wheel kits include a carrier, axle, or snap-fit bracket, and the replacement may need to be installed in a specific direction.
Compare the new assembly with the old one before installation. Replace cracked wheels, split axles, seized rollers, and carriers that no longer retain the rack wire. Clean the rail channel while the rack is removed, but do not lubricate it unless the dishwasher manufacturer permits lubrication.
You will know it worked when: the empty rack rolls smoothly through its full travel and stays level at the front and rear positions.
Common mistake: buying a wheel based only on dishwasher brand. Use the complete model number and compare the carrier shape, axle position, and wheel diameter.
Step 8: Cure the Repair Completely
Place the repaired rack on a level, ventilated surface where dust will not settle onto wet coating. Keep the rack out of the dishwasher for the exact cure time on the product label.
Twenty-four hours is a common minimum for small rack-coating repairs at normal room temperature, but thick coats, low temperature, high humidity, and poor ventilation can extend curing. A surface that feels dry may still contain solvent beneath the film.
You will know it worked when: the coating is firm, does not transfer to a clean cloth, and has no strong wet-solvent feel.
Common mistake: running a hot wash to “test” an uncured patch. Use the label’s cure time first, then run an empty short rinse or light cycle.
What Materials Are Safe for a Dishwasher Rack?
A purpose-made dishwasher-rack vinyl or PVC coating is the preferred patch material because the formulation is intended for hot, wet cycles. Flexible vinyl tine caps are appropriate for rounded wire tips when the cap fits securely and the rack remains structurally sound.
Ordinary enamel paint can chip under thermal cycling. Hardware-store rubber coatings and general-purpose epoxy may have unknown immersion, detergent, or temperature limits. Product labeling should identify the intended application, temperature range, curing conditions, and handling precautions.
Material Selection by Damage
| Material or part | Suitable use | Avoid using it for | Check before purchase |
|---|---|---|---|
| Rack-repair vinyl | Exposed steel and peeled coating | Missing wire or cracked frame | Dishwasher-rack application |
| Flexible tine cap | Sharp, intact tine end | Loose tine base or broad corrosion | Wire diameter and cap depth |
| Replacement wheel kit | Cracked or seized roller | Rusted frame support | Model number and carrier shape |
| Silicone organizer | Small missing-tine zone | Sagging rack or broad rust | Rack dimensions and clearance |
| OEM rack | Structural deterioration | A single superficial chip | Exact model compatibility |
When Should You Replace the Rack?
Replace a dishwasher rack when corrosion has reduced the strength of the wire grid, when the rack sags, or when damage extends across multiple connected supports. A coating repair is economical for isolated defects, but it cannot restore steel that has become thin, brittle, or detached.
Use the following field test: grip a questionable tine near its base and apply gentle hand pressure. Stable wire should resist movement. If the base flexes, flakes, fractures, or pulls away from a cross-wire, replacement is safer than repeated patching.
A rack replacement also makes sense when repair areas cover roughly one-fifth or more of the rack, when several wheel carriers are failing, or when repeated patches have peeled after proper preparation. The 20% figure is a practical maintenance threshold, not a manufacturer safety standard.
Replacement Fit Checks
- Find the full dishwasher model number on the door edge, tub frame, or rating plate.
- Confirm whether the part is an upper rack, lower rack, or third-rack assembly.
- Compare wheel quantity, wheel diameter, carrier shape, rail stop position, and tine layout.
- Verify that the replacement includes required rollers and clips.
- Check the seller’s return policy before opening a nonreturnable part.
- Test the empty rack through its full travel before loading dishes.
Universal racks may fit some open designs, but proprietary rail stops and carrier assemblies often make an OEM or model-specific rack the safer choice.
Common Mistakes and How to Fix Them
The New Coating Peels After Washing
Peeling usually indicates rust, grease, detergent residue, moisture, or unstable old coating beneath the patch. Strip the failed area back to firmly attached coating, sand farther into the exposed zone, clean with isopropyl alcohol, and allow complete drying before reapplying.
A thick edge can also lift if it catches a plate or utensil. Feather the boundary and keep the final surface smooth.
Rust Returns Under the Patch
Returning rust means active corrosion remained under the repair or moisture entered through an unsealed edge. Remove the patch rather than painting over the new orange area, then inspect whether the wire has lost significant thickness.
If deep pits or a flexible wire remain, replace the rack. Repeatedly sealing weakened metal wastes material and can leave sharp fragments near dishes.
Tine Caps Fall Off
Loose caps usually have the wrong internal diameter, insufficient insertion depth, contamination, or no compatible bonding material where the instructions require one. Remove the cap, clean and dry the wire, and install a correctly sized replacement.
Do not glue a cap with cyanoacrylate or an unidentified adhesive unless its label specifically supports hot-water immersion and the intended application. An incompatible adhesive can soften, crack, or detach during washing.
The Rack No Longer Slides Smoothly
A stiff rack usually has a displaced wheel, damaged carrier, obstructed rail, bent frame, or incorrectly installed stop. Remove the rack, compare both sides, clear debris, and confirm that each wheel contacts the rail evenly.
Do not use cooking oil or household grease on the rails. These substances can collect soil and may damage plastic components.
The Repair Has a Strong Odor
Solvent odor can remain during application and early curing. Move the rack to a ventilated area and follow the product’s safety instructions rather than increasing heat with a hair dryer or placing the rack near a flame.
If the coating remains tacky beyond the label’s stated cure period, remove the failed material and contact the manufacturer. Do not put a persistently wet repair into the dishwasher.
Cost, Time, and Expected Lifespan
A minor dishwasher rack repair typically costs $10-$25 for coating and tine caps, while a wheel kit commonly costs $10-$35 and a model-specific replacement rack often costs $60-$250 or more. Hands-on time ranges from 15 minutes for a wheel swap to 90 minutes for extensive preparation.
The figures below are typical retail and DIY ranges, not fixed prices. Brand, region, shipping, rack size, and discontinued-part availability can change the total substantially.
| Repair scope | Materials cost | Hands-on time | Cure or test time |
|---|---|---|---|
| One coating chip | $10-$15 | 15-25 minutes | Label-dependent, often 24 hours |
| Several rust spots and caps | $15-$25 | 30-60 minutes | Label-dependent, often 24-48 hours |
| Two wheel assemblies | $10-$35 | 15-45 minutes | No coating cure required |
| Organizer for missing tines | $15-$40 | 5-15 minutes | No coating cure required |
| Full replacement rack | $60-$250+ | 10-30 minutes | Empty movement test |
A properly prepared patch may last 1-3 years in ordinary household use, but lifespan varies widely with rack loading, water chemistry, detergent concentration, and the amount of steel already lost. Treat that range as a practical expectation, not a warranty.
How Can You Prevent Rack Rust?
Prevent dishwasher rack rust by removing chipped coating early, avoiding metal-on-metal loading, keeping sharp utensils from scraping tines, and checking the rack monthly for exposed wire. Early touch-ups require less sanding because corrosion has had less time to spread beneath the coating.
Water chemistry also affects corrosion. A water softener that is incorrectly adjusted can leave excess salt or mineral residue, while hard-water deposits can trap moisture around joints. Follow the dishwasher and water-softener manufacturer’s settings, and do not add extra detergent or rinse aid beyond the product instructions.
Maintenance Checklist
- Inspect tine tips and intersections every 4-6 weeks.
- Remove loose coating as soon as bare steel appears.
- Keep knives and heavy pans from striking rack wires.
- Clean debris from wheel tracks and carrier channels.
- Confirm that spray arms rotate without contacting a rack.
- Replace a rack before structural wires become sharp or flexible.
- Use the dishwasher manufacturer’s recommended detergent quantity.
- Check for salt or mineral residue if corrosion returns unusually quickly.
FAQ
Can I repair a dishwasher rack without removing it?
Small touch-ups are possible in place, but removing the rack produces a more reliable repair. The underside of wire intersections is difficult to clean and coat inside the tub, while solvent odor and drips create ventilation and cleanup problems. Remove the rack whenever rust extends beyond a single accessible tip.
Can I use a rust converter before rack coating?
Use a rust converter only if the rack-coating manufacturer explicitly permits it. Many converters leave a chemical film that can reduce adhesion, and a converter does not restore metal lost to corrosion. For small rack repairs, mechanical rust removal followed by the specified cleaning method is usually more predictable.
How do I repair a dishwasher rack with a missing tine?
A missing tine can be bypassed with a compatible silicone organizer or replaced by installing a model-specific rack assembly. A tine cap cannot replace missing wire because the cap needs an intact end to grip. Check that the substitute does not block spray-arm rotation or prevent dishes from standing securely.
Is a rusty dishwasher rack safe to use?
A lightly chipped rack can remain usable while awaiting repair if no sharp wire contacts dishes and no loose fragments are present. Stop using the rack when wires are sharp, brittle, flexible, or shedding coating, because the damage can scratch glassware and worsen during each wash.
Why does only the top rack rust?
The upper rack may rust first because its tine tips and wheel supports experience frequent contact, while water remains trapped around small joints after cycles. A top-rack-only repair should still include an underside inspection, because hidden corrosion at the carrier or frame can affect alignment and rolling.
How do I find the correct replacement rack?
Use the dishwasher’s complete model number, not only the brand or approximate age. Confirm rack position, wheel arrangement, carrier design, tine pattern, and included hardware against the replacement listing. Manufacturer parts diagrams and authorized parts suppliers provide the most reliable compatibility check.
The Bottom Line
How to repair dishwasher rack damage depends on whether the steel is still structurally sound. Sand and seal isolated rust with purpose-made rack coating, use tight-fitting tine caps for sharp intact tips, replace wheel assemblies when rolling hardware fails, and install a model-specific rack when corrosion causes flexing, sagging, or widespread wire loss. Cure the repair for the product’s stated period before washing dishes.