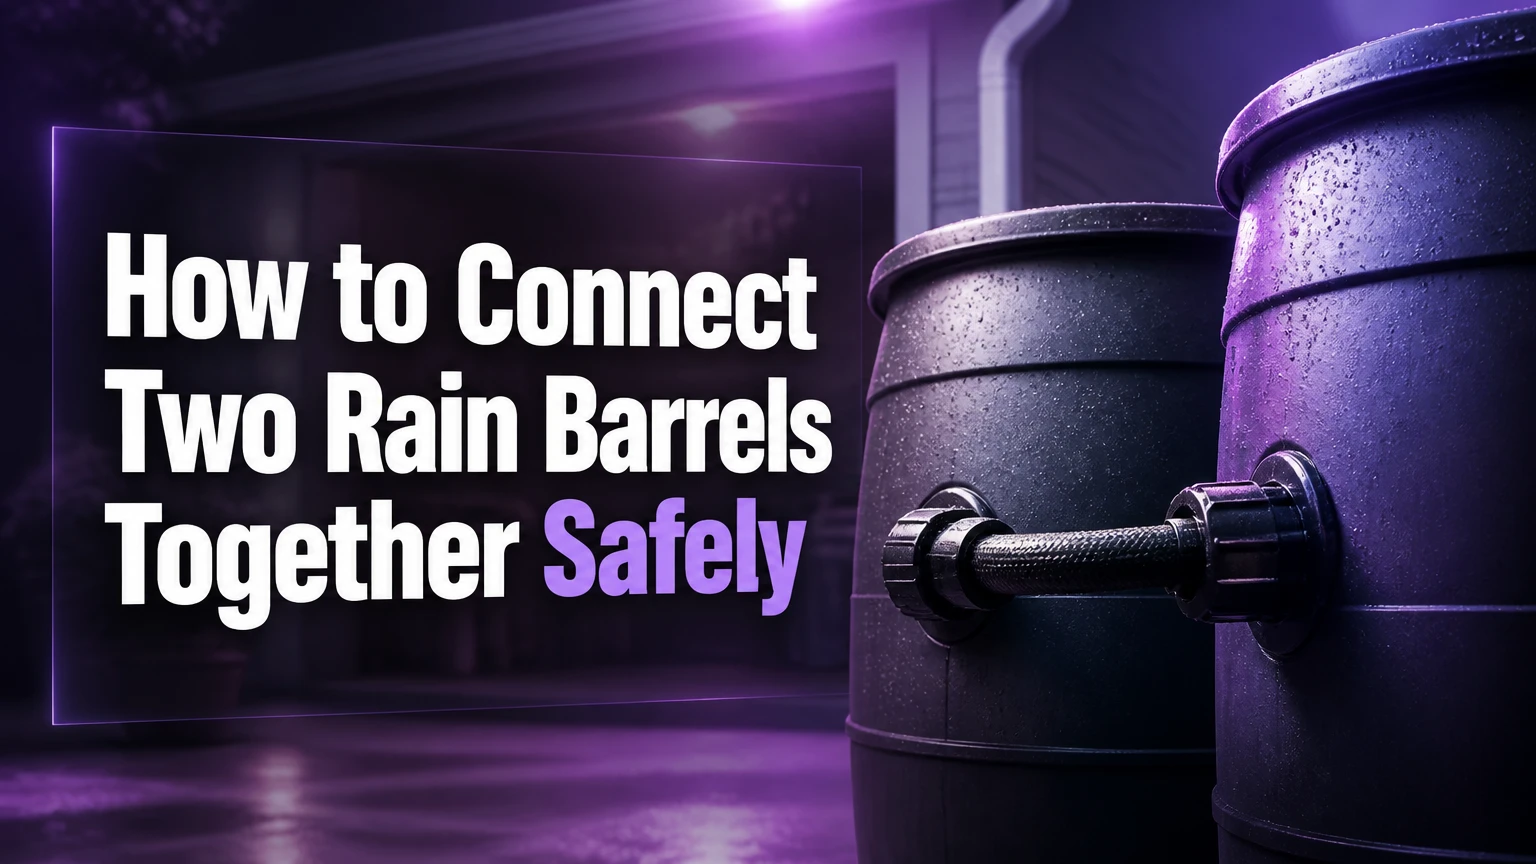
To connect two rain barrels together, link the primary barrel to a second barrel with either a top overflow hose or a bottom equalizing line. A bottom connection fills both containers from below and permits one outlet; a top connection fills the first barrel before sending overflow to the second. Install a screened overflow regardless of method.
Key Facts at a Glance
- A 1-inch internal-diameter connection is a practical minimum for many residential downspouts and heavy rainfall.
- Bottom-linked barrels should sit on level, structurally sound bases, although equal height is not required for hydraulic connection alone.
- A top-linking hose installed 2-3 inches below the rim transfers water only after the first barrel reaches that level.
- Every linked system needs a screened air path and an overflow directed away from the building foundation.
- Typical DIY installation takes 1-2 hours and costs about $20-$75 in fittings, hose, valves, and seal materials.
- Rain barrels store non-potable water unless a professionally designed and legally compliant treatment system makes the water potable.
How Does a Two-Barrel Rainwater System Work?
A two-barrel rainwater system routes roof runoff into one container, then distributes or overflows that water into a second container. The connection height determines the sequence: a high hose creates sequential filling, while a low hose creates hydraulic equalization between the barrels.
Rainfall enters through a downspout diverter, screened inlet, or covered lid. The first barrel must release displaced air as water enters. When water reaches the system’s connection or overflow elevation, excess water moves through the linking pipe and eventually exits through an overflow hose.
Hydrostatic equalization does not guarantee identical water levels under every condition. Flow resistance, different barrel shapes, blocked screens, unequal outlets, and a narrow connector can create temporary level differences. The barrels approach the same water level when the connecting path has adequate capacity and both containers can vent freely.
How Much Water Can Two Barrels Store?
Two 50-gallon barrels provide approximately 100 gallons of nominal storage, but usable capacity is lower when a freeboard zone, sediment space, or automatic overflow is maintained. A 55-gallon drum pair provides 110 gallons before subtracting those allowances.
Roof runoff can exceed barrel capacity quickly. The common planning estimate is:
Collected gallons = roof area in square feet × rainfall in inches × 0.623 × runoff coefficient
For example, a 500-square-foot roof section receiving 1 inch of rain produces about 312 gallons before losses. Two 50-gallon barrels cannot hold that storm, so the downspout diverter and overflow route must handle the excess.
Which Connection Method Should You Use?
Choose bottom linking when both barrels should drain through one low outlet, while choose top linking when you want a simpler overflow arrangement or independent barrel maintenance. The best method depends on available elevation, winter temperatures, barrel shape, outlet access, and expected rainfall intensity.
Bottom-Linking, Equalizing Connection
A bottom connection joins fittings installed low on both barrels, usually 2-4 inches above the internal floor. Water entering the first barrel travels through the connecting hose or pipe, and both barrels generally rise toward the same level.
This method works well with a single pump or spigot because the low connection makes stored water available from both containers. It also transfers sediment between barrels, keeps fittings under continuous water pressure, and requires careful support beneath the barrels.
Install a shutoff valve at each barrel if cleaning one container without emptying the other matters. A single valve between the barrels can isolate the pair, but two valves provide better control.
Top-Linking, Overflow Connection
A top connection places an overflow port or hose 2-3 inches below the rim of the primary barrel. The primary barrel fills first; water then travels to the second barrel, which receives the overflow.
Top linking reduces the length of hose exposed to constant hydrostatic pressure, but the second barrel normally needs its own outlet or a pump. The overflow line must be large enough for the inflow, and the secondary barrel still needs a separate emergency overflow near its top.
Commercial Connector Kits
A commercial kit usually includes bulkhead fittings, gaskets, hose adapters, clamps, and a hole saw. Kits simplify matching the hole diameter to the fitting, but proprietary parts can make later repairs more expensive.
| Connection option | Typical fitting size | Filling behavior | Best application |
|---|---|---|---|
| Bottom hose link | 3/4-1 inch | Both barrels rise toward one level | One spigot or pump |
| Bottom PVC link | 1-1.5 inch | High-capacity equalization | Permanent homestead installation |
| Top overflow hose | 1-1.5 inch internal diameter | Primary barrel fills first | Independent barrel outlets |
| Commercial kit | 3/4-1.5 inch, brand-specific | Depends on installation height | First-time installer |
What Do You Need Before Connecting the Barrels?
A bottom-linked installation typically requires two compatible bulkhead fittings, two hose adapters, 1-3 feet of reinforced hose or rigid pipe, two shutoff valves, a matching hole saw, seal tape, clamps, and a screened overflow assembly. Confirm the fitting manufacturer’s hole diameter before drilling.
Use food-grade or rainwater-rated barrels with opaque walls and secure lids. Do not use a container that held fuel, pesticides, solvents, or industrial chemicals, because residues can remain in plastic pores and seals.
Materials and Tools
| Item | Typical specification | Quantity | Typical cost |
|---|---|---|---|
| Bulkhead fitting | 1 inch, plastic or brass | 2 | $12-$30 |
| Linking hose | 1-1.5 inch internal diameter, reinforced | 1-3 feet | $8-$25 |
| Shutoff ball valve | Matching hose or pipe thread | 1-2 | $8-$24 |
| Hole saw | Exact kit or bulkhead diameter | 1 | $10-$25 |
| Thread seal tape | PTFE tape for tapered threads | 1 roll | $2-$5 |
| Overflow assembly | 1-1.5 inch hose with screen | 1-2 | $8-$25 |
| Base material | Concrete blocks, pavers, or engineered stand | 2 bases | $20-$80 |
Avoid relying on a thin 1/2-inch garden hose during heavy storms. A narrow hose may work as a drain outlet, but it can become a transfer bottleneck when the downspout delivers water faster than the hose can pass it.
Step-by-Step: How to Connect Two Rain Barrels Together
The following procedure describes a bottom-linked system because it provides shared storage through one outlet. Allow 30 minutes for site preparation and 30-60 minutes for drilling, fitting, and testing. The most important success factor is a rigid, level base that cannot settle under the combined weight of the water.
Step 1: Inspect and Clean the Barrels
Wash both barrels with water and a mild, unscented detergent, then rinse until no residue remains. Confirm that each lid is secure, each inlet has a mosquito-resistant screen, and each barrel has no cracks around existing ports.
Do not seal the barrels completely airtight. Incoming water needs an air-displacement path, and a blocked vent can slow filling or create pressure fluctuations.
Success checkpoint: Both barrels are clean, intact, screened, and able to vent.
Common mistake: Using a chemically contaminated drum because the exterior appears clean.
Step 2: Build a Level, Load-Bearing Base
Place the barrels on compacted ground, concrete pavers, or a purpose-built stand. Keep the bases level and wide enough to support the entire barrel footprint, then raise the outlets high enough to fit a watering can or hose.
A full 50-gallon barrel weighs roughly 417 pounds because water weighs about 8.34 pounds per gallon. Two full barrels therefore place approximately 834 pounds on the base, excluding the containers and stand.
Elevation increases gravity-fed outlet pressure, but it does not make bottom equalization possible. A bottom-linked system can balance at ground level if the fittings and hose are correctly installed; height is primarily for usable water pressure and drainage access.
Success checkpoint: The bases do not rock, tilt, or compress when loaded.
Common mistake: Stacking loose blocks that can shift when the barrels become heavy.
Step 3: Position the Barrels and Mark the Ports
Place the barrels close enough for a short, gently curved connection. Mark the center of each low-side port 2-4 inches above the internal floor, avoiding molded ribs, curved corners, and existing drain hardware.
Keep both ports at the same elevation when possible. Equal port height reduces trapped water and makes the system easier to drain, although barrel shape and outlet height still influence the final water level.
Leave access around each fitting for a wrench and allow enough room to remove the lid. A connection hidden against a wall is difficult to repair.
Success checkpoint: The marks align horizontally and remain accessible after installation.
Common mistake: Drilling so close to the rounded bottom that the gasket cannot seat flat.
Step 4: Drill Matching Holes
Wear safety glasses and drill slowly through each mark with the hole saw specified for the bulkhead fitting. Do not choose the hole saw by nominal pipe size alone, because a 1-inch bulkhead may require a hole larger than 1 inch.
Remove plastic burrs with a utility knife or fine abrasive pad. Wipe away shavings before installing the fittings, since loose plastic can prevent a gasket from sealing.
Success checkpoint: Each hole is round, smooth, and free of cracks.
Common mistake: Forcing a dull hole saw, which can tear thin barrel plastic around the port.
Step 5: Install the Bulkhead Fittings
Follow the fitting’s supplied gasket diagram rather than assuming every bulkhead uses the same arrangement. Many bulkhead designs place the gasket on the wet side inside the barrel, while some specialty fittings use a different washer or flange configuration.
Insert the fitting squarely, place the correct gasket and nut in their specified positions, and tighten by hand before using channel locks for a small additional turn. Excessive torque can distort the barrel wall or squeeze the gasket out of position.
Apply PTFE tape only to tapered threaded joints that require it. A gasketed bulkhead face normally creates the seal; tape cannot repair a poorly seated washer.
Success checkpoint: The flange sits flat and the fitting does not rotate when the adapter is tightened.
Common mistake: Treating PTFE tape as a substitute for a correctly positioned gasket.
Step 6: Add Valves and Connect the Hose
Attach a matching hose barb, threaded adapter, or PVC union to each bulkhead. Use stainless-steel hose clamps on barbed connections, and keep the hose path short, supported, and free of sharp bends.
Install one valve at each barrel if you want to isolate either container. Place valves where they remain reachable after the barrels are full, because a hidden shutoff has little maintenance value.
A 1-inch connector is a practical baseline for many home systems. Use 1.5-inch plumbing when the downspout serves a large roof area, intense storms are common, or the connector must carry overflow quickly.
Success checkpoint: The hose has no kink, the clamps sit behind the barb, and both valves open fully.
Common mistake: Connecting a hose whose stated diameter refers to its outside diameter rather than its internal flow opening.
Step 7: Connect the Inlet and Provide Air Relief
Route the downspout into the primary barrel through a diverter or screened inlet. Keep the lid secured and provide an unobstructed screened vent, inlet opening, or manufacturer-approved air path on both barrels.
A secondary barrel can fail to fill when its air cannot escape, even when the connecting hose is clear. Check the vent before replacing fittings or enlarging holes.
Install a first-flush diverter where roof dust, pollen, bird droppings, or leaf debris is significant. Alabama Cooperative Extension System guidance identifies roof runoff contamination and maintenance as important considerations for rainwater storage, particularly when water contacts roof materials and gutters.
Success checkpoint: Air can leave each barrel while water enters.
Common mistake: Covering every opening with an unvented cap in an attempt to prevent mosquitoes.
Step 8: Install the Emergency Overflow
Fit an overflow port near the top of the secondary barrel and route the discharge at least several feet away from the foundation. Use a screened outlet that cannot admit insects or small animals, but do not install a screen so restrictive that it blocks stormwater flow.
The overflow should have equal or greater effective capacity than the inlet under the site’s heaviest expected storm. Never direct discharge onto a basement stairwell, neighboring property, septic field, or erosion-prone slope without checking local conditions.
Success checkpoint: Overflow exits safely without backing into the gutter or pooling against the building.
Common mistake: Assuming the second barrel’s lid seam is a safe overflow path.
Step 9: Test the System in Stages
Close the barrel valves, add a few gallons to each container, and inspect every joint with a dry paper towel. Then open the valves, add more water to the primary barrel, and observe transfer into the secondary barrel.
Test the emergency overflow with a hose before the first major storm. Confirm that the barrels remain stable, water levels respond as expected, and no hose collapses under suction when draining.
Success checkpoint: No paper towel becomes damp, the secondary barrel receives water, and overflow leaves the foundation area.
Common mistake: Waiting for a storm to reveal a leak or undersized overflow.
How Should You Size and Place the Connection?
Use the fitting manufacturer’s hole specification and choose a connector with at least a 1-inch internal diameter for a typical residential system. Place a bottom port 2-4 inches above the barrel floor, or place a top overflow 2-3 inches below the receiving barrel’s rim.
Connection diameter should reflect inflow, not barrel count alone. A small roof and gentle rainfall may tolerate 3/4-inch plumbing, but a 1-inch downspout outlet can overwhelm a narrow transfer hose during a cloudburst.
| System condition | Recommended connector | Port placement | Additional requirement |
|---|---|---|---|
| Two 50-gallon barrels, small roof | 1 inch | Bottom, 2-4 inches above floor | Screened vent |
| Two 55-gallon barrels, typical roof | 1-1.5 inches | Bottom, 2-4 inches above floor | Two shutoff valves |
| Large roof or intense rainfall | 1.5 inches | Top or bottom, short route | Oversized emergency overflow |
| Narrow side yard | 1 inch flexible hose | Top, 2-3 inches below rim | Independent secondary overflow |
| Freezing climate | 1 inch drainable fittings | Bottom, lowest practical point | Removable hose and valves |
A long hose with multiple bends can have less flow capacity than a short straight pipe of the same nominal size. Practitioners commonly prefer rigid PVC for permanent installations because it maintains its bore and resists kinking, while flexible hose is easier to retrofit around misaligned barrels.
What Are the Trade-Offs Between Top and Bottom Linking?
Bottom linking provides shared access and more uniform storage, while top linking reduces constant connection pressure and can simplify individual barrel removal. Neither method is universally safer: overflow design, barrel stability, fitting quality, and maintenance determine the real failure risk.
| Criterion | Bottom equalizing link | Top overflow link |
|---|---|---|
| Typical connection height | 2-4 inches above floor | 2-3 inches below rim |
| Filling sequence | Both barrels rise together | Primary fills before secondary |
| Shared low outlet | Usually one outlet | Usually separate outlets |
| Constant fitting pressure | Yes, while water is stored | Mostly after water reaches link |
| Sediment movement | More likely between barrels | More sediment remains in primary |
| Isolation requirement | Strongly recommended | Useful but less essential |
| Winter draining | One low drain can empty both | Each barrel often drains separately |
| Installation tolerance | Needs accurate low ports | More forgiving alignment |
Which Method Is Best for Gravity Irrigation?
Bottom linking is usually better for gravity irrigation because one elevated spigot can draw from both barrels. Raise the outlet only as high as the stand safely permits, since water pressure depends on the vertical distance between the water surface and the outlet.
A 2-foot water head produces only modest pressure, so gravity systems may deliver a slow trickle through long hoses, fine spray nozzles, or uphill runs. A pump is more appropriate for sprinklers, drip systems with pressure requirements, or distant garden beds.
Which Method Is Better in a Freezing Climate?
Top linking can be easier to winterize if each barrel has an accessible drain, but bottom linking can also work when valves and hoses are removable. Drain all water from exposed fittings before freezing conditions, because expanding ice can split bulkheads, valves, and rigid pipe.
Do not leave a full barrel on a vulnerable stand through freeze-thaw cycles. Follow the barrel manufacturer’s storage instructions, and disconnect flexible links if ice could form inside them.
How Much Does the Installation Cost and How Long Does It Take?
A typical DIY two-barrel connection costs $20-$75 and takes 1-2 hours, excluding construction of a large stand or replacement of an incompatible downspout diverter. Commercial kits often cost $25-$60, while individually selected fittings can reduce cost but increase compatibility risk.
| Installation level | Parts cost | Labor time | Typical result |
|---|---|---|---|
| Basic top-link hose | $20-$40 | 45-90 minutes | Sequential storage |
| Bottom-link DIY | $35-$75 | 1-2 hours | Shared storage and outlet |
| Bottom-link with valves | $50-$100 | 1.5-2.5 hours | Easier cleaning and isolation |
| Rigid PVC installation | $60-$150 | 2-4 hours | Higher flow and permanent routing |
UV-resistant PVC fittings may last 5-10 years or longer. Flexible vinyl hose often needs inspection after 2-3 years, particularly where sunlight, freezing, or repeated bending causes cracking.
Common Problems and How Do You Fix Them?
Most linked-barrel failures come from poor support, incorrect hole sizing, blocked vents, undersized transfer lines, or an overflow route that cannot handle stormwater. Diagnose the system with low water levels first, because tightening fittings under full-barrel pressure can worsen a damaged gasket or cracked wall.
Leakage Around a Bulkhead
Empty water below the fitting, dry the area, and inspect the gasket for burrs, distortion, cracks, or incorrect orientation. Remove the fitting if necessary, smooth the hole, reinstall the specified washer, and tighten gradually.
If the barrel wall is cracked or too thin to support the fitting, a larger washer or a different bulkhead design may be necessary. Do not continue tightening a leaking fitting indefinitely.
The Second Barrel Remains Empty
Check that both isolation valves are open, the hose is not kinked, and the secondary barrel can vent. Inspect the hose ends for debris, then confirm that the primary barrel’s water level actually reaches a top-link port if using the overflow method.
A bottom-linked barrel can remain empty when the connecting port is higher than the available water level or when an internal dip in the hose traps air. Shorten the line, support it continuously, and remove high loops.
The Primary Barrel Overflows First
A blocked transfer hose, clogged screen, or undersized connector is restricting flow. Clean the inlet and connector, then compare the connector’s internal diameter with the downspout inflow.
Add a separate overflow directly from the primary barrel if the downspout can deliver more water than the link handles. A two-barrel system still needs a safe backup route even when both barrels are connected.
Water Smells or Turns Dark
Remove accumulated sediment, clean the barrel, and improve roof-runoff filtration with a gutter screen or first-flush diverter. Organic debris decomposes faster in warm, shaded water, especially when the barrel lid admits leaves or insects.
Use stored water promptly for ornamental plants, trees, or cleaning where permitted. Never assume clear rain-barrel water is safe to drink.
Barrels Shift or Lean
Drain the barrels, rebuild the base on compacted level material, and keep both containers fully supported. Do not attempt to correct a leaning full barrel by pushing it, because the water mass can crush fittings or overturn the stand.
The combined weight of two full barrels can exceed 800 pounds. Stability is a structural requirement, not an appearance issue.
What Changes in Difficult Layouts?
Different barrel sizes, uneven ground, narrow spaces, and pump-fed irrigation require changes to the basic layout. Keep the inlet, air path, isolation valves, and overflow accessible even when the containers cannot sit side by side.
Different-Sized Barrels
Different capacities are compatible with bottom linking if both containers have suitable fittings and the overflow system is sized for total inflow. The final water level will equalize by height, not by gallons, so a short barrel may reach its lid while a taller barrel still has unused volume.
Use independent high-level overflows when barrel heights differ substantially. This prevents the shorter container from becoming the first uncontrolled spill point.
Unequal Ground Levels
Do not place one barrel on an improvised tilted platform to make fittings align. Build a stable stepped base or use a top-linking layout that tolerates the site’s geometry.
For a bottom link, the lower barrel can fill to the same water elevation as the higher barrel only if its top and overflow elevations allow that water level. Otherwise, the lower container may overflow first.
Pump-Fed Irrigation
Connect the pump to a low outlet or manifold that can draw from the combined storage. Install a coarse pre-pump screen and keep sediment out of the pump inlet, because bottom equalization moves fine debris between containers.
A pump does not eliminate the need for an emergency overflow or screened vent. It changes water delivery, not stormwater capacity.
Narrow Side Yards
Use a short top overflow when access to the barrel backs is limited. Keep the secondary barrel’s emergency overflow facing the open drainage route, and use unions or quick-disconnect fittings so the containers can be removed for cleaning.
How Do You Maintain and Winterize Linked Barrels?
Inspect screens, hoses, clamps, valves, and overflow outlets at least once each season and after severe storms. At the end of the growing season, drain stored water, flush sediment, disconnect exposed hoses, and leave the system in the manufacturer’s recommended winter position.
| Maintenance task | Frequency | What to inspect | Action |
|---|---|---|---|
| Clean inlet screen | Monthly during leaf fall | Leaves and roof grit | Brush and rinse |
| Check fittings | Every 1-2 months | Dampness and loosened nuts | Dry, inspect, retighten |
| Flush sediment | Every 6-12 months | Sludge at barrel floor | Drain and rinse |
| Test overflow | Before storm season | Blockage and discharge direction | Hose-test the route |
| Winterize | Before freezing weather | Ice-prone hose and valves | Drain, disconnect, store |
Do not use chlorine, algaecide, or plumbing chemicals unless the barrel and intended water use permit them. Chemical residues can harm plants, seals, aquatic life, or people.
Safety, Water Quality, and Local Rules
Rain barrels are appropriate for non-potable irrigation, but untreated roof runoff can contain bird feces, pathogens, metals, roofing residues, and chemical contaminants. Keep the lid secured, block mosquito access with corrosion-resistant mesh, and prevent children from climbing onto unstable stands.
Local rules vary. Some jurisdictions regulate rainwater collection, backflow protection, discharge, or connections to potable plumbing, so check the local water authority and building department before installing a permanent system.
A rain barrel is not a pressurized drinking-water tank. Do not connect it directly to indoor plumbing or a potable supply without approved backflow protection, treatment, testing, and professional design.
FAQ
Can I connect two rain barrels without drilling them?
Yes, a top overflow can connect barrels through existing overflow ports or a diverter kit, provided the ports are compatible and the secondary barrel has an emergency overflow. A no-drill arrangement is easier to reverse, but it may transfer water less reliably than a properly sealed bottom bulkhead connection.
Do two rain barrels need to be the same height?
No, but same-height barrels simplify bottom equalization and overflow control. Unequal barrel heights can leave unused capacity or cause the shorter barrel to overflow first, so install independent high-level overflows when the container rims are at different elevations.
Can I use a regular garden hose between rain barrels?
A regular 1/2-inch garden hose may work for slow drainage, but it is usually a poor stormwater transfer line because its internal opening restricts flow. A reinforced hose with a 1-inch internal diameter is a more practical residential minimum, especially for bottom linking.
Should the barrels be connected at the top or bottom?
Connect barrels at the bottom when you want shared storage through one spigot or pump. Connect them at the top when you prefer sequential filling, simpler alignment, or more independent containers. Both methods require screened vents and a separate emergency overflow.
Why does my linked rain barrel overflow before the other one fills?
The most likely causes are a blocked or kinked connector, unequal port elevations, a closed valve, inadequate air relief, or an undersized hose. Clean the screens, open the valves, verify the hose route, and test with a small volume before modifying the drilled fittings.
Is rain-barrel water safe for vegetables?
Untreated rain-barrel water is not automatically potable and may contact contaminated roofing or gutters. Use local public-health guidance for edible crops, avoid questionable roof materials, and never drink the water unless a compliant treatment and testing system has been designed for that purpose.
The Bottom Line
To connect two rain barrels together, use a 1-inch or larger bottom bulkhead connection for shared storage, or a 1-1.5-inch top overflow for sequential filling. Build a stable base, match the hole saw to the fitting, follow the gasket instructions, provide screened air relief, and route emergency overflow away from the foundation. The correct method depends on how you will drain the water, not simply on the number of barrels.