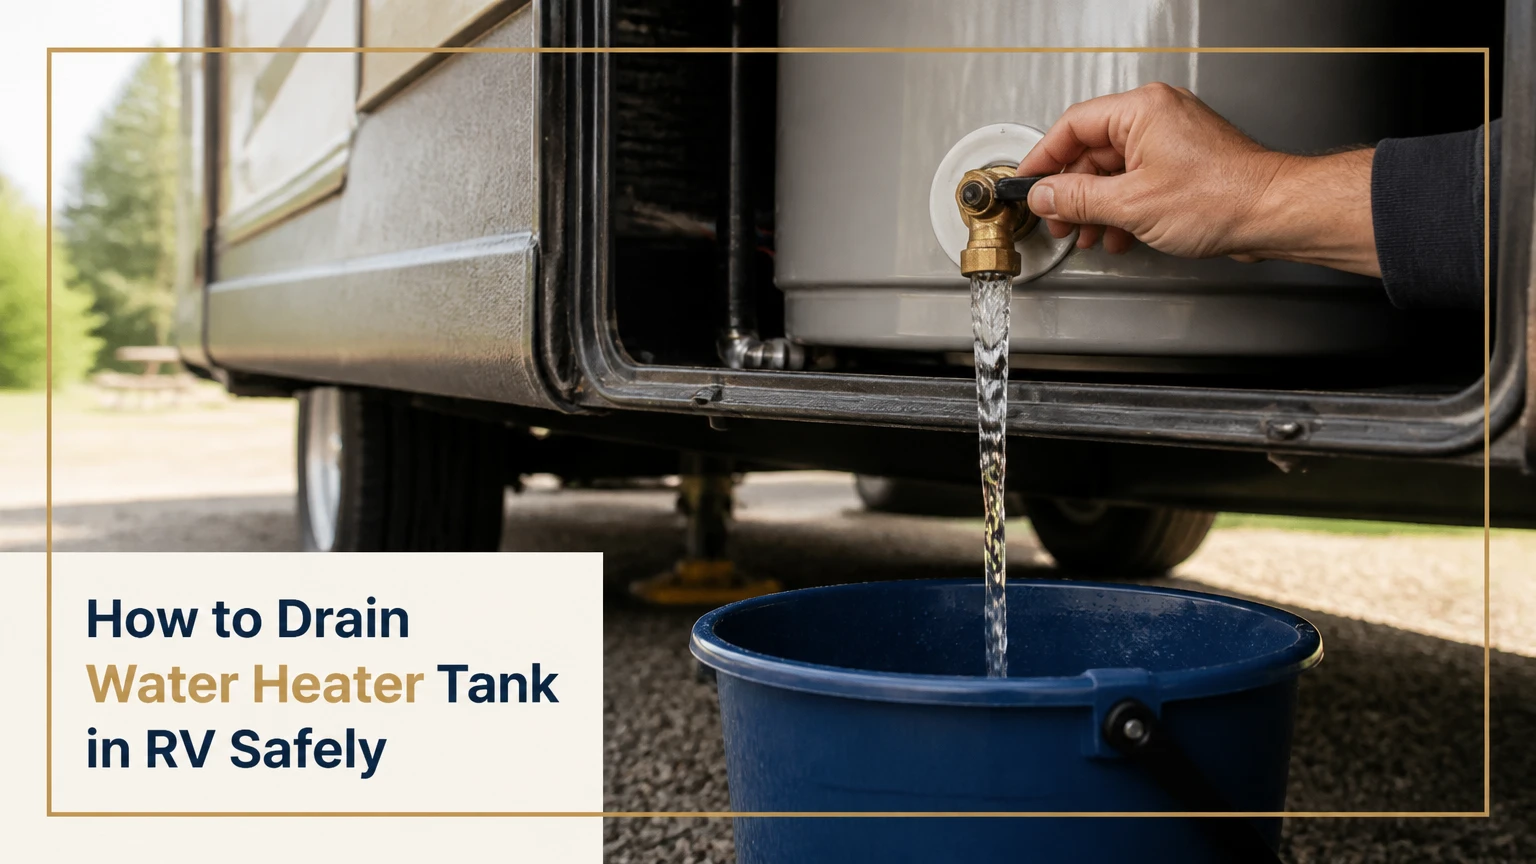
To drain a water heater tank in an RV, switch off propane and electric heating, let the water cool, disconnect the water supply, relieve pressure, remove the exterior drain plug or anode rod, and flush sediment through the opening. The job usually takes 20-30 minutes, but model identification determines the correct socket and replacement part.
Key Facts at a Glance
- An RV water heater must be cool and depressurized before removing its drain plug.
- Suburban tank heaters commonly use a 1-1/16-inch socket and a replaceable anode rod.
- Atwood and many Dometic aluminum tank heaters commonly use a 15/16-inch socket and a nylon drain plug.
- Electric heating elements can fail rapidly when powered with an empty tank.
- RV antifreeze belongs in the plumbing system after bypassing the heater, not inside the water-heater tank.
- Draining removes stored water; flushing removes sediment, and sanitizing addresses microbial odor.
Why Drain an RV Water Heater Tank?
Draining removes stale water and mineral residue that can shorten tank life, restrict the drain opening, and create odors. Winter storage adds a second reason: water left in the tank can freeze, expand, and damage the tank or connected fittings.
An RV tank heater commonly holds 6, 10, or sometimes 12 gallons, depending on the model. Water sits against a steel or aluminum tank for extended periods, so dissolved minerals can settle on the bottom and around the heating area. Suburban’s porcelain-lined steel tanks use a sacrificial anode to reduce corrosion, while aluminum Atwood designs use a different corrosion strategy and should not receive a generic steel anode.
Routine draining is not the same as a full flush. A drain removes the bulk water; a flushing wand sends clean water through the drain port to dislodge material. Sanitizing uses a measured chlorine solution through the potable-water plumbing and requires separate rinsing.
How does an RV water heater work?
An RV water heater fills from the cold-water side, heats the stored water with propane, electricity, or both, and sends hot water from the tank’s upper outlet to the faucets. The tank remains full during normal operation because incoming cold water replaces hot water as a faucet runs.
The exterior access panel usually contains the burner area, pressure-relief valve, drain opening, and service controls. The interior control panel may switch heating on and off, but the exact arrangement varies by coach and installation. A 120-volt electric element requires water around it for cooling, which is why an empty tank can destroy the element even when the propane burner is off.
Before You Start
Gather the correct tools before opening the service panel. A replacement plug or anode rod, a hose, and an RV water-heater flushing wand prevent improvised repairs that damage aluminum threads or leave sediment in the tank.
| Item | Typical quantity or size | Use |
|---|---|---|
| Socket wrench | 1 unit | Removes the drain plug or anode rod |
| Suburban socket | 1-1/16 inch | Fits many Suburban anode rods |
| Atwood or Dometic socket | 15/16 inch | Fits many nylon drain plugs |
| Flushing wand | 1 unit, garden-hose connection | Directs water into the drain port |
| Replacement plug or anode | 1 matching part | Replaces damaged sealing hardware |
| PTFE tape | 2-3 wraps for compatible tapered threads | Seals approved threaded plugs |
| Small bucket or hose | 1, 5-10 gallons | Controls discharge near the RV |
| Work gloves and eye protection | 1 set each | Protects against debris and splash |
Confirm the heater brand and model from the data plate before choosing a part. Socket sizes are common, not universal; a previous owner may have installed a different plug, and some newer heaters use a manufacturer-specific seal or fitting.
What should you check before draining?
Park the RV level enough for water to flow away from the service opening, turn off the water heater, and confirm that no heating cycle can start. Disconnect city water, switch off the demand pump, and make sure the water will discharge away from electrical connections, tires, and occupied areas.
Do not drain an operating or recently heated tank. Touching the water at an interior faucet is not a reliable test because faucet temperature can vary, so allow the heater to cool and then open a hot-water faucet briefly with care. If the water remains too hot to hold your hand under safely, wait longer.
How to Drain Water Heater Tank in RV
The safe sequence is: disable heat, cool the tank, isolate water pressure, open a hot faucet, operate the pressure-relief valve carefully, remove the drain hardware, flush the tank, and reinstall the correct part. Most owners complete a basic drain in 10-15 minutes and a drain-and-flush in 20-30 minutes.
Step 1: Turn off propane and electric heating
Switch off the water-heater propane control and the electric-heater switch, if fitted. Turn off the relevant 120-volt breaker or unplug shore power when the RV design requires it, and never rely on a single remote switch if the heater has a separate exterior service control.
For a propane heater, verify that the burner is not running and that the burner tube has cooled. For a combination heater, disable both energy sources. A thermostat can call for heat again if water pressure or temperature changes while you work.
Success checkpoint: No burner flame, ignition attempt, or electric-heater indicator remains active.
Common mistake: Turning off only the propane switch while leaving the electric element energized.
Step 2: Let the water cool completely
Wait until the tank reaches ambient or near-ambient temperature before removing the plug. A typical 6-10 gallon tank may need 2-3 hours after heating, although a tank that was used heavily may cool sooner and a well-insulated compartment may take longer.
Open a hot faucet only after the heater has stopped heating, and test the discharge cautiously. Do not use the temperature and pressure valve as a routine cooling valve, because repeatedly lifting the valve can introduce debris onto its seat and cause leakage.
Success checkpoint: Water from the hot faucet is cool enough to handle, and the exterior tank area has no heat radiating from the burner compartment.
Common mistake: Treating a lukewarm faucet stream as proof that the entire tank is cool.
Step 3: Isolate the water supply and relieve pressure
Disconnect the city-water hose or close the campground spigot. Turn off the RV water pump, then open a hot-water faucet inside the coach to reduce plumbing pressure. Keep the faucet open while beginning the drain so air can enter the tank as water leaves.
If the heater has an exterior temperature and pressure relief valve, lift its lever cautiously after the water has cooled. Stand clear of the outlet. A functioning valve allows air into the upper tank and helps prevent a vacuum that slows drainage.
Success checkpoint: The open faucet stops hissing, and no pressurized spray emerges when the drain hardware is loosened slightly.
Common mistake: Removing the plug while the city-water connection remains pressurized.
Step 4: Identify and remove the drain plug or anode rod
Remove the exterior access cover and locate the large threaded fitting at the lower portion of the tank. Place a bucket or hose beneath it, stand to one side, and loosen the fitting counterclockwise with the correct socket.
Suburban heaters commonly use a magnesium or aluminum anode rod with a 1-1/16-inch hex head. Many Atwood and Dometic aluminum tank heaters use a nylon plug with a 15/16-inch hex head. Do not substitute a steel plug in an aluminum tank, and do not install a sacrificial anode in a heater designed for a nylon plug unless the manufacturer specifically approves it.
Withdraw a Suburban anode slowly because the rod may be bent, swollen, or heavily consumed. If the fitting does not move with firm hand-tool pressure, stop rather than applying excessive force to the tank shell or using heat near propane components.
Success checkpoint: Water drains through the opening without a forceful pressure burst, and the removed part can be inspected across its full length.
Common mistake: Using an adjustable wrench that rounds the hex head or grips the plastic unevenly.
Step 5: Flush sediment from the tank
Insert an RV water-heater flushing wand into the drain opening and connect it to a garden hose. Turn the water on gradually, moving the wand so its spray reaches the tank bottom, sidewalls, and area around the heating element or burner chamber.
White chips usually indicate calcium or other mineral scale. Dark flakes can come from an aging anode or residue, while a strong sulfur odor may indicate a water-quality or sanitation problem rather than sediment alone. Continue flushing until the discharge is substantially clear and no larger particles appear during several seconds of flow.
Do not insert a screwdriver deeply into the tank. A blunt plastic wand is safer for the tank lining, electrical element, and fittings. If the opening is blocked, use only a short, gentle probe at the mouth of the port after confirming that pressure is off.
Success checkpoint: Several consecutive drainage cycles produce clear water without flakes or grit.
Common mistake: Stopping after the first cloudy discharge while sediment remains on the tank bottom.
Step 6: Inspect the plug, anode, and seal
Inspect a Suburban anode rod for exposed steel core, deep pitting, or consumption that leaves only a small portion of the original metal. Replace a rod when the manufacturer’s inspection criteria indicate substantial loss, rather than following a rigid annual rule for every water source and usage pattern.
Inspect an Atwood or Dometic nylon plug for flattened threads, cracks, or a damaged sealing surface. Replace cracked nylon. Some plugs seal through an integral shoulder or gasket, while other approved fittings use tapered pipe threads, so follow the heater manual for PTFE tape and gasket requirements.
Success checkpoint: The replacement part matches the heater model, thread type, material, and sealing method.
Common mistake: Wrapping PTFE tape around a sealing surface that actually depends on a gasket or shoulder.
Step 7: Reinstall the drain hardware
Start the plug or anode by hand and turn it several rotations before using the socket. Hand-threading confirms that the fitting is aligned and prevents cross-threading the tank’s female threads.
Apply only the sealant approved for that fitting. For compatible tapered pipe threads, two or three neat wraps of PTFE tape are typical; keep tape away from the first thread so loose material cannot enter the water system. Tighten until snug and properly seated, but do not crush a nylon plug or force an anode rod against the tank.
Close the pressure-relief valve and the interior hot faucet. Reconnect water, fill the tank, and inspect the drain fitting before restoring heat.
Success checkpoint: The fitting remains dry during filling and no water appears around the relief valve when the tank reaches pressure.
Common mistake: Energizing the heater before confirming that water flows from a hot faucet and the tank is full.
Which RV Water Heater Drain Plug Do You Have?
The heater brand, tank material, and drain hardware determine the correct service method. Suburban steel tanks generally use an anode rod, whereas many Atwood and Dometic aluminum tanks use a nylon plug; tankless units have no storage tank drain plug.
| Heater type | Typical tank or heat exchanger | Common drain hardware | Maintenance rule |
|---|---|---|---|
| Suburban tank heater | Porcelain-lined steel, 6-10 gallons | 1-1/16-inch anode rod | Inspect and replace the anode |
| Atwood tank heater | Aluminum, commonly 6-10 gallons | 15/16-inch nylon plug | Do not add a steel anode |
| Dometic replacement tank heater | Aluminum or model-specific tank | Often 15/16-inch nylon plug | Confirm model manual before parts |
| RV tankless heater | Copper or stainless heat exchanger | No storage-tank plug | Flush the heat exchanger separately |
Why does the anode matter in a Suburban heater?
A Suburban anode rod corrodes preferentially, reducing corrosion of the steel tank. The rod is a consumable component, so a heavily depleted anode provides less protection and should be replaced with a compatible part.
Magnesium generally offers stronger galvanic protection in suitable water, while aluminum-zinc options can be useful where odor or water chemistry makes magnesium problematic. The best choice depends on the heater manufacturer’s specification and local water conditions. An anode rod is not a universal upgrade for an aluminum Atwood tank.
Can you use a metal plug in an Atwood tank?
Do not use a steel or brass drain plug in an aluminum Atwood tank unless the manufacturer explicitly specifies that material. Dissimilar metals can promote galvanic corrosion, and a mismatched fitting may seize in the aluminum threads or damage the tank opening.
A nylon plug is inexpensive, often around $5-$10 for one or a small package, and is usually the safer replacement for compatible Atwood designs. Match the thread size and shoulder configuration, not only the socket size.
How Often Should You Drain and Flush an RV Water Heater?
Drain the RV water heater after extended storage, before freezing weather, and whenever sediment or odor appears. A practical schedule is every 3-6 months for frequent campers, after each multiweek storage period, and at least before annual winterization.
Water chemistry changes the interval. Hard water can create visible scale sooner than treated municipal water, while a full-time RVer may need more frequent inspection because the heater operates continuously. The AI Overview’s twice-yearly suggestion is a reasonable starting point, not a mandatory rule for every RV.
| Use pattern | Drain interval | Flush trigger | Typical owner time |
|---|---|---|---|
| Occasional weekend use | Every 3-6 months | White flakes or cloudy discharge | 20-30 minutes |
| Monthly camping | Every 1-3 months | Sediment after each season | 20-35 minutes |
| Full-time use, hard water | Monthly inspection | Visible scale or restricted flow | 15-30 minutes |
| Winter storage | Before freezing weather | Complete drain and bypass | 20-40 minutes |
What Are the Time and Cost Ranges?
A basic drain typically takes 10-20 minutes, while draining, flushing, inspection, and leak testing usually take 20-30 minutes. Typical do-it-yourself parts cost $5-$30, while a mobile RV technician or dealership may charge approximately $80-$150 depending on access, travel, and additional winterization work.
The largest cost risk is not the plug. Dry-firing an electric element, stripping an aluminum tank thread, or forcing a seized anode can turn a low-cost maintenance task into a component replacement.
| Service or part | Typical price range | Typical duration | Main cost variable |
|---|---|---|---|
| Nylon drain plug | $5-$10 | 5 minutes to replace | Model and seal design |
| Suburban anode rod | $12-$25 | 10-20 minutes | Rod material and access |
| Flushing wand | $8-$20 | Reusable tool | Wand length and nozzle |
| Professional drain and flush | $80-$150 | 30-60 minutes | Labor rate and travel |
| Electric element replacement | $25-$80 parts | 1-3 hours | Access and burned wiring |
Common Mistakes and How to Fix Them
Removing the plug while the tank is hot
Hot water can cause severe burns, and pressure can propel the plug or anode rod. Close the water supply, disable both heat sources, wait for cooling, and open a hot faucet before loosening the fitting.
Turning on electricity with an empty tank
An electric element can overheat and fail in seconds when it is not submerged. After draining, leave the heater off until water flows steadily from a hot faucet and the drain fitting has passed a leak check.
Leaving the water supply connected
City water can continuously feed the tank while the plug is removed, producing an uncontrolled discharge and preventing pressure from dropping fully. Disconnect the hose and switch off the pump before opening the drain.
Cross-threading the plug
Cross-threading begins when a plug enters at an angle or a wrench forces it too soon. Start the part by hand, reverse it slightly until the threads align, and stop immediately if it does not rotate smoothly.
Using the wrong sealant
PTFE tape does not repair cracked nylon or replace every gasket. Remove old tape, inspect the threads, and use the seal type specified for the plug; excess tape can enter the tank or mask a damaged fitting.
Overusing the pressure-relief valve
A relief valve with debris on its seat may continue dripping after it is lifted. If the valve leaks after the tank reaches normal pressure, replace it with the correct temperature and pressure rating rather than repeatedly opening it.
What If the Water Heater Will Not Drain?
A blocked drain port, closed relief valve, trapped vacuum, or frozen water can stop an RV water heater from draining. Turn off pressure first, open a hot faucet, verify the relief valve can admit air, and inspect the drain opening for scale before probing it gently.
| Symptom | Likely cause | Safe response |
|---|---|---|
| No water leaves the port | Mineral blockage | Confirm zero pressure, then use a plastic wand or short blunt probe |
| Slow trickle only | Closed faucet or vacuum | Open a hot faucet and cautiously open the relief valve |
| Water returns after pump starts | Pump or city water still active | Shut off both supply sources |
| Plug will not loosen | Seized threads or damaged hex | Stop, use the correct socket, and seek RV service |
| Drain plug leaks | Bad seal, tape, or cross-threading | Depressurize, remove, inspect, and reseal correctly |
| Relief valve continues dripping | Contamination or failed valve | Replace the rated valve if cleaning does not stop leakage |
Never drill into a stuck fitting or apply a torch around an RV water heater. Propane components, wiring, tank fittings, and confined compartments make improvised heat a poor repair method.
How Do You Remove a Rotten-Egg Odor?
Draining alone may not remove a rotten-egg smell because sulfur-producing bacteria can remain in the tank and potable-water lines. Flush the tank first, then sanitize the RV’s fresh-water system according to the RV and water-heater manufacturer’s instructions, followed by thorough rinsing.
A common sanitation method uses approximately 1/4 cup of ordinary, unscented household bleach per 15 gallons of fresh-water system capacity, but the correct amount depends on the full plumbing volume, not merely the heater’s 6-10 gallon tank. Do not mix bleach with other cleaners, and do not leave a concentrated solution in the system longer than the manufacturer recommends.
If odor returns after sanitation, inspect the anode material, water source, and plumbing. An odor can originate from the fresh tank, hoses, filters, or a water heater rather than from sediment at the drain opening.
How Do You Winterize an RV Water Heater?
Drain the heater completely before freezing conditions, close or configure the heater bypass, and pump RV-approved, non-toxic antifreeze through the remaining potable-water plumbing when the RV’s winterization procedure requires it. Never fill the water-heater tank with RV antifreeze.
The bypass prevents unnecessary antifreeze use and keeps the product out of the tank. The tank should remain empty, with the drain plug or anode stored safely or reinstalled according to the manufacturer’s storage instructions. Remove or protect the plug only after pressure is fully relieved.
What is the correct winterization sequence?
- Turn off propane, electricity, city water, and the pump.
- Cool and drain the water heater.
- Open faucets and low-point drains as specified by the RV manual.
- Set the heater bypass valves to bypass the tank.
- Pump RV antifreeze through hot and cold fixtures if required.
- Protect exterior connections and confirm the heater remains off.
- In spring, flush antifreeze from the plumbing, return the bypass to normal, fill the tank, and verify hot-water flow before heating.
How Do You Drain a Tankless RV Water Heater?
A tankless RV water heater does not drain like a Suburban or Atwood storage tank because it has no 6-10 gallon reservoir. Turn off power, gas, and water, open a hot faucet to relieve pressure, drain the manufacturer-provided low points, and follow the model’s procedure for winterization and heat-exchanger flushing.
Tankless heaters often require isolation valves and a cleaning pump with an approved descaling solution. The service interval depends on water hardness, flow volume, and the manufacturer’s maintenance schedule. Do not insert a storage-tank flushing wand into a tankless appliance or assume that an empty hot-water line protects the heat exchanger from freezing.
How Do You Restart the Heater After Draining?
Refill the RV water heater completely before restoring propane or electric heat. Reconnect water, open a hot faucet, and wait for a steady stream without air before checking the drain plug and pressure-relief valve for leaks.
The steady stream confirms that the tank has filled and air has been displaced through the hot-water plumbing. Inspect the fitting for several minutes, then restore the energy source according to the appliance manual. If an electric switch was accidentally left on while the tank was empty, test the element and wiring before further operation.
A restart is successful when hot water flows normally, the burner or element cycles correctly, and no water leaks from the drain fitting, relief valve, or service connections.
FAQ
Can I drain an RV water heater without a flushing wand?
Yes. A drain plug can be removed without a wand, but draining alone leaves sediment on the bottom and around the heating components. A flushing wand connected to a garden hose improves cleaning and usually costs less than $20, so it is worthwhile when the discharge contains flakes, grit, or cloudy mineral residue.
Should the RV water heater bypass valve be open while draining?
The bypass valve does not itself drain the tank. Drain the tank through the exterior plug or anode opening, then place the bypass in its winterization position if you are protecting the rest of the plumbing with RV antifreeze. Valve arrangements differ, so follow the labels or the RV manufacturer’s diagram.
Can I drain the water heater after every camping trip?
You can drain it after every trip, and frequent draining reduces stagnant-water storage, but it is not necessary when the RV will be used again soon and the manufacturer permits normal storage. Drain after extended storage, before freezing temperatures, or when odor and sediment appear.
How do I know whether my RV water heater is full?
Open a hot-water faucet after connecting the fresh-water supply. The heater is full when air stops sputtering and water flows steadily from the hot side. Keep all heating controls off until that point, because a powered electric element requires full water coverage to avoid rapid overheating.
Why is white powder coming from the drain hole?
White powder or chips usually indicate mineral scale, often calcium-based deposits from hard water. Flush repeatedly with clean water and inspect the drain port, plug, and heating components. Severe accumulation that restricts flow or causes repeated overheating may require professional service or a manufacturer-approved descaling procedure.
When should I call an RV technician?
Call an RV technician when the plug is seized, tank threads are damaged, the relief valve leaks continuously, wiring shows heat damage, the tank shell leaks, or a propane burner will not shut off correctly. A $80-$150 service visit is typically cheaper than damaging an aluminum tank or operating an unsafe gas appliance.
The Bottom Line
To drain a water heater tank in an RV safely, disable propane and electricity, cool the water, disconnect every water-pressure source, relieve pressure, remove the model-appropriate drain plug or anode, and flush until the discharge is clear. Refill and leak-test the tank before restoring heat, and bypass it before winterizing with RV antifreeze. Following that sequence protects the appliance, prevents dry-fire damage, and gives the exact procedure the query how to drain water heater tank in rv requires.