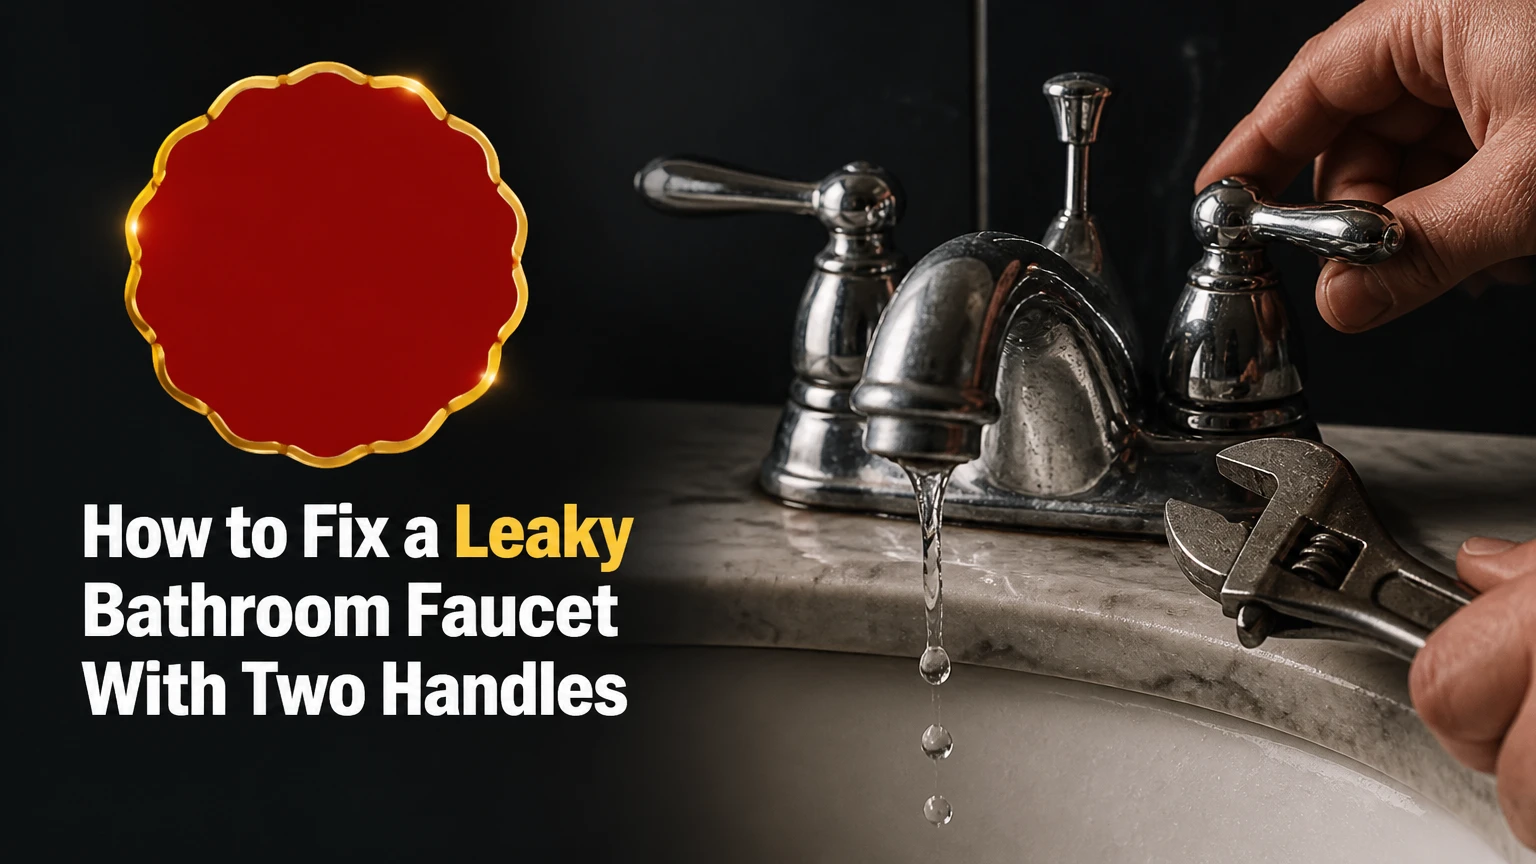
To fix a leaky bathroom faucet with two handles, shut off both supply valves, identify whether the hot or cold valve is leaking, remove that handle, and replace its worn washer, O-ring, stem, or cartridge. Most repairs take 30-60 minutes, but selecting an exact replacement part determines whether the repair succeeds.
Key Facts at a Glance
- A warm drip usually points to the hot-water valve, while a cold drip usually points to the cold-water valve.
- Compression faucets normally require a new rubber washer, O-ring, or valve seat.
- Cartridge and ceramic-disc faucets often require an exact brand-specific replacement cartridge.
- Most two-handle faucet repairs need only one valve to be opened and rebuilt.
- Silicone-based plumber’s grease is suitable for faucet seals; petroleum grease may damage rubber components.
- A faucet that still drips after a correct repair may have a damaged valve seat, debris in the valve body, or an incorrect cartridge.
Before You Start
A two-handle bathroom faucet repair is usually a beginner-to-intermediate plumbing task. Allow more time when the faucet is corroded, the handles are seized, or the manufacturer and model are unknown.
| Repair factor | Typical requirement | Important condition |
| Working time | 30-60 minutes | Add 30 minutes for seized or mineral-coated parts |
| Difficulty | Beginner to intermediate | Cartridge identification may be the hardest stage |
| Replacement parts | $3-$40 | Branded ceramic cartridges may cost more |
| Basic tools | $15-$50 if not owned | A handle puller or deep socket may be needed |
| Professional service | Often $120-$350 | Varies by location, access, faucet condition, and minimum callout |
| Full faucet replacement | Commonly $50-$300 before labor | Premium widespread models can cost substantially more |
Tools and materials
Gather the following before shutting off the water:
- Adjustable wrench
- Phillips and flathead screwdrivers
- Hex-key set
- Tongue-and-groove pliers
- Needle-nose pliers
- Clean rags or paper towels
- Silicone plumber’s grease
- Small container for screws
- Penetrating oil for corroded fasteners
- Replacement washer, O-ring, stem, cartridge, or repair kit
- Optional faucet-handle puller
- Optional valve-seat wrench and seat-dressing tool
Cover the drain before removing any screw, clip, or retaining ring. Small faucet parts can disappear through an open pop-up drain within seconds.
What Causes a Two-Handle Bathroom Faucet to Leak?
A two-handle bathroom faucet leaks when pressurized water bypasses the sealing surface inside either the hot or cold valve. The failed component may be a compressed rubber washer, a cut O-ring, a scored cartridge, a damaged ceramic seal, a loose bonnet nut, or a pitted metal valve seat.
Minerals can accelerate the problem. Scale deposits prevent sealing surfaces from meeting evenly, while sediment can scratch cartridge walls or become trapped under ceramic-disc seals. Excessive tightening also causes damage because it crushes washers, deforms seals, and may crack plastic or ceramic components.
The U.S. Environmental Protection Agency states that household leaks collectively waste nearly 1 trillion gallons of water each year. An older EPA WaterSense fact sheet also estimates that a faucet dripping once per second can waste more than 3,000 gallons annually.
Which Side of the Faucet Is Leaking?
The temperature of the dripping water usually identifies the faulty valve. Close both handles, wait until the water in the spout reaches a stable temperature, and touch or collect several drops. Warm or hot water suggests the hot valve is leaking; consistently cold water suggests the cold valve.
When the drip temperature is unclear, close one under-sink supply valve at a time:
- Close the hot supply valve.
- Wait 30-60 seconds.
- Check whether the drip stops.
- Reopen the hot supply.
- Repeat the test with the cold supply.
If closing the hot supply stops the drip, repair the hot handle. If closing the cold supply stops it, repair the cold handle. A drip that continues after either individual valve is closed may indicate that the shutoff valve does not seal completely.
This test avoids unnecessary work. Rebuilding both sides is reasonable when both valves are the same age, but only one valve must usually be opened to stop an isolated spout leak.
What Type of Two-Handle Faucet Do You Have?
Identify the valve type before buying parts. Handle movement provides a useful clue, but the removed internal part gives the most reliable identification.
| Faucet type | Handle movement | Internal mechanism | Most common repair |
| Compression | Several rotations | Threaded stem presses a rubber washer onto a metal seat | Replace washer and O-ring; inspect valve seat |
| Cartridge | Quarter-turn or partial turn | Plastic or brass cartridge aligns internal water passages | Replace cartridge or cartridge seals |
| Ceramic disc | Usually quarter-turn | Polished ceramic plates open and close water ports | Clean seals or replace ceramic cartridge |
| Reverse compression | Several rotations with different stem action | Threaded stem lifts or lowers a sealing washer | Replace washer, gasket, O-ring, and possibly seat |
Handle movement is not conclusive because manufacturers use different internal designs. Remove the valve and match its length, spline count, diameter, retaining method, and hot or cold orientation.
Moen, for example, publishes separate identification and replacement instructions for 1224 and 1234 cartridges used in certain two-handle bathroom faucets. Delta likewise lists specific two-handle stem cartridges according to faucet series and manufacturing configuration.
How to Fix a Leaky Bathroom Faucet With Two Handles
The complete repair has seven stages: isolate the water, remove the faulty handle, expose the valve, extract the mechanism, replace the failed sealing component, reassemble the faucet, and test it under pressure.
Step 1: Shut Off the Water and Release Pressure
Turn the hot and cold shutoff valves under the sink clockwise until they stop. Open both faucet handles afterward to release trapped pressure and drain the remaining water from the spout.
Place a towel inside the vanity. A small amount of water may drain from the valve body when the stem or cartridge is removed.
You will know the water is isolated when: no steady stream flows after both handles are opened.
Common mistake: Trusting a stiff shutoff valve without testing it. An old valve may turn while failing to stop the water completely.
If the under-sink valves do not work, close the home’s main water valve. Do not remove a faucet cartridge while the line remains pressurized.
Step 2: Remove the Leaking Handle
Inspect the handle for a decorative cap, visible top screw, rear set screw, or hidden hex screw. Pry off a decorative hot or cold index cap carefully, then remove the screw underneath.
Pull the handle straight upward. Avoid forceful sideways rocking because lateral pressure can bend the valve stem.
For a seized handle:
- Apply a small amount of penetrating oil around the stem.
- Wait 10-15 minutes.
- Protect the finish with a cloth.
- Pull upward with even pressure.
- Use a faucet-handle puller if the handle remains fixed.
You will know the handle is ready for removal when: its retaining screw is completely free and the handle moves independently of the stem.
Common mistake: Prying against the sink or faucet body. A screwdriver can chip porcelain, scratch the finish, or distort a thin escutcheon.
Step 3: Expose and Document the Valve Assembly
Remove the decorative sleeve, escutcheon, stop tube, or trim ring covering the valve. Take a clear photograph before loosening the retaining hardware.
The photograph should show:
- Cartridge orientation
- Position of clips or stop rings
- Order of washers and spacers
- Direction of any tabs
- Depth of the exposed stem
This record becomes important when hot and cold cartridges have opposite rotations. Installing a valve in the wrong orientation can reverse handle movement or prevent the faucet from closing correctly.
You will know the valve is exposed when: the bonnet nut, packing nut, retaining clip, or cartridge collar is fully visible.
Common mistake: Mixing parts from the hot and cold sides. Keep each side’s components in a separate labeled container.
Step 4: Remove the Stem or Cartridge
Use an adjustable wrench or correctly sized socket to loosen the retaining nut counterclockwise. Hold the faucet body steady when possible so torque is not transferred to the supply tubes below the sink.
For a compression faucet, unscrew the stem assembly from the faucet body. For a cartridge faucet, remove its clip, bonnet nut, or collar and pull the cartridge vertically. Use pliers only on a section that will not be reused.
Do not aggressively twist a plastic cartridge unless the manufacturer’s instructions specify rotation. Twisting can break the upper stem while leaving the lower cartridge shell lodged inside the valve body.
You will know removal is complete when: the entire valve component, including its lower sealing end, is visible outside the faucet.
Common mistake: Losing a small retaining clip. Cover the drain and store the clip immediately.
Step 5: Replace the Failed Sealing Component
Inspect the removed valve under bright light. The correct repair depends on its construction and condition.
| Observed condition | Likely failure | Correct repair |
| Flattened, cracked, or hardened bottom washer | Compression washer no longer seals | Install an identical washer |
| Cut or brittle O-ring around stem | Water bypasses stem or leaks near handle | Replace O-ring and lubricate lightly |
| Grooved or scored cartridge body | Cartridge wall or internal seals are damaged | Replace complete cartridge |
| Torn rubber seat or weak spring | Cartridge inlet cannot seal | Replace seats and springs as a matched set |
| Mineral-coated ceramic seals | Debris prevents full closure | Clean approved components or replace cartridge |
| Pitted metal valve seat | New washer cannot seal against rough surface | Replace or dress the valve seat |
For a compression stem, remove the small screw holding the bottom washer. Install a washer with the same diameter, thickness, profile, and center-hole size. Replace the stem O-ring at the same time when a correct match is available.
Apply a thin film of silicone plumber’s grease to O-rings and moving sealing surfaces. Do not pack grease into water passages.
For a cartridge valve, take the old cartridge to a hardware or plumbing-supply store or identify it through the manufacturer. Compare every dimension. A cartridge that looks similar may have different tabs, port locations, spline geometry, or rotation direction.
Lowe’s repair guidance likewise recommends carrying removed faucet parts to the store for accurate matching and following the faucet manufacturer’s instructions.
You will know the replacement is correct when: it matches the original component in overall length, diameter, tabs, ports, splines, and retaining method.
Common mistake: Buying a “universal” cartridge based only on appearance. Small geometric differences can cause immediate leakage.
Step 6: Reinstall the Valve and Handle
Clean loose sediment from the valve cavity with a damp cloth. Do not scratch the brass or plastic bore with a screwdriver, drill bit, or abrasive tool.
Insert the stem or cartridge in the original orientation. Align all tabs with their corresponding slots. Reinstall the clip, bonnet nut, packing nut, stop ring, sleeve, and handle in reverse order.
Tighten retaining nuts until secure, then stop. A faucet valve requires compression sufficient to seal, not maximum wrench force.
Before installing the decorative cap, operate the handle manually. It should turn smoothly through its expected range and stop decisively in the closed position.
You will know reassembly is correct when: the handle closes in its original direction, sits at the correct height, and does not wobble.
Common mistake: Over-tightening a bonnet nut. Excessive force may crack a cartridge, crush an O-ring, or make the handle difficult to turn.
Step 7: Restore Water, Flush, and Test
Remove the aerator from the end of the spout before restoring water. This prevents loosened scale or installation debris from clogging its screen.
Close both faucet handles. Open each under-sink supply valve slowly while watching the repaired valve, supply connections, and cabinet floor.
Test the faucet in this order:
- Keep both handles closed for one minute.
- Check the spout for dripping.
- Open the repaired handle gradually.
- Run water for 30-60 seconds.
- Close the handle and wait two minutes.
- Inspect around the handle and valve body.
- Reinstall the cleaned aerator.
You will know the repair worked when: the spout remains dry, the handle area stays dry, and the valve operates smoothly without excessive force.
Common mistake: Declaring success immediately after closing the handle. Water remaining inside the spout can produce several normal residual drops, so allow one or two minutes before judging the seal.
Why Does the Faucet Still Drip After Repair?
A faucet that continues dripping after a new washer or cartridge usually has a mismatched part, damaged valve seat, trapped debris, incorrect cartridge orientation, or incomplete closure. Repeated tightening rarely solves these problems and may create additional damage.
| Symptom after repair | Probable cause | Recovery action |
| Drip rate is unchanged | Wrong side repaired or wrong part installed | Repeat supply-isolation test and verify part number |
| Drip is slower but continues | Pitted seat or imperfect washer contact | Inspect and replace or dress valve seat |
| Handle leaks only when open | Damaged upper O-ring or loose packing nut | Replace O-ring or tighten nut slightly |
| Handle turns backward | Hot and cold cartridge orientation reversed | Reinstall cartridge in correct orientation |
| Handle is difficult to move | Nut too tight, dry seals, or mineral deposits | Loosen slightly, clean, and apply silicone grease |
| Flow is weak after repair | Debris trapped in aerator | Remove, rinse, and reinstall aerator |
| Water leaks below the sink | Disturbed supply connection or body leak | Shut water off and inspect connections immediately |
Inspect the valve seat
Compression faucets seal when the rubber washer presses against a metal valve seat inside the faucet body. A washer cannot seal reliably against a seat with grooves, corrosion, or sharp mineral deposits.
Some seats unscrew with a valve-seat wrench. Replace a removable damaged seat with an identical part. A mildly rough nonremovable seat may sometimes be resurfaced with a seat-dressing tool, but removing too much metal can permanently alter the sealing geometry.
Verify cartridge orientation
Many quarter-turn faucets use separate hot and cold cartridges because each handle rotates in a different direction. Confirm the part number and orientation rather than rotating the cartridge until the handle appears visually correct.
Flush debris from the valve body
A grain of sediment trapped beneath a seal can cause an immediate new drip. Shut off the supply, remove the valve again, and clean the cavity. Avoid opening the water with an unrestrained valve body unless the manufacturer specifically provides a flushing procedure.
Common Mistakes and How to Fix Them
Repairing both handles without diagnosing the leak
Repairing both sides doubles the opportunity to break a seized screw or install a part incorrectly. Identify the faulty valve by water temperature or supply isolation first.
Recovery: Re-test each supply independently and focus on the valve that allows the drip.
Reusing an old compressed washer
A hardened washer may look intact but fail to rebound against the valve seat. Turning it over provides only a temporary and unreliable seal.
Recovery: Install a new washer with an exact dimensional match.
Using petroleum-based lubricant
Petroleum grease can swell or degrade certain rubber compounds. It may also contaminate internal components.
Recovery: Clean away the unsuitable grease and apply a minimal amount of silicone plumber’s grease.
Scratching the cartridge bore
A scratched valve bore can damage a new O-ring during installation and create a leak around the cartridge.
Recovery: Inspect the bore carefully. Deep scoring may require replacement of the faucet or valve body.
Forcing corroded parts
Excessive force can twist supply tubes, crack porcelain, or break a cartridge below the gripping surface.
Recovery: Apply penetrating oil, use the correct puller or socket, and stop when the faucet body begins moving.
Ignoring a leaking shutoff valve
A shutoff valve that leaks around its stem or fails to stop water is a separate plumbing defect.
Recovery: Close the main supply and repair or replace the shutoff valve before continuing.
How Much Does a Two-Handle Faucet Repair Cost?
A basic washer-and-O-ring repair may cost less than $10 in parts, while a branded cartridge commonly costs more. The total depends on the faucet model, whether special tools are required, and whether corrosion creates additional work.
| Repair option | Typical parts cost | Best use case | Main limitation |
| Washer and O-ring repair | $3-$12 | Serviceable compression stem | Does not correct a damaged valve seat |
| Seats and springs kit | $5-$20 | Compatible cartridge-style valves | Must match the exact faucet design |
| Replacement stem | $10-$35 | Worn or corroded compression assembly | Spline and thread must match |
| Replacement cartridge | $15-$60 | Scored cartridge or failed internal seals | Often brand and model specific |
| Valve-seat replacement | $5-$25 | Removable pitted compression seat | Requires correct seat wrench |
| Complete faucet replacement | $50-$300+ | Corroded, obsolete, or repeatedly failing faucet | More installation work and possible drain disruption |
Professional pricing varies widely by market. A plumber may charge a minimum service fee even when the actual valve replacement takes less than an hour.
When Should You Replace the Faucet Instead?
Replace the faucet when its valve body is cracked, internal bore is deeply scored, finish is heavily corroded, required parts are obsolete, or multiple repairs approach the price of a new fixture. Replacement is also sensible when shutoff valves, supply lines, drain components, or mounting hardware already require major work.
Use this practical rule: repair a sound faucet when the exact internal part is readily available and costs less than roughly one-third of an acceptable replacement fixture. Consider replacement when uncertainty, corrosion, repeated leaks, and labor make the repair unpredictable.
A WaterSense-labeled replacement may reduce water use compared with an older inefficient faucet. The EPA estimates that replacing older faucets and aerators with WaterSense-labeled models can save an average family about 700 gallons per year.
Variations for Difficult Faucet Repairs
Widespread bathroom faucets
A widespread faucet has separate hot and cold valve bodies connected to a central spout below the sink. Support the valve body from underneath while loosening the upper retaining nut so the hidden supply connection does not twist.
Handles with no visible screws
Some handles thread directly onto an adapter or hide the retaining screw under a lever, rear plug, snap-on cap, or decorative base. Search the manufacturer’s parts diagram before applying force.
Faucets without working local shutoff valves
Close the main water supply and open a lower faucet to relieve pressure. Plan to replace the defective shutoff valves because future maintenance depends on reliable local isolation.
Heavily mineralized components
Soak removable metal trim parts in white vinegar for 30-60 minutes, then rinse and dry them. Do not soak unknown cartridges, plated components, or rubber seals unless the manufacturer confirms chemical compatibility.
When Should You Call a Plumber?
Call a licensed plumber when the shutoff valves do not close, the faucet body moves inside the sink, water appears below the vanity, a cartridge breaks inside the valve body, or corrosion prevents controlled disassembly. Professional help is also appropriate when the home has fragile supply piping or the leak continues after an exact replacement part and valve-seat inspection.
Stop immediately when water cannot be contained. A minor faucet drip is less costly than damage to a vanity, wall cavity, floor, or lower-level ceiling.
Expert Repair Rules
Match the removed component, not the faucet’s appearance. Manufacturers often use different internal cartridges in fixtures with nearly identical external designs.
A new washer requires a sound seat. Replacing rubber repeatedly will not correct a grooved metal sealing surface.
Residual drops are not always a continuing leak. After the handle closes, water remaining in the spout may drain briefly. A true leak produces fresh drops continuously after the spout has emptied.
Frequently Asked Questions
Can I fix a two-handle faucet without turning off the water?
No. Removing a stem or cartridge exposes the pressurized water passage. Close the hot and cold shutoff valves and verify that flow has stopped before disassembly. When the local valves fail, close the home’s main water supply instead of attempting the repair under pressure.
Should I replace both faucet cartridges at the same time?
Replacing both cartridges is optional when only one valve leaks. Replacing the pair can be sensible when both are the same age, access is easy, and the exact parts are available. Diagnose the failed side first because opening a functioning valve creates an additional opportunity for damage or incorrect installation.
Why does my faucet leak around the handle?
Water leaking around a handle normally indicates a worn upper stem O-ring, loose packing or bonnet nut, damaged cartridge seal, or cracked valve component. Tighten the retaining nut only slightly. If the leak continues, shut off the supply and replace the correct seal or cartridge.
Can I use plumber’s tape on a faucet cartridge?
Plumber’s tape is generally not applied to a cartridge body, O-ring, or compression stem unless the manufacturer specifically requires it. These components seal through washers, gaskets, O-rings, or precision surfaces. Tape can obstruct insertion, distort alignment, or break loose inside the valve.
Why is the faucet handle stiff after replacing the cartridge?
A stiff handle may result from an over-tightened retaining nut, a dry O-ring, mineral deposits, incorrect cartridge alignment, or a mismatched replacement. Shut off the water, inspect the cartridge orientation, clean the valve cavity, apply silicone plumber’s grease sparingly, and retighten the nut without excessive force.
How long should a faucet cartridge last?
Cartridge life depends on water quality, operating frequency, water pressure, material quality, and sediment exposure. A cartridge may function for many years, but hard water and debris can shorten its service life. Cleaning the aerator and addressing excessive pressure can reduce stress on faucet components.
Conclusion
Learning how to fix a leaky bathroom faucet with two handles begins with accurate diagnosis. Identify the leaking side, determine the valve type, remove the internal mechanism carefully, and install an exact replacement washer, seal, stem, or cartridge.
Test the faucet slowly after reassembly. When a correct new part does not stop the drip, inspect the valve seat, cartridge orientation, valve-body condition, and supply pressure before applying more force. Replace the faucet or call a plumber when corrosion, obsolete parts, failed shutoffs, or body damage makes a controlled repair unlikely.