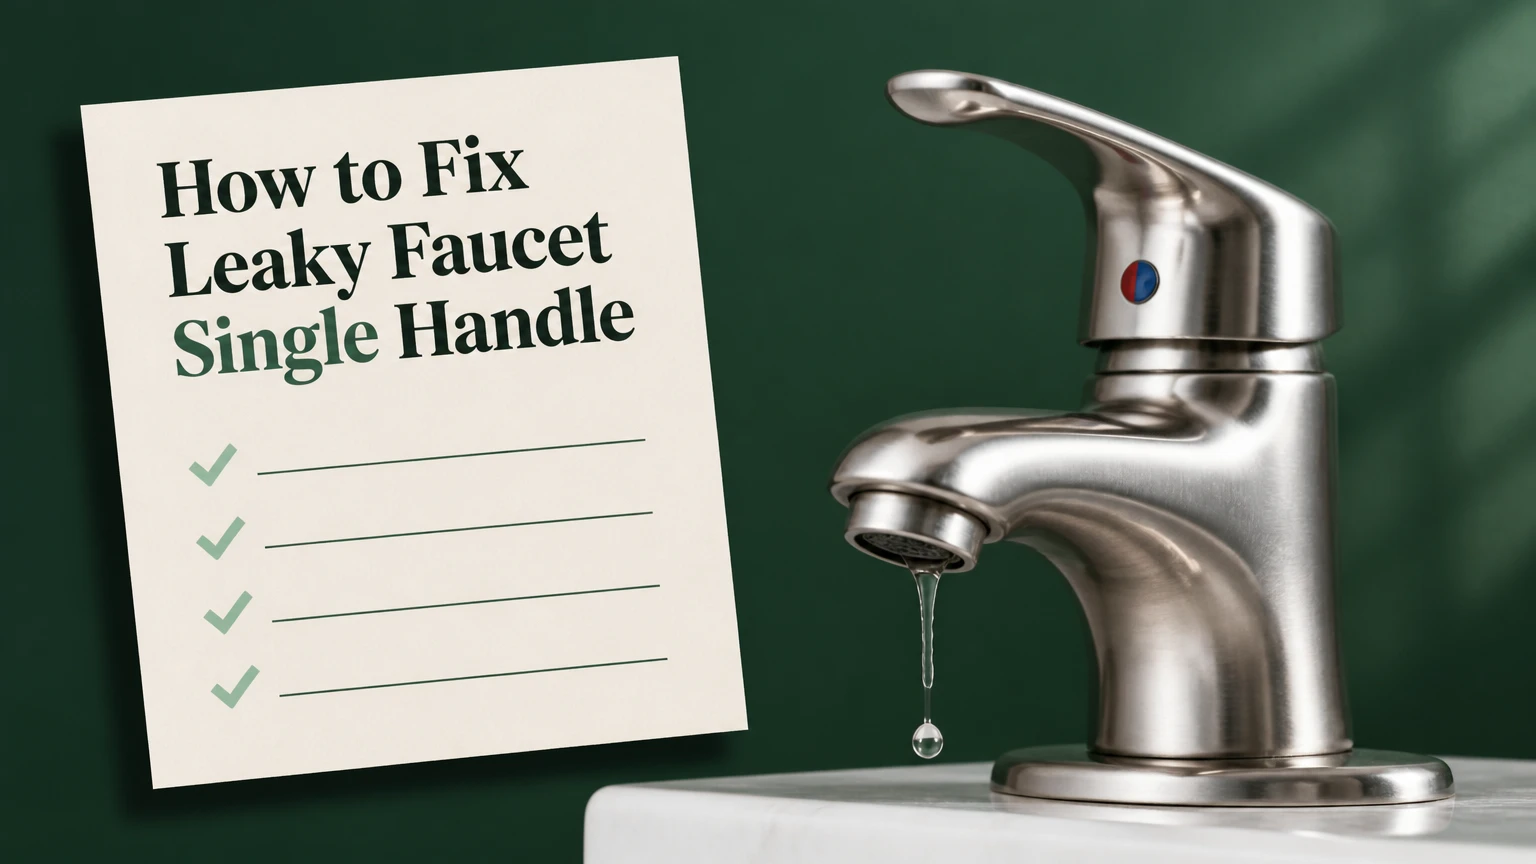
To fix a leaky single-handle faucet, shut off both water supplies, identify whether the faucet uses a cartridge, ball, or ceramic disc mechanism, and replace the worn sealing component. Most repairs take 30-60 minutes, but accurate part identification determines whether the faucet stops leaking after reassembly.
The EPA WaterSense program reports that a faucet dripping once per second can waste more than 3,000 gallons of water per year. Fixing the internal valve, seats, springs, seals, or O-rings stops that waste and prevents staining, cabinet damage, and mineral buildup.
Key Facts at a Glance
- A continuous drip from the spout usually indicates a worn cartridge, valve, seat, spring, or ceramic inlet seal.
- A leak beneath the handle usually points to cartridge O-rings, a loose retaining nut, debris, or a worn cam seal.
- Most single-handle faucet repairs cost $3-$50 in parts and take 30-60 minutes.
- Cartridge, ball, and ceramic disc faucets require different repair parts that are rarely interchangeable.
- Petroleum jelly and petroleum-based lubricants can damage rubber seals; use silicone plumber’s grease.
- A badly corroded valve body may continue leaking even after new internal parts are installed.
Before You Start
A successful repair depends more on matching the replacement part than on applying force. Photograph each layer during disassembly, keep components in removal order, and take the old cartridge or valve assembly to the hardware store when the model number is unavailable.
| Repair factor | Typical requirement | Practical note |
| Time | 30-60 minutes | Add 30 minutes for a seized cartridge |
| Difficulty | Beginner to intermediate | Ball faucets contain more loose parts |
| Parts cost | $3-$50 | Brand-specific cartridges cost more |
| Professional repair | $150-$350 typical | Varies by access, location, and faucet model |
| Main tools | Allen keys, screwdriver, wrench, pliers | Cartridge puller may be required |
| Downtime | 45-90 minutes | Longer if replacement parts are unavailable |
Tools and Materials
Prepare an adjustable wrench, Allen wrench set, flat screwdriver, Phillips screwdriver, tongue-and-groove pliers, needle-nose pliers, utility knife, old toothbrush, white vinegar, clean rags, silicone plumber’s grease, and the correct repair kit.
A cartridge faucet may also require a cartridge puller. A ball faucet usually needs matching seats, springs, cam packing, and possibly a new ball. A ceramic disc faucet may require inlet seals or a complete ceramic cylinder.
Where Is the Faucet Leaking?
The visible leak location is the fastest diagnostic clue. Dry the faucet completely, wrap separate pieces of paper towel around the handle, spout base, supply connections, and countertop opening, then run and shut off the faucet while watching which towel becomes wet first.
| Leak location | When water appears | Most likely cause | First repair |
| Spout tip | Continues after shutoff | Worn cartridge, valve, seats, or springs | Replace internal control parts |
| Under handle | While running or after shutoff | Cartridge O-rings, cam seal, debris | Service cartridge or upper seals |
| Spout base | Only while water runs | Worn swivel-spout O-rings | Replace spout seals |
| Countertop base | During faucet use | Water tracking from handle or body | Trace source before removing faucet |
| Cabinet below | Supply turned on | Loose hose, shutoff, or faucet connection | Tighten or replace connection |
| Brief spout drip | Stops after 1-2 minutes | Residual water or aerator restriction | Clean aerator before disassembly |
Kohler distinguishes a temporary spout drip from a continuous leak. A brief drip may come from debris or mineral buildup in the aerator, while an all-day drip after shutoff usually indicates a worn valve or cartridge.
Which Type of Single-Handle Faucet Do You Have?
Single-handle faucets usually use a cartridge, ball, or ceramic disc mechanism. Identify the design before buying parts because visually similar cartridges can differ in diameter, length, tab position, stem shape, and inlet-port arrangement.
| Faucet type | Handle movement | Internal clues | Common failure | Typical repair |
| Cartridge | Pulls up and rotates | Cylindrical plastic or brass unit | O-rings or internal cartridge wear | Replace cartridge |
| Ball | Joystick-like movement | Rounded ball, cam, seats, springs | Worn seats, springs, or cam packing | Install ball repair kit |
| Ceramic disc | Smooth quarter-turn motion | Wide cylinder with ceramic discs | Debris, inlet seals, cracked discs | Clean or replace cylinder |
| Proprietary valve | Model-specific movement | Unique molded housing | Internal seals or complete valve | Use manufacturer part diagram |
How to Identify the Brand and Model
Look for a logo on the handle, faucet base, aerator, supply label, or underside of the sink. Search the model number before removing parts because the manufacturer’s diagram may show the correct cartridge, retaining clip, seals, and disassembly order.
When no number is visible, photograph the complete faucet and removed component beside a ruler. Compare the stem profile, body length, port pattern, alignment tabs, and retaining method, not only the color and general shape.
Step 1: Shut Off the Hot and Cold Water
Turn both under-sink shutoff valves clockwise until they stop. Open the faucet fully and move the handle through both temperature positions to release pressure and verify that water flow has stopped.
You will know the supplies are closed when the flow reduces to a few residual drops and then stops. If water continues flowing steadily, the shutoff valve is not sealing.
Do not force an old valve with pliers. A corroded valve stem may snap and create a larger leak. Shut off the home’s main water supply when either fixture valve fails to close securely.
Step 2: Protect the Sink and Record the Assembly
Close the drain stopper or cover the drain with a rag. Small set screws, retaining clips, springs, and seals can disappear into the drain within seconds.
Place a folded towel in the basin to protect the finish and catch dropped parts. Take one photograph before removing each layer, then arrange components from left to right in disassembly order.
Success means every removed washer, clip, nut, spacer, and seal has a known position. Guessing during reassembly is a common cause of reversed cartridges and persistent leaks.
Step 3: Remove the Single Faucet Handle
Find the handle screw beneath a red-blue index cap, rear access hole, top button, or decorative cover. Pry the cover gently with a thin screwdriver, then loosen the screw using the correct Allen key or screwdriver.
Back out a set screw only far enough to release the handle unless the design requires complete removal. Pull the handle straight off while rocking it slightly.
If the handle is stuck, apply white vinegar around the stem to loosen mineral deposits and wait 10-15 minutes. Avoid aggressive prying against chrome, brushed nickel, or painted finishes.
Step 4: Remove the Cap and Retaining Hardware
Unscrew the decorative dome, bonnet nut, collar, or retaining ring that secures the internal valve. Wrap finished surfaces with a cloth before using pliers or an adjustable wrench.
Some cartridge faucets use a U-shaped retaining clip instead of a threaded nut. Pull the clip straight out with needle-nose pliers and store it separately.
The valve should remain centered and undamaged after the retainer is removed. Stop if the faucet body twists below the countertop, because continued force may loosen supply connections or damage mounting hardware.
Step 5: Repair a Ball-Type Faucet
A ball faucet usually leaks because its rubber seats and small springs no longer press firmly against the rotating ball. Remove the cap, cam, cam washer, and ball, then lift out both seats and springs with an Allen key or small screwdriver.
Install each new spring with the wide end facing down into the faucet body and the narrow end entering the rubber seat. Delta’s repair guidance specifies this orientation for its common seat-and-spring assemblies.
Inspect the ball for grooves, corrosion, or scratches. Replace it when damage crosses a sealing surface. Reinstall the ball with its alignment pin or slot in the original position, followed by the cam washer and cam.
You will know the assembly is seated correctly when the ball moves smoothly without lifting out of the housing. A backward spring, tilted seat, or misaligned ball usually causes immediate dripping.
Step 6: Replace a Cartridge-Type Faucet
Grip the exposed cartridge stem and pull straight upward. Avoid twisting unless the manufacturer specifically directs rotation because alignment tabs or plastic ears may break inside the faucet body.
A mineral-bound cartridge may require a manufacturer-compatible cartridge puller. Tighten the puller evenly and extract the cartridge in controlled increments rather than rocking the faucet body.
Compare the old and new cartridges side by side. Confirm the overall length, stem shape, port pattern, tabs, O-ring locations, and retaining groove before installation. Moen notes that its cartridges are not universally interchangeable, even within the same brand.
Apply a thin film of silicone plumber’s grease to the replacement cartridge’s rubber O-rings. Insert the cartridge in the documented orientation and align all tabs before reinstalling the clip or bonnet nut.
Success means the cartridge sits fully flush and the retaining clip enters without force. If the clip will not align, the cartridge is not fully seated or is the wrong part.
Step 7: Service a Ceramic Disc Faucet
Remove the retaining screws or nut and lift the ceramic disc cylinder vertically from the faucet body. Inspect the rubber inlet seals beneath the cylinder for distortion, cuts, embedded grit, or mineral deposits.
Clean loose scale from the faucet cavity using white vinegar and a soft toothbrush. Do not scrape polished ceramic surfaces with metal tools because a scratch can prevent the discs from sealing.
Replace damaged inlet seals when the manufacturer supplies them separately. Replace the complete cylinder when the discs are cracked, chipped, or still leak after cleaning.
Position the cylinder exactly over its inlet ports and alignment points. Tighten retaining screws evenly, alternating between screws, to avoid tilting or cracking the assembly.
Step 8: Reassemble Without Over-Tightening
Reinstall the retaining clip, nut, collar, cap, handle, and decorative cover in reverse order. Tighten threaded retainers until snug, then stop.
Over-tightening can distort cartridge seals, crack plastic housings, bind the handle, or damage ceramic components. Under-tightening can allow water to escape around the valve.
Move the handle through its full range before turning the water back on. It should operate smoothly without grinding, severe resistance, or excessive looseness.
Step 9: Restore Water and Test the Repair
Open the cold shutoff valve slowly, then open the hot valve. Watch the handle base, faucet body, supply connections, and cabinet below while pressure returns.
Run the faucet for 60 seconds to flush air and loose debris. Move the handle through hot, cold, low-flow, and full-flow positions, then shut it off and observe the spout for at least two minutes.
A successful repair produces no continuous spout drip, no moisture under the handle, and no water below the sink. Recheck the cabinet after 10 minutes because a slow supply leak may take time to appear.
Common Mistakes and How to Fix Them
Installing the Wrong Cartridge
A cartridge that looks correct may have different tabs, port geometry, or dimensions. Remove it and compare every feature with the original or verify the part through the manufacturer’s diagram.
Reversing Hot and Cold Positions
A cartridge installed 180 degrees out of position may reverse the temperature direction. Shut off the water, remove the handle and retainer, rotate the cartridge as directed, and reinstall it.
Using the Wrong Lubricant
Petroleum jelly, automotive grease, and penetrating oil can soften or swell faucet seals. Clean the affected parts and use only silicone-based plumber’s grease approved for potable-water fixtures.
Tightening the Bonnet Nut Too Much
A handle that becomes stiff after repair usually indicates excessive compression. Shut off the water and loosen the retaining nut slightly until movement is smooth and no leak appears.
Leaving Debris in the Valve Body
Sediment beneath a new seat, seal, or cartridge can create an immediate leak. Remove the component, flush or wipe the cavity, inspect the sealing surface, and reinstall clean parts.
Misdiagnosing Water at the Faucet Base
Water leaking beneath the handle can travel down to the countertop and resemble a base leak. Moen recommends isolating the handle area with a paper towel before assuming the faucet’s mounting seal has failed.
Why Is the Faucet Still Leaking After Repair?
A faucet that still leaks usually has an incorrect part, damaged sealing surface, installation error, or second leak source. Repeating the same repair without identifying the exact moisture path may damage the faucet and waste additional parts.
| Post-repair symptom | Likely cause | Corrective action |
| Continuous spout drip | Wrong cartridge or damaged valve seat | Verify part and inspect body |
| Leak under handle | Pinched O-ring or loose retainer | Re-seat seals and tighten correctly |
| Stiff handle | Over-tightened bonnet or dry seals | Loosen slightly and lubricate |
| Reversed temperature | Cartridge installed backward | Rotate to correct orientation |
| Reduced water flow | Aerator clogged with repair debris | Remove and rinse aerator |
| Leak below sink | Disturbed supply connection | Tighten or replace connector |
| Faucet body rotates | Loose mounting hardware | Secure faucet beneath countertop |
| New parts fail immediately | Corroded or scored faucet body | Replace complete faucet |
Kohler identifies debris on seals and O-rings as a common cause of leakage under the handle while the faucet is running. A continuous leak while the faucet is off is more likely to involve the valve or cartridge.
How Much Does a Single-Handle Faucet Repair Cost?
A DIY repair typically costs $3-$50 for common internal parts. Professional faucet repair commonly costs more because the total includes diagnosis, travel, labor, part sourcing, corrosion removal, testing, and possible shutoff-valve work.
| Repair option | Typical cost | Typical time | Best use |
| Seats and springs | $3-$8 | 30-45 minutes | Ball faucet dripping from spout |
| O-ring kit | $2-$10 | 30-60 minutes | Leak around handle or spout base |
| Replacement cartridge | $15-$50 | 30-60 minutes | Cartridge faucet leaking continuously |
| Complete ball kit | $12-$25 | 45-75 minutes | Multiple worn ball-faucet parts |
| Cartridge puller | $15-$35 | Adds 10-20 minutes | Mineral-seized cartridge |
| Professional repair | $150-$350 typical | 15-60 minutes onsite | Corrosion, uncertain diagnosis, failed valves |
| New faucet installation | $150-$600+ total | 1-3 hours | Obsolete, damaged, or badly corroded faucet |
These are typical ranges rather than fixed national prices. Faucet brand, local labor rates, countertop access, seized components, and emergency service can raise the final amount.
Should You Repair or Replace the Faucet?
Repair the faucet when the body is structurally sound, the finish is acceptable, and an exact replacement component is available. Replace it when corrosion, cracks, unavailable parts, or repeated internal failures make another repair unreliable.
| Condition | Repair | Replace |
| Faucet under 10 years old | Usually practical | Only if body is damaged |
| One failed cartridge | Replace internal part | Rarely necessary |
| Heavy internal corrosion | Unreliable sealing | Usually preferred |
| Cracked faucet body | Cannot be sealed dependably | Required |
| Obsolete cartridge | Temporary adaptation risky | Preferred |
| Repeated leaks within one year | Investigate water quality first | Consider replacement |
| Finish badly deteriorated | Mechanically repairable | Better long-term value |
| Mounting hardware rusted solid | Difficult disassembly | Often more efficient |
A high-quality faucet with an accessible cartridge can remain serviceable for many years. A cheap or obsolete faucet may cost more in labor and repeat visits than a complete replacement.
When Should You Call a Plumber?
Call a plumber when the fixture shutoff valves do not work, the faucet body is cracked, the cartridge breaks during removal, water leaks inside the wall, or corrosion prevents safe disassembly. Professional help is also appropriate when you cannot identify the model and no compatible replacement part can be confirmed.
Shut off the main water supply immediately when a valve stem breaks, a supply hose ruptures, or uncontrolled water enters the cabinet. Protecting the property takes priority over completing the faucet repair.
Expert Repair Insights
Diagnose Before Buying Parts
A drip from the spout and a leak under the handle may involve different surfaces of the same cartridge. Confirm when and where water appears before ordering a component.
Do Not Blame Every Brief Drip on the Cartridge
A high-arched spout can release trapped water briefly after shutoff. Clean the aerator and observe the duration before opening the valve body.
Hard Water Can Shorten Repair Life
Mineral deposits can seize cartridges, abrade seals, clog aerators, and prevent new components from seating. Repeated leaks across several fixtures may justify testing hardness and treating the water rather than repairing faucets one at a time.
Frequently Asked Questions
Can I fix a single-handle faucet without knowing the brand?
You can disassemble and inspect the faucet, but buying the correct internal part is difficult without identifying the brand or matching the old component. Photograph the faucet, measure the cartridge, note the retaining method, and take the original part to a plumbing supplier rather than choosing by appearance alone.
Why does my faucet drip only after I turn it off?
A few delayed drops may be residual water draining from the spout or aerator. A drip that continues for several minutes or throughout the day indicates that the internal valve is not sealing, usually because of a worn cartridge, damaged seats and springs, debris, or deteriorated ceramic inlet seals.
Can I replace only the O-rings on a faucet cartridge?
Replace only the O-rings when the cartridge body, stem, and internal control surfaces remain undamaged and the manufacturer supplies the correct seals. Replace the complete cartridge when it is cracked, stiff, deeply worn, unavailable for inspection, or has already failed after an O-ring repair.
Why is the single-handle faucet hard to turn after repair?
The retaining nut may be over-tightened, the cartridge may be misaligned, an O-ring may be pinched, or the seals may lack silicone plumber’s grease. Shut off the water, reopen the assembly, inspect the cartridge orientation, lubricate approved rubber surfaces lightly, and tighten the retainer only until snug.
Can vinegar damage faucet parts?
Short contact with diluted white vinegar is generally useful for dissolving mineral deposits on removable metal parts and aerators. Avoid long soaking of plated finishes, rubber components, natural stone, or unknown coatings. Never use abrasive tools on ceramic discs or polished valve surfaces.
How long should a faucet cartridge last?
A cartridge commonly lasts several years, but actual service life depends on water hardness, sediment, pressure, usage, installation quality, and cartridge construction. Repeated early failure can indicate excessive water pressure, abrasive debris, poor part compatibility, or damage inside the faucet body.
Conclusion
Learning how to fix a leaky faucet single handle begins with locating the leak and identifying the valve design. Shut off both supplies, document the assembly, replace the exact cartridge, seats, springs, seals, or ceramic unit, then restore pressure gradually and test every possible leak point.
Most repairs are manageable in 30-60 minutes when the correct part is available. Stop and replace the faucet or call a plumber when the valve body is cracked, badly corroded, unsupported by replacement parts, or connected to shutoff valves that cannot safely isolate the water.