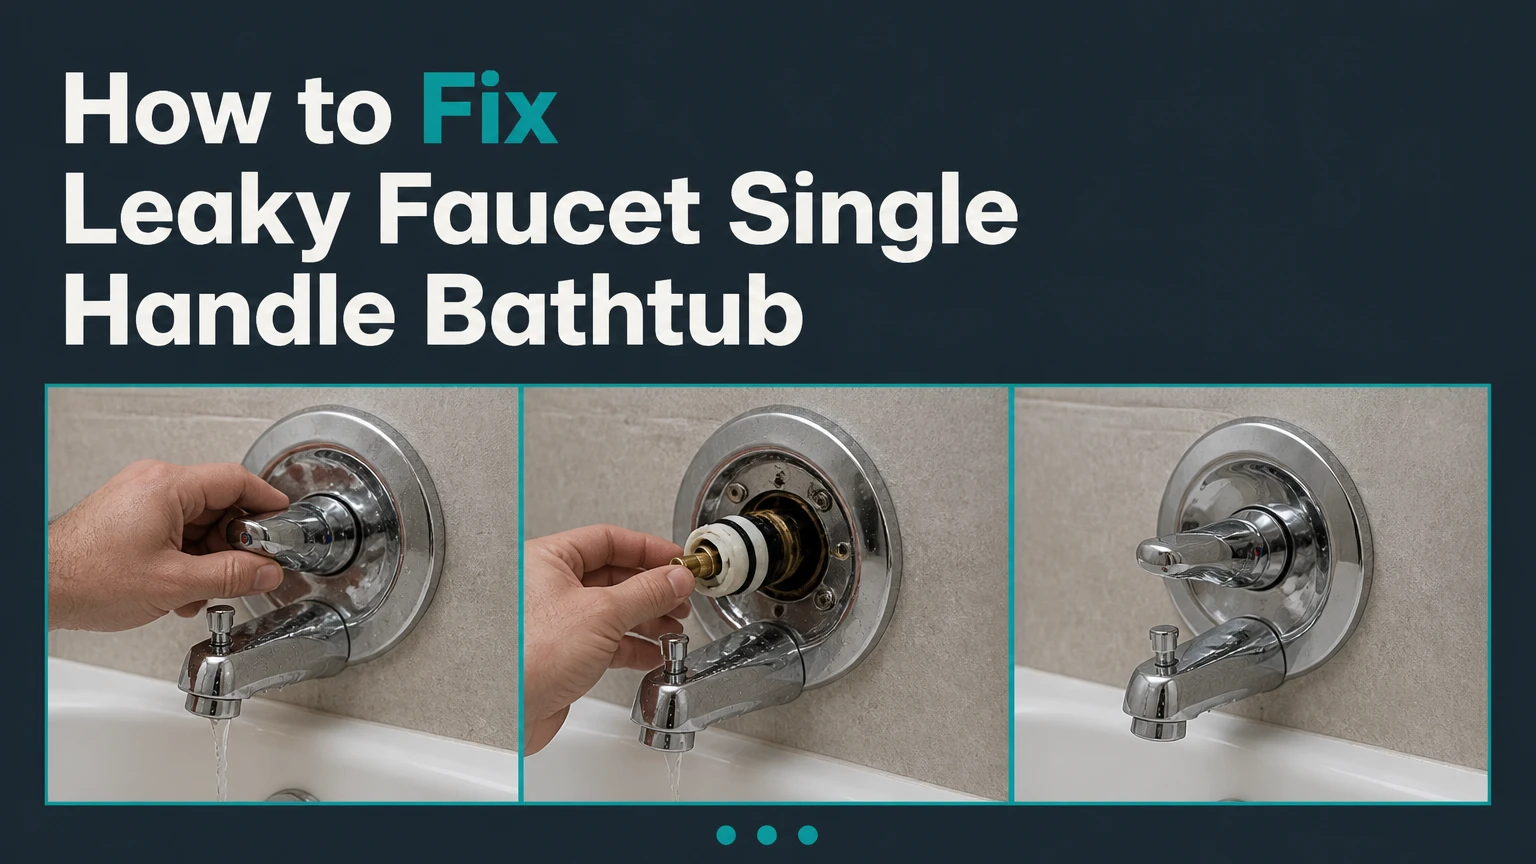
To fix a leaky single-handle bathtub faucet, shut off the water, remove the handle and trim, identify the valve mechanism, and replace the worn cartridge, seats, springs, or seals. Most repairs take 45-90 minutes, but correct part identification determines whether the repair succeeds without damaging the valve inside the wall.
Key Facts at a Glance
- A drip from the tub spout while the handle is off usually indicates an internal sealing failure.
- A leak from behind the handle more often involves a cartridge O-ring, packing seal, bonnet, or damaged valve component.
- Most modern single-handle tub and shower valves use a replaceable cartridge.
- Older Delta-style valves may use a ball, rubber seats, and springs instead of a one-piece cartridge.
- The water supply must remain off until the retaining clip or bonnet is fully reinstalled.
- A cartridge that requires extreme pulling force should be loosened with the correct tool, not yanked from the plumbing.
The U.S. Environmental Protection Agency states that “one drip per second can waste more than 3,000 gallons per year.” That makes a persistent tub-spout drip more than an annoyance, especially when the leak continues around the clock.
Before You Start
Plan for 45-90 minutes, moderate DIY difficulty, and approximately $15-$80 for ordinary replacement parts and supplies. A corroded or seized cartridge can extend the job, while a damaged valve body or inaccessible plumbing may require professional repair.
| Requirement | Typical amount or specification | Purpose |
| Replacement cartridge or repair kit | One exact-match unit | Restores the internal seal |
| Hex keys | Commonly 1/8 to 3/16 inch | Removes many lever-handle screws |
| Screwdrivers | Phillips and flathead | Removes caps, screws, and trim |
| Needle-nose pliers | One pair | Extracts retaining clips |
| Adjustable or tongue-and-groove pliers | One pair | Removes bonnet nuts or sleeves |
| Silicone plumber’s grease | Small tube | Lubricates compatible O-rings |
| Cartridge puller or twisting tool | Model-specific | Loosens a seized cartridge |
| Towels and drain cover | Two or more towels | Protects the tub and catches parts |
| White vinegar | About 1 cup | Softens removable mineral deposits |
Do not use petroleum jelly on faucet seals unless the manufacturer explicitly permits it. Petroleum products can damage some rubber compounds. Use silicone grease labeled for plumbing fixtures and potable-water applications.
Identify the leak location first
A correct diagnosis prevents unnecessary disassembly. Dry the spout, handle, escutcheon plate, and surrounding wall, then observe where fresh water first appears.
| Leak symptom | Most likely area | Normal repair direction |
| Tub spout drips when valve is off | Cartridge, seats, springs, or ceramic seals | Replace internal sealing parts |
| Water emerges behind the handle | Stem O-ring, packing, cartridge, or bonnet | Inspect and replace cartridge or seals |
| Water appears around the wall plate | Trim seal, valve connection, or hidden leak | Remove trim and inspect carefully |
| Showerhead drips only after bathing | Water draining from shower arm | Wait several minutes before diagnosing |
| Tub spout and showerhead run together | Diverter or excessive flow restriction | Inspect spout diverter and supply conditions |
| Handle is difficult to turn | Scale, swollen seals, or failing cartridge | Replace cartridge and clean valve body |
A few minutes of drainage from a showerhead after use can be normal. Continuous dripping long after the valve is closed indicates a sealing problem.
Determine the faucet brand and valve model
Look for a logo on the handle, escutcheon, tub spout, instruction label, or access-panel documentation. Photograph the installed cartridge orientation before removing anything, and take the old part to a plumbing supplier when the model remains uncertain.
Do not select a cartridge by appearance alone. Similar cartridges can differ in length, port position, stem shape, retaining method, or manufacturing date. Delta’s official parts system, for example, separates several 13, 14, 17, 17T, 1500, and older valve families because their cartridges and seals are not interchangeable.
Which Type of Single-Handle Valve Do You Have?
Most single-handle bathtub faucets use a cartridge, ball valve, or ceramic sealing assembly. The retaining hardware and repair part change with the mechanism.
| Valve type | Identification clues | Common failure | Typical repair |
| Pressure-balancing cartridge | Long cylindrical plastic or brass part | Worn seals, debris, mineral scale | Replace complete cartridge |
| Standard flow cartridge | Pull-and-turn or rotate-only operation | O-ring or cartridge wear | Replace complete cartridge |
| Ball valve | Rounded ball beneath a cap and cam | Hardened seats and weak springs | Replace seats, springs, and damaged ball |
| Ceramic-disc assembly | Compact precision cartridge | Debris, cracked discs, damaged seals | Replace cartridge or ceramic components |
| Stem-style mixing valve | Distinct stem or washer assembly | Washer or stem seal wear | Rebuild or replace stem |
Moen’s official instructions for its 1222 Posi-Temp valve use a U-shaped retaining clip and a cylindrical cartridge. The cartridge must be loosened, removed, replaced in the correct orientation, and secured before the water is restored.
Older Delta single-lever designs may use rubber seats, springs, a cam, packing, and a stainless-steel ball. Delta identifies its RP3614 and related kits for certain non-DST single-handle leaks, while newer Monitor and MultiChoice valves use model-specific cartridges.
How to Fix Leaky Faucet Single Handle Bathtub
The standard repair follows eight stages: isolate the water, remove the handle, expose the valve, release the cartridge, extract the failed component, clean the valve body, install the replacement, and test under pressure. Stop if the valve body moves inside the wall, the plumbing twists, or hidden water damage becomes visible.
Step 1: Shut Off the Water Supply
Turn off the local tub and shower shutoff valves when an access panel provides them. Otherwise, close the home’s main water shutoff, then open a lower-level faucet and operate the tub handle to release pressure.
Confirm that the flow has stopped completely. A weak stream that continues indefinitely can mean the main valve is not fully closed or does not seal properly.
Cover the tub drain before removing small parts. Manufacturer repair instructions commonly recommend this because retaining clips, screws, and washers can fall directly into an open drain.
Success checkpoint: No pressurized water flows when the tub valve is opened.
Common mistake: Assuming the water is off because the first stream stopped. Wait until residual pressure has discharged.
Step 2: Remove the Faucet Handle
Find the handle screw beneath a decorative cap, behind a small plug button, or underneath the lever. Use the exact hex key or screwdriver size to avoid stripping the fastener.
Pull the handle straight from the valve stem. If mineral deposits hold it in place, apply a warm vinegar-dampened cloth around the joint for 15-30 minutes. A handle puller is safer than prying against tile or bending the stem.
Arrange removed parts in order on a towel. Photograph each layer before proceeding.
Success checkpoint: The handle comes off without bending the stem or damaging the wall finish.
Common mistake: Twisting aggressively before confirming that every set screw has been loosened.
Step 3: Remove the Trim and Stop Tube
Slide off the decorative sleeve or stop tube. Remove the escutcheon screws only when the plate blocks access to the cartridge, retaining clip, or bonnet nut.
Cut old caulk carefully with a plastic scraper or utility knife held away from finished surfaces. Do not pull hard on a sealed plate because tile, grout, waterproofing, or the plate itself may crack.
Inspect behind the escutcheon with a flashlight. Active dripping from a supply joint, valve body, or pipe connection is not a routine cartridge leak.
Success checkpoint: The cartridge retainer is visible and the valve remains rigid inside the wall.
Common mistake: Removing more trim than necessary and disturbing an intact wall seal.
Step 4: Remove the Retaining Clip or Bonnet Nut
Use needle-nose pliers to pull a U-shaped retaining clip straight upward. For valves secured by a threaded bonnet, support the valve and loosen the bonnet counterclockwise with an appropriate wrench.
Never turn on the water while the cartridge is unsecured. Moen specifically warns that water cannot be restored if the retaining clip is missing, damaged, or unable to seat correctly.
Place the clip or bonnet where it cannot fall behind the wall. Inspect it for cracks, severe corrosion, distortion, or damaged threads.
Success checkpoint: The retainer is removed without shifting the entire valve body.
Common mistake: Forcing a clip that is still loaded by a cartridge that is not fully seated or properly aligned.
Step 5: Extract the Old Cartridge or Valve Assembly
Attach the manufacturer’s twisting tool or cartridge puller when available. Rotate the cartridge only as instructed for that model, then pull it straight from the valve body.
Moen’s 1222 instructions call for loosening the cartridge with the supplied twisting tool before pulling the stem with pliers. Its 1225 instructions similarly use a partial rotation to break the cartridge free from deposits.
Use progressive force:
- Grip the stem and apply steady outward pressure.
- Use the supplied twisting tool to break the mineral bond.
- Install a compatible cartridge puller.
- Pause and reassess if the valve or piping moves.
For a ball valve, remove the cap, cam, packing, and ball in sequence. Extract the rubber seats and springs with a small screwdriver or pick, noting spring orientation.
Success checkpoint: The internal part comes out intact and the brass valve body does not rotate.
Common mistake: Rocking the cartridge violently from side to side, which can damage the valve bore or stress concealed plumbing.
Step 6: Clean and Inspect the Valve Body
Wipe the valve bore with a soft cloth, nylon brush, and a small amount of white vinegar. Remove loose scale and debris without scratching the sealing surfaces.
Do not grind the inside with sandpaper, files, drill brushes, or metal picks. A deep scratch in the valve bore can create a leak path that a new cartridge cannot seal.
Flush the body only when you can control the water safely. Follow the valve manufacturer’s instructions, use a towel or shield over the opening, and keep hands away from the pressurized outlet.
Moen recommends cleaning and flushing the valve body before installing several replacement cartridges.
Success checkpoint: The bore feels smooth, contains no loose fragments, and shows no major scoring or corrosion.
Common mistake: Leaving a piece of old O-ring or mineral debris behind the new seal.
Step 7: Install the New Cartridge or Repair Kit
Compare the replacement with the removed part before installation. Match the overall length, port arrangement, retaining grooves, stem profile, tabs, and hot-cold markings.
Apply a thin, even coating of silicone plumber’s grease to the approved rubber surfaces. Excess grease can collect debris, so the seals should look lubricated rather than packed.
Insert the cartridge in the manufacturer-specified orientation. On a Moen 1222 cartridge, the H and C marking is positioned upward during installation. Other models use tabs, notches, flats, or alignment slots.
Push the cartridge fully into the valve body, then reinstall the clip or bonnet. A retaining clip should slide into its groove without hammering.
Success checkpoint: The cartridge sits flush, the retainer seats completely, and the stem moves through its normal range.
Common mistake: Using the handle screw to pull a partially seated cartridge into position.
Step 8: Restore the Water and Test
Leave the trim accessible during the first pressure test. Close the faucet, restore the water slowly, and inspect the cartridge stem, bonnet, retaining area, and valve body with a dry tissue.
Operate the faucet through cold, mixed, and hot positions. Then close it and watch the tub spout for at least five minutes. A few residual drops may leave the spout, but a continuing rhythmic drip means the valve is not sealing.
Verify that temperature direction and maximum handle travel are correct. Reversed hot and cold usually indicates an orientation problem or a stem that must be rotated according to the manufacturer’s procedure.
Reinstall the sleeve, escutcheon, and handle after the valve remains dry. Renew the trim seal where required, while leaving any manufacturer-specified drainage opening unobstructed.
Success checkpoint: The valve operates smoothly, remains dry behind the trim, and produces no persistent spout drip when off.
What If the Cartridge Is Stuck?
A stuck cartridge should be loosened with controlled rotation and a model-compatible puller. Excessive side loading can damage the valve body or move soldered and threaded connections inside the wall.
Mineral accumulation often bonds the cartridge seals to the brass bore. A twisting tool breaks that bond more safely than raw pulling force. Moen includes this loosening stage in its official 1222 and 1225 cartridge procedures.
Stop the repair when:
- The brass valve body rotates or shifts.
- Copper or PEX connections flex visibly.
- The cartridge stem breaks off.
- The valve bore cracks or becomes deeply scored.
- Part of the cartridge remains lodged inside.
- Access requires cutting waterproofed tile without a repair plan.
A plumber may remove the cartridge with professional extraction tools or replace the valve through a rear access wall. That is safer than turning a routine seal repair into concealed water damage.
Common Mistakes and How to Fix Them
| Problem after repair | Likely cause | Corrective action |
| Spout still drips | Wrong part, debris, torn seal, or damaged bore | Remove, inspect, flush, and install exact OEM-compatible part |
| Water leaks behind handle | Pinched O-ring, loose bonnet, or stem-seal failure | Depressurize, reseat seals, and inspect retainer |
| Hot and cold are reversed | Cartridge or stem orientation is incorrect | Rotate according to model instructions |
| Handle will not reinstall | Stem position, adapter, or trim stack is wrong | Compare with disassembly photos and parts diagram |
| Handle is hard to turn | Cartridge is misaligned or seals lack approved lubricant | Remove, inspect, lubricate lightly, and reinstall |
| Retaining clip will not seat | Cartridge is not fully inserted | Do not force clip, realign and press cartridge flush |
| Flow is weak after repair | Debris entered ports or cartridge is incompatible | Flush valve and verify exact part number |
| Wall plate leaks during use | Failed trim seal or concealed valve leak | Remove trim, dry area, and identify the source |
Installing the cartridge backward
Incorrect orientation can reverse temperature direction, restrict handle movement, or prevent the retainer from fitting. Use the manufacturer’s markings rather than assuming every cartridge follows the same pattern.
Moen’s 1225 guidance notes that hot and cold may be corrected by rotating the stem 180 degrees on applicable models. That procedure should not be generalized to unrelated valve designs.
Replacing only visible O-rings
External O-rings may not be the sealing surfaces responsible for a spout drip. Pressure-balancing cartridges contain internal seals that are difficult or impractical to rebuild accurately.
Replace the complete cartridge when the manufacturer supplies it as the normal service component. Use a seats-and-springs kit only for a valve specifically designed around replaceable seats and springs.
Buying parts before identifying the valve
Brand recognition is only the first step. A manufacturer may use several incompatible cartridges across different product generations.
Delta’s official catalog lists separate cartridges for pre-April 2006 Monitor valves, current MultiChoice 13 and 14 Series valves, 17 Series valves, 17T valves, older 1600 Series valves, and Peerless models.
Brand-Specific Repair Variations
| Valve family | Retaining method | Typical service part | Important distinction |
| Moen Posi-Temp 1222 | U-shaped clip | Complete 1222 cartridge | Rotate-only temperature control |
| Moen 1225 shower valve | U-shaped clip | Complete 1225 cartridge | Often pull for volume and rotate for temperature |
| Delta older ball valve | Threaded cap and cam | Seats, springs, O-rings, ball as needed | Ball components must be reassembled in sequence |
| Delta Monitor 1300/1400 | Bonnet and cartridge | Model/date-specific cartridge | Manufacturing date affects cartridge choice |
| Delta MultiChoice 13/14 | Bonnet and cartridge | RP46074-type family | Do not confuse with earlier Monitor cartridge |
| Delta 17 or 17T | Bonnet and dual-function cartridge | Series-specific cartridge | Temperature and volume functions differ |
| Ceramic-disc valve | Nut or model-specific retainer | Complete ceramic cartridge | Debris can damage precision surfaces |
These are common patterns, not universal instructions. Always use the parts diagram for the exact valve.
How Much Does the Repair Cost?
A straightforward DIY cartridge replacement commonly costs $15-$80 for the part, grease, and minor supplies. Tool purchases, premium cartridges, seized-part removal, wall access, or valve replacement increase the total.
| Repair level | Typical DIY cost | Typical time | What it includes |
| Seats and springs | $8-$25 | 30-60 minutes | Rubber seats, springs, O-rings |
| Standard cartridge | $20-$60 | 45-90 minutes | Complete plastic or brass cartridge |
| Premium or complex cartridge | $50-$120 | 60-120 minutes | Pressure-balance or dual-function part |
| Cartridge puller purchase | $15-$50 | Adds 10-30 minutes | Model-compatible extraction tool |
| Professional cartridge repair | $150-$400 | 1-2 hours | Diagnosis, labor, and ordinary parts |
| Concealed valve replacement | $500-$1,500+ | Several hours | Wall access, plumbing work, and restoration |
These are typical planning ranges, not fixed quotes. Local labor rates, travel charges, trim condition, valve access, and wall restoration can change the final price substantially.
When Should You Call a Plumber?
Call a plumber when the leak originates inside the wall, the shutoff valve does not work, the cartridge breaks during removal, or the valve body moves under tool pressure. Professional help is also appropriate when replacement parts cannot be identified confidently.
A cartridge repair is not a good DIY project when:
- Water is entering the wall cavity.
- Mold, damaged drywall, loose tile, or swollen trim is visible.
- The home’s main shutoff is inaccessible or unreliable.
- The valve body is cracked, heavily corroded, or deeply scored.
- Threaded or soldered plumbing moves when the bonnet is turned.
- The repair requires opening a waterproof shower enclosure.
- The replacement cartridge cannot be retained securely.
The honest limitation is simple: a new cartridge can repair worn internal seals, but it cannot repair a cracked brass body, failed pipe joint, damaged supply line, or improperly supported valve.
Frequently Asked Questions
Can I replace a bathtub cartridge without shutting off the water?
No. Removing a retaining clip, bonnet, cartridge, ball, stem, or seal while the plumbing is pressurized can release uncontrolled water into the bathroom and wall cavity. Shut off the local supplies or main water supply, release residual pressure, and confirm that flow has stopped before disassembly.
Why does my bathtub faucet drip after a new cartridge?
A new cartridge may still drip when it is the wrong model, installed backward, damaged during insertion, blocked by debris, or unable to seal against a scored valve body. Turn the water off, remove the cartridge, inspect every seal, clean the bore, verify the part number, and reinstall it correctly.
Should I use an OEM or generic replacement cartridge?
An original manufacturer part is usually the lowest-risk choice when the valve model is known. A high-quality compatible cartridge may work, but small dimensional or material differences can affect insertion force, handle movement, temperature balance, and sealing. Compare the warranty, specifications, and exact model compatibility before buying.
Can vinegar damage a bathtub faucet cartridge?
Prolonged soaking can affect some finishes, lubricants, and elastomers. Use vinegar mainly on removable mineral deposits and uncoated metal surfaces, apply it briefly, and rinse afterward. Do not soak an unknown cartridge or decorative finish unless the manufacturer approves the method.
Why is my single-handle bathtub faucet hard to turn?
A stiff handle usually points to mineral deposits, swollen or dry seals, internal cartridge damage, or misalignment. Remove the handle to confirm that the trim is not binding. When the cartridge stem itself remains stiff, replacement is generally more reliable than forcing or repeatedly lubricating a worn component.
Do I need to replace the entire bathtub faucet?
Usually not. A tub-spout drip or handle leak often requires only an internal cartridge, seat, spring, seal, or stem repair. Replace the complete valve when the brass body is cracked, obsolete parts are unavailable, corrosion prevents sealing, or the valve no longer provides suitable pressure balancing and temperature control.
Conclusion
The reliable way to handle how to fix leaky faucet single handle bathtub is to diagnose the leak location, identify the exact valve, shut off the water, and replace the manufacturer-specified sealing component without forcing the concealed plumbing. A properly seated cartridge or repair kit should stop the drip, restore smooth handle movement, and remain dry during a staged pressure test.